The kitchen and food prep is always a challenge when tent camping with the family. As a kid my dad took us camping in western North Carolina and I (vaguely) recall a rather elaborate setup with two large tents facing each other, and a heavy canvas tarp stretched in between, covering and protecting our dining and cooking area. There were boxes of food and supplies, large ice coolers, a Coleman stove and more. I’ve never seen anything like it since, but I’ve also not attempted to mimic it. Times and equipment have changed providing lighter weight equipment. Campgrounds themselves seem to have changed also, with smaller camp sites which are often a bit too close together. Trailers and RVs outnumber tents in these facilities. I needed a mini-van friendly camp kitchen so I started searching the web.
My Chuck Box
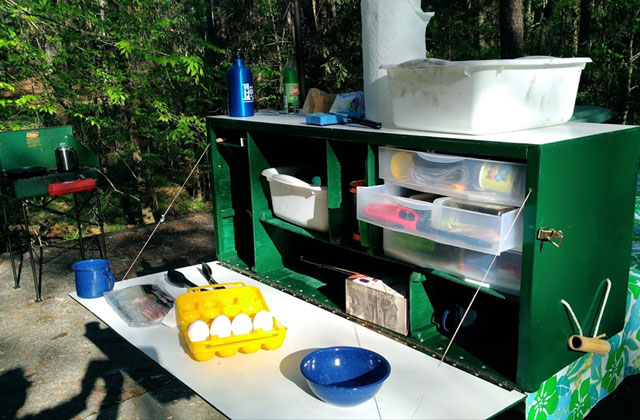
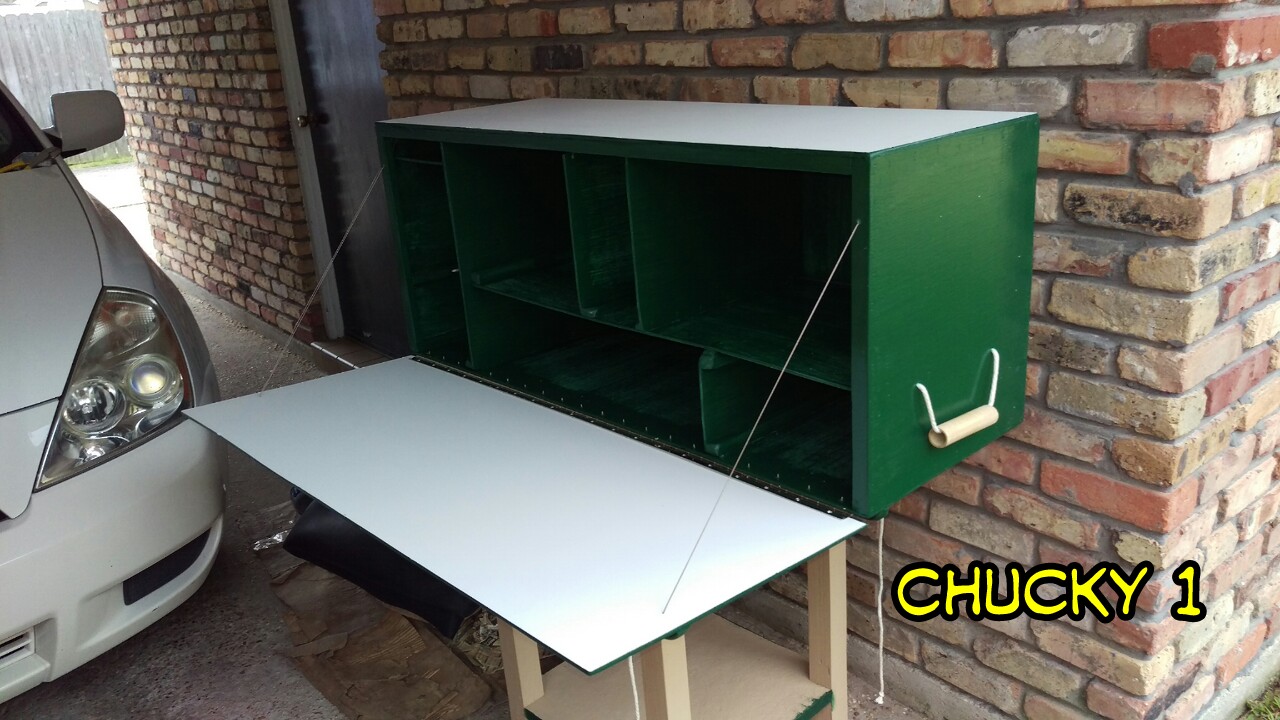
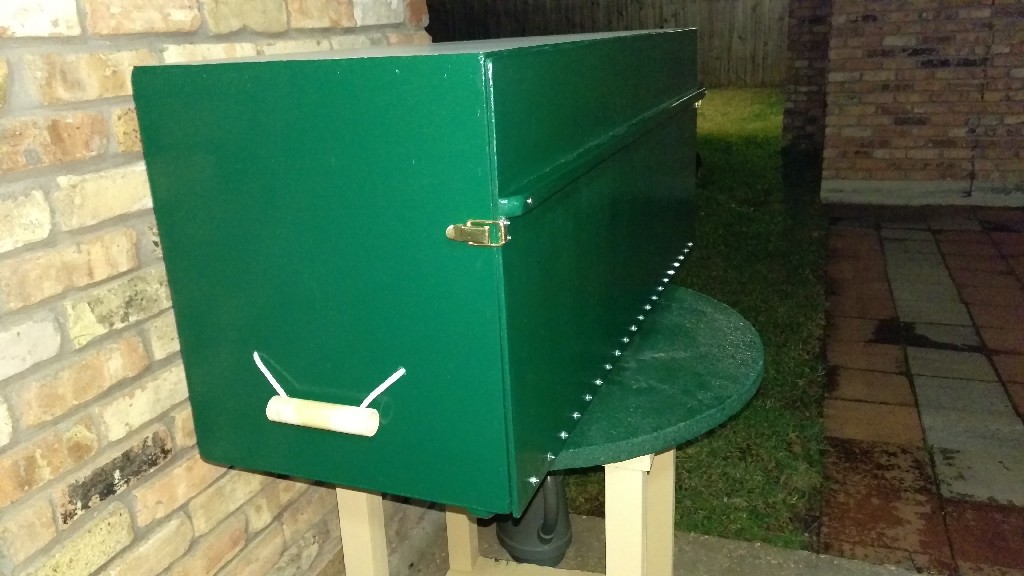
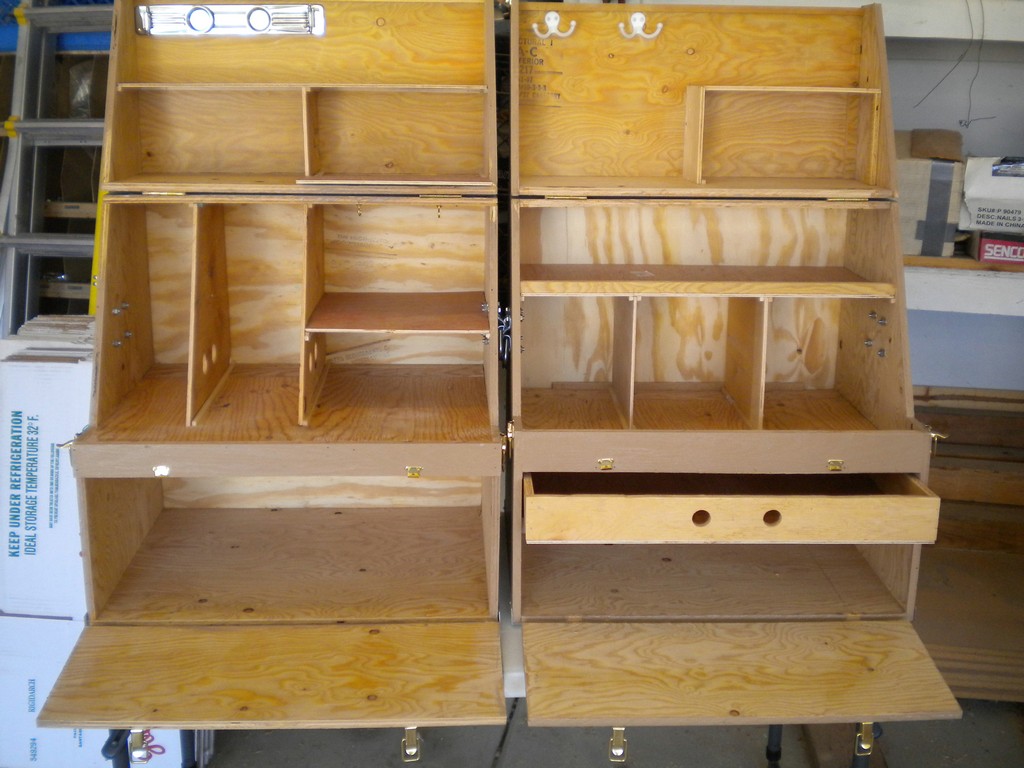
My chuck box ended up as a chest 3-1/2 feet wide, 16 inches deep and 18 inches tall. This is smaller than the scout troop camp kitchens, but considerably larger than several of those chuck boxes available for order online through “micro-vendors”. So let’s get to it and check out some photos.


Ideas from Others
The scout troop camp kitchens were formidable due to their size and rugged construction. Built of thick plywood, steel hinges, and pipe or 2 x 4 removable legs, these beasts were meant to last many seasons of scouting events. But they were also designed to be carried by four scouts. They hold most everything and truly are portable kitchens, but just too big for a family of four.
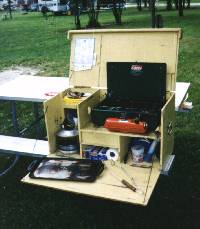
Some do-it-yourselfers devised chuck boxes from plastic containers. This is essentially what I already had. While they were light weight and somewhat waterproof, the problem is they were still just a chest into which all the stuff got dumped. To access what you need at the bottom, you had to remove the items on the top. Also, there was no cooking or food prep surface.
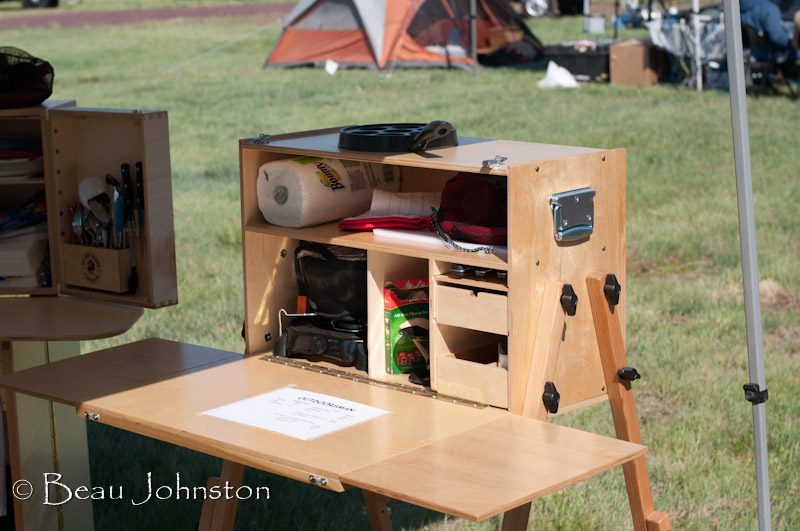
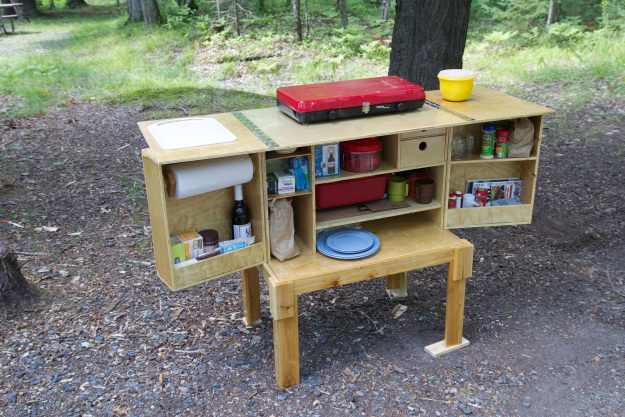
My web searches led me to some unique designs from others which were more interesting. These were intended for individual or small family camping. Some were built from thin plywood and even boxes that nested within “legs” upon which they stacked when in use. The designs were very efficient, offering storage compartments for all the necessary utensils, condiments, lightweight pots and pans, and small butane stoves. I really took a hard look at these; but realized they simply wouldn’t hold all of my stuff. I needed a hybrid - big enough to hold the kitchen equipment for my family, small enough to fit into the minivan, and light enough that two people could easily carry it - one alone in a pinch for a short distance.

Design Process
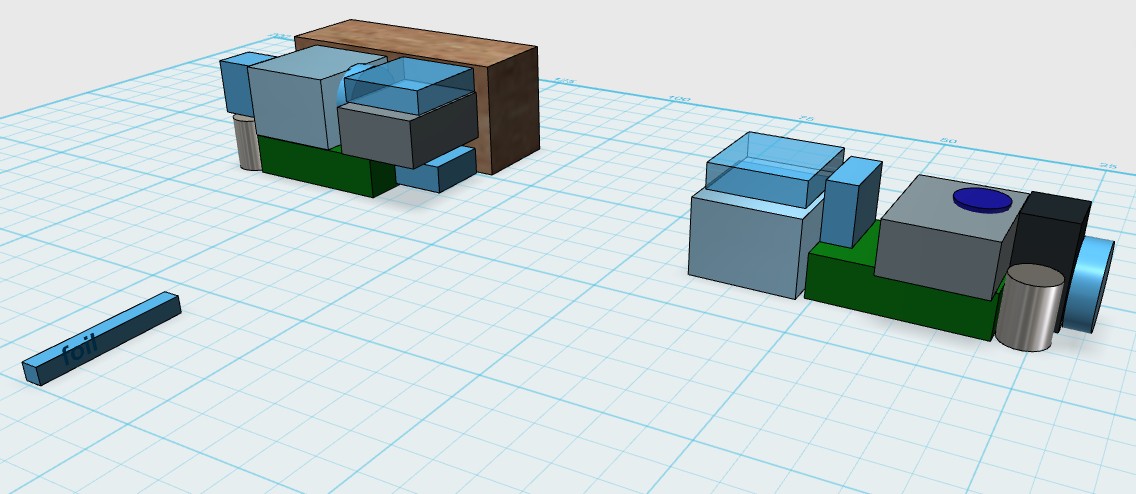
I fell back to my design training and CAD skills. Step one was to lay out all of my camp kitchen equipment and make an inventory. This included measuring the dimensions of each.
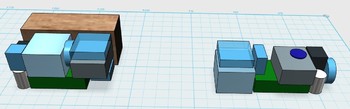 Step two was to create a 3D model. I found a free 3D software application for Windows capable of drawing simple shapes like boxes and cylinders at scale. I went down my list of kitchen items, drawing a 3D shape for each. Next I kept playing around with these shapes in the software, stacking them in various ways, rearranging and trying again until I found what I felt to be the most efficient arrangement in a manageable rectangular chest shape.
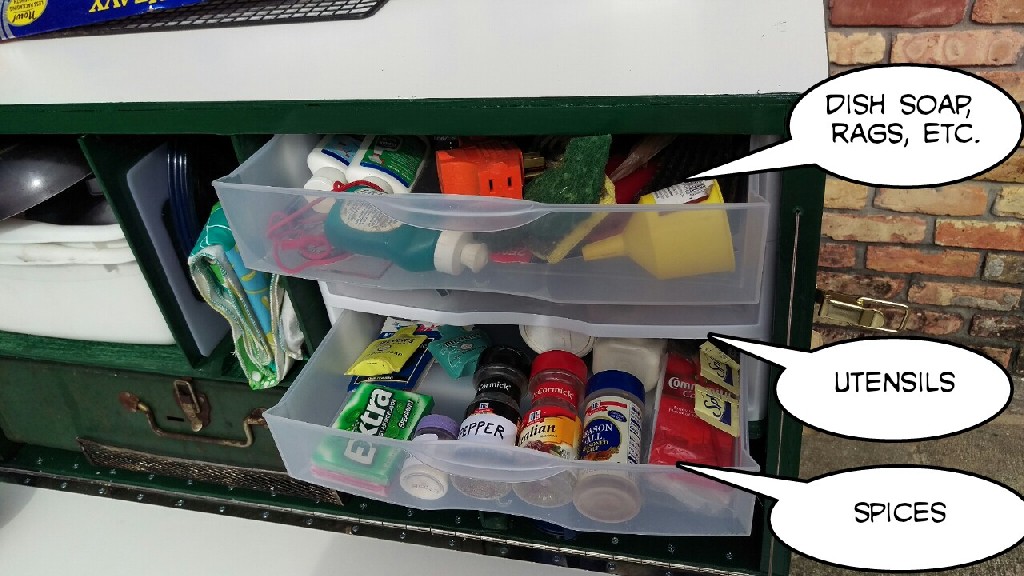
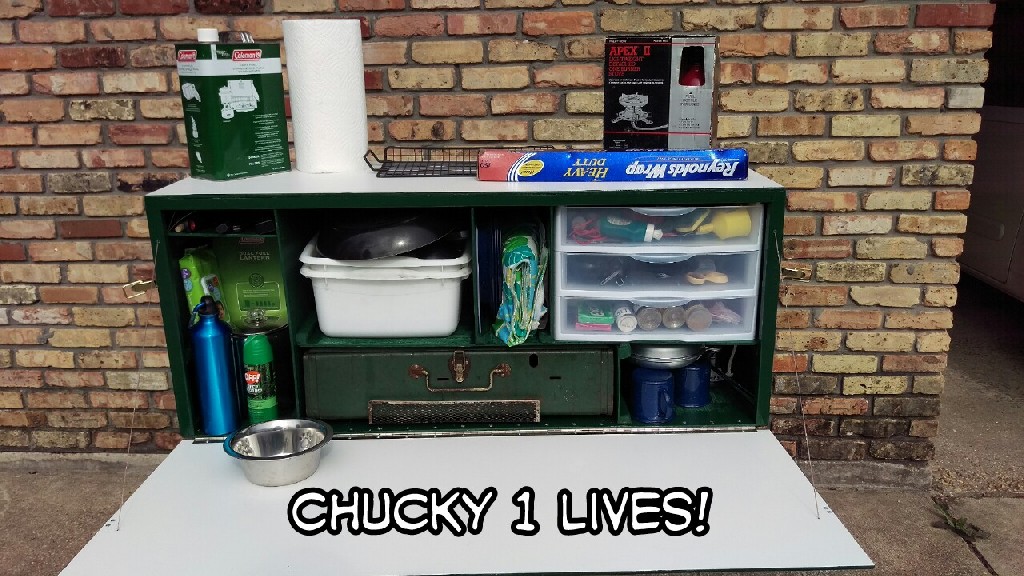
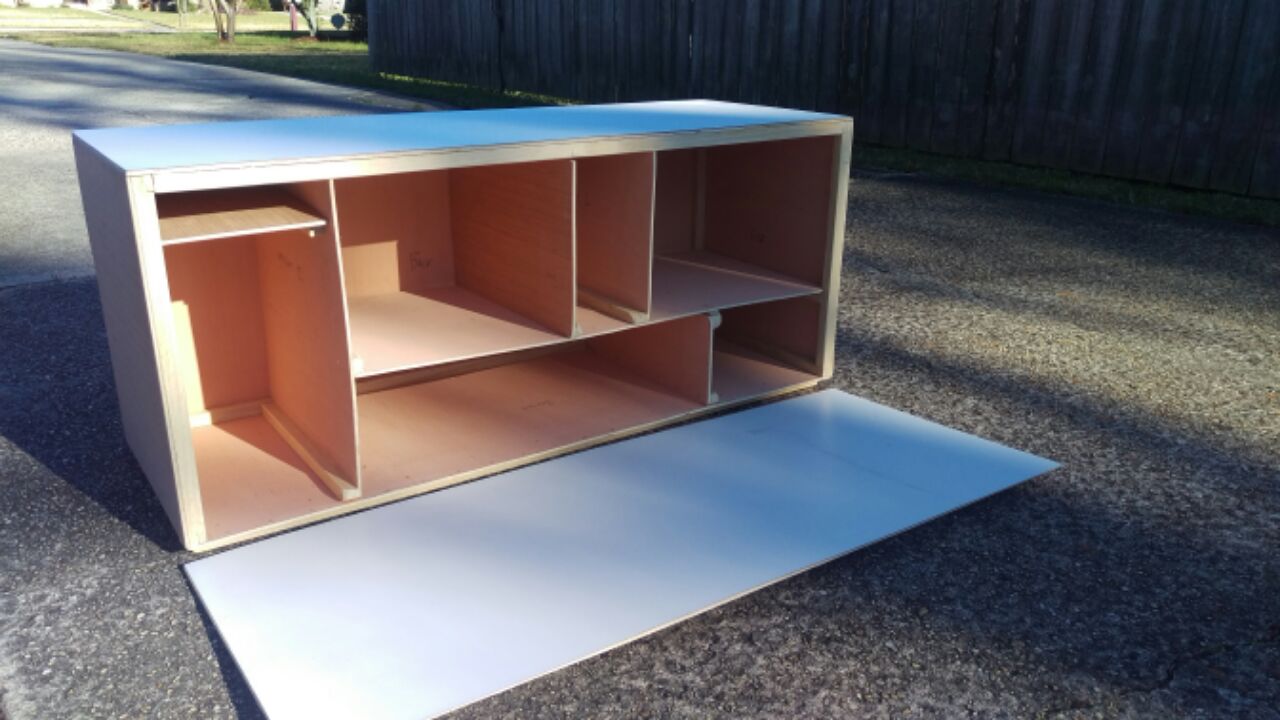
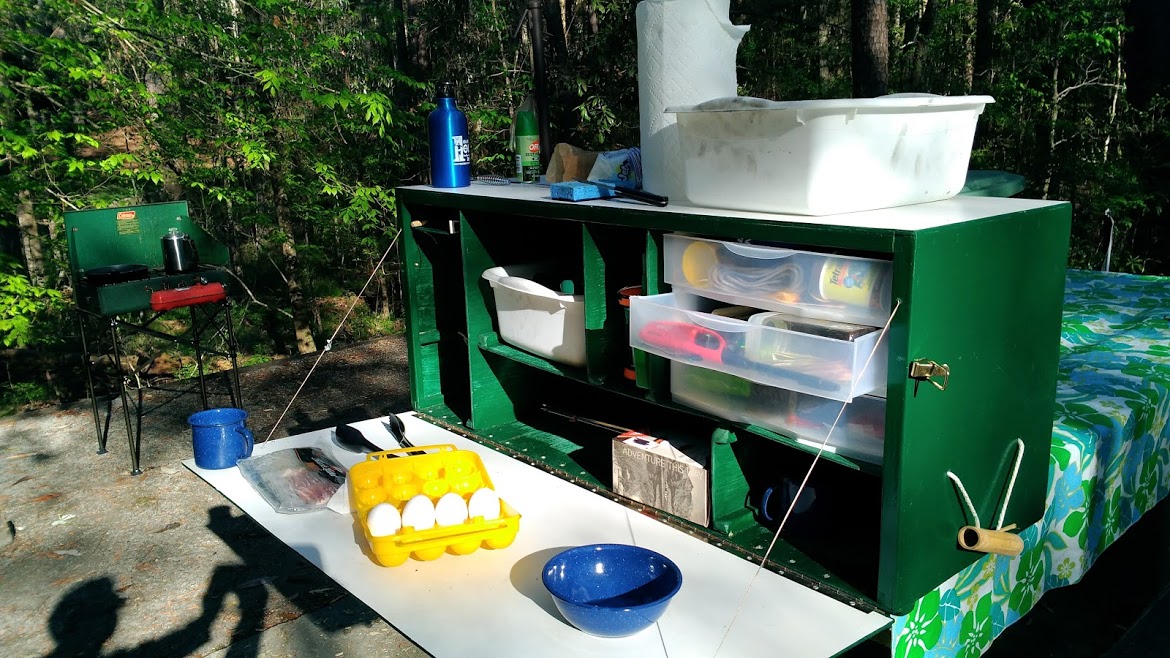
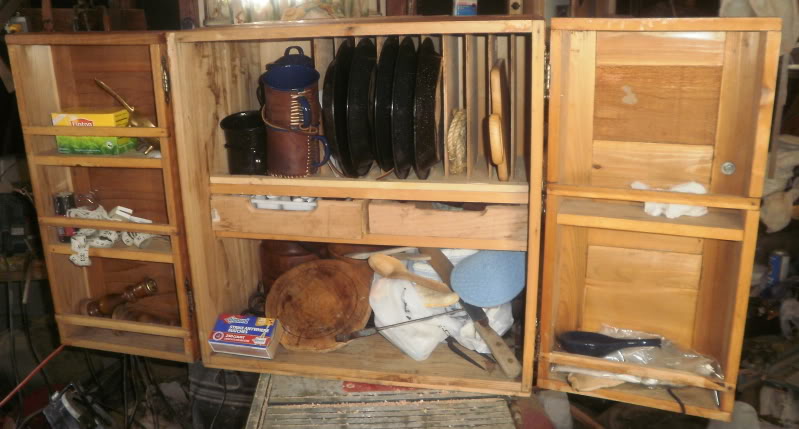
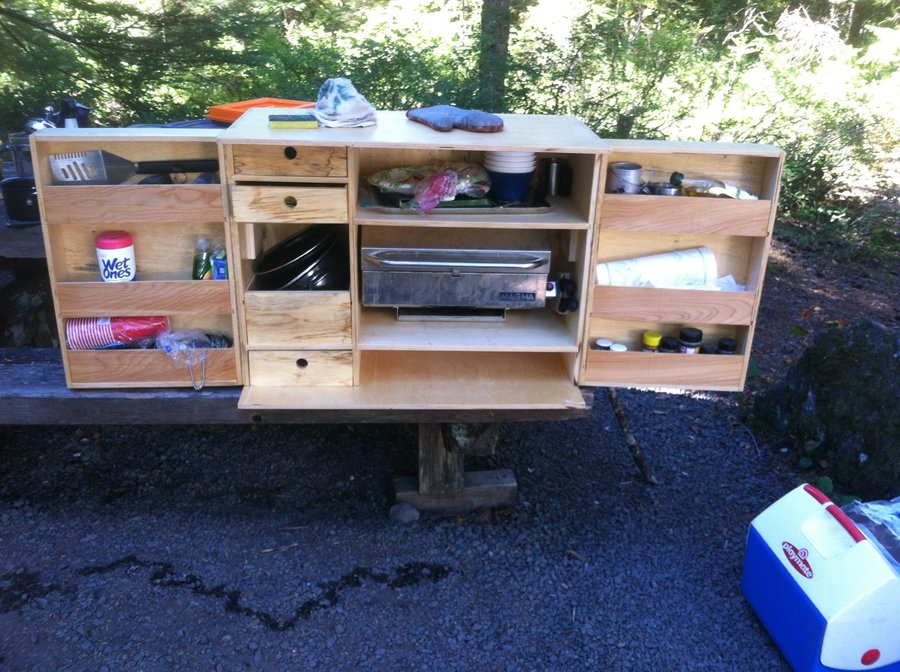
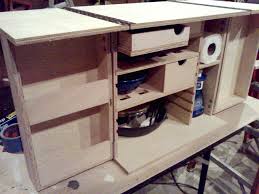
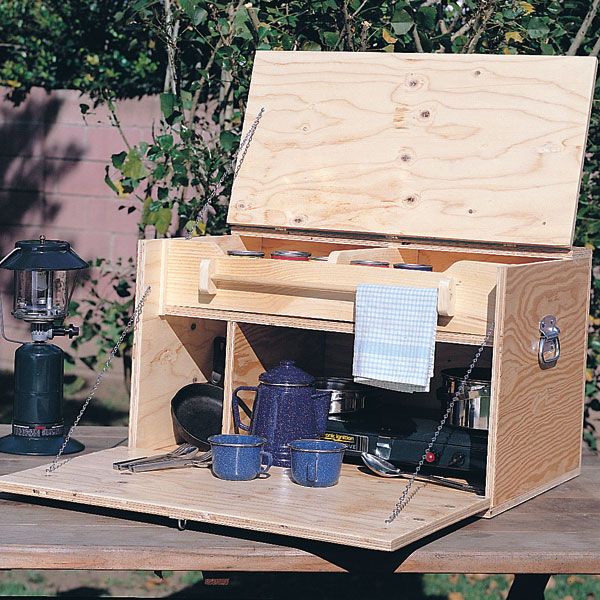
Now I designed the shelf and divider arrangement. Without these, it was just another box and I may as well have stuck with plastic. I had to expand the overall dimensions of the chuck box to allow room for these thin plywood dividers and shelves, and some wiggle room between them to get items in and out. My design kept the heaviest things - Coleman stove and lantern - on the bottom. Higher up on one end was a compartment to hold a plastic small drawer unit from Walmart. These drawers hold small things like utensils, spices, lighters, cleaning items, and similar. Above the stove in the middle are the stacked dish pans into which I stack the pots and pans. Plates are inserted vertically to the right which allows them to drip dry if necessary, and the gas / electric lanterns are on the left.
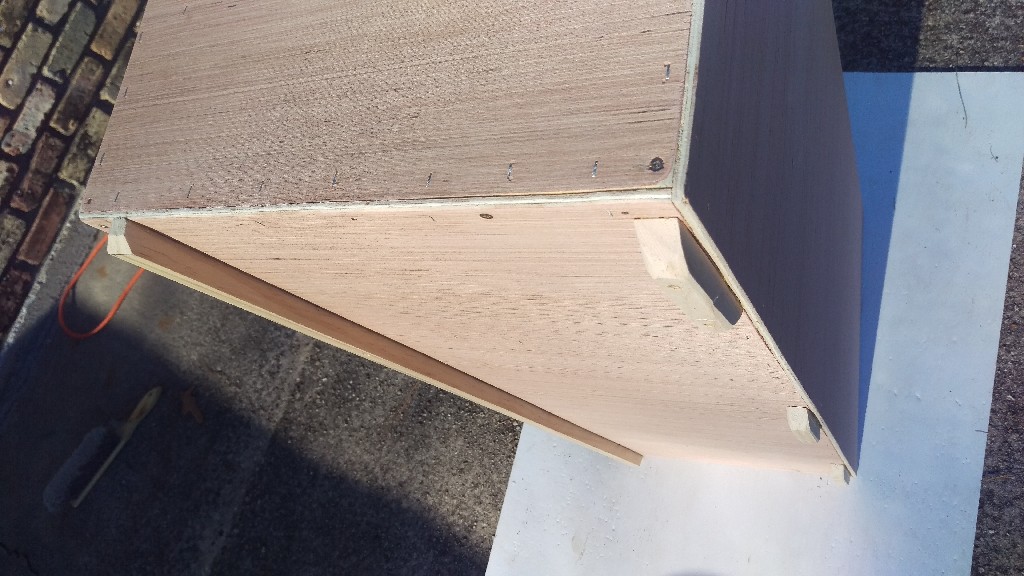
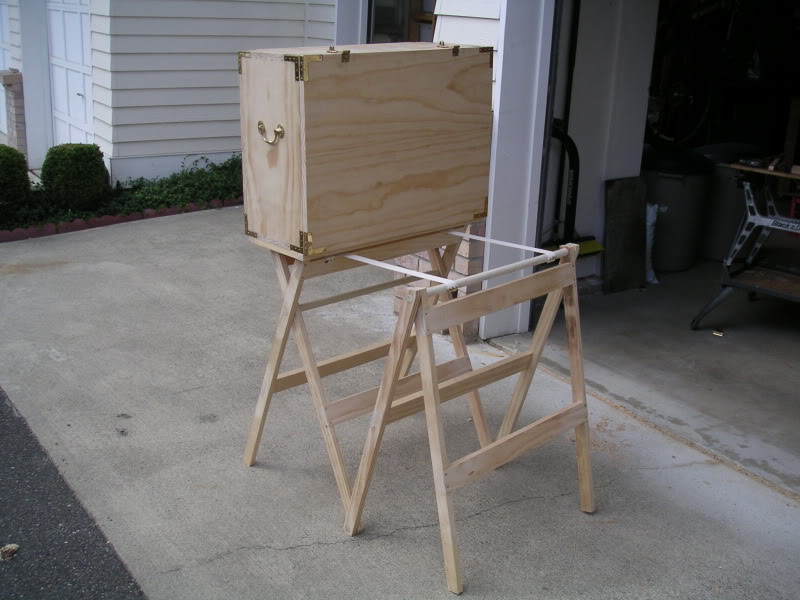
The fold-down front panel is on a piano hinge for a secure connection to the box, and it is surfaced with formica. The top of the box also is surfaced with formica, so that both serve as cooking or serving surfaces which clean up easily. The weight of the scout troop boxes scared me, so I employed a skin on frame construction technique for my box. I used thin doorskin plywood for the exterior surfaces, but ripped thin strips of 1" x hardwood with which I built a frame. I used miter cuts and assembled the frame with glue and screws.
I also glued and screwed the plywood skins to the frame, then sanded and painted it. The formica panels were glued with contact cement to the top and inside of the front door. Blocks of hardwood were glued and screwed to the bottom to serve as feet. This keeps the box up off the concrete floor of the storage room, preventing moisture from ruining it. Finally, everything received a second coat of paint. I used oil based to ensure water resistance.
Improving It
What would I do to improve it? Nothing is perfect. My first error was in measuring my Coleman stove. Length and width, no problem, but when measuring the height, I forgot about the little dimple feet on it. So the vertical space I left in the box for the stove is a little tight. The other tight fit is the vertical clearance I left for the plates. It was the hardwood frame member that caused the fit problem, not the roof of the box. The last issue is more easily fixed. I used short lengths of rope and five inch long hollowed-out bamboo to create handles on each end. These need a more solid upgrade to make carrying, especially balancing the chest while carrying, a more pleasant experience. The weight is a bit of an issue. When fully loaded it really does require my two boys to handle it. But, cutting the weight substantially would require me replacing much of my gear with new, lighter stuff.