Having successfully built three recreational kayaks constructed of marine-grade plywood using the stitch-and-glue method I had some surplus materials remaining and decided to pursue another boat project. Stand-up paddleboarding (SUP) appealed to me — and to my sons also — so we decided to build a paddleboard rather than another kayak.
Above is a 1.2 minute time-lapse video of the paddleboard construction process.
Plans
I spent about a year researching various plans - free and paid - and techniques for wooden board building. I learned what I could from reading and watching videos. As a kid I’ve surfed in the Atlantic and in lakes behind boats, but I’ve never used a stand-up paddleboard. How hard could it be? It’s all about balance, right? The designs offered by Jarvis Boards of Austin appealed to me so I took advantage of a really good Black Friday sale and purchased the printed roll plans (which my sons gave to me as a Christmas gift.) I also purchased Jarvis’ kit of plastic parts (deck lashing plugs and fin box) at the same time as it too was deeply discounted.
I chose Jarvis Boards’ 11’-4" long San Marcos model as it seemed geared towards casual users and offers stability. In my mind’s eye I could see me and my dog paddling around a lake. He loves riding in our canoe, but he can’t fit in or on our kayaks so he’s been left out…
Materials
- I had plenty of left over Raka brand epoxy resin and hardener from my kayak builds.
- Although I haven’t unrolled it, I’m pretty sure I have enough 4 oz fiberglass cloth to fully encase the board.
- Okoume marine-grade plywood is the material of choice for the framing members, but since it is not available locally I elected to go with a sheet of 5 mm RevolutionPly from my local Lowes store. Comprised primarily of Poplar, RevolutionPly is purported to be more “green” and sustainable than tropical woods such as Okoume, Meranti or Luan. Also, Revolution is a fraction of the cost. So far while working with RevolutionPly I’ve encountered no knots or voids, and since the framing members remain vertical and are not twisted or contorted within the board, the bending strength of the plywood is not a concern as it may be for a stitch-n-glue kayak hull or deck.
- Paulownia is the lumber of choice for the skin of the paddleboard. Paulownia is described as being the second lightest weight commercially available wood next to balsa, and it is much stronger. Originating in Asia, Paulownia tomentosa or Princess Tree is grown commercially in tree farms worldwide and is purported to be a sustainable product, though it is classified as an invasive species in the USA. I shopped around several specialty lumberyards in my area but could not find Paulownia. My best local option was Western Red Cedar lumber which many builders use but it is heavier. Thankfully, Jarvis Boards decided to shift their warehousing operations and rather than move it they deeply discounted their remaining stock of Paulownia lumber so I jumped at the opportunity to purchase from them. I bought 5 packs but turns out needed only 3.
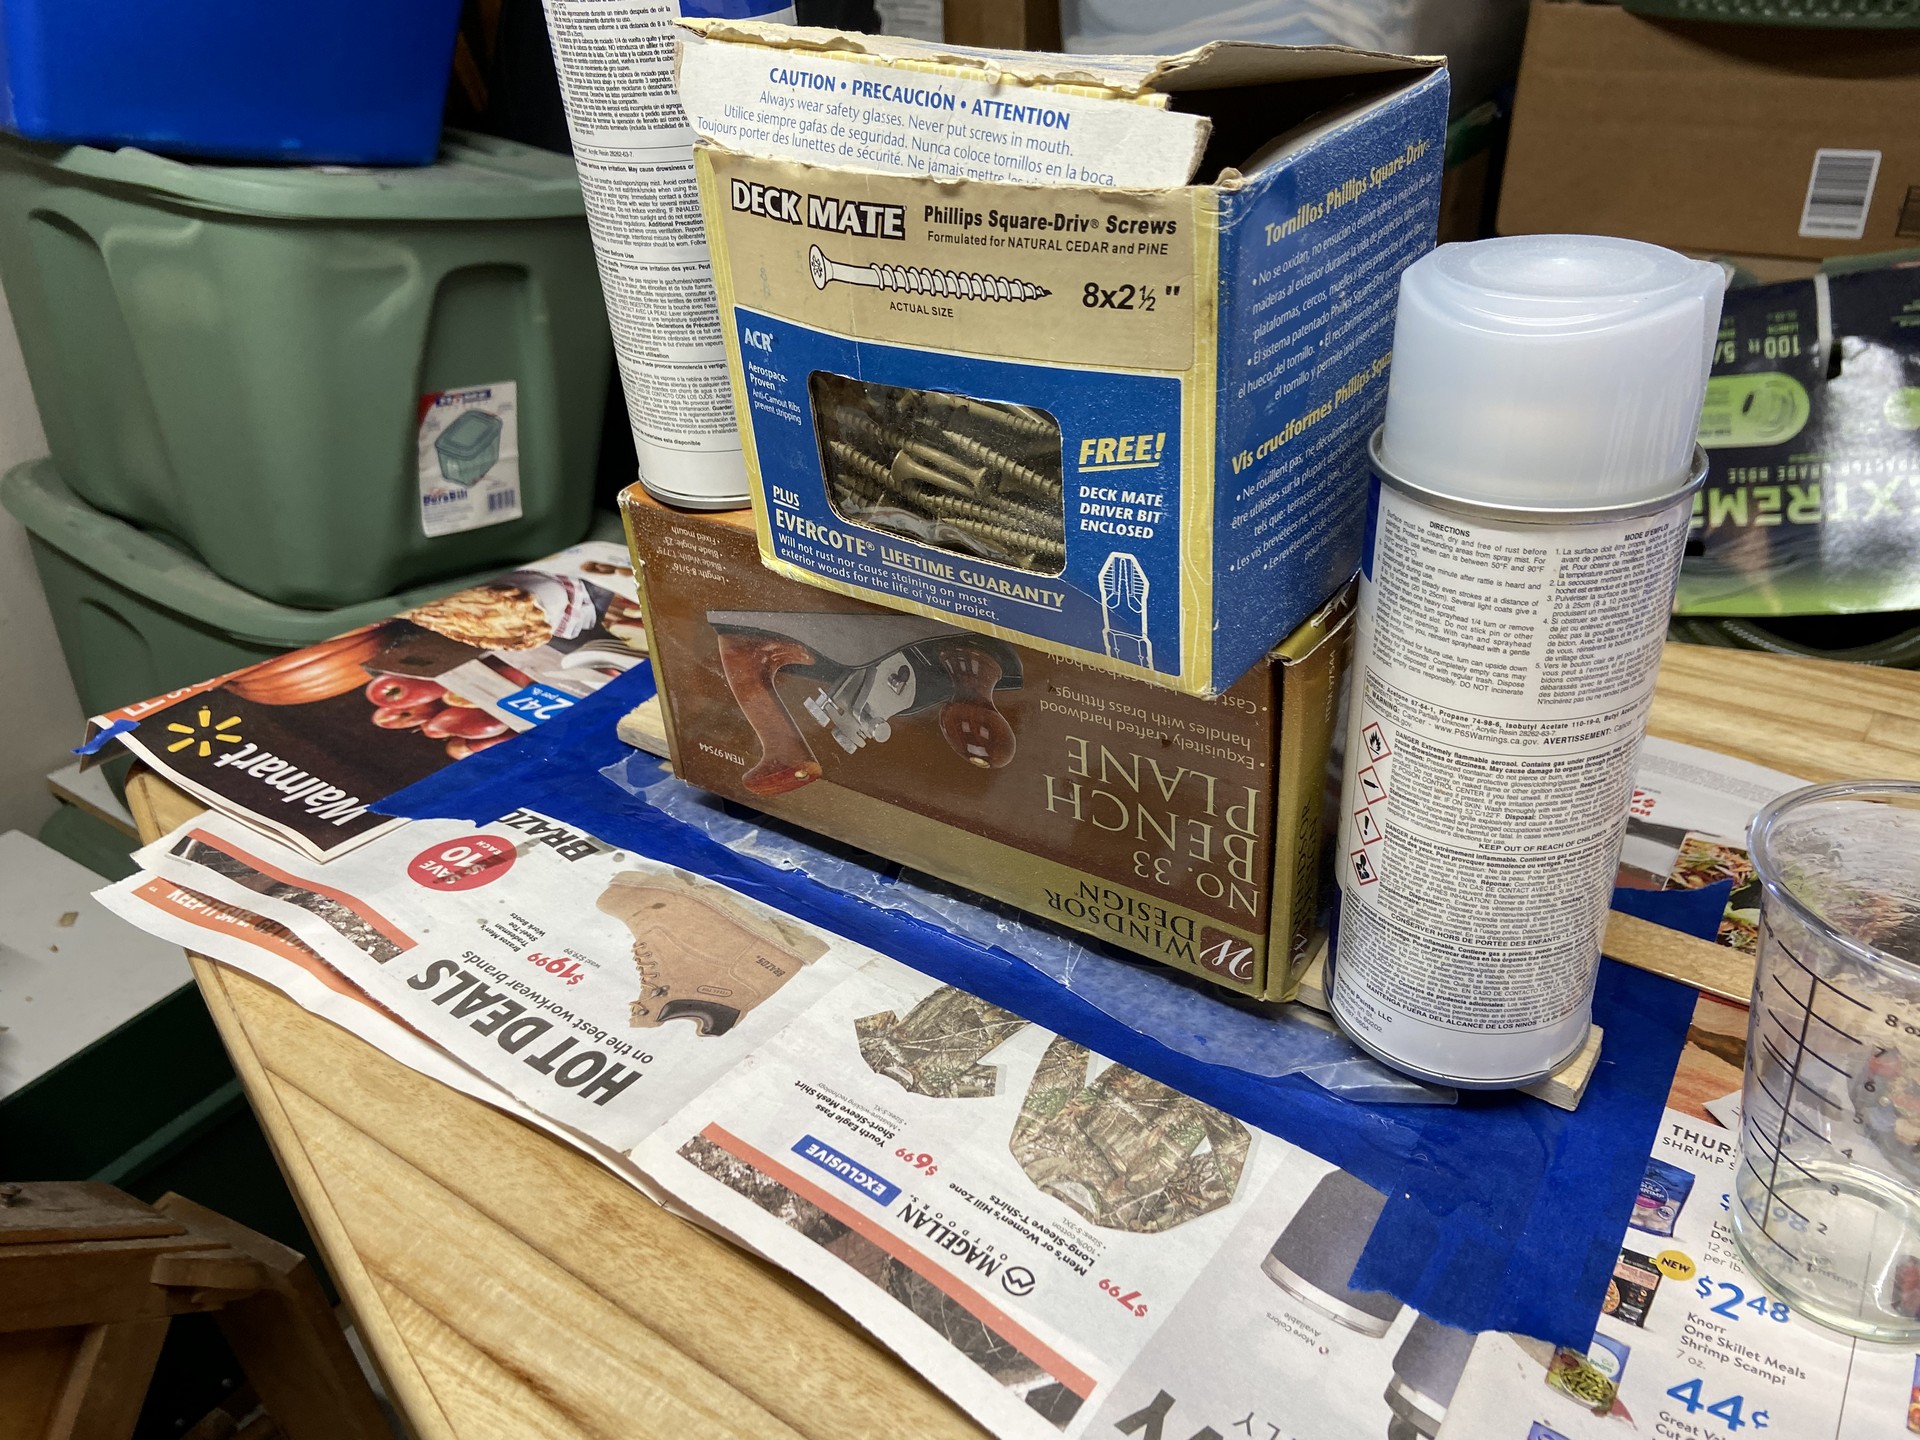
- The glue recommended by Jarvis (and some other builders) is a polyurethane glue such as Gorilla ™ glue because it is strong, fast drying, and foams up to fill voids within bonds. Others recommend Polyvinyl Acetate (PVA) which is what most folks recognize as standard wood glue. A hot glue gun is recommended for certain steps in construction where an immediate bond is needed and that can be cut or melted apart at a future step in the process. So, I’ll probably use each of these, in addition to occasional epoxy mixed with a wood flour thickener.
Cost
I’m keeping track of costs to build this on a Google sheet.
Surplus materials from my kayak(s) building project is the whole reason I undertook this SUP build. I thought I could build it very cheaply using Meranti plywood, but decided to go with paulownia strip build technique when I compared costs, considered weight and studied plans. Due to the size, the board weighs in at around 40 lbs and may increase depending on materials, technique and accessories. I’ll now journal about the SUP construction project.
Weekend #1
December 29, 2023
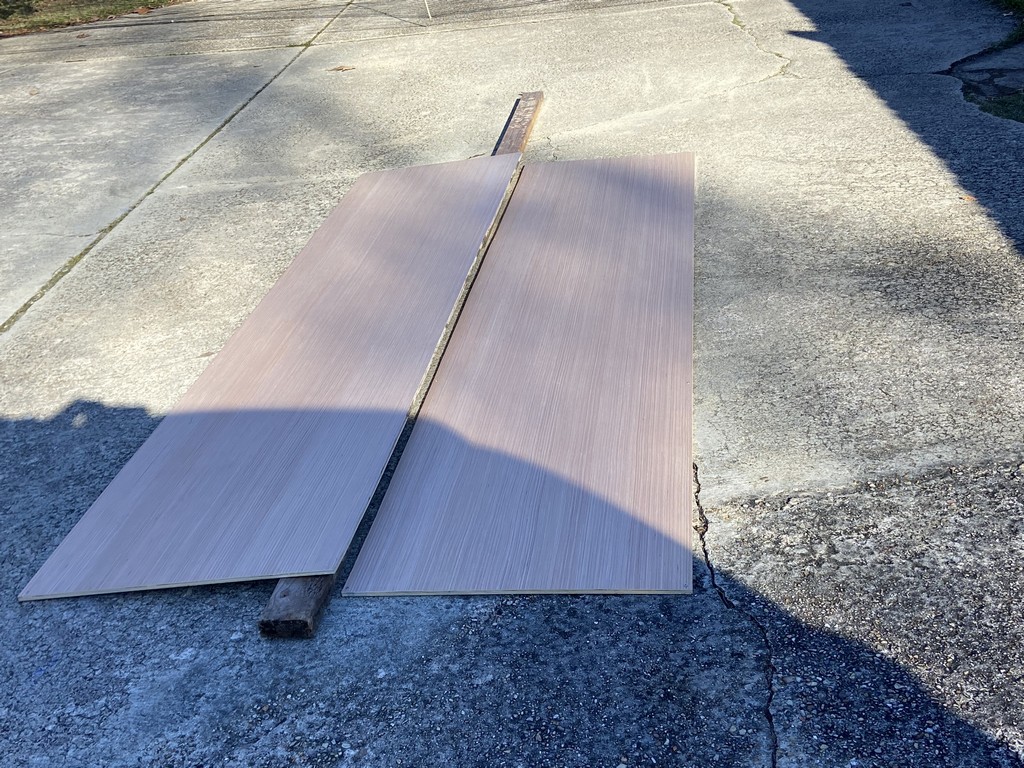
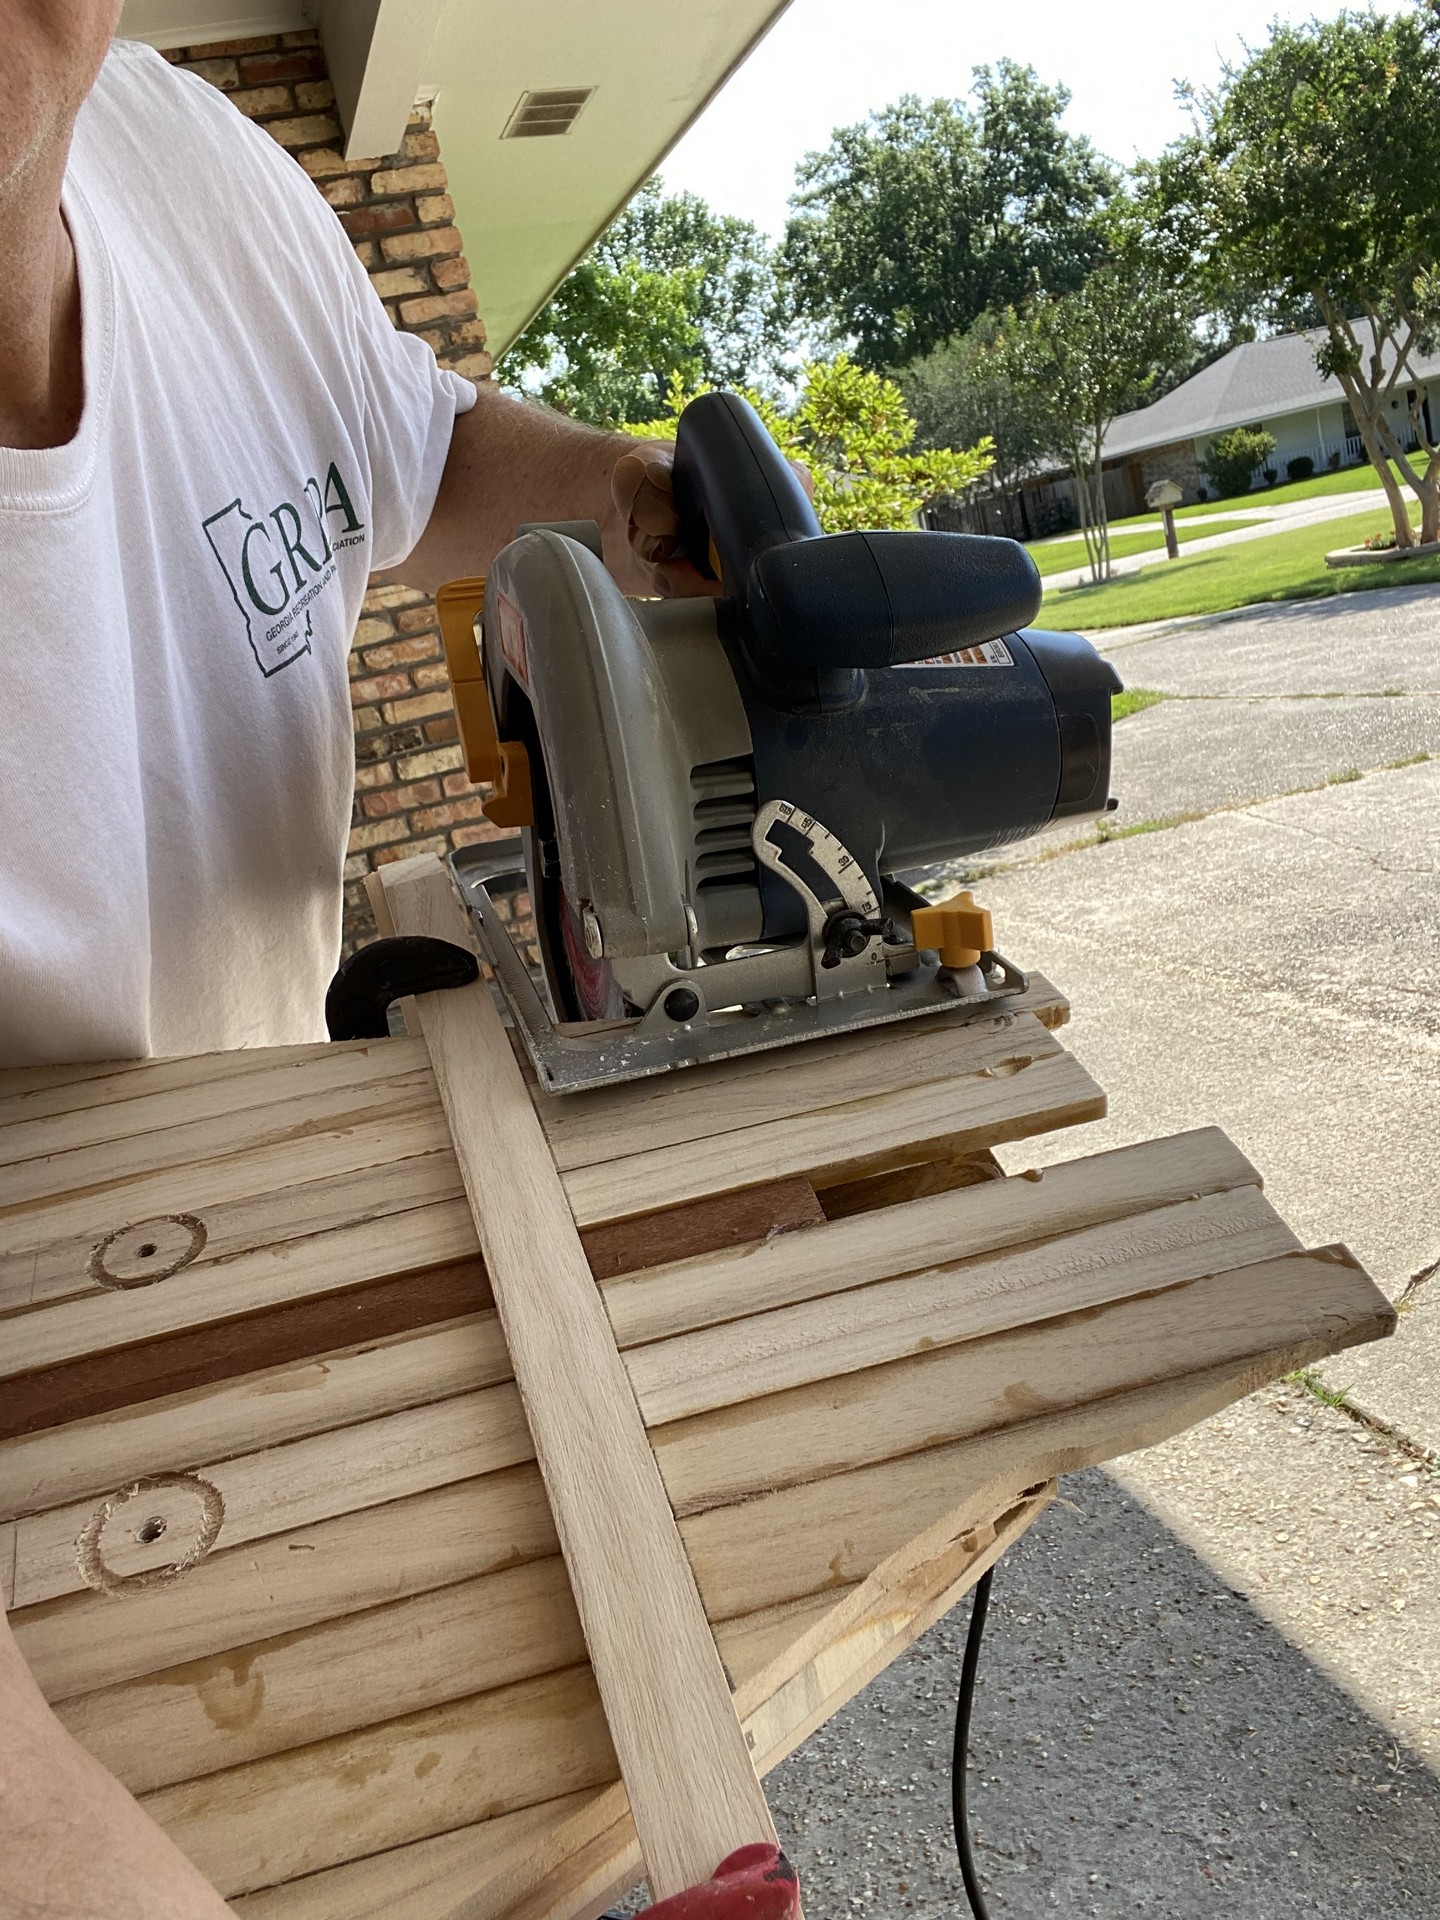
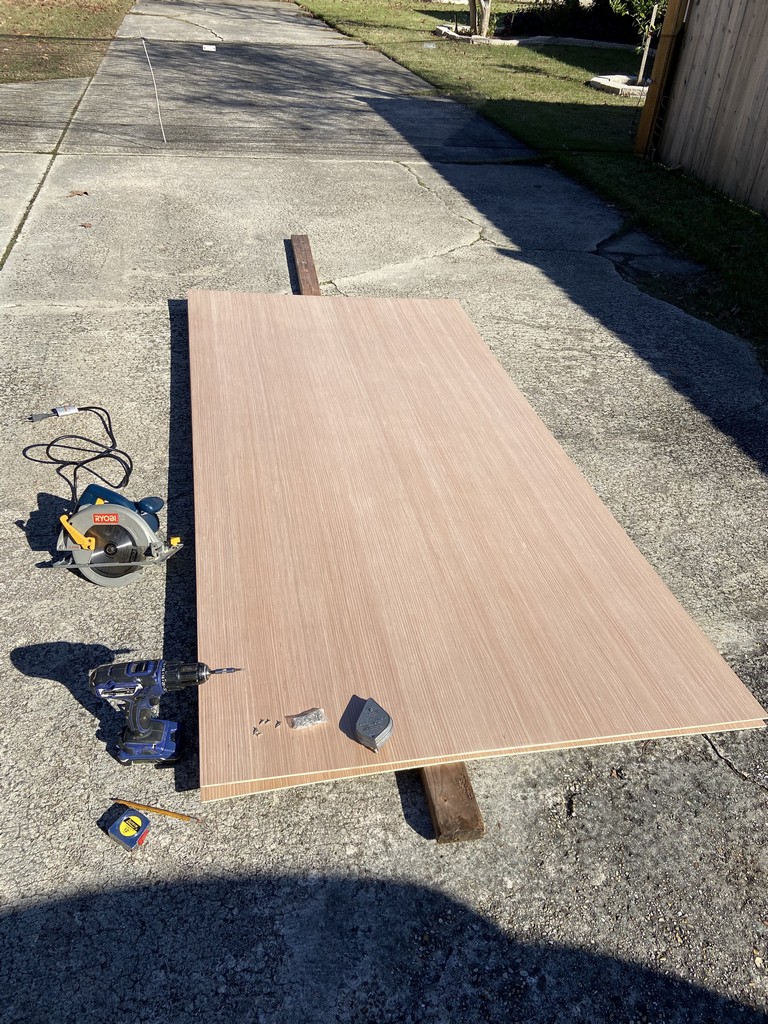
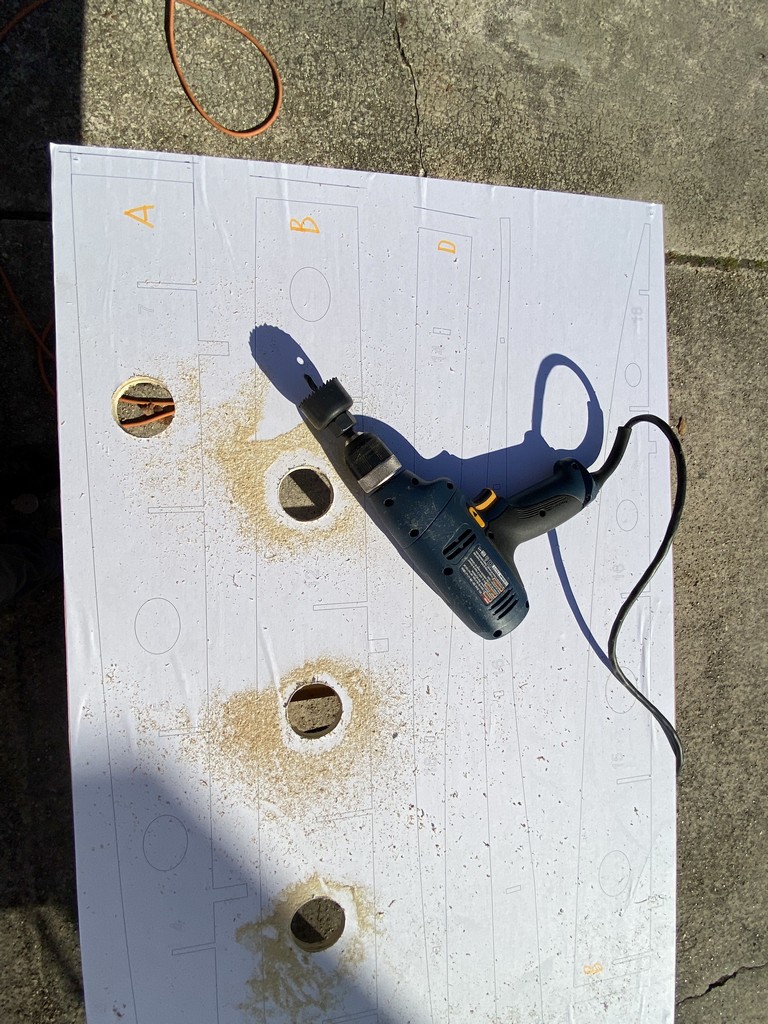
In the photo below I’m preparing to cut the 5 mm RevolutionPly plywood sheets in half lengthwise.
Using the Patterns
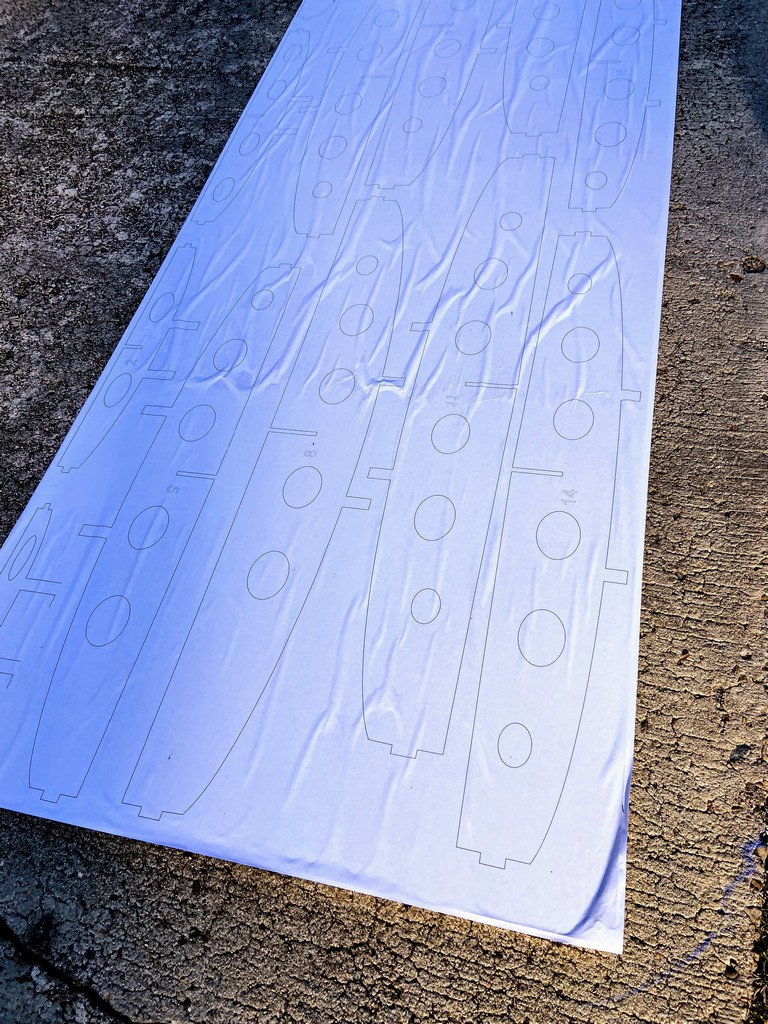
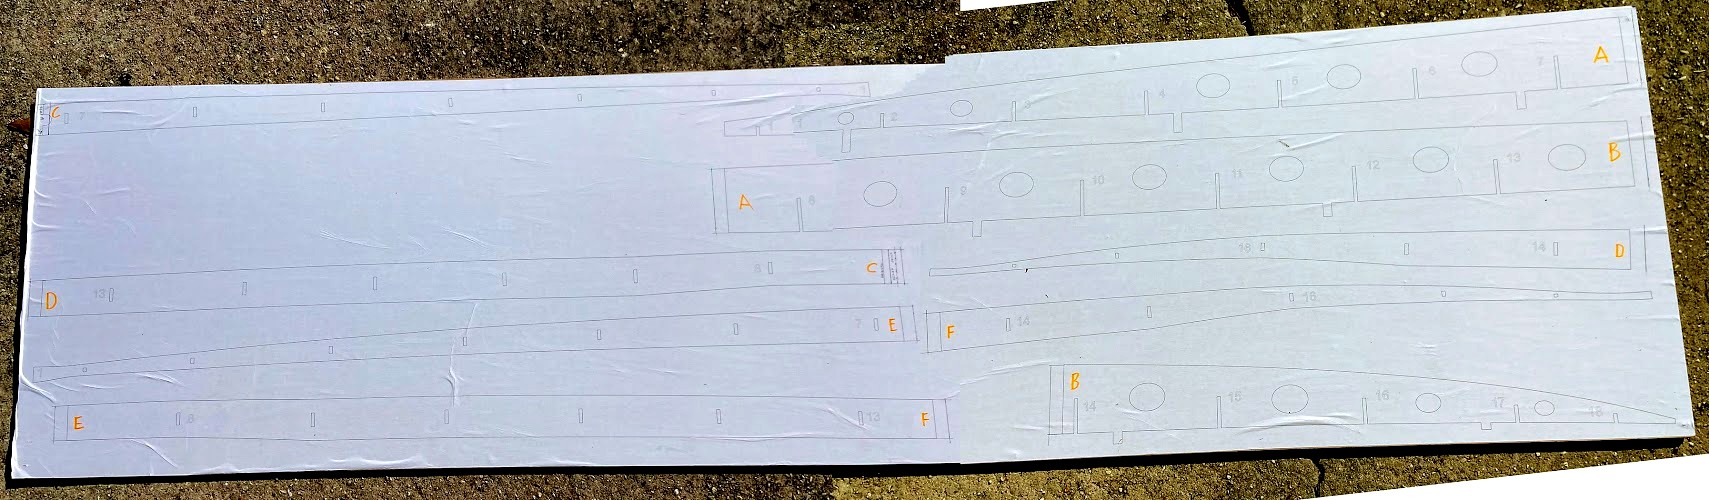
The plans or patterns for the structural pieces are plotted on 2’ x 8’ paper, so I began by ripping the 4 x 8 sheet of plywood in half lengthwise. Then I diluted Elmer’s ™ glue 50% in water to affix the paper patterns to the plywood. A foam brush was used to apply diluted school glue to the wood in sections as I rolled and smoothed out the paper. It dried overnight and in the process many of the wrinkles disappeared.
This technique of wet gluing paper patterns to plywood may not be appropriate for visible hull pieces of a kayak, but since all of these plywood components for the paddleboard are internal I accepted a bit of paper size expansion or shrinkage due to the wet glue. For my kayaks, I kept the paper patterns dry: taping them to the Okoume plywood and using a pointed awl to transfer the shape outlines to the plywood by punching through the patterns. While cutting out the SUP frame components I learned that either I diluted the glue too much or didn’t apply enough - as the paper was separating from the wood in some areas.
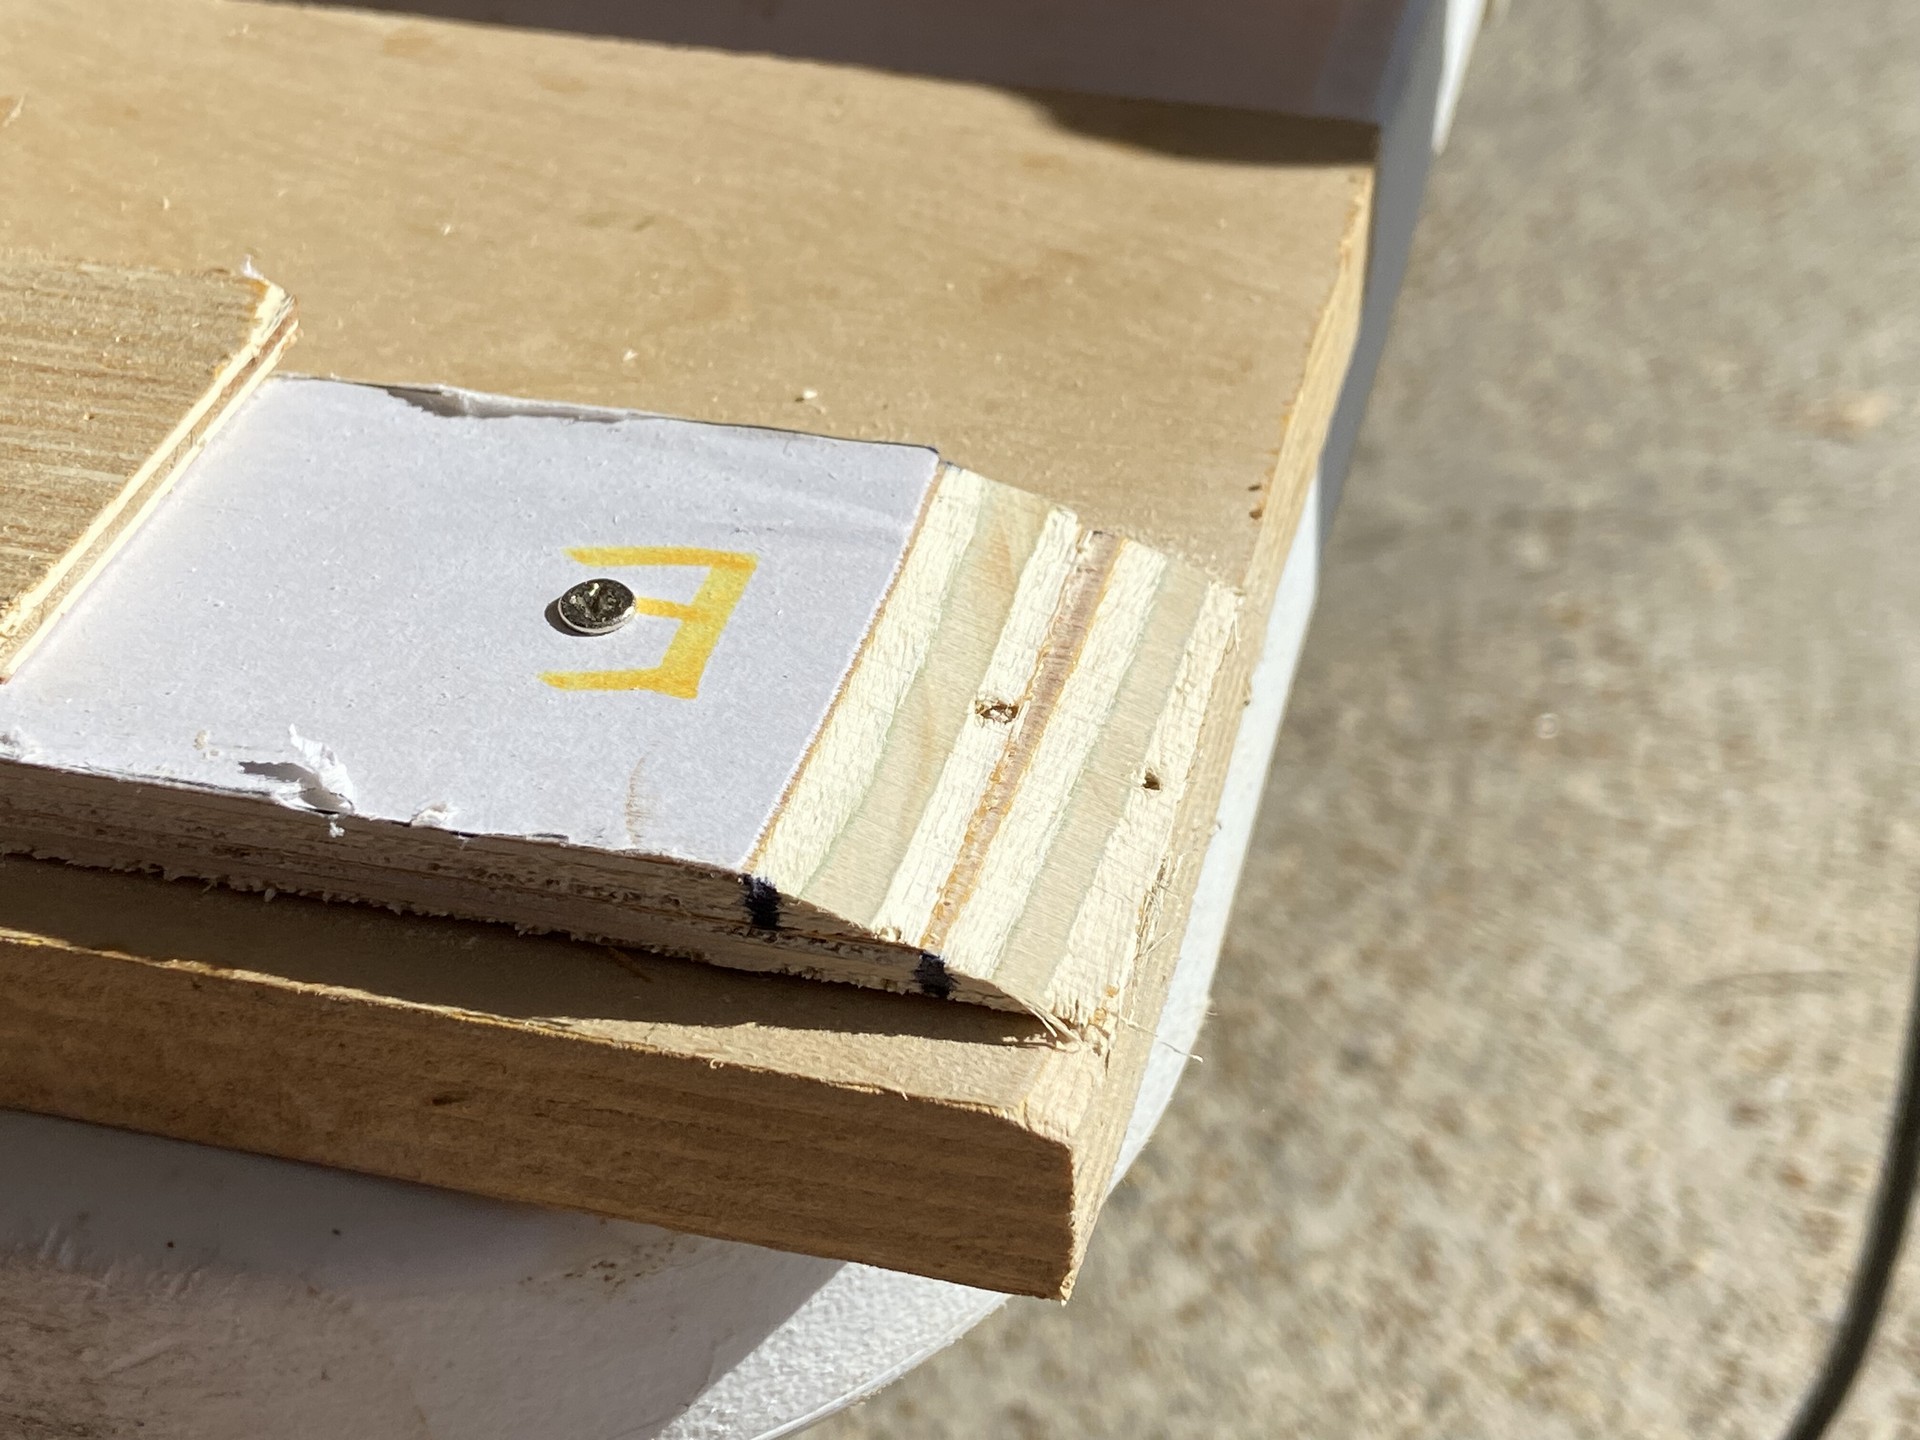
Jarvis Boards’ plans come only as patterns with absolutely no print instructions. A series of videos is provide on their YouTube channel. I watched enough to understand the process, but it took a minute to understand all of the pieces on the paper sheets. To Jarvis’ credit, one pattern sheet has exclusively longitudinal components (which must be jointed together to form their full length) and the second sheet is exclusively cross members which require no splicing. On the longitudinal center spine and rails sheet I used a highlighter marker to indicate which ends join each other.
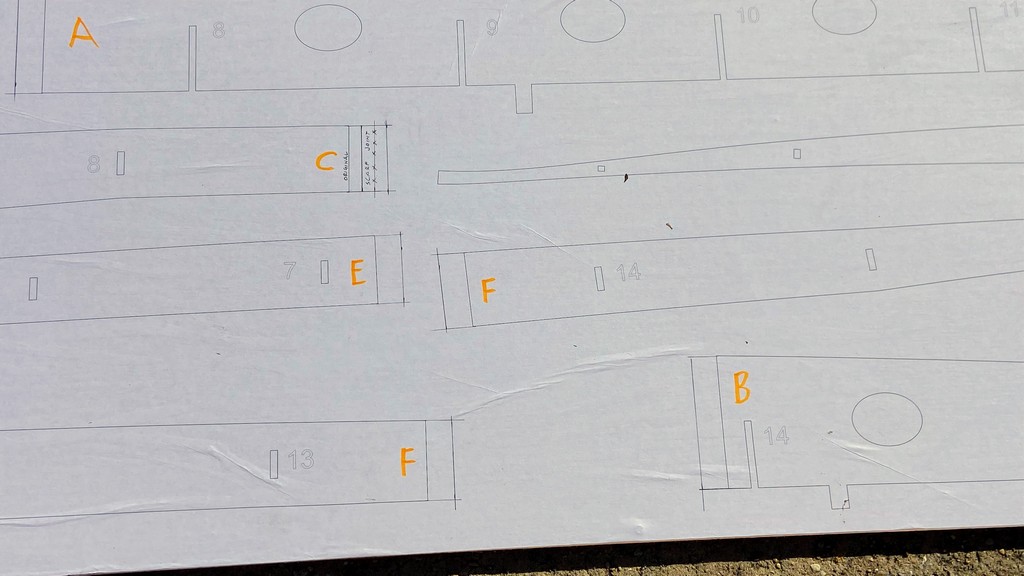
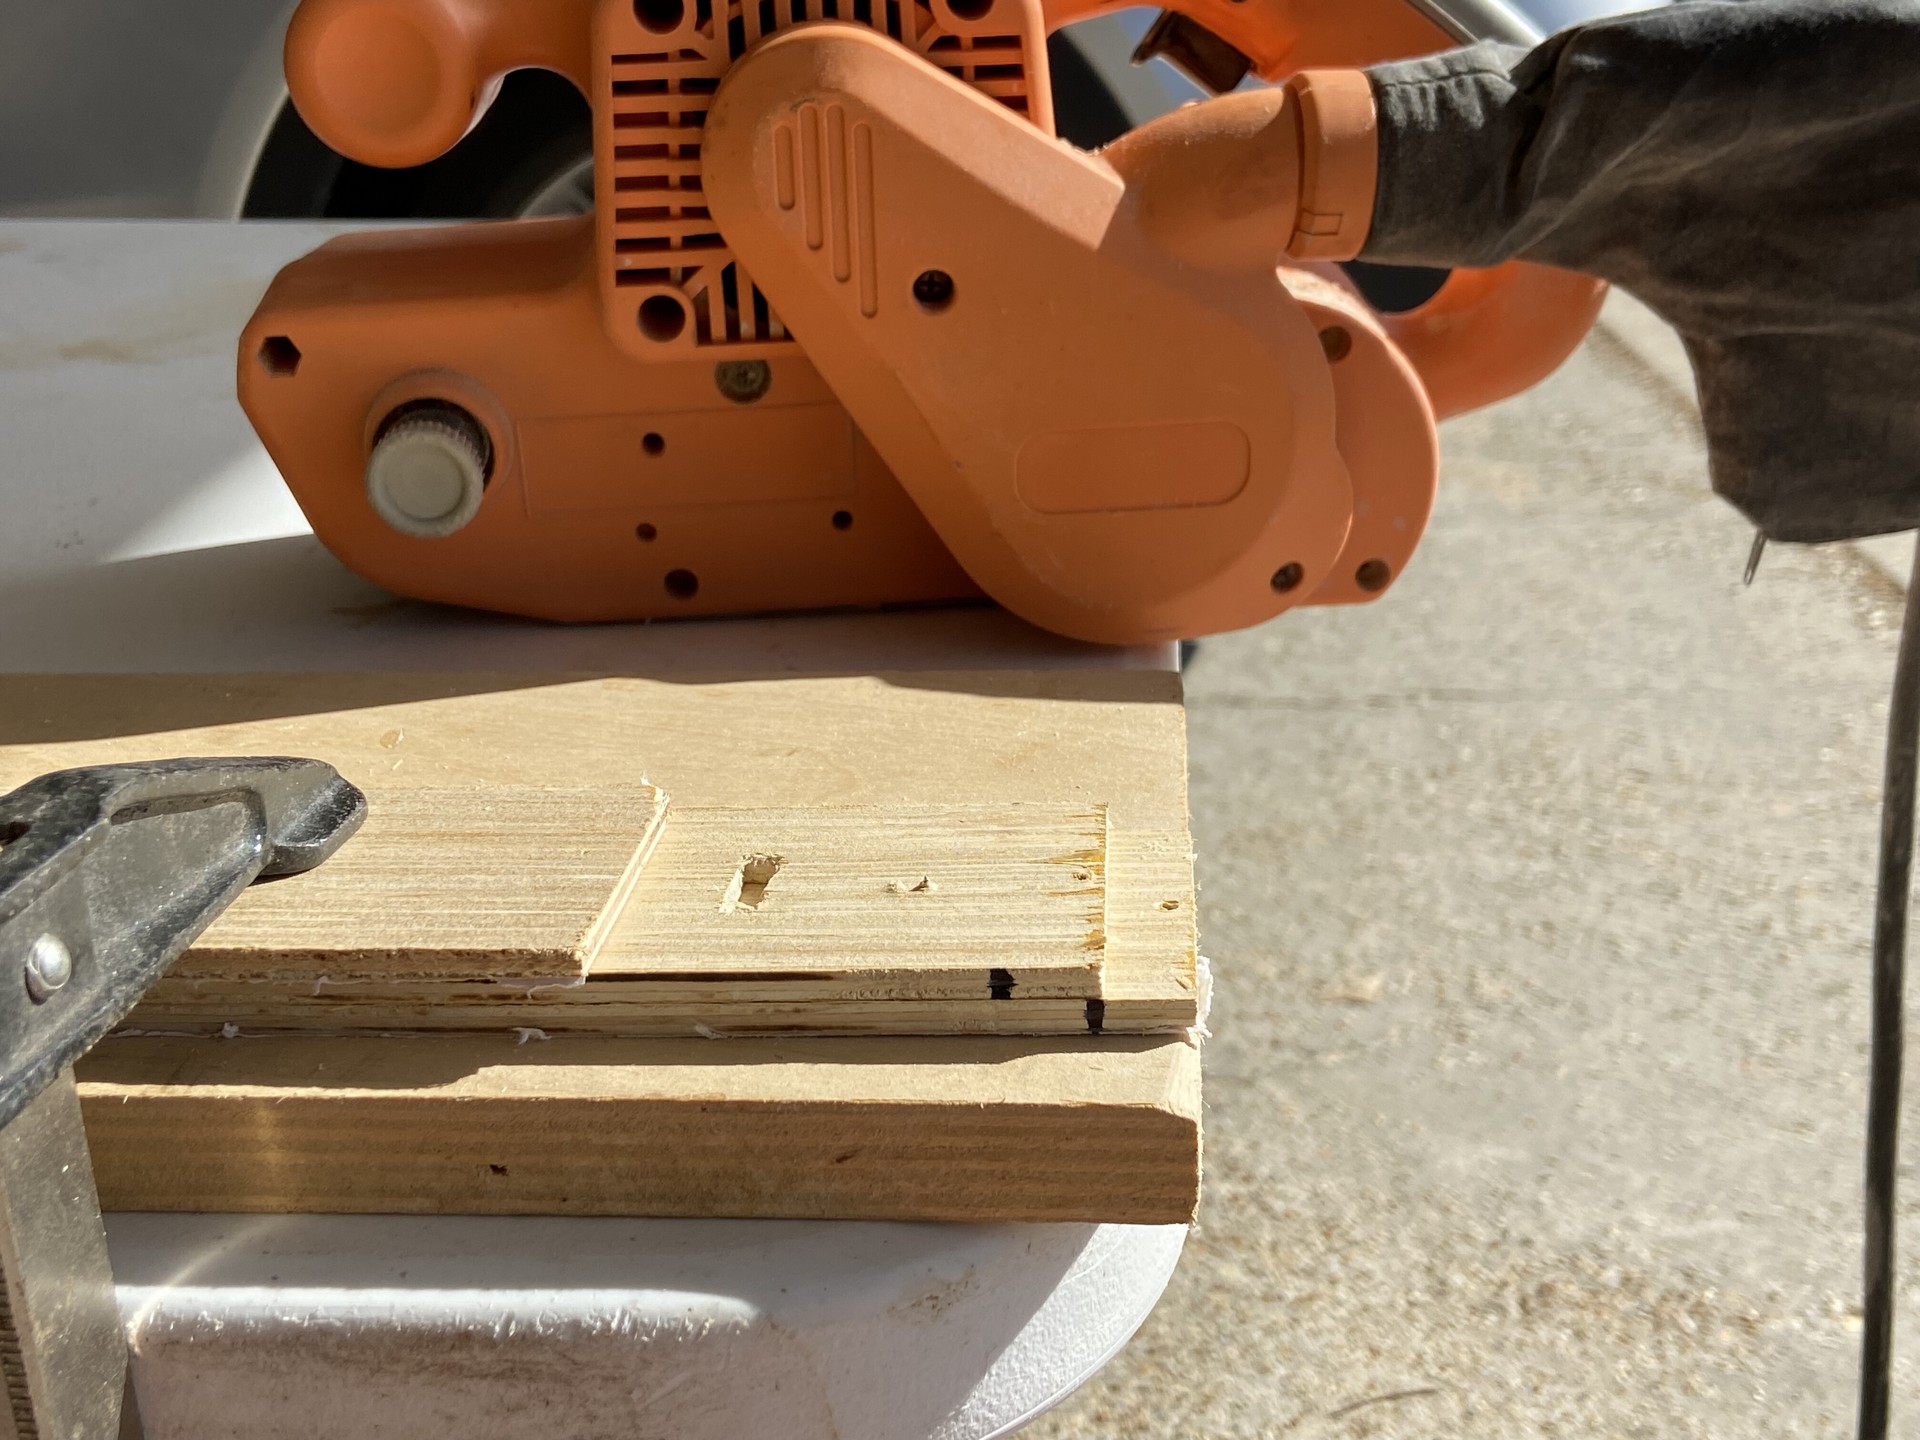
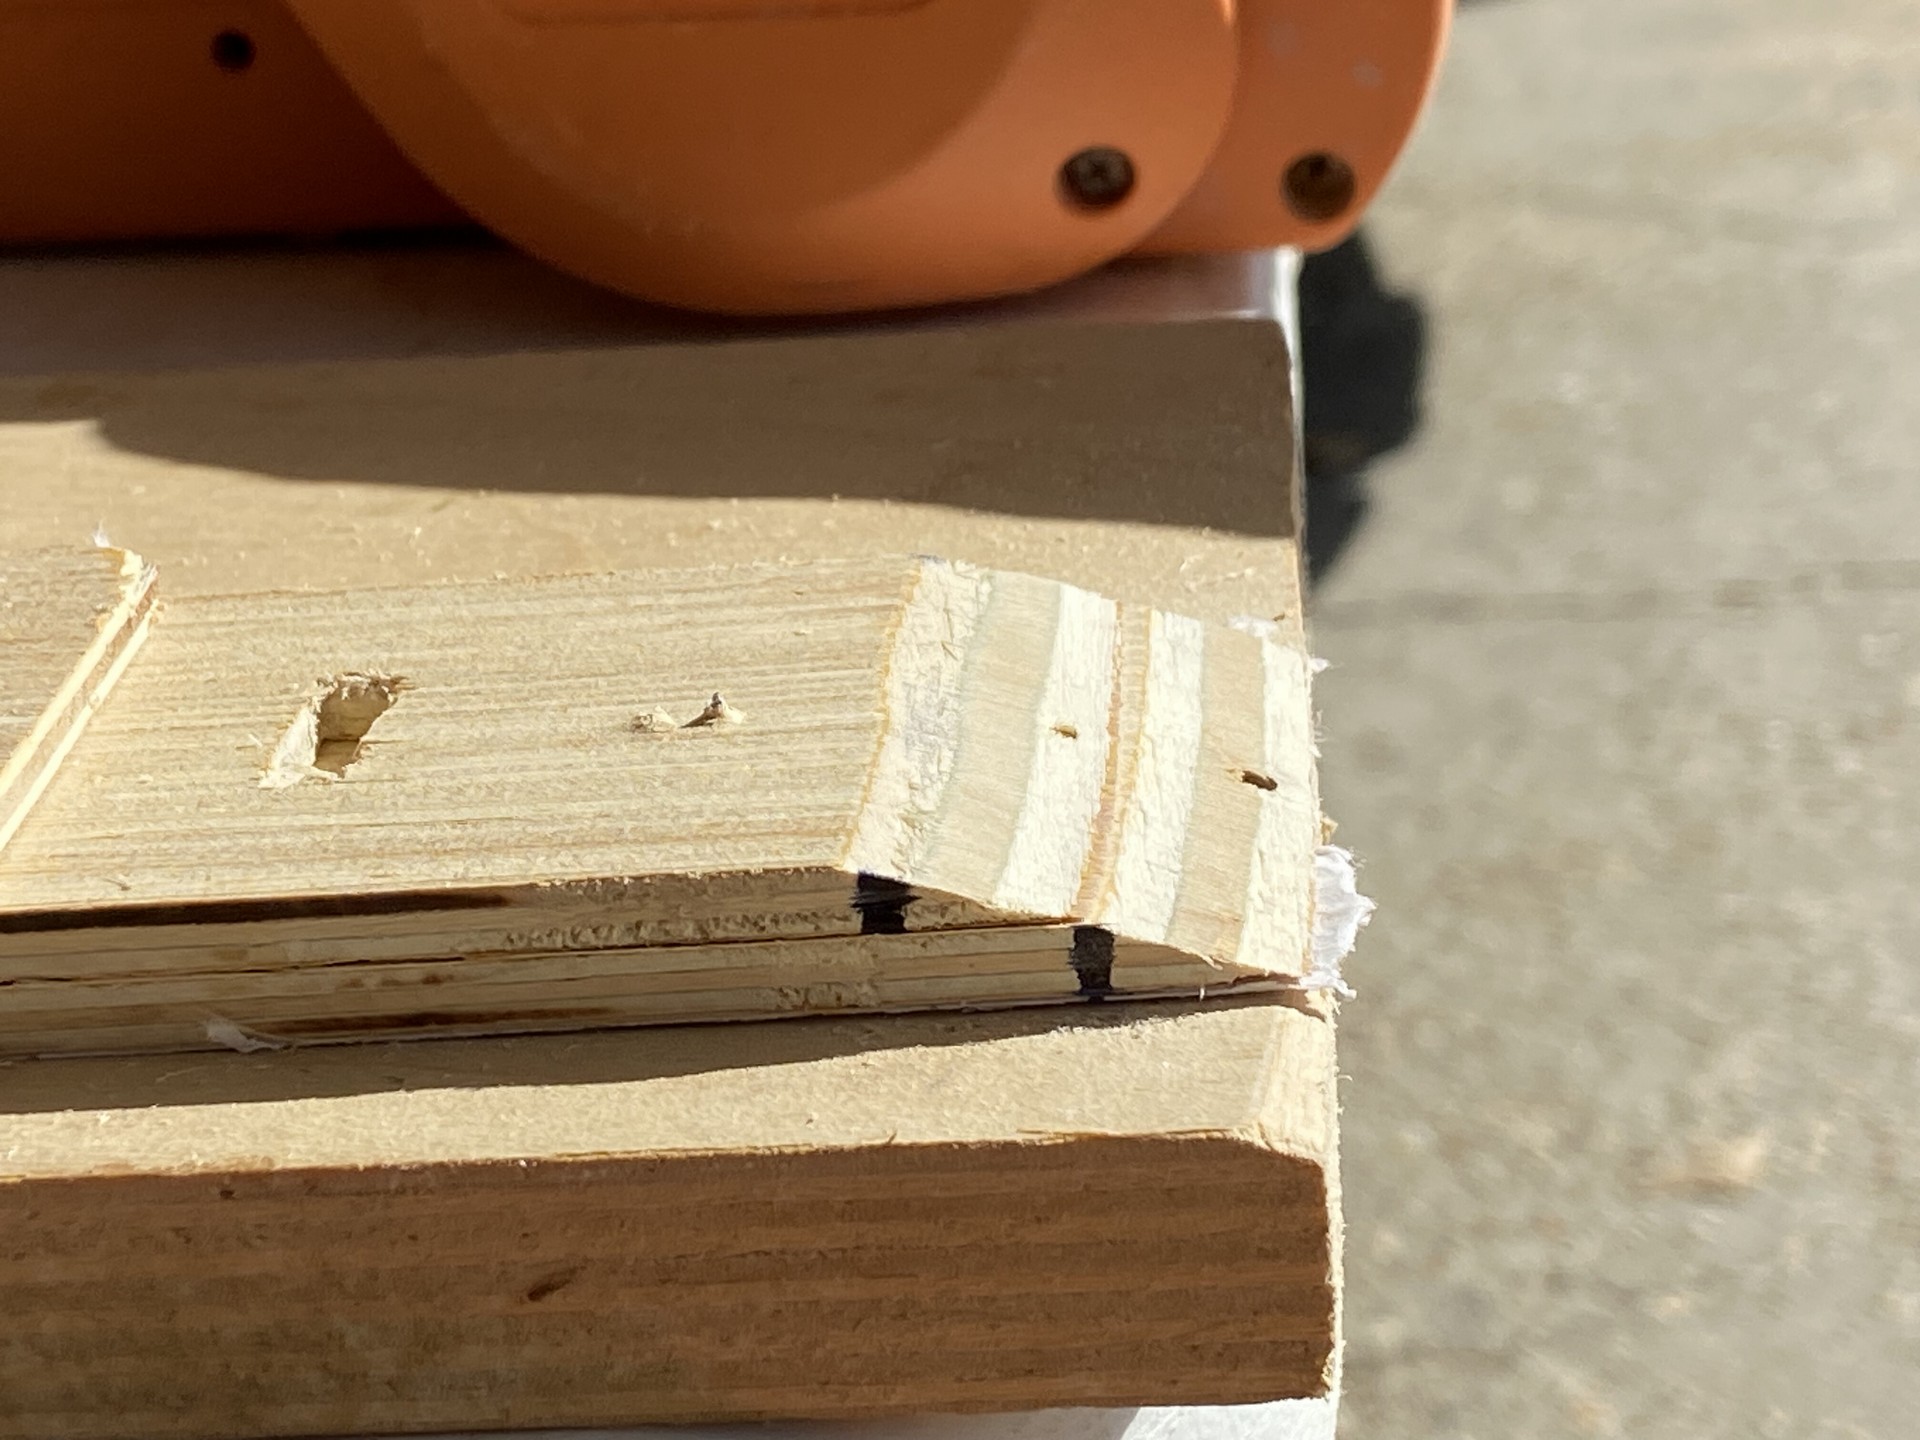
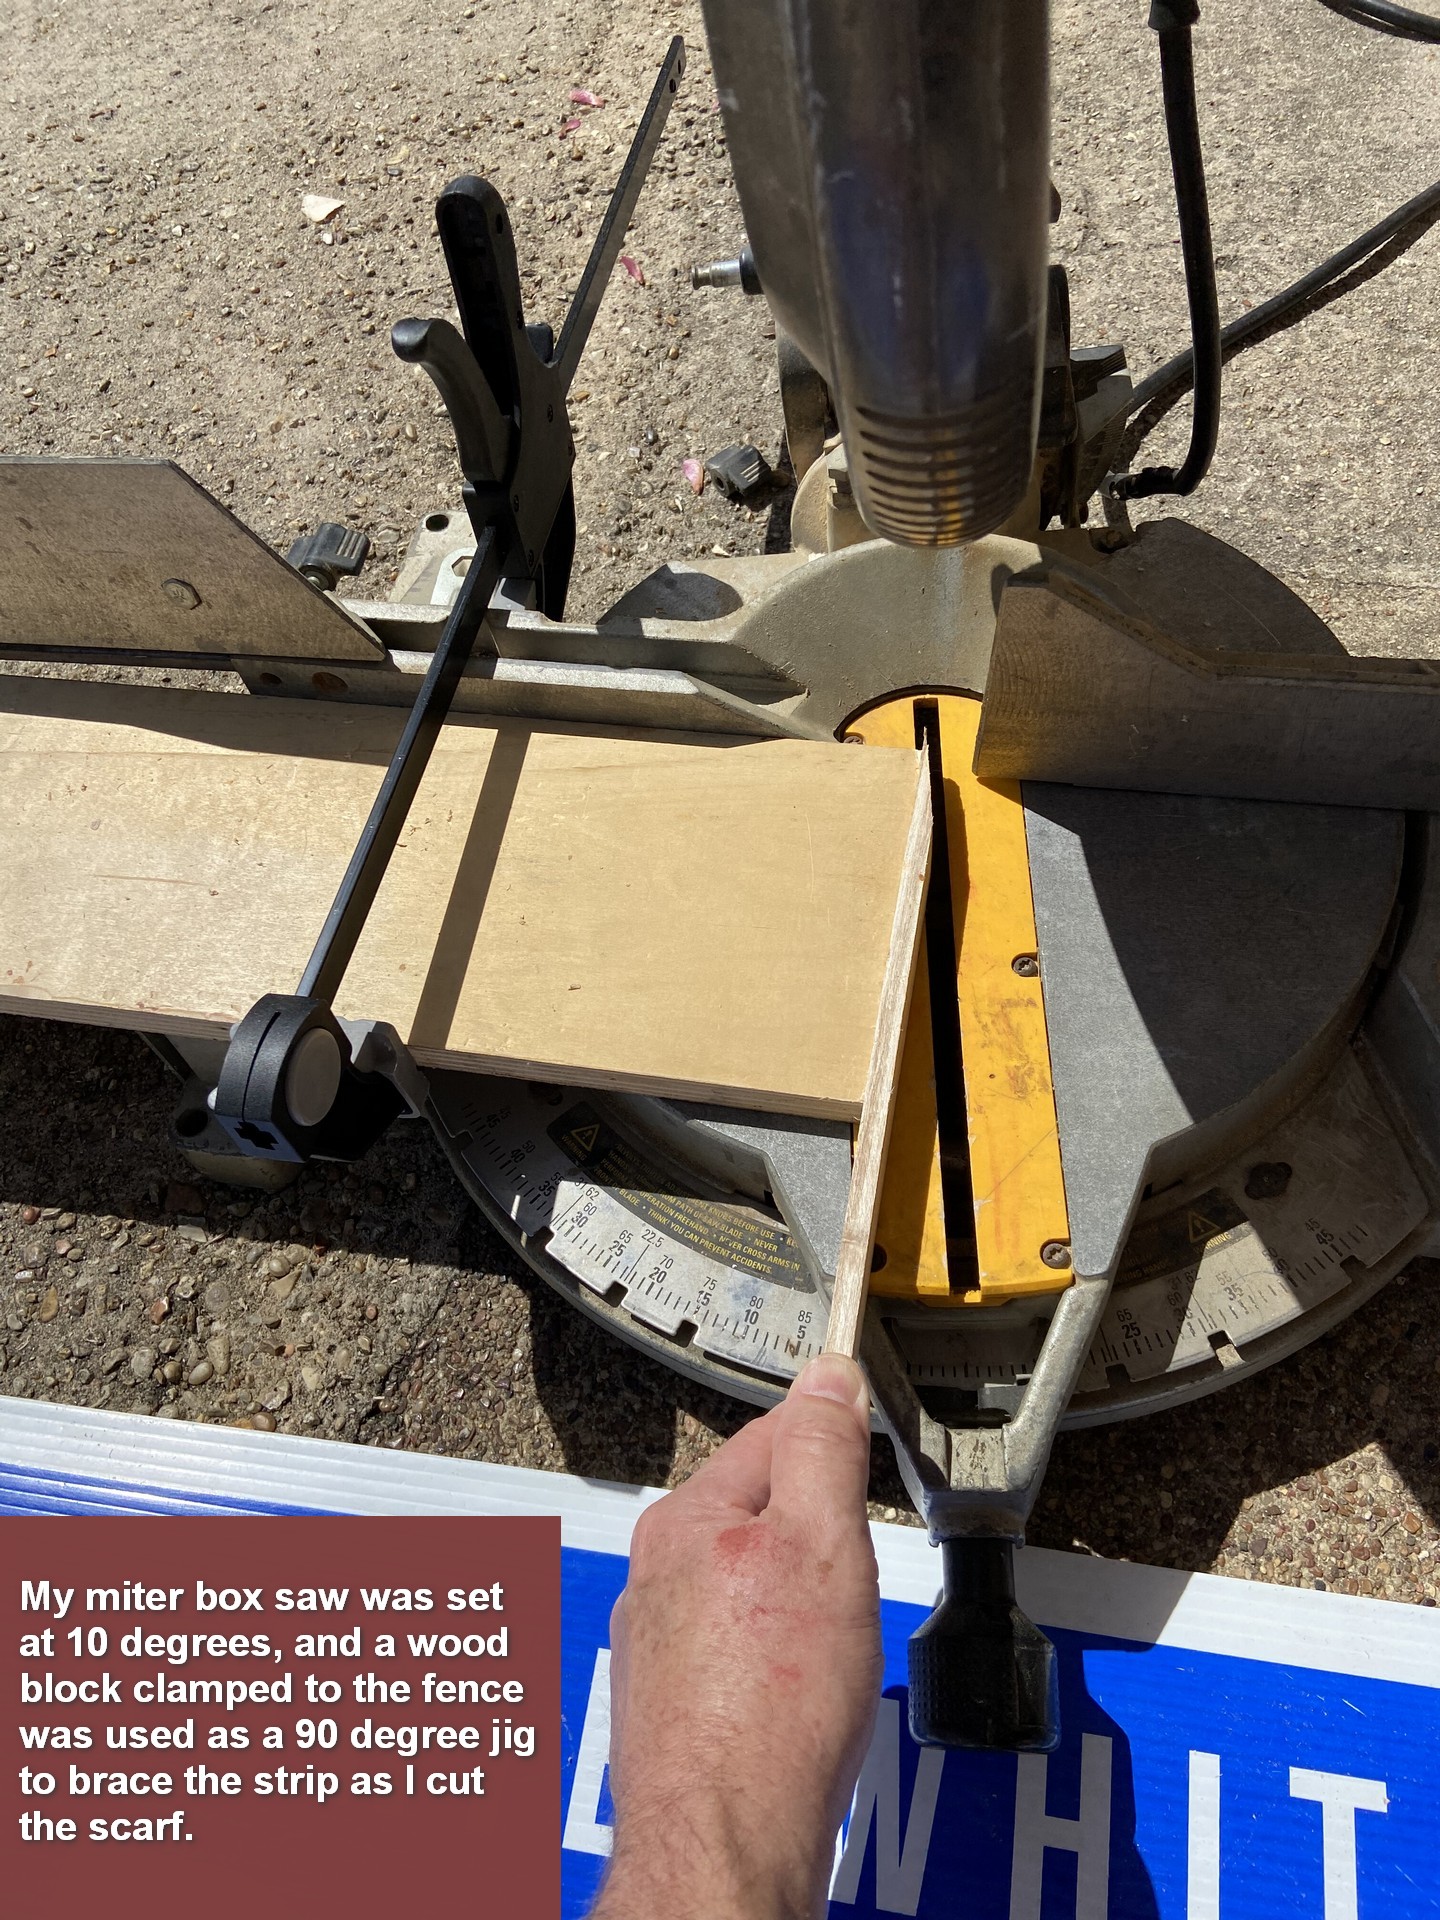
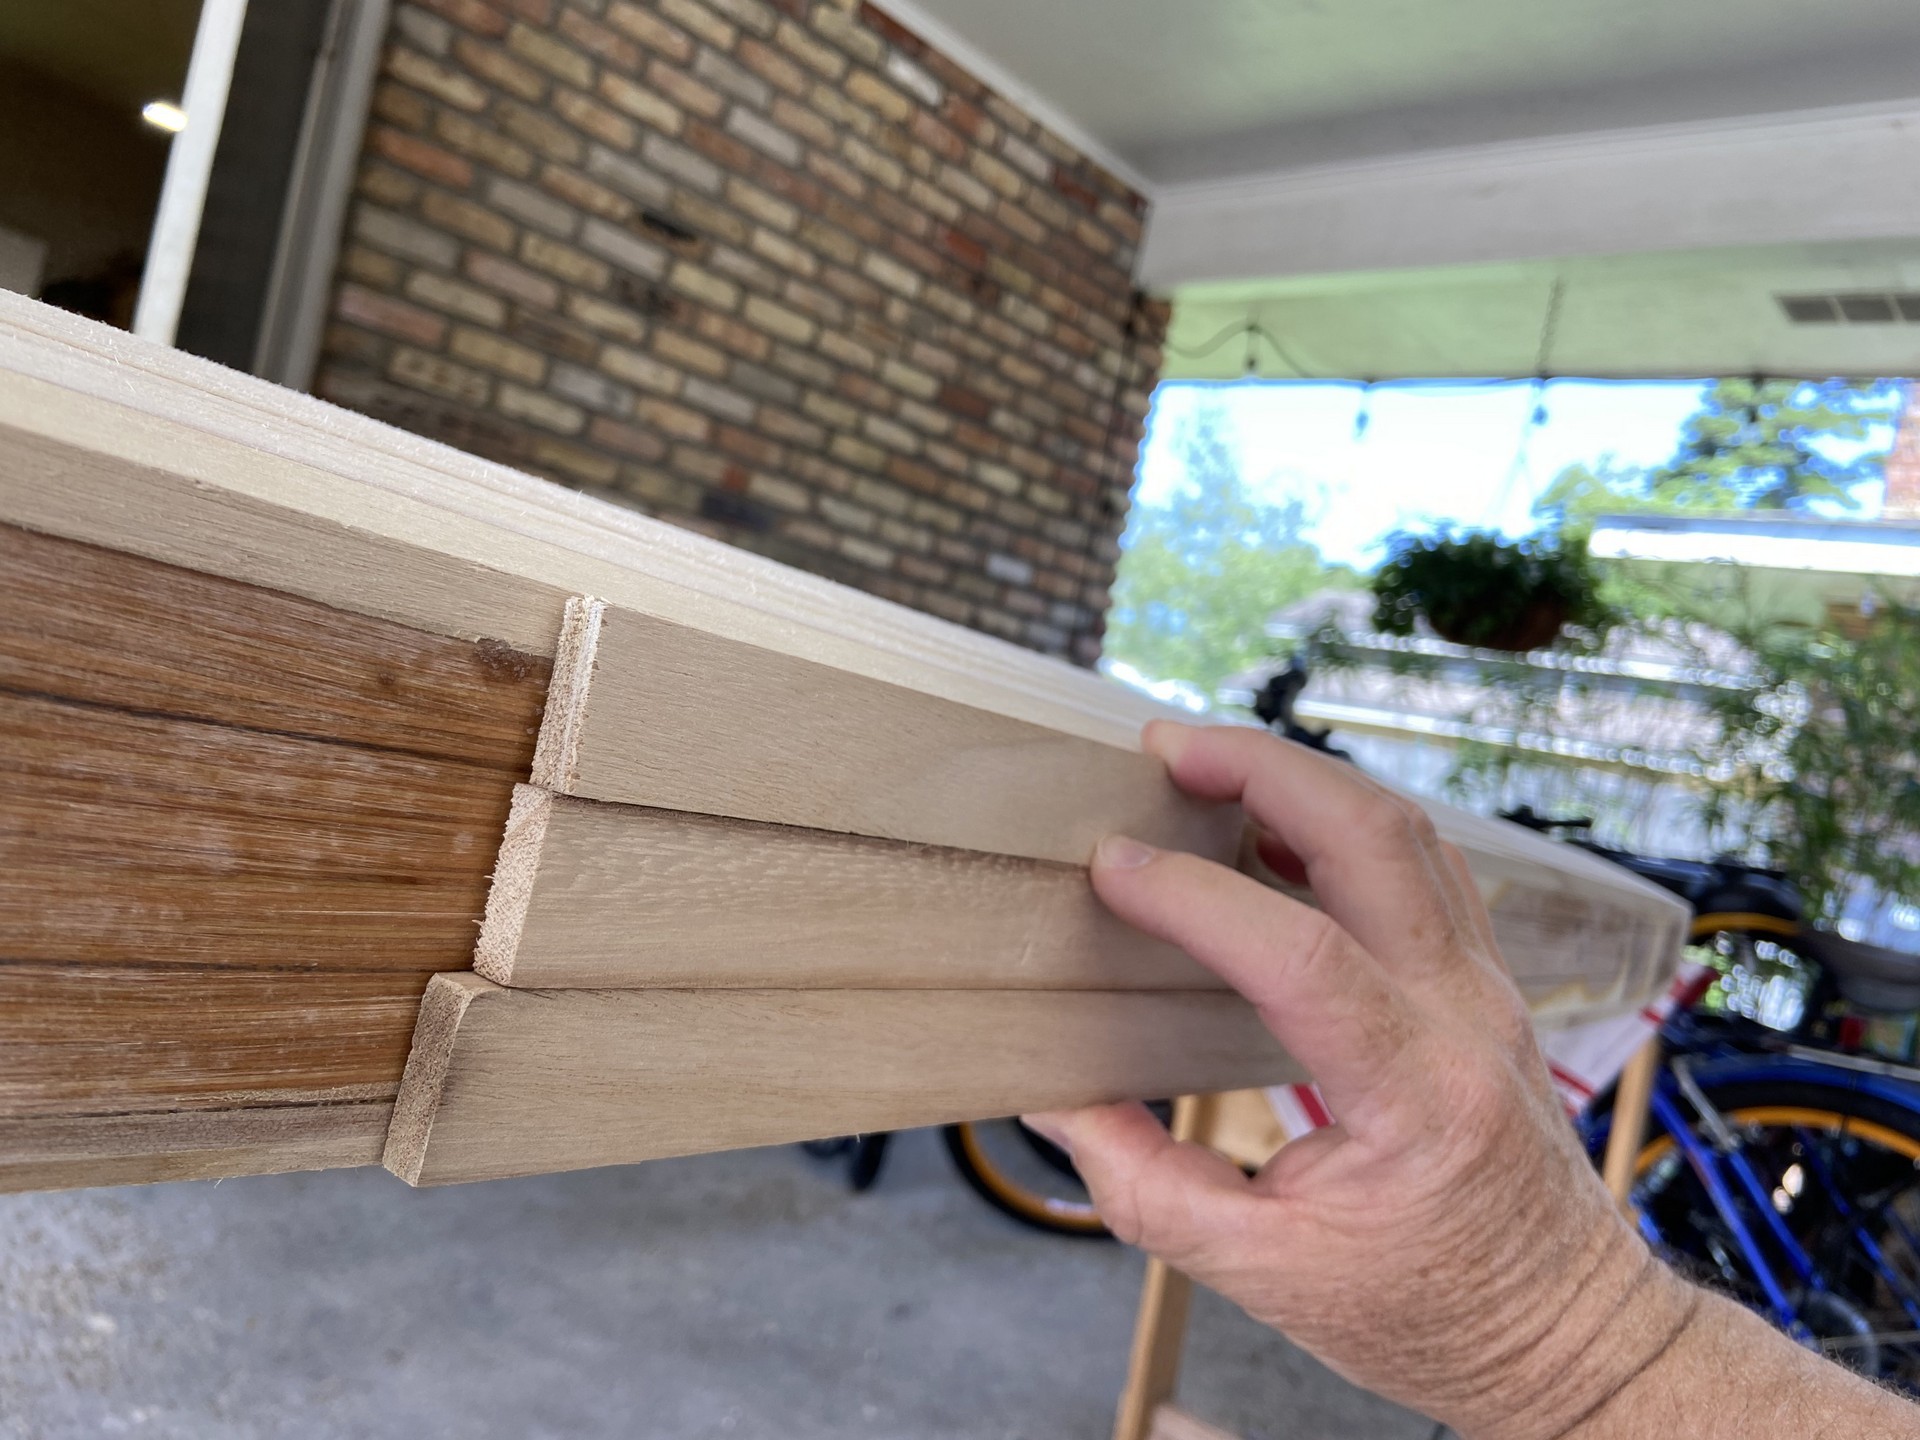
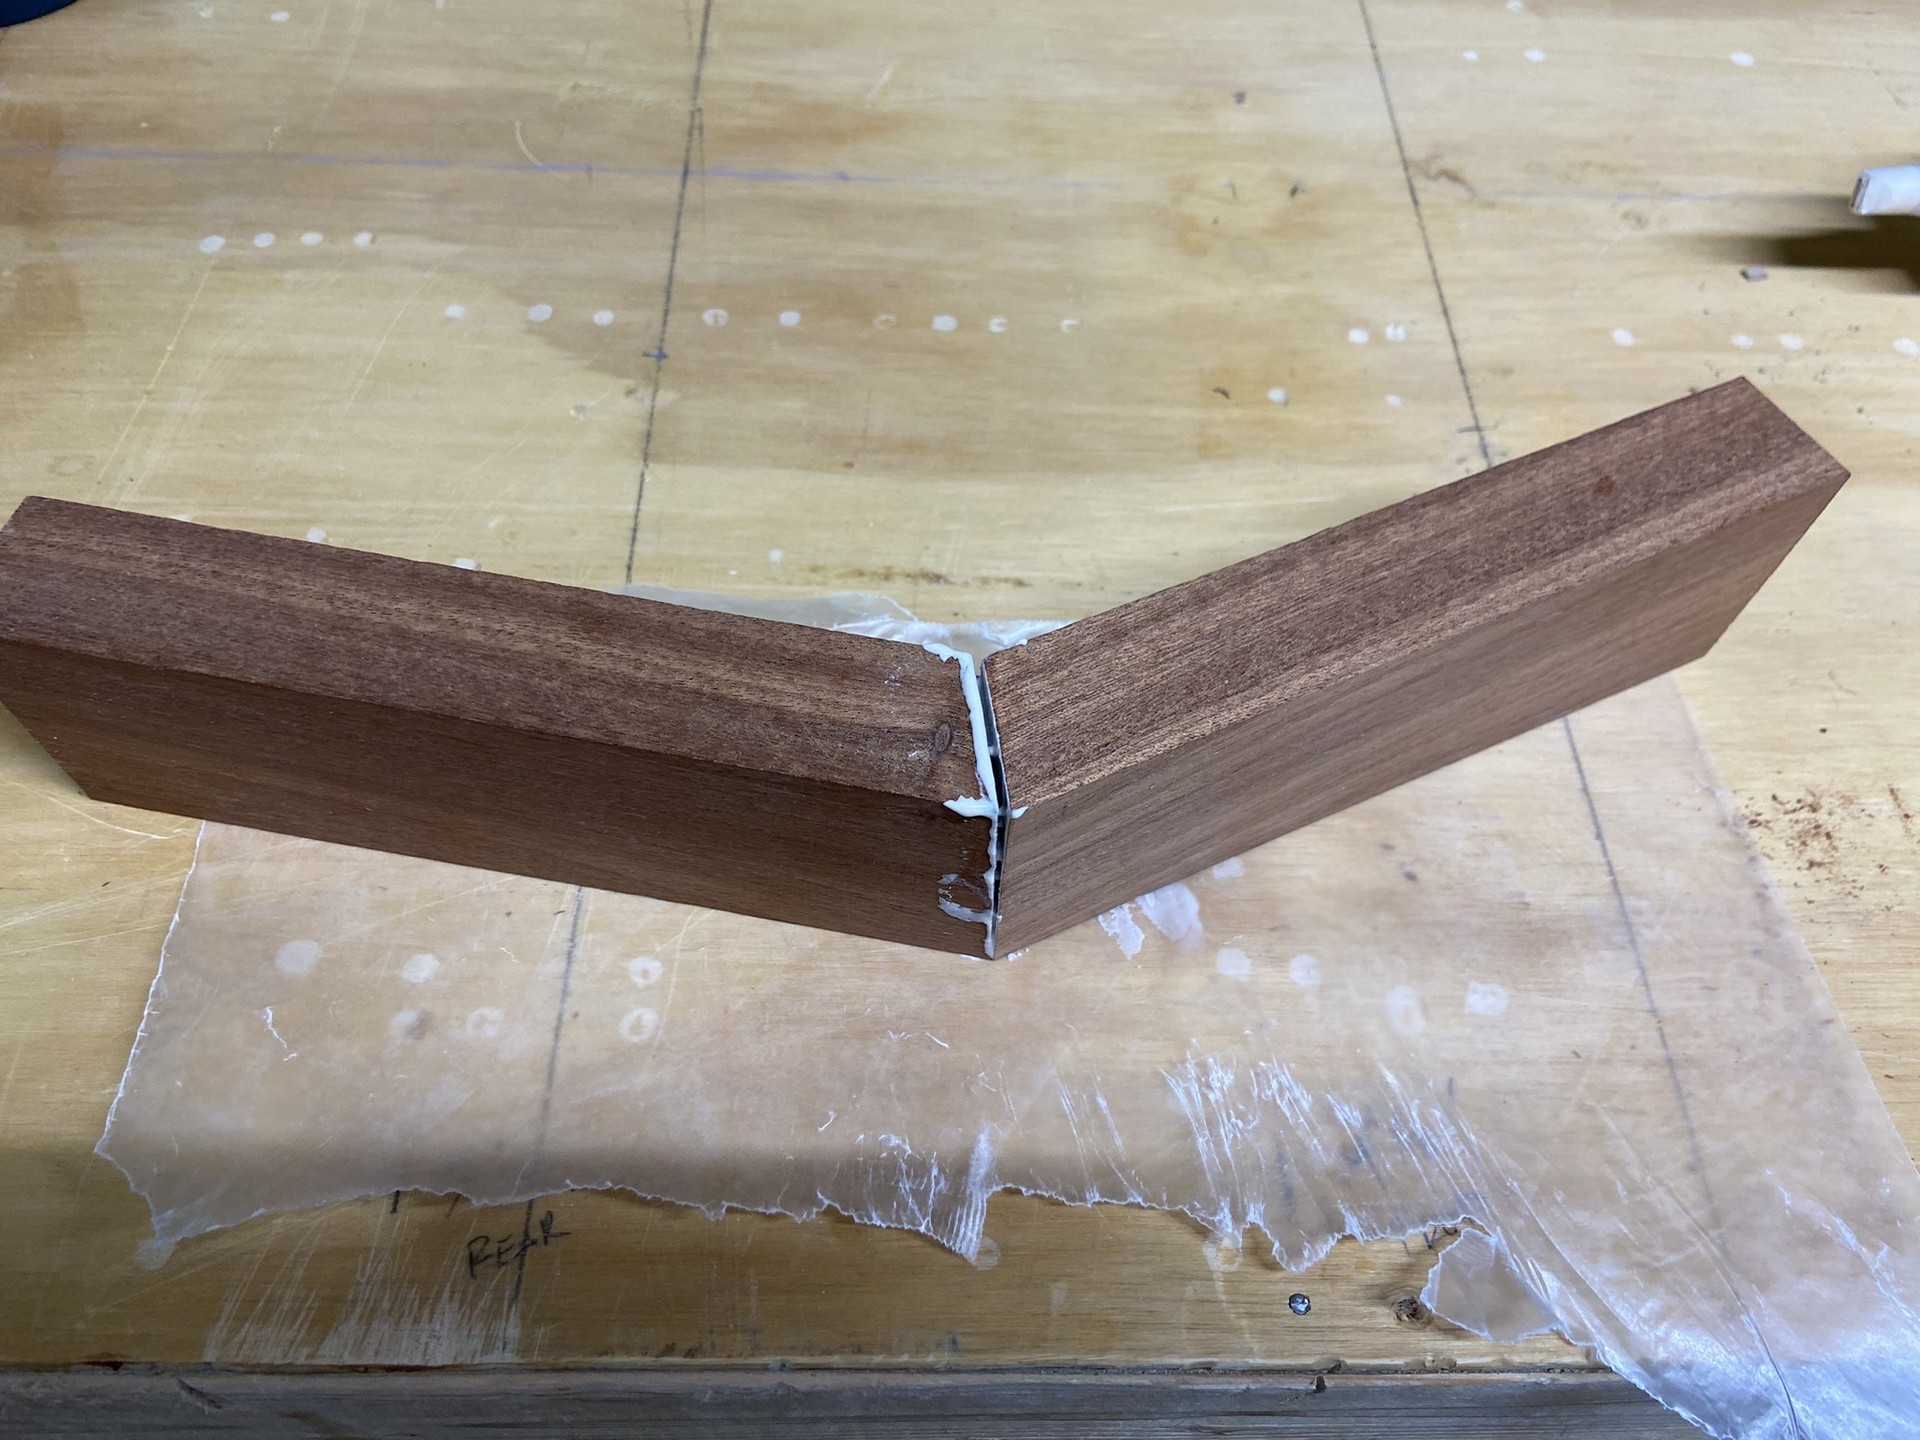
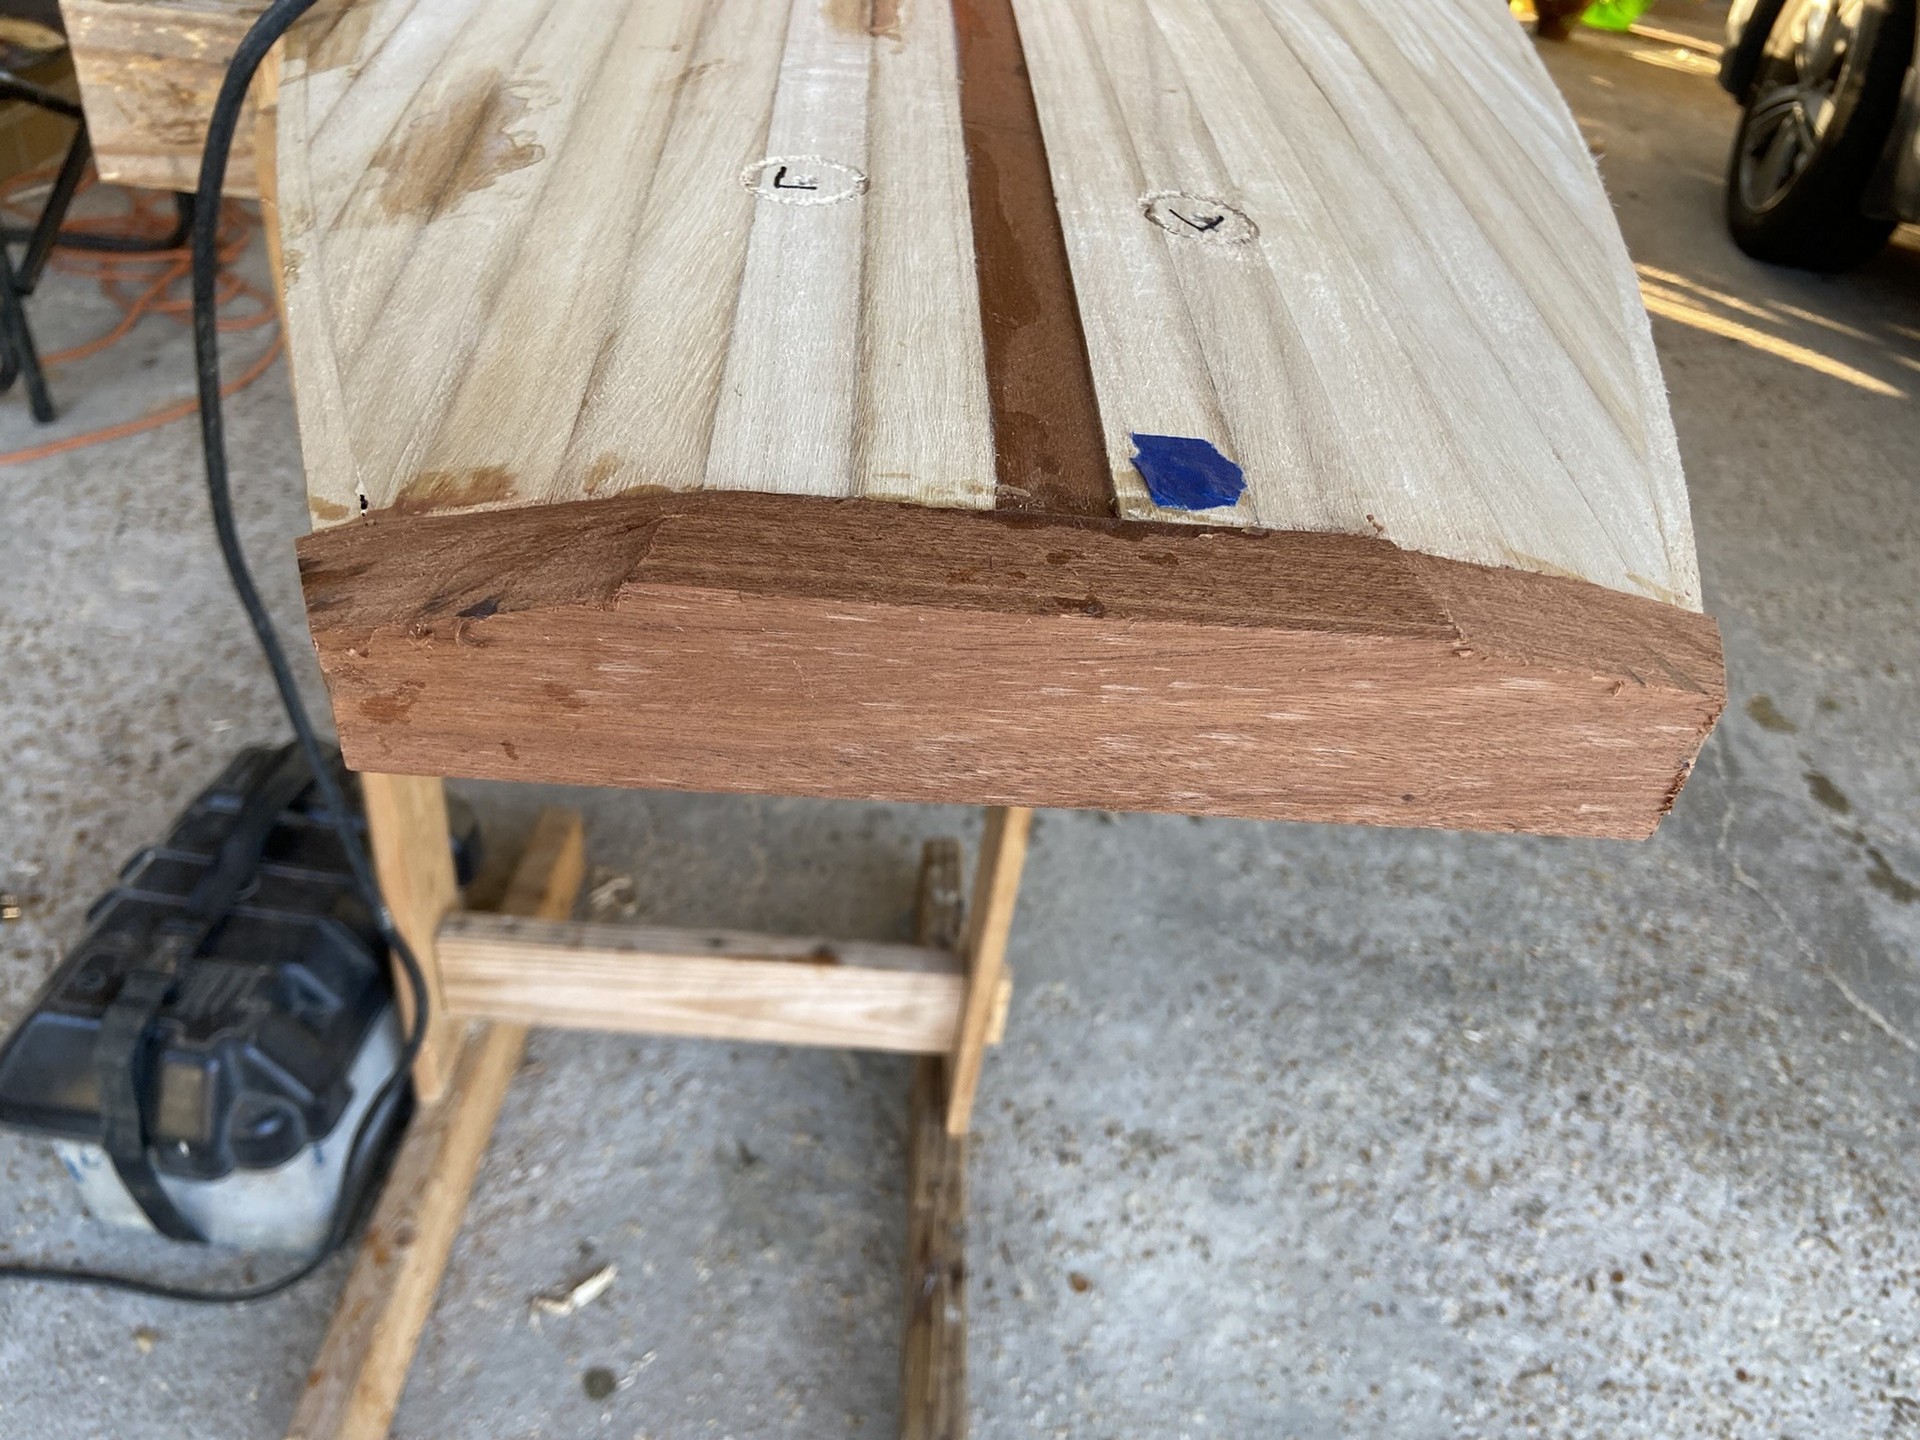
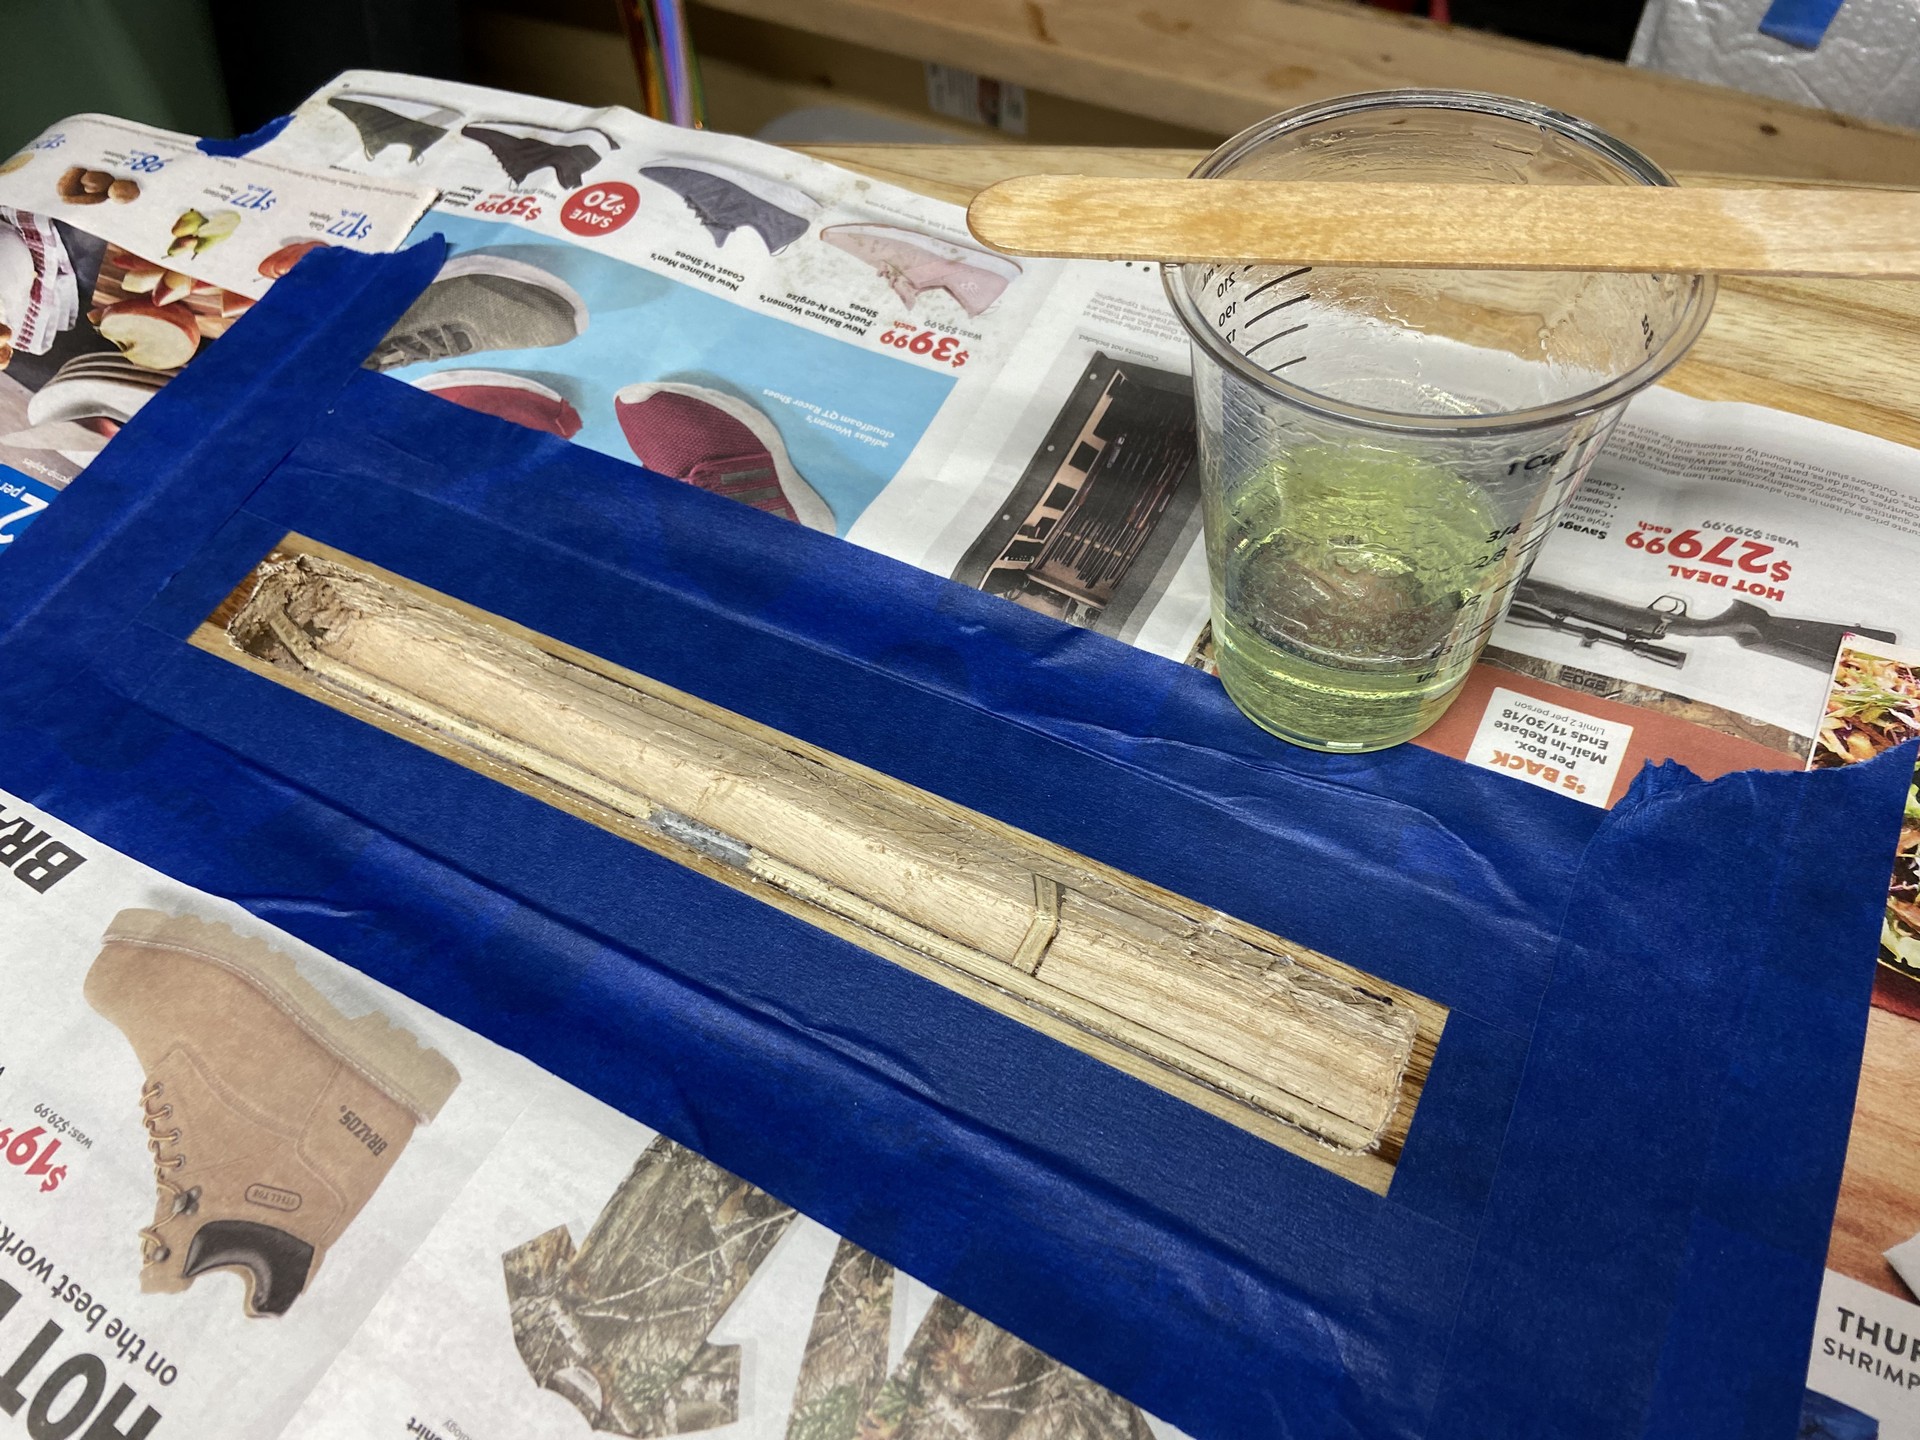
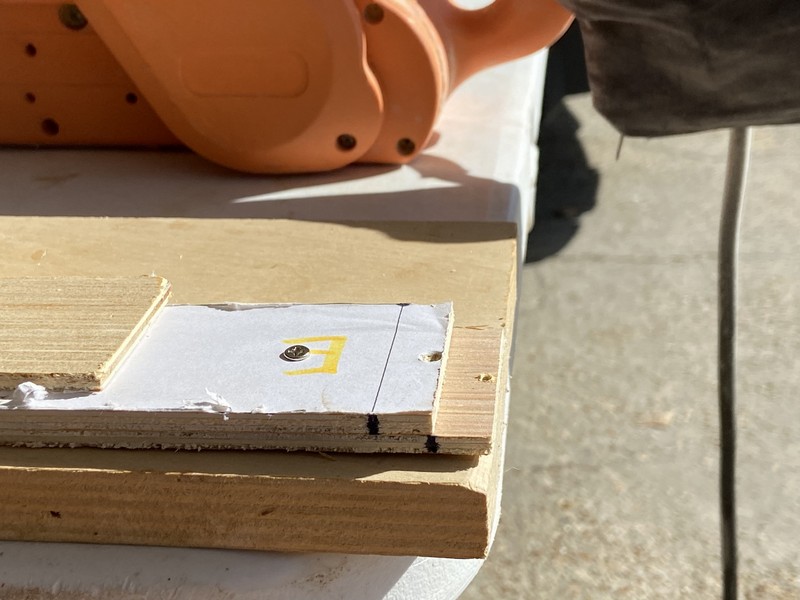
During my kayak build I learned about the benefits of a scarf joint (depicted below) and I am determined to join these longitudinal frame pieces with scarf joints rather than with butt block joints, which was described in all of the paddleboard construction videos I viewed. The butt block is quick and easy, but adds unnecessary weight. The scarf joint is essentially a pair of matched wedges of wood with a large shared surface area between them to accept glue, making a strong joint.
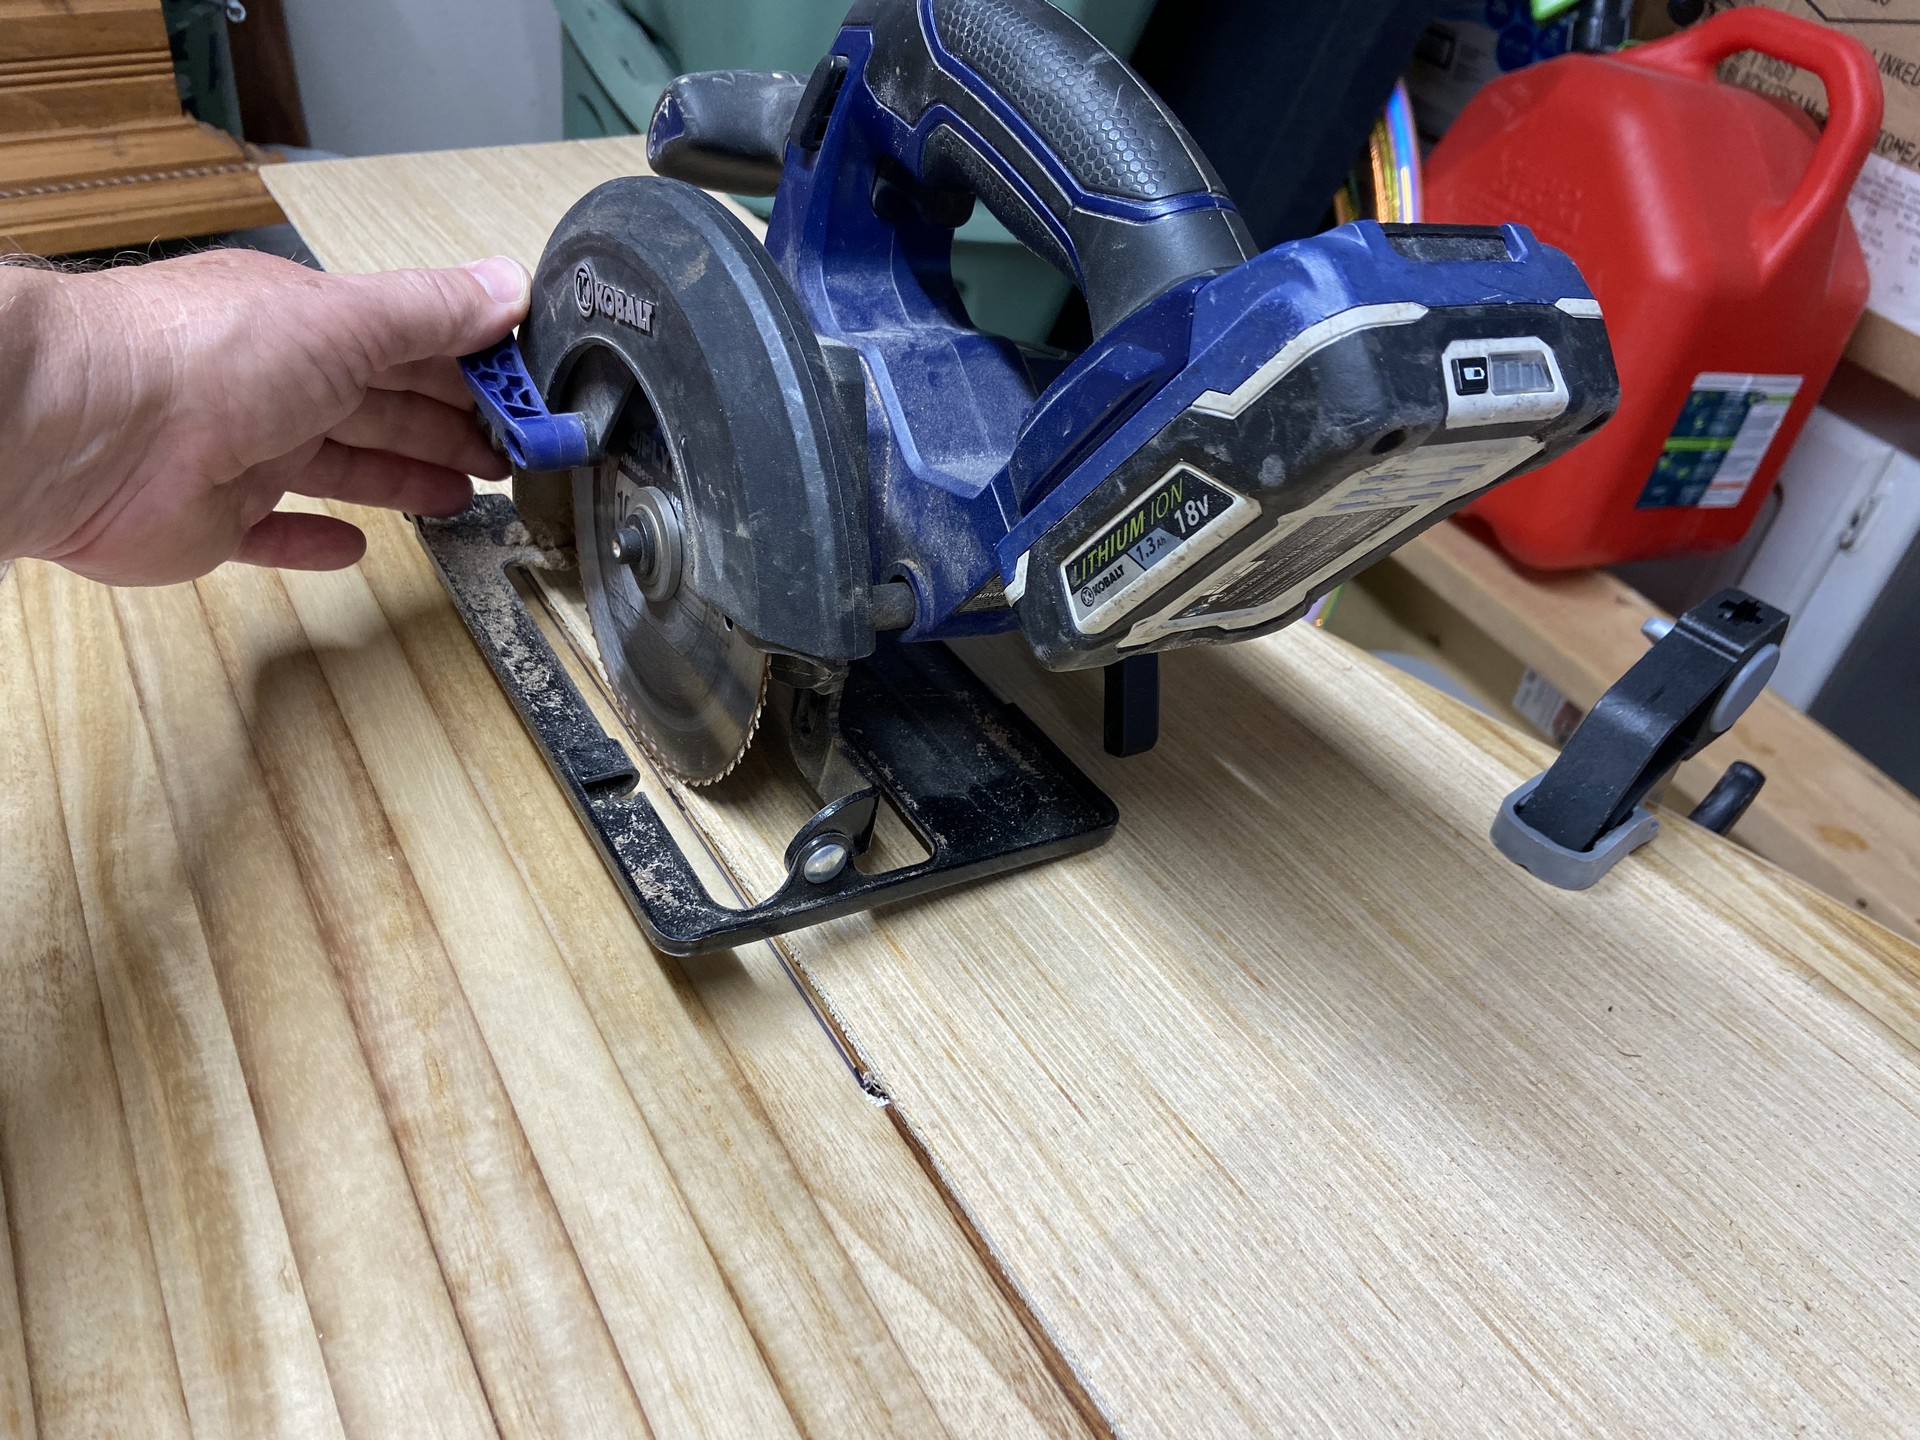
To accommodate the length required for the joints, I measured and added 3/4" to the length of each of the pieces, sketching it on the pattern sheet with a pencil. Original outlines of the components were maintained so I’ll be able to confirm the final overall length is correct. When building my kayaks, the scarf joints were across 2’ wide plywood sheets prior to cutting out the hull shapes. I cut these scarfs using a circular saw and a wooden jig to hold the saw at an acute angle, then cleaned them up with a block plane. See related blog post. For these paddleboard frame members I’ll simply use a belt sander.
NOTE: I decided to go with 1" scarf joints and so have reduced the added length to just 1/2" rather than 3/4".
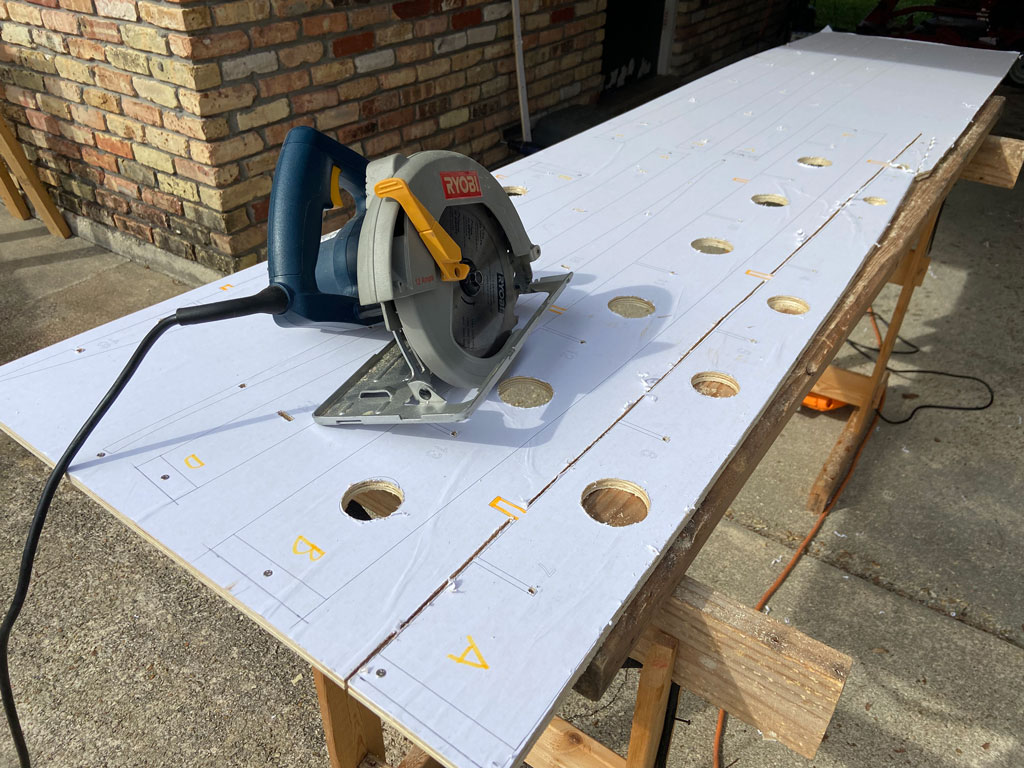
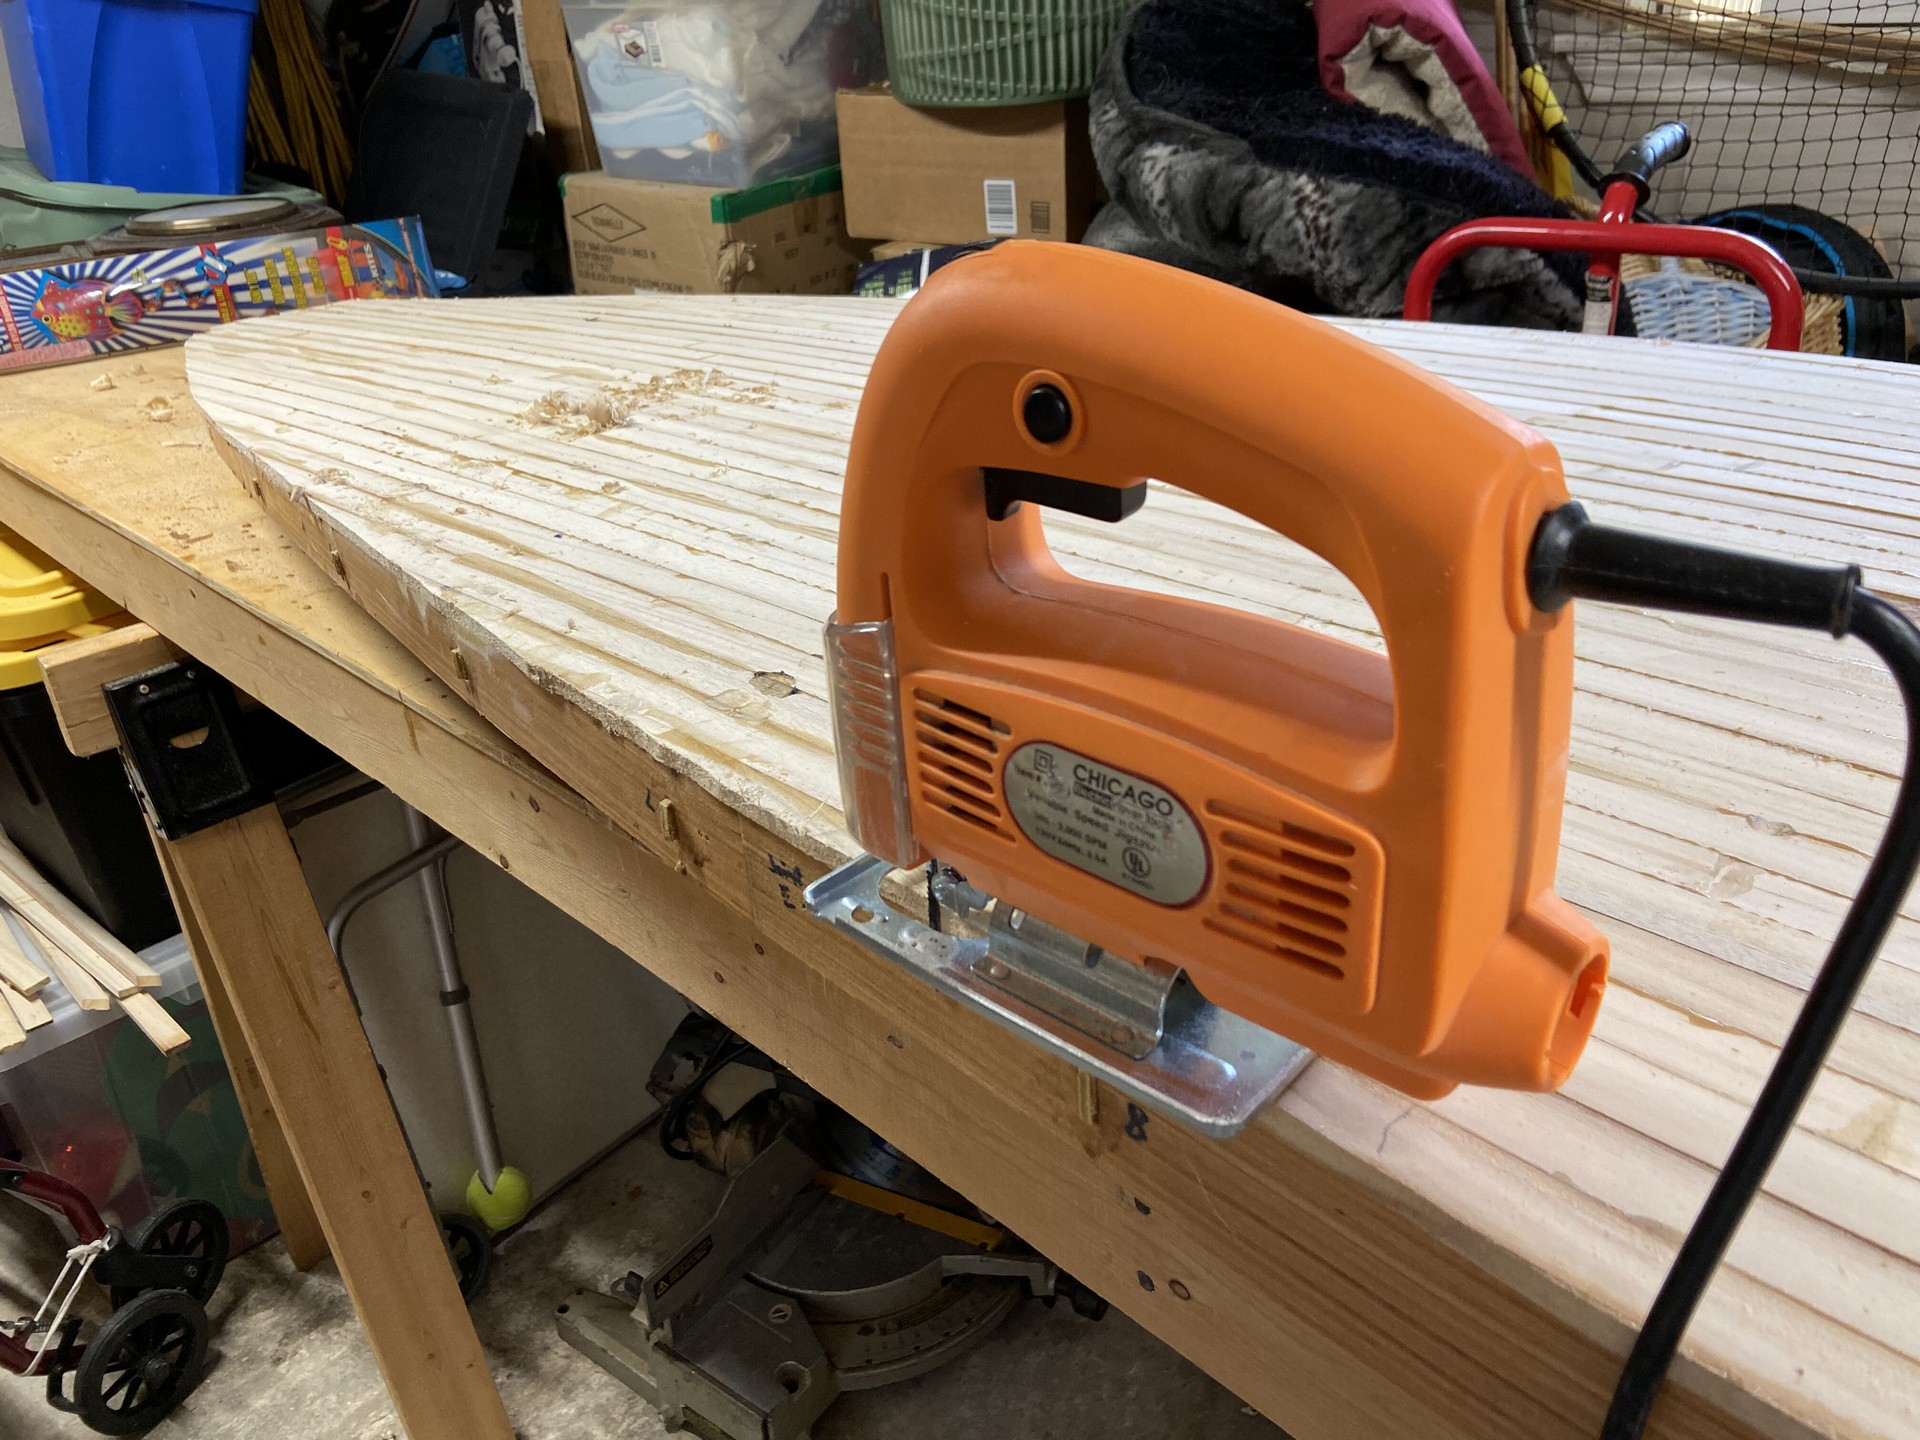
Start Cutting
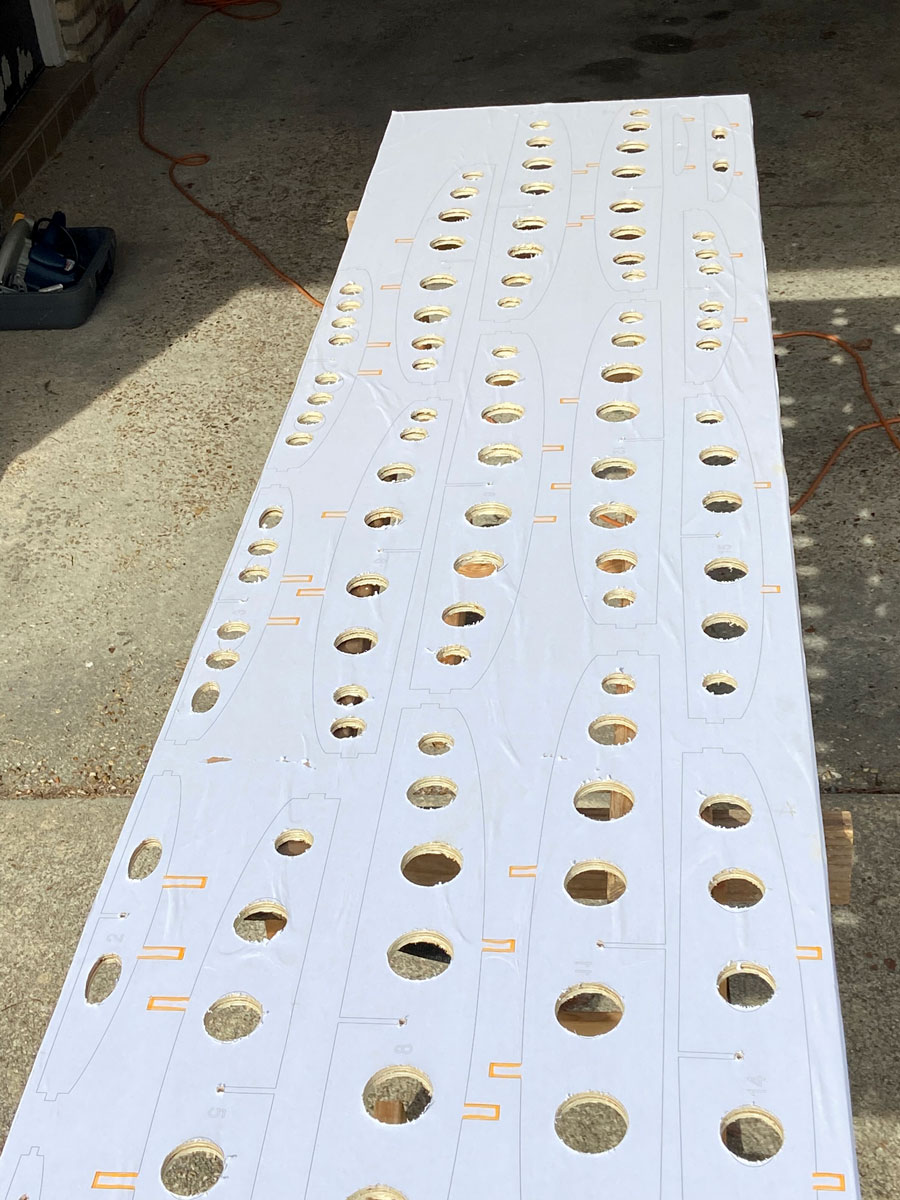
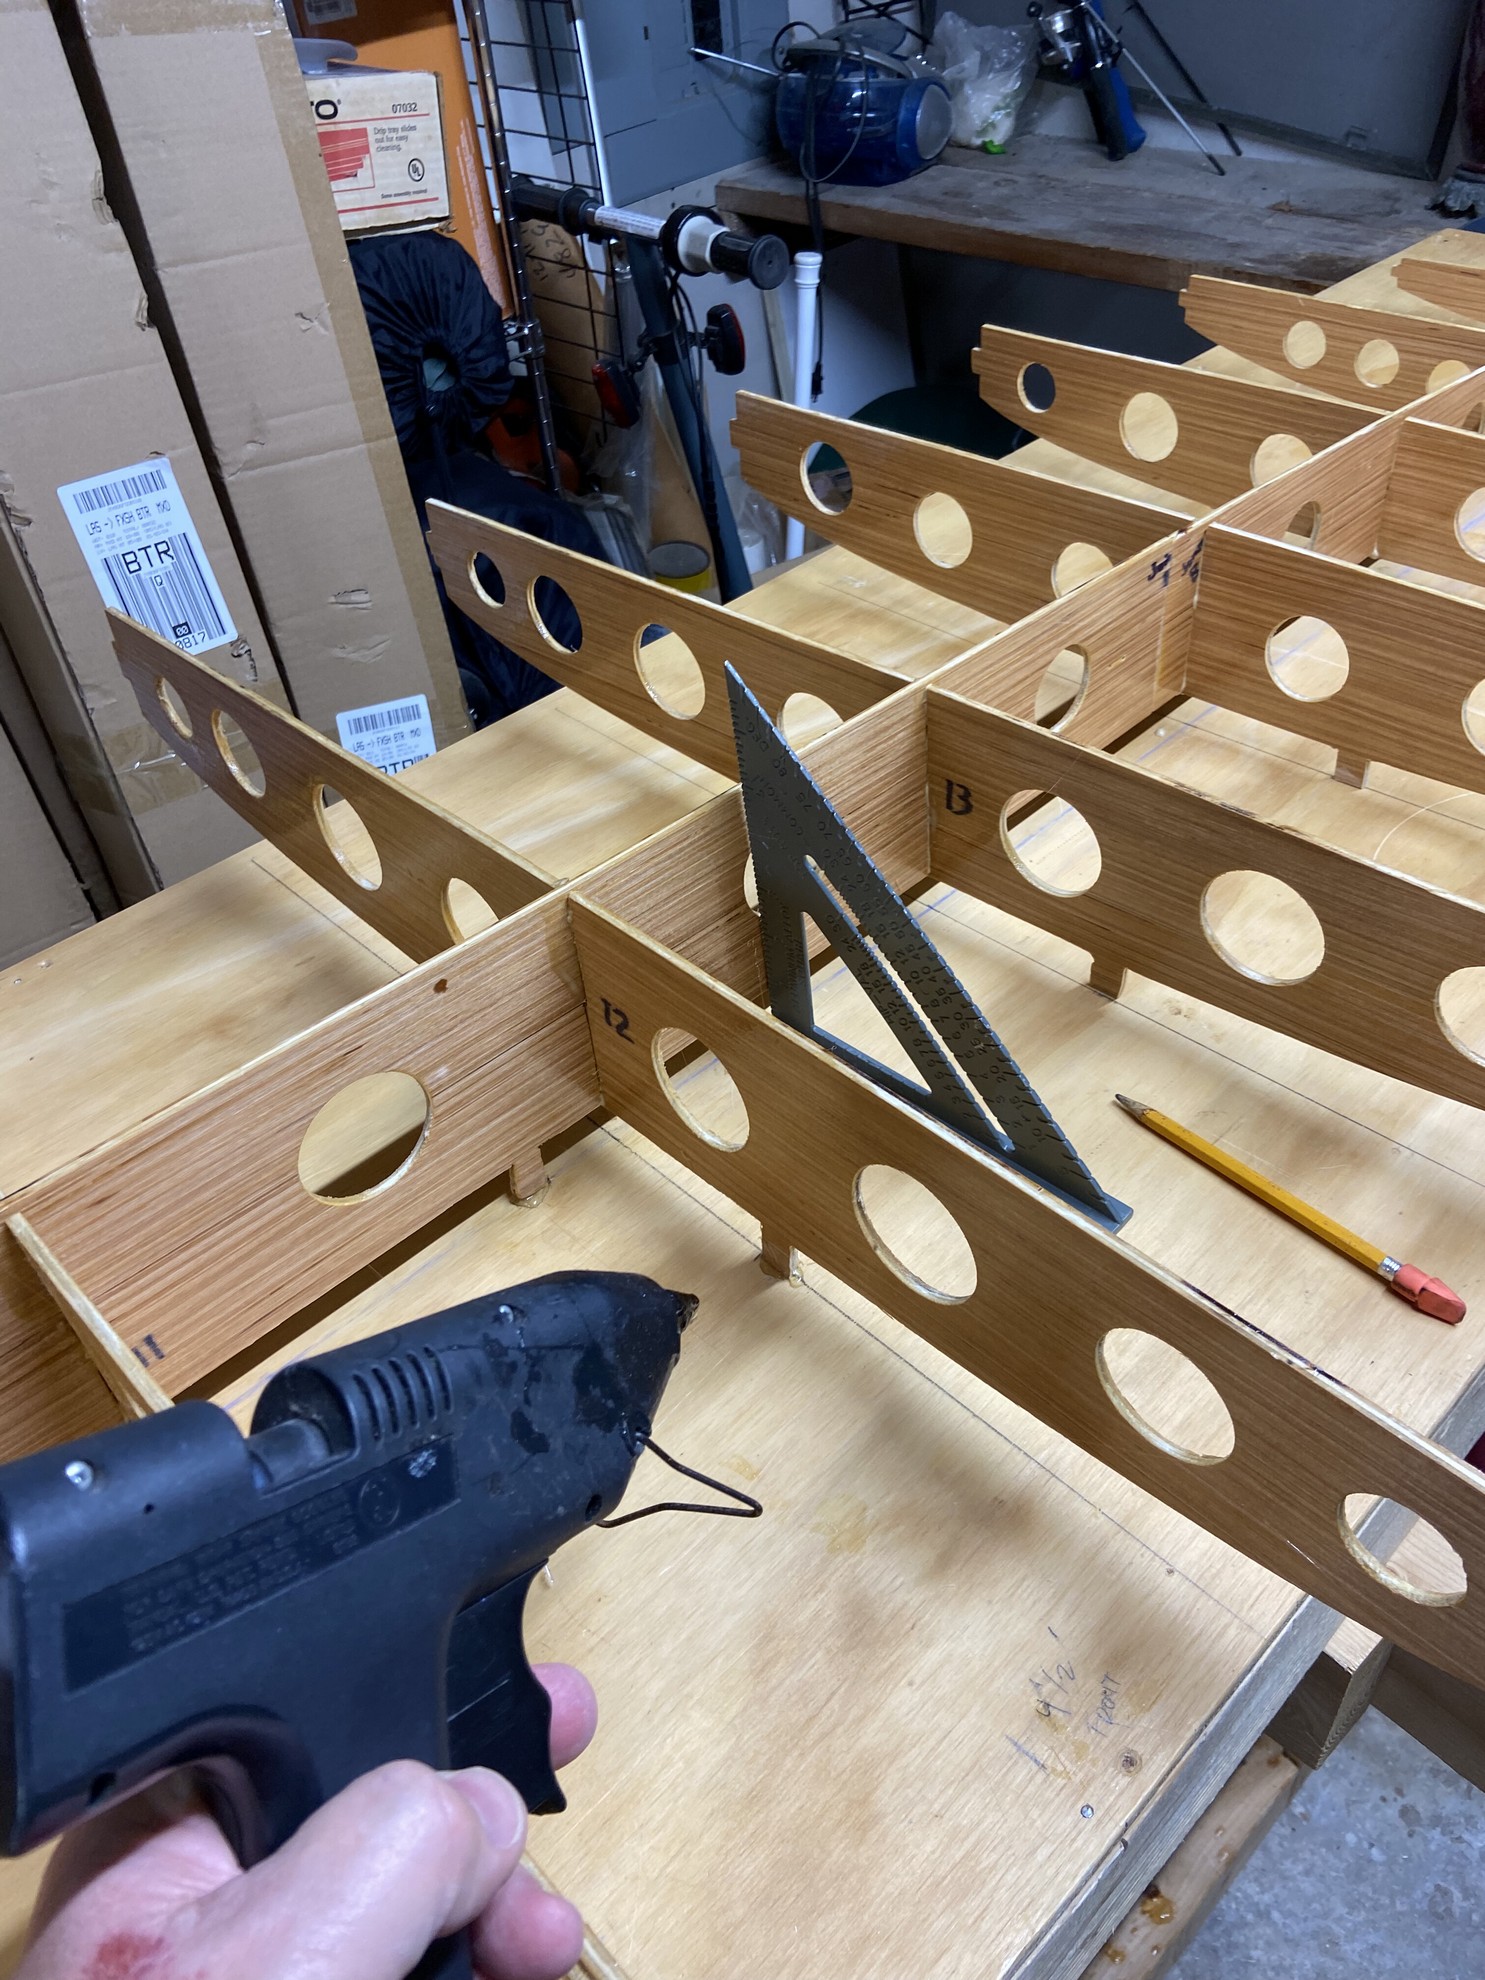
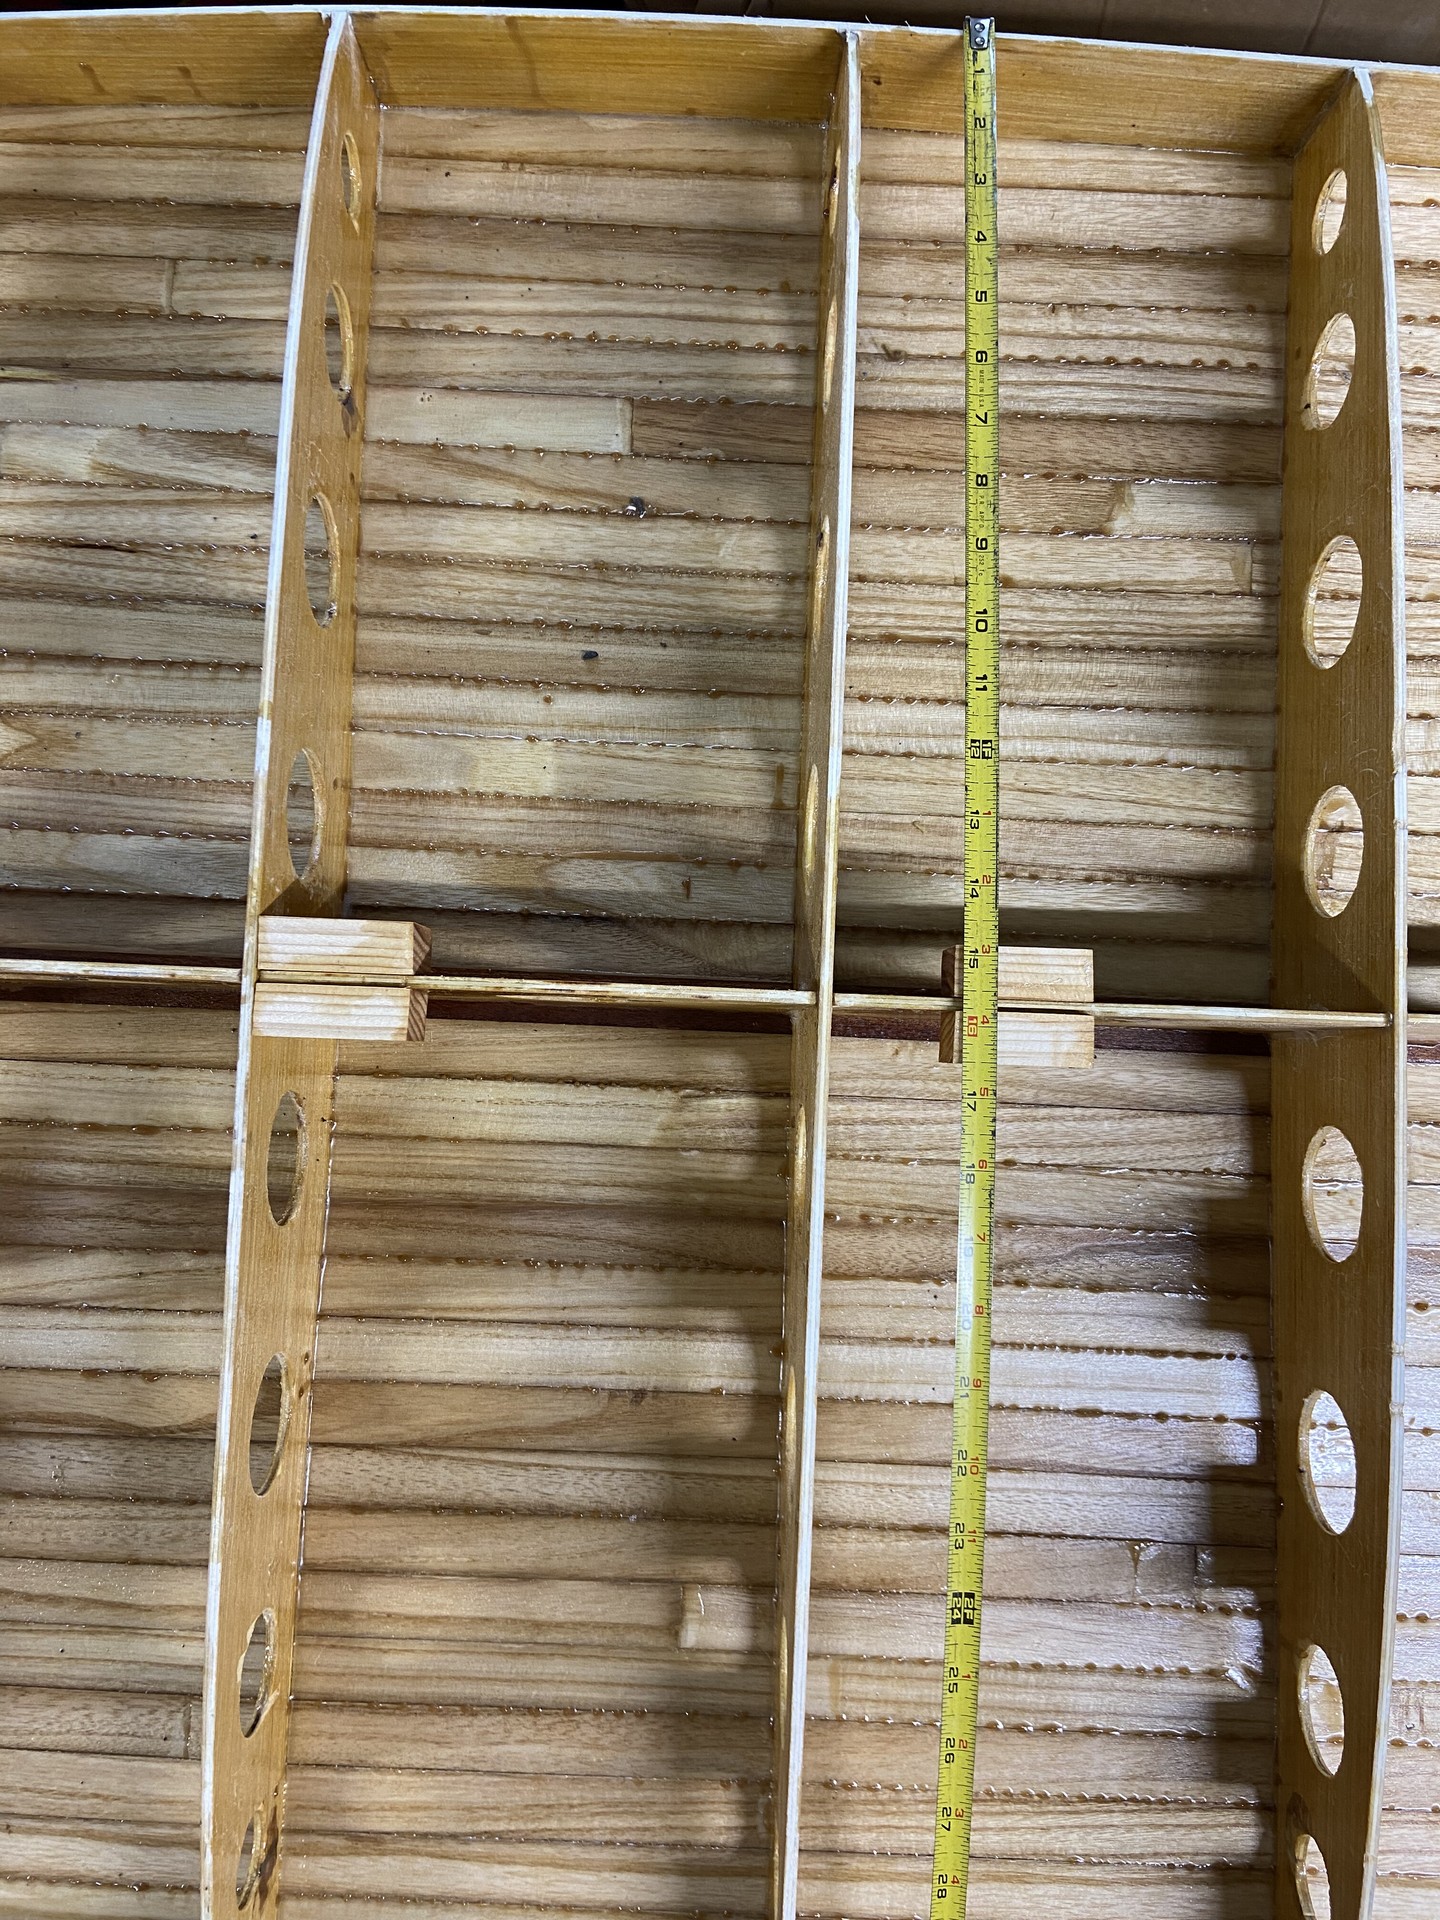
It seems other scratch builders cut out the voids in the structural members using a jigsaw. I decided to use my hole saw set with a drill in hopes of gaining some precision and maybe some speed. I did have some problems with the hole saw blowing out the material on the underside of the plywood stock, so I learned to go slower and apply less pressure as the drill turned the blade. I filled these blowouts with thickened epoxy to ensure structural stability of the frame piece.
Comparing Jarvis’ plans with those of other paddleboards, the Jarvis plans are conservative in removing less material from the internal frame members. I took some license in determining how large to make the voids, using the closest sized hole saw. In some cross members (which are not beneath the load bearing area of the finished board where one stands) I removed extra material by drilling additional holes with a smaller blade. Again, the purpose in removing extra material is to reduce weight by creating more and larger voids in the plywood frames. According to Jarvis Boards, the target weight for this 11’-6" San Marcos board is 42 lbs. Other builders on the Facebook group have both bragged about less and also complained about excess weight. These remarks have caused me to be weight conscious at the beginning of the project when I’m able to do something about it.
During this first weekend working on the project I completed cutting out all of the voids, but did not begin cutting out the frame components.
Weekends #2 and #3
January 6 to 15 , 2024
Continued Cutting…
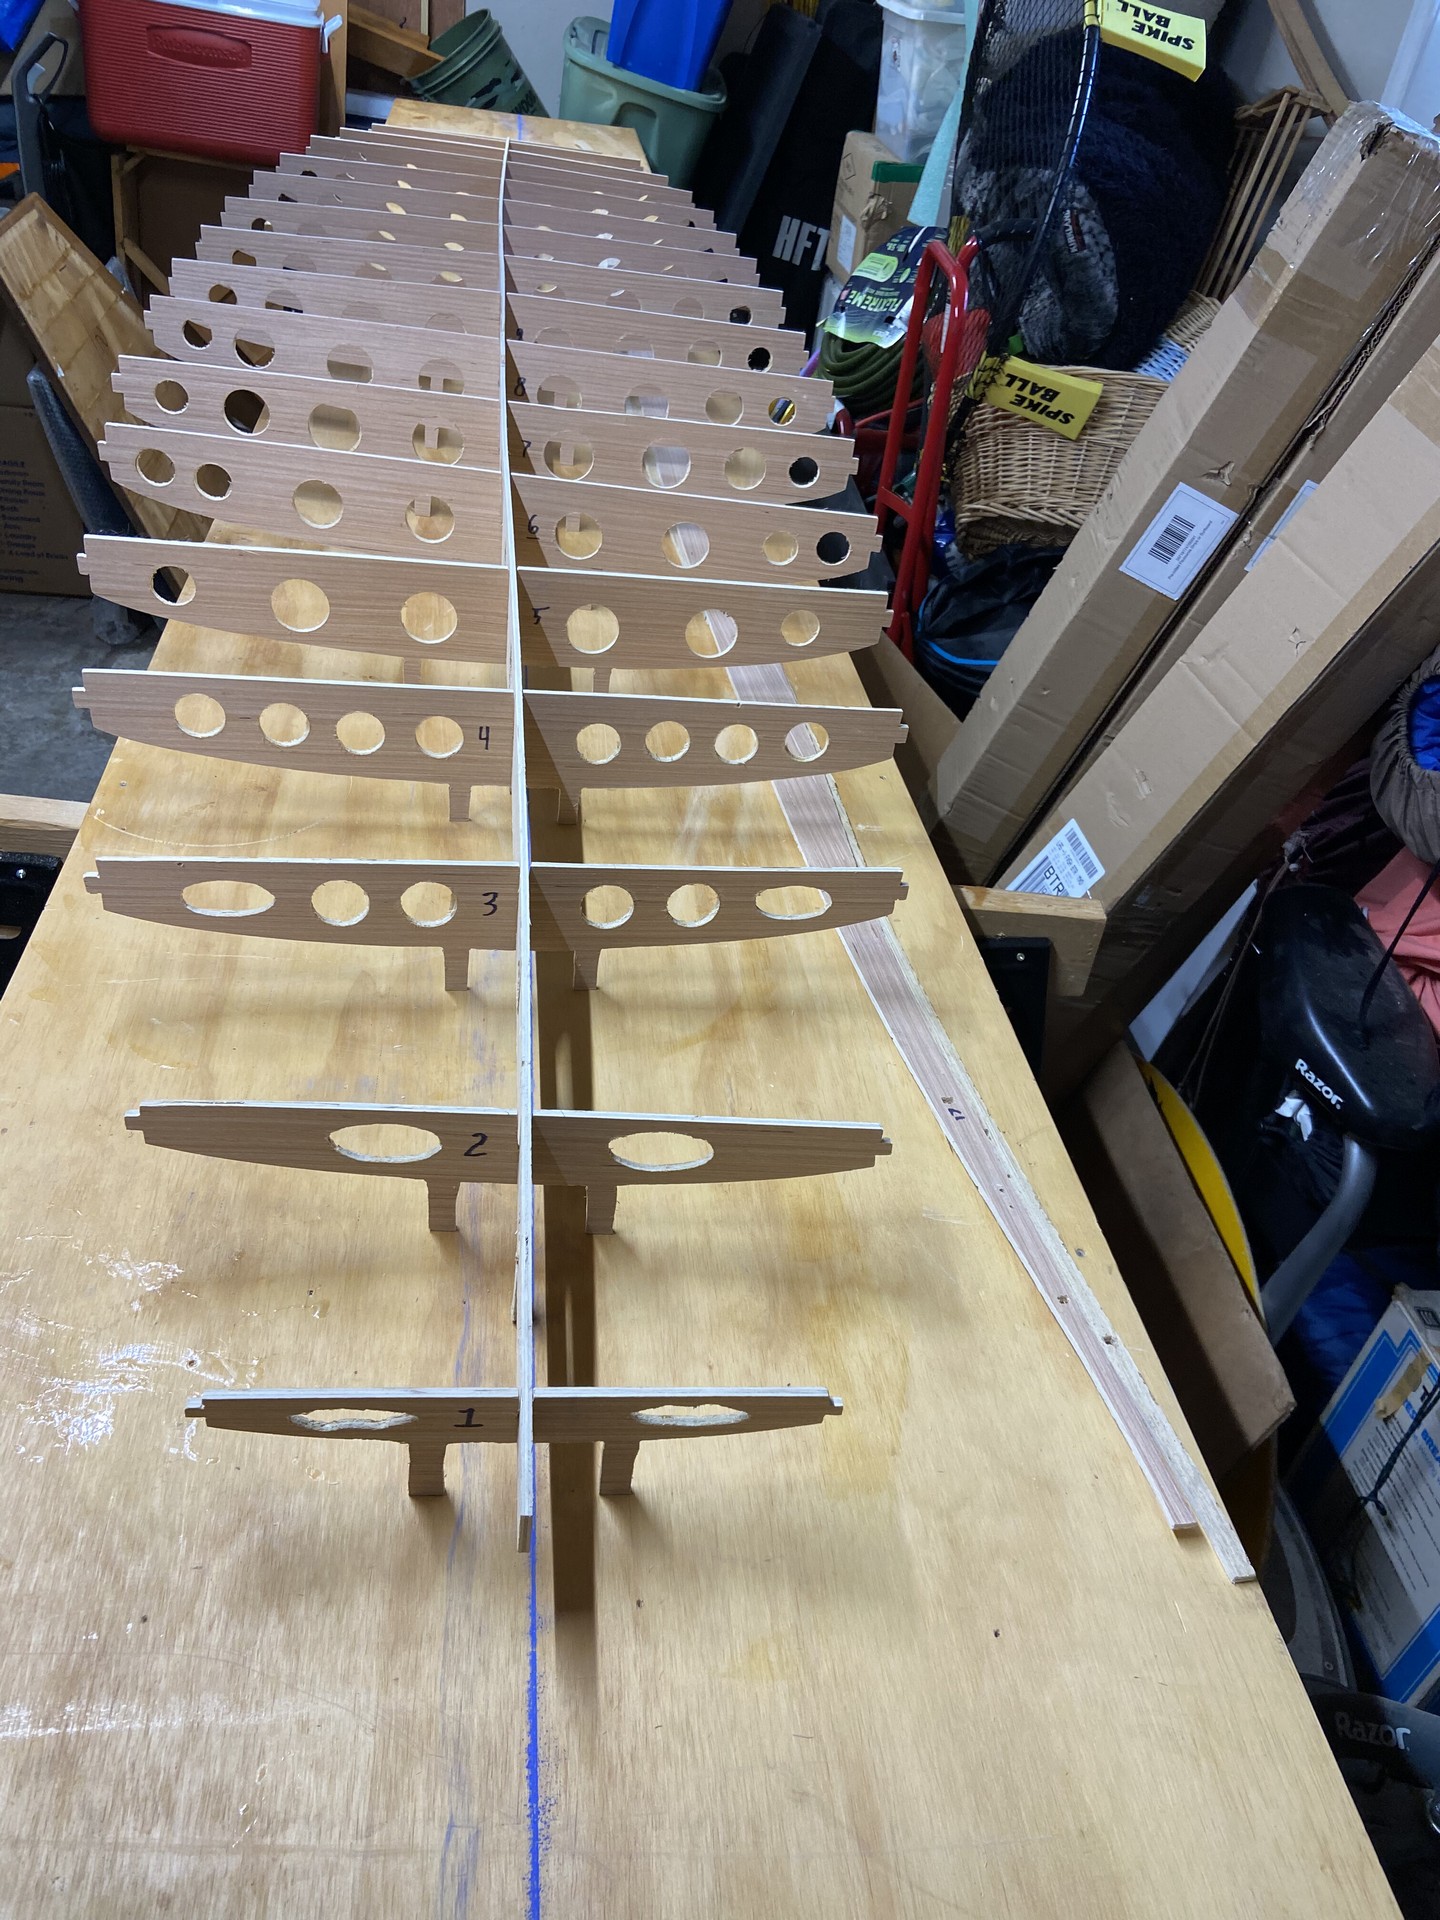
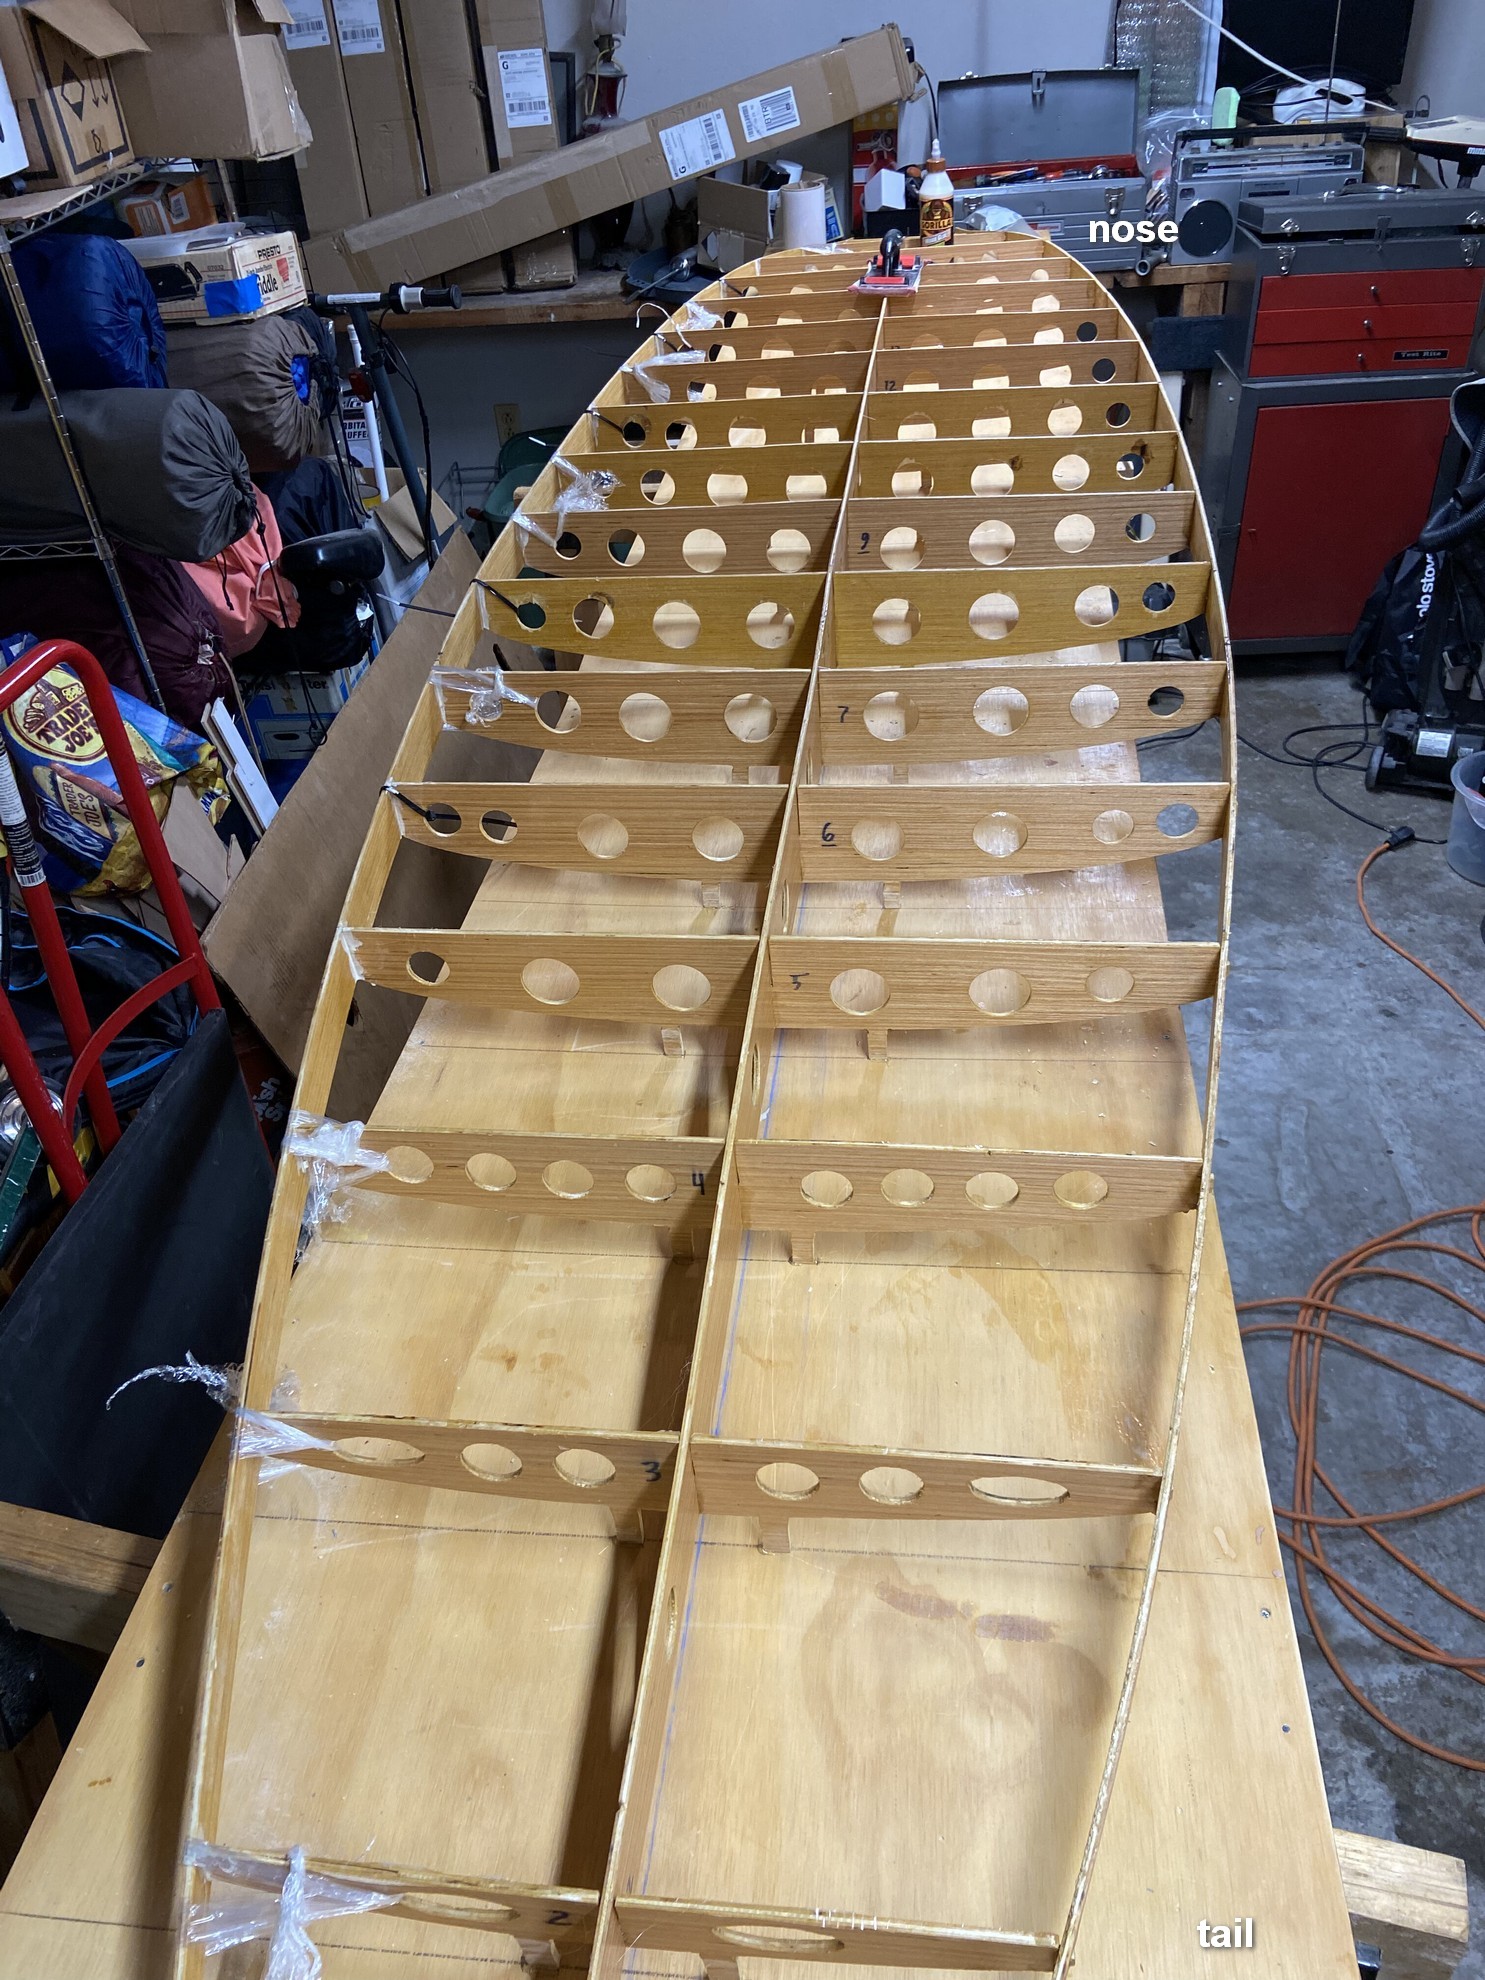
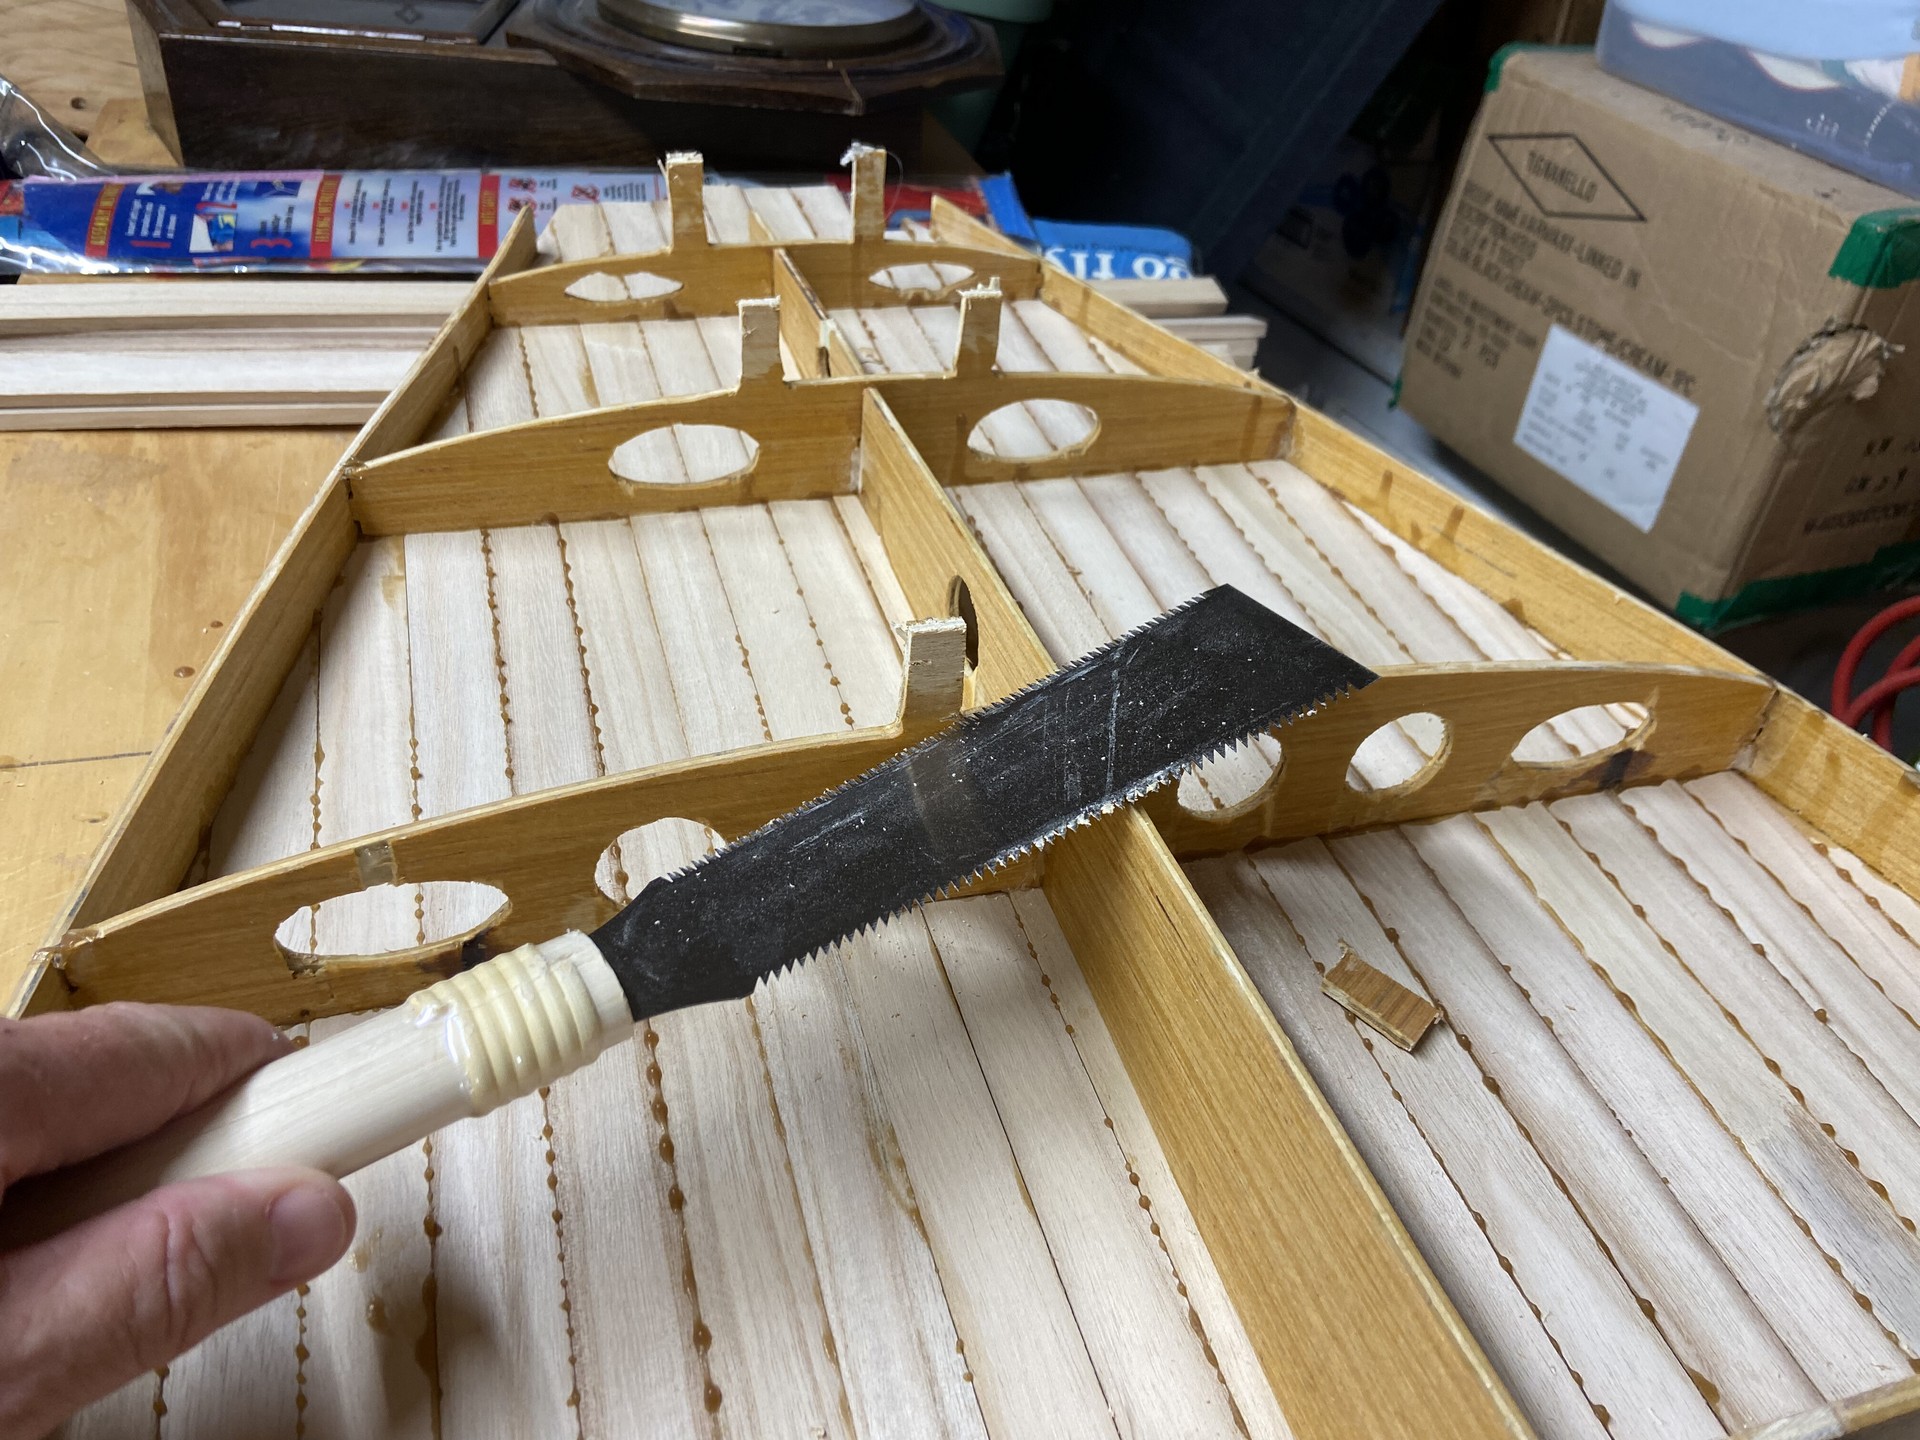
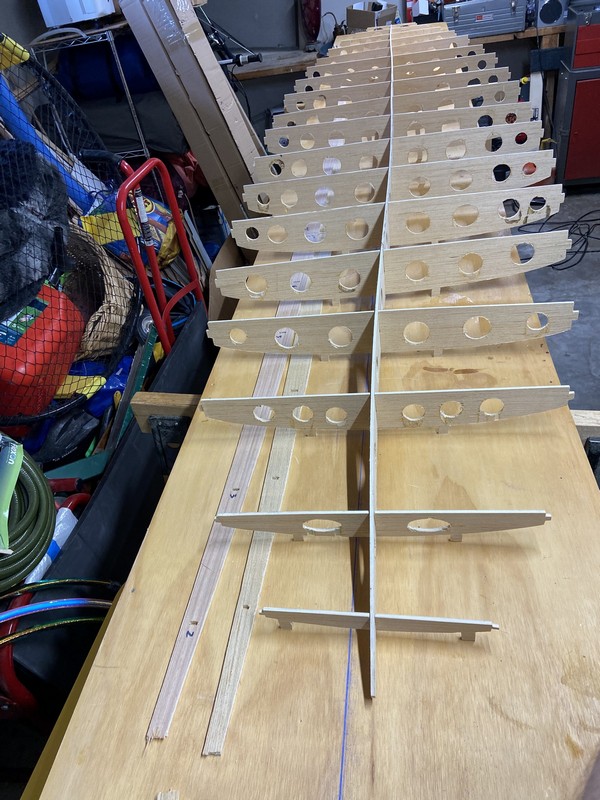
It required three more afternoons of effort over two weekends to complete the cutting out of the internal frame pieces from the plywood sheets. I used a jigsaw along the curves and a circular saw for the straight edges. The rough cutting was two afternoons (one for each plywood sheet,) then the third day was spent sanding all pieces down to their precise shapes as defined by the paper patterns. I used 80 grit on a belt sander for most of this task, with some use of a Japanese pull saw and of course a hand sanding block. Builders who purchase frame kits are really missing out by skipping this super fun step! They receive their components precisely cut by CNC router machines, saving a lot of time and perhaps some challenging labor. I invested sweat equity and a sore lower back.
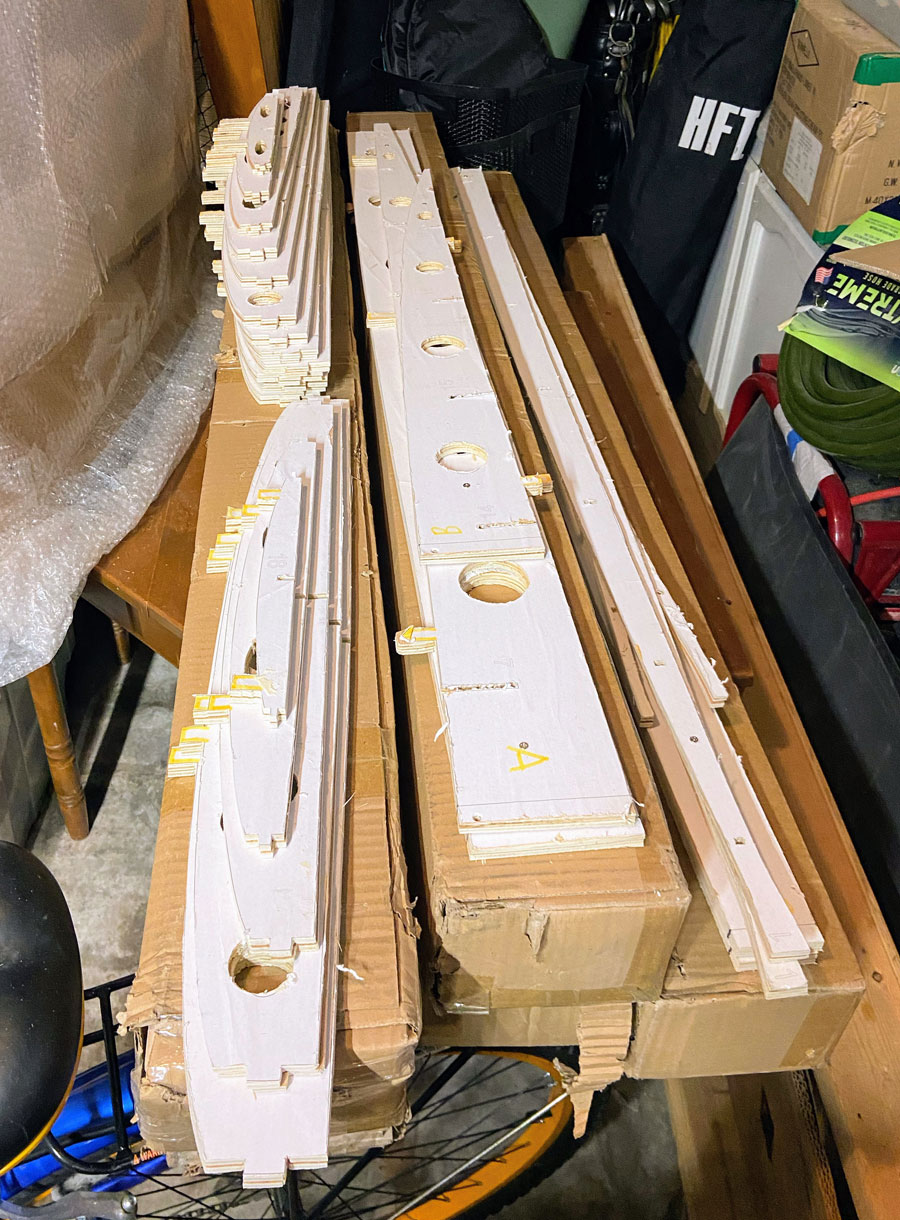
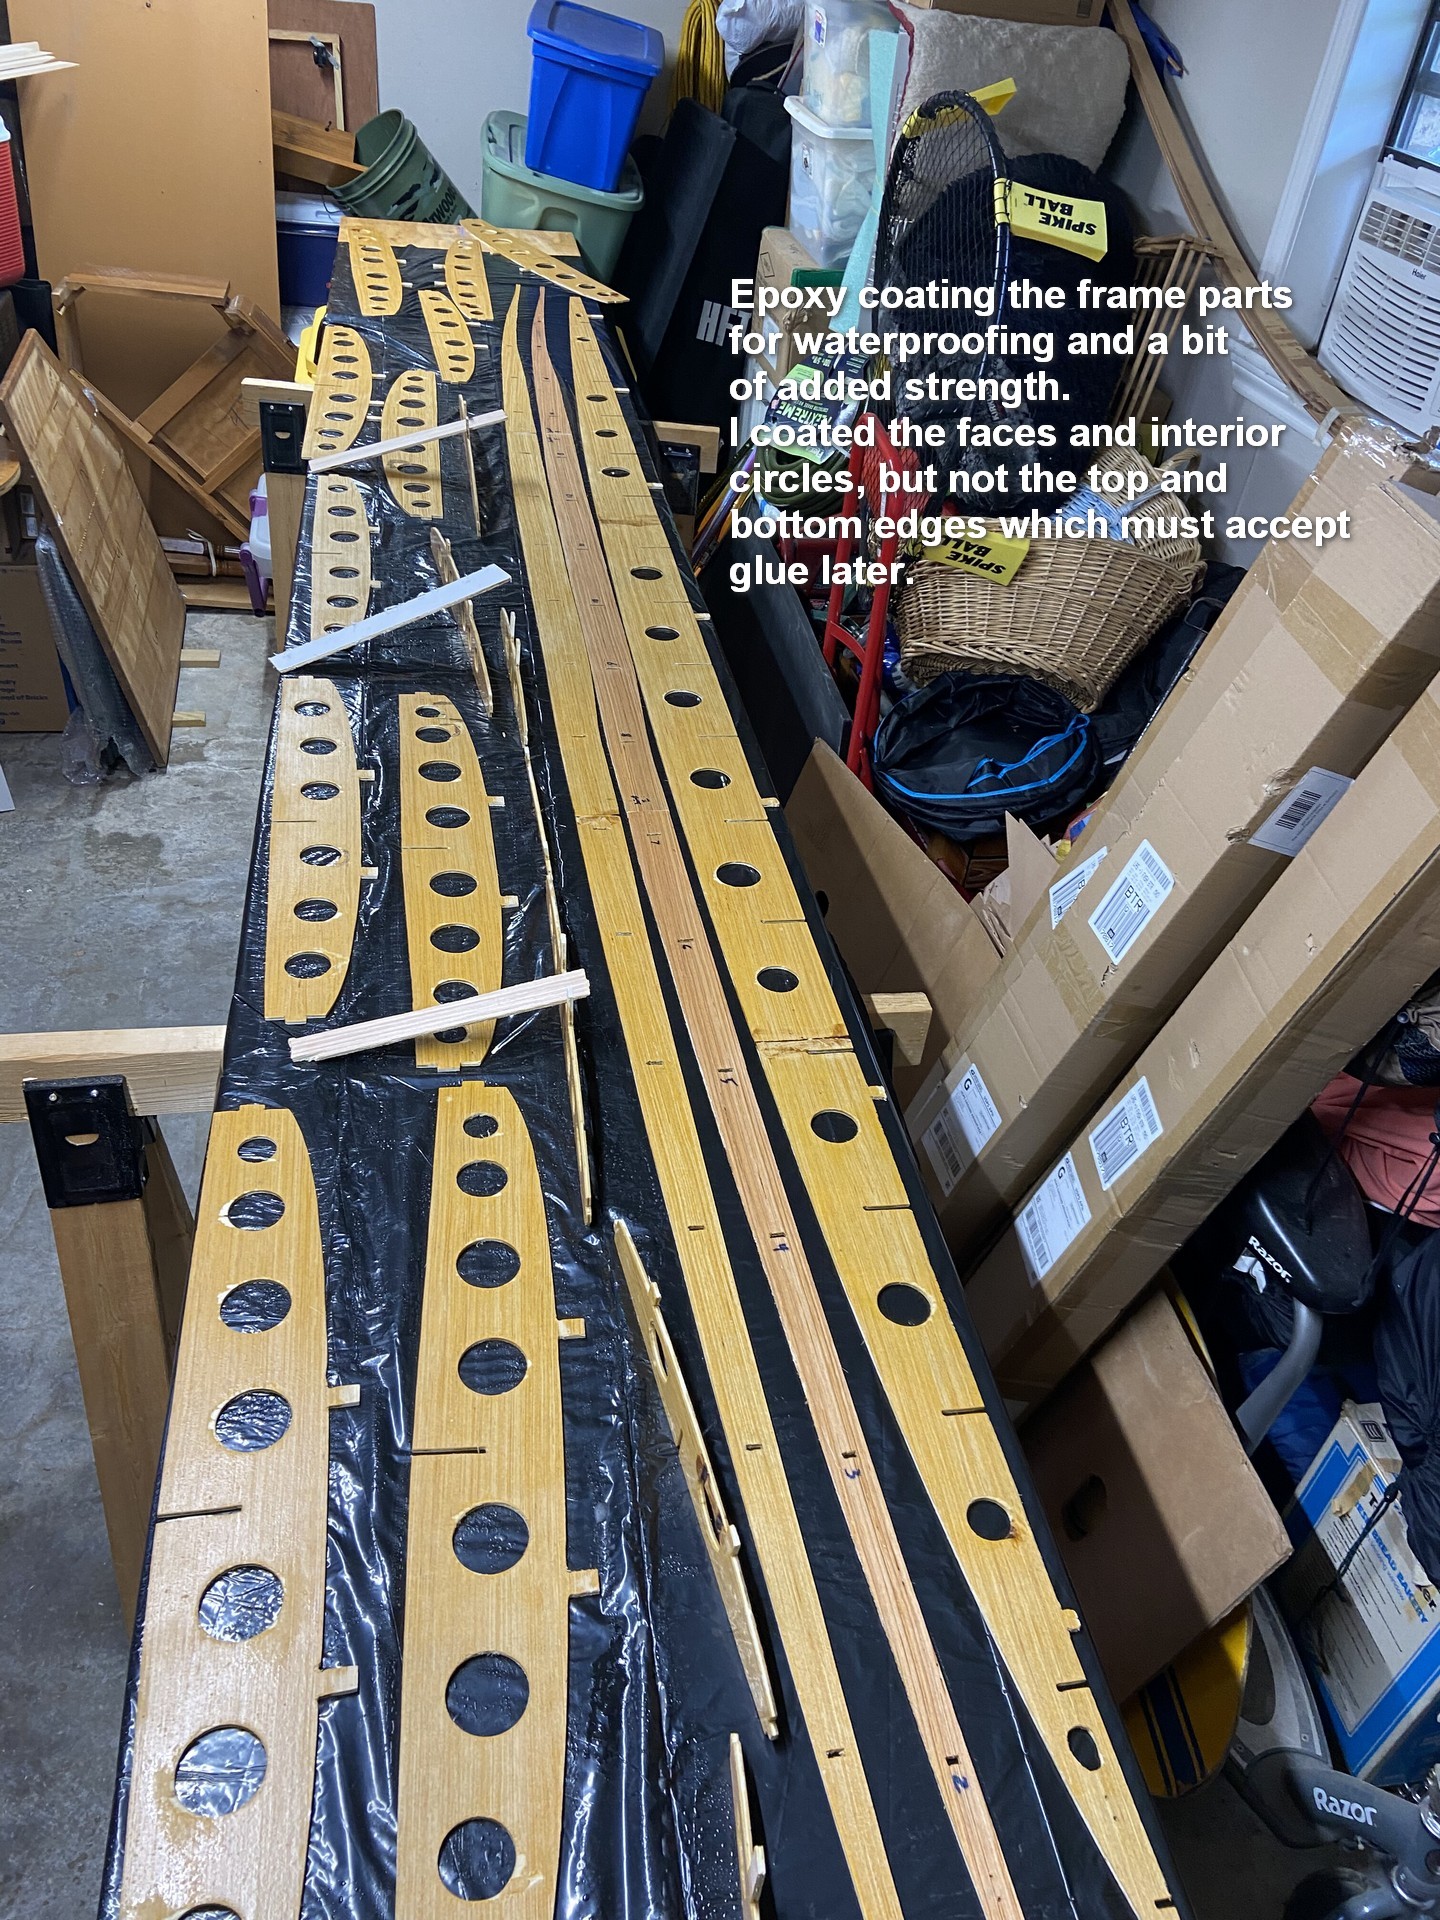
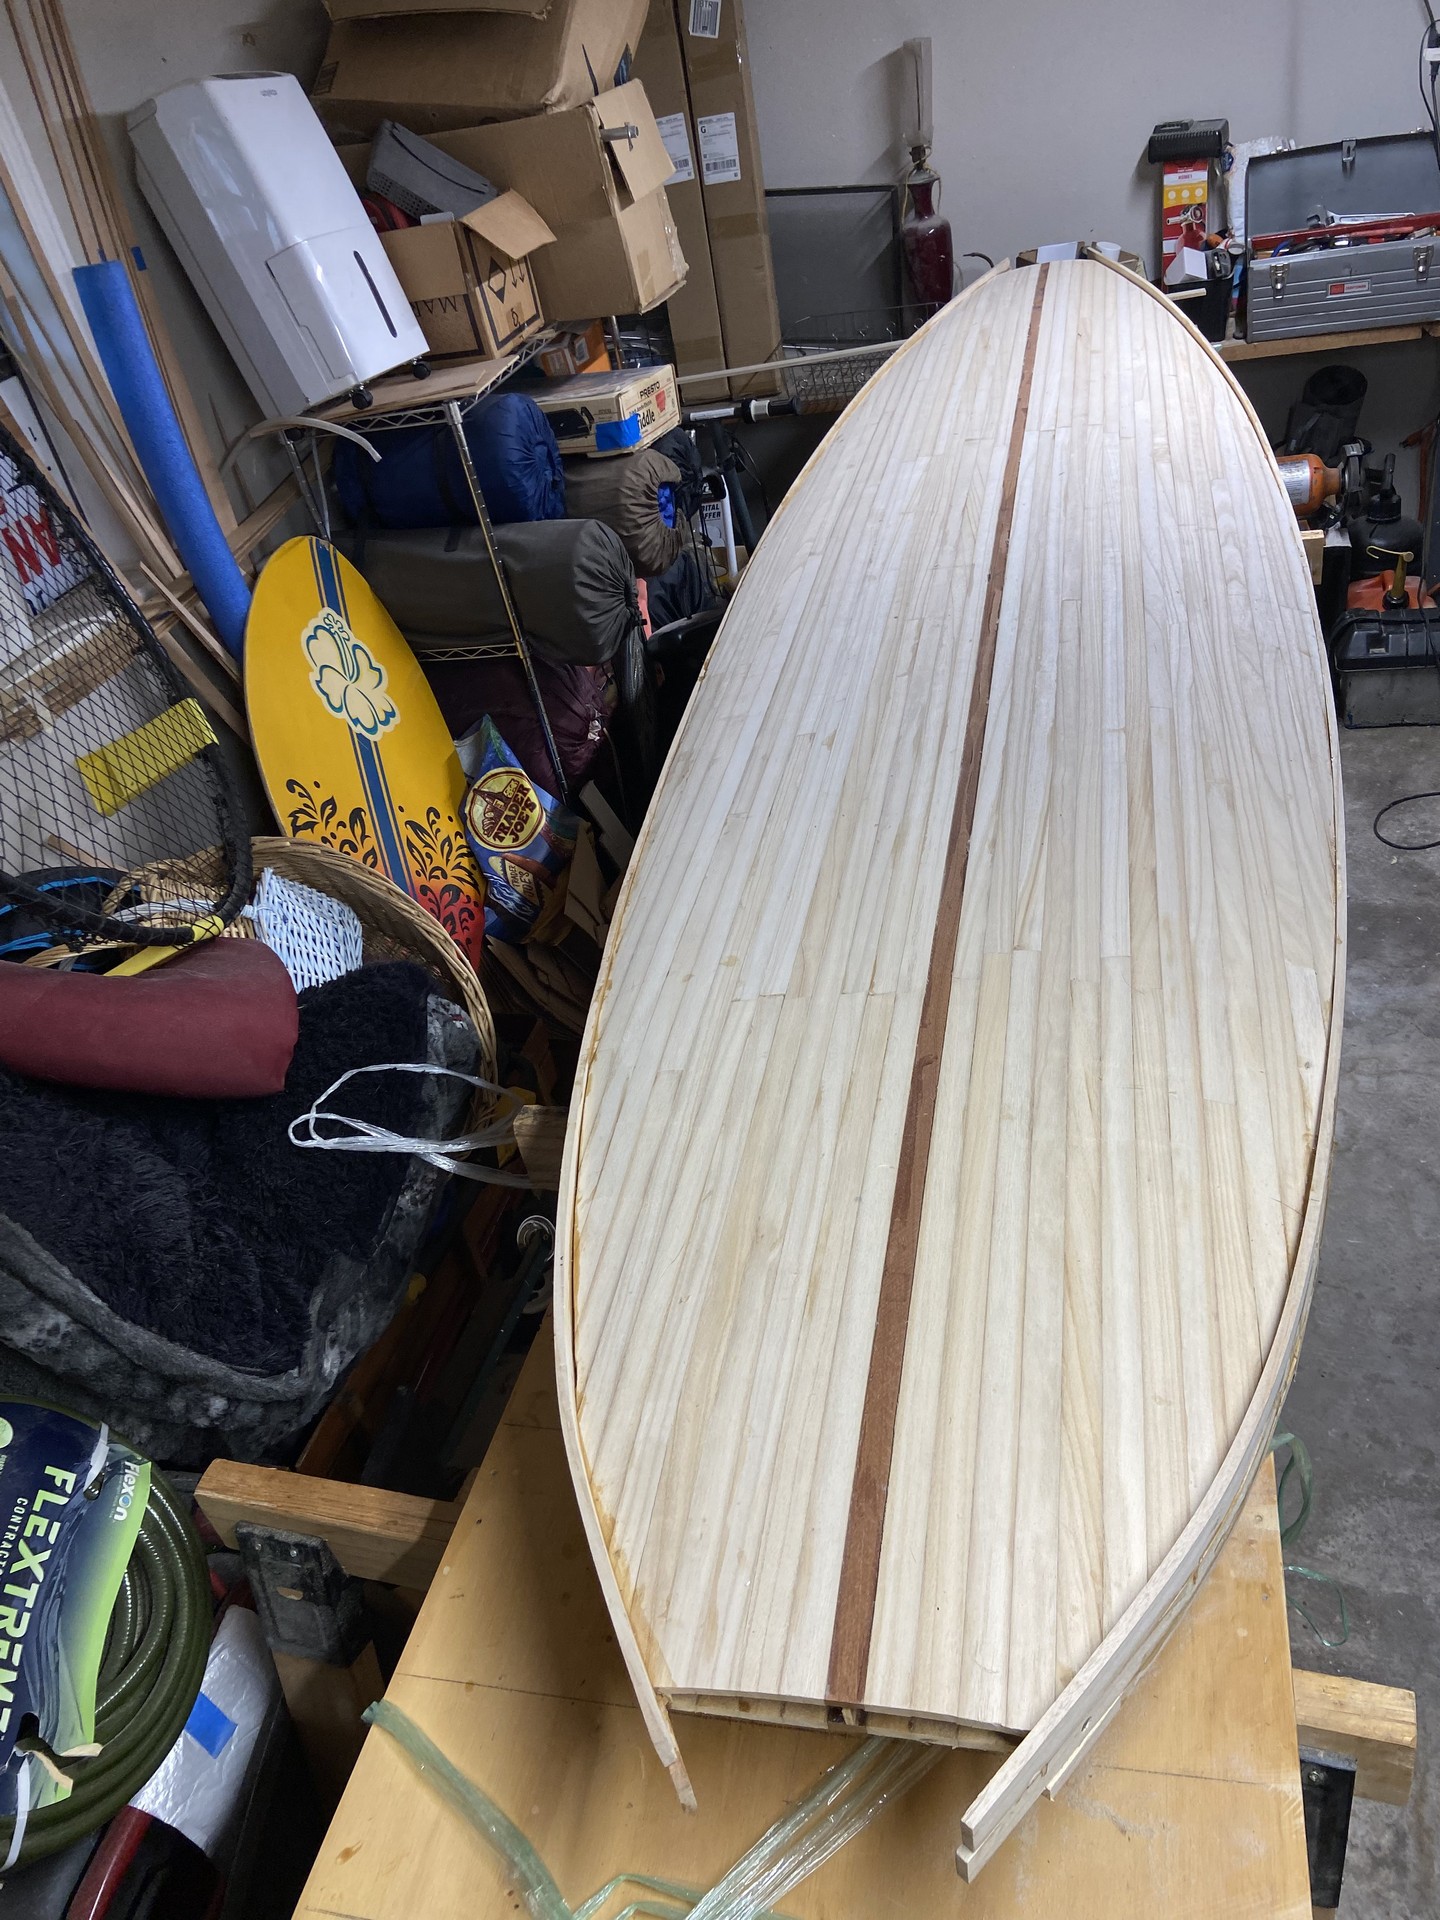
By the end of the MLK Day holiday all of the interior frame components for the SUP were precisely cut and shaped. You see them above, stacked on top of the 5 boxes of Paulownia strips which I purchased from Jarvis Boards. An extreme (for us) cold front has reached south Louisiana to be followed this weekend with a reinforcing cold front. These sub-freezing temperatures will prevent any gluing, but I will be able to 1) clean out my storage room / workshop space, 2) set up my long workshop table, and 3) make the scarf joint cuts in preparation for gluing. I suppose I could try to use an electric heater or an incandescent light bulb to warm the work area, but in south Louisiana it will warm up soon enough.
Weekend #4
February 24 , 2024
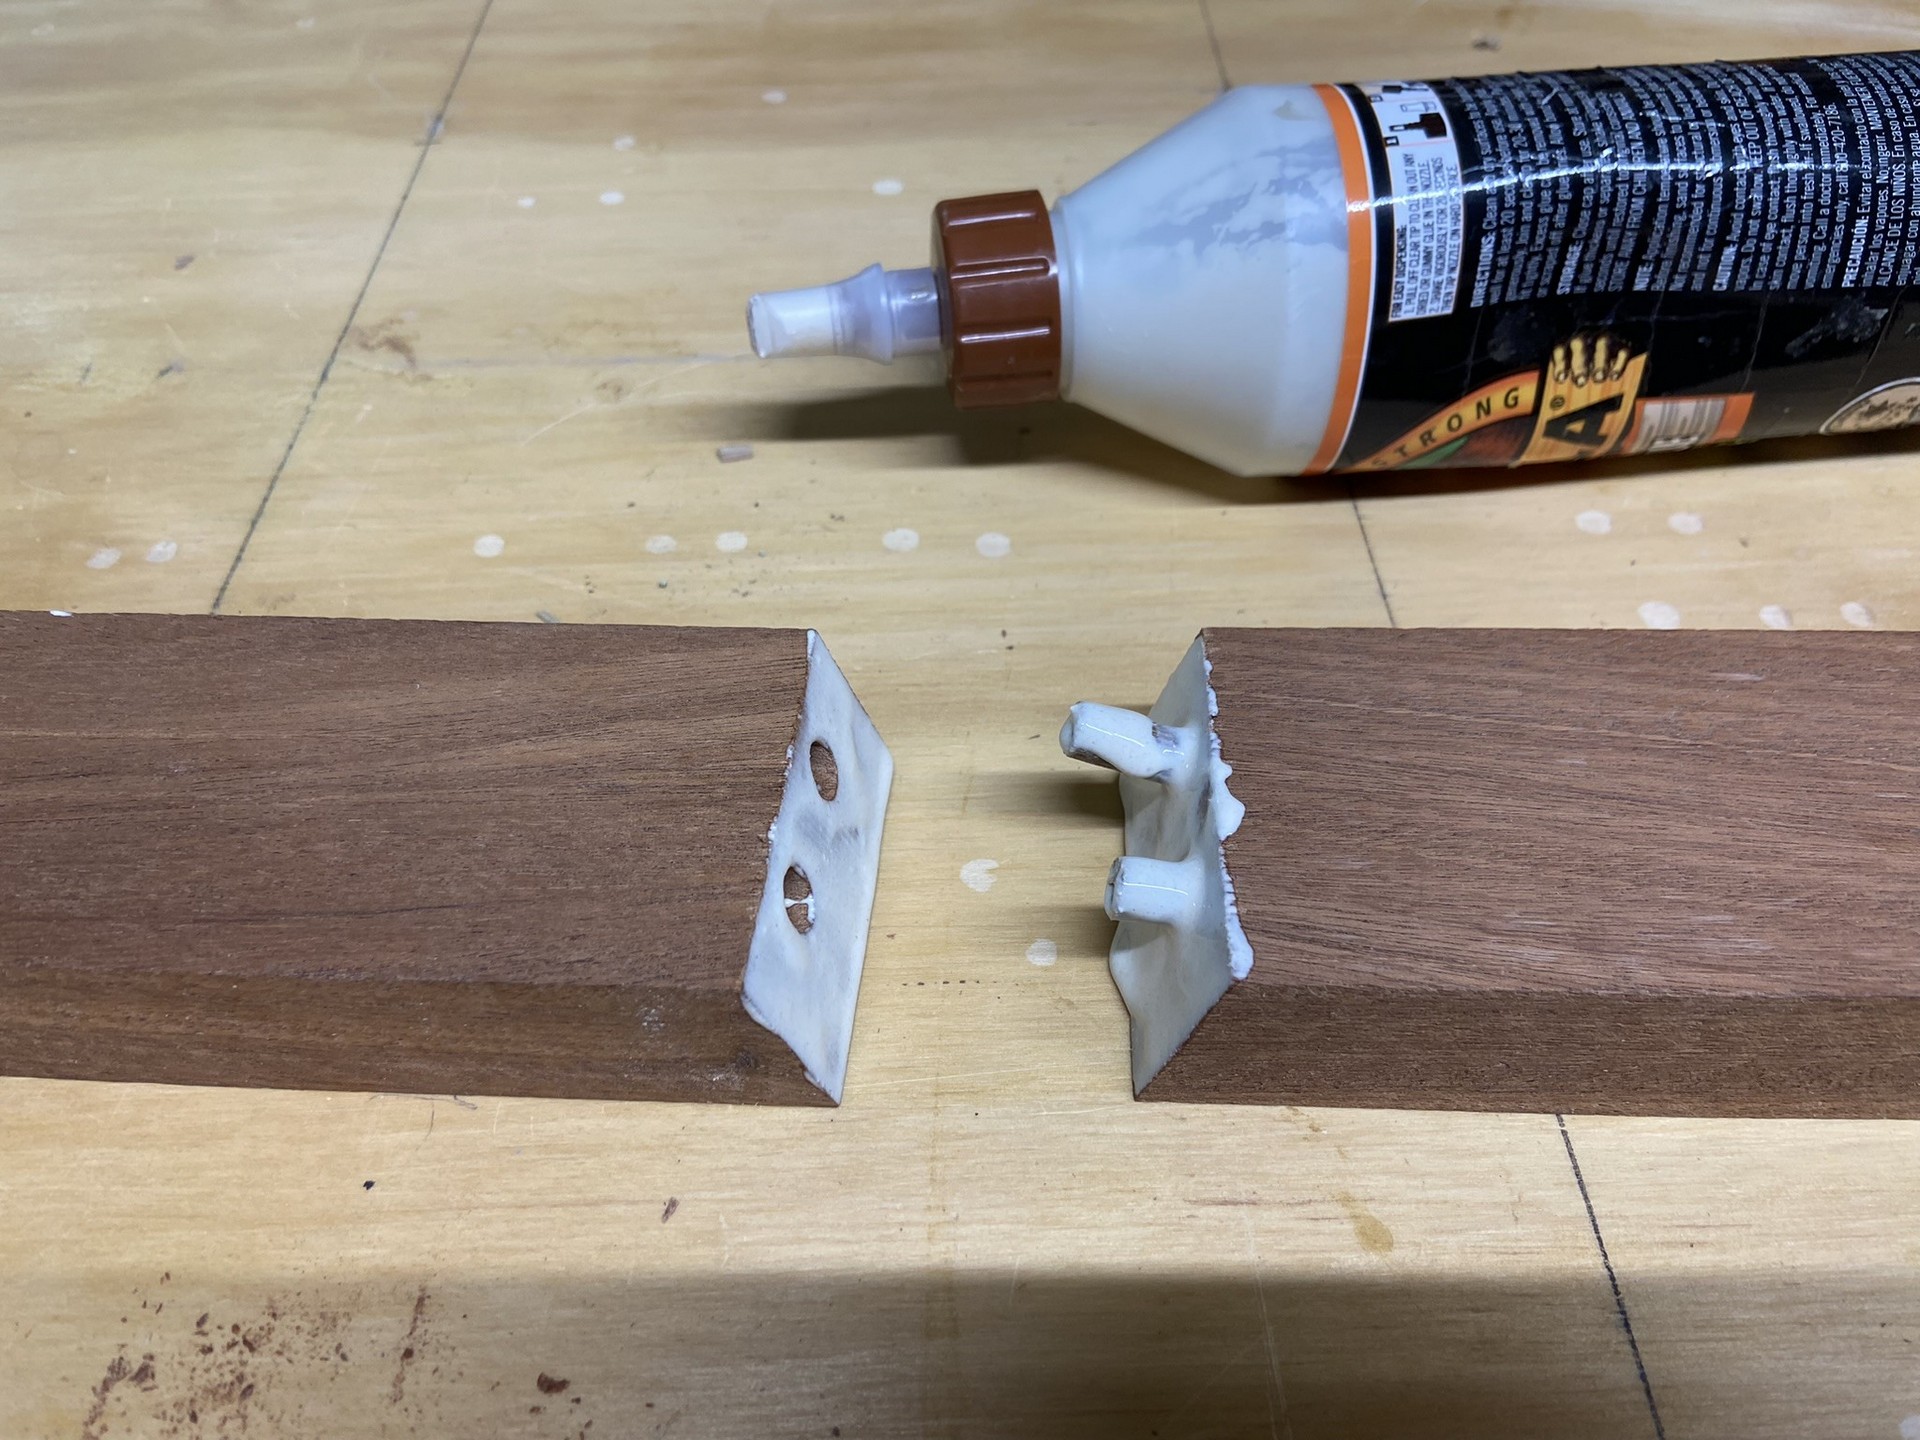
This was the weekend to join the central spine of the board’s frame and the edge rails together. As mentioned above, Jarvis Boards recommends butt block joints but I decided on scarf joints to save a tad bit of weight and it just looks cleaner. I used my belt sander to create the scarfs on the thin plywood, then glued them with epoxy thickened with silica powder.

Weekend #5
March 2, 2024
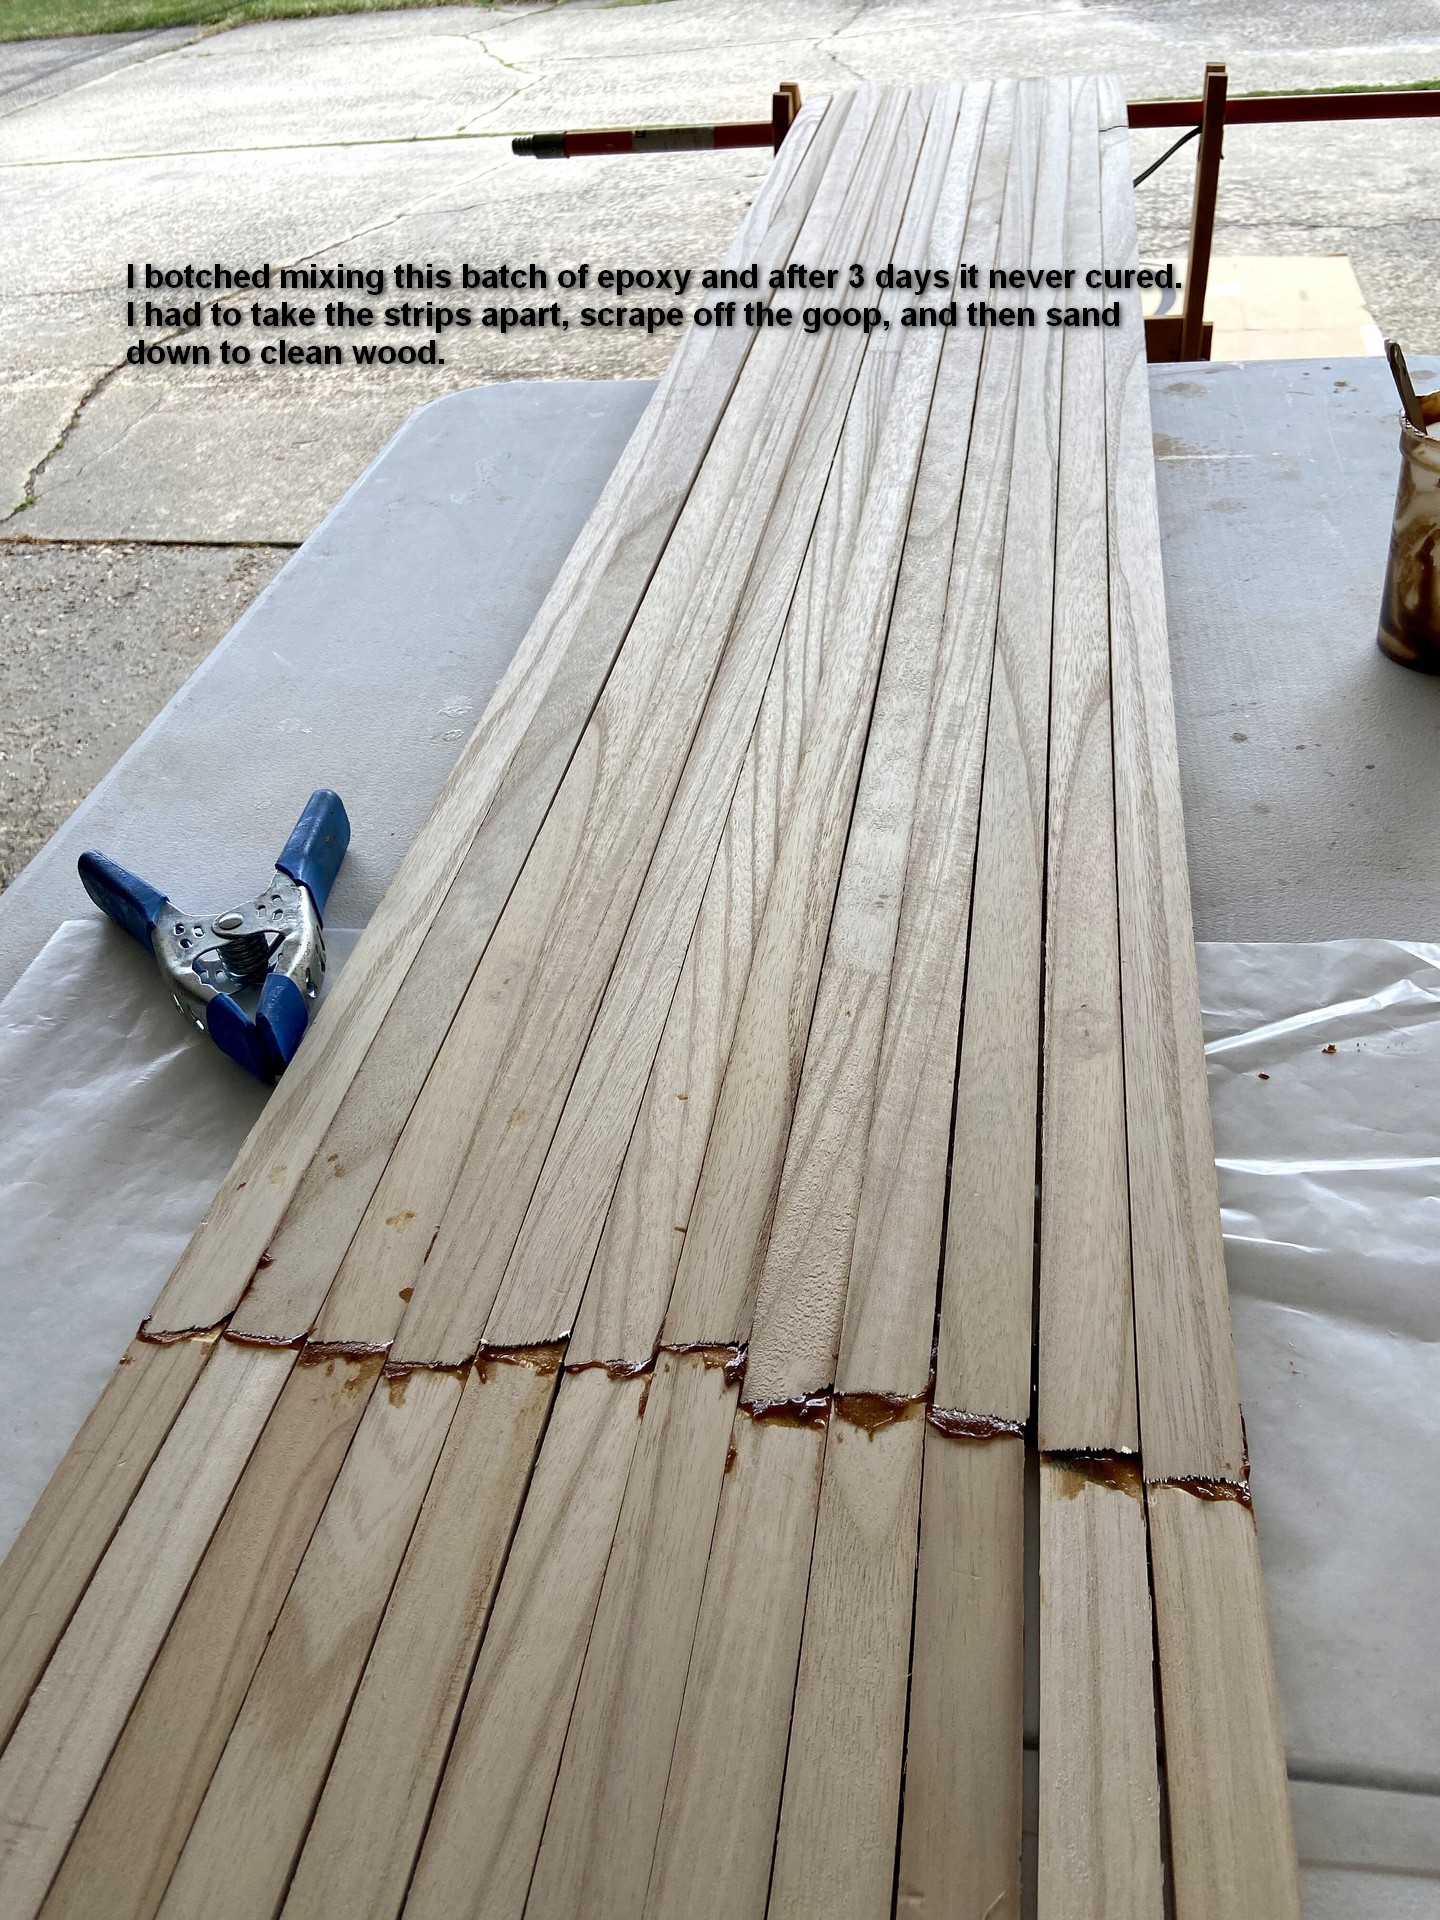
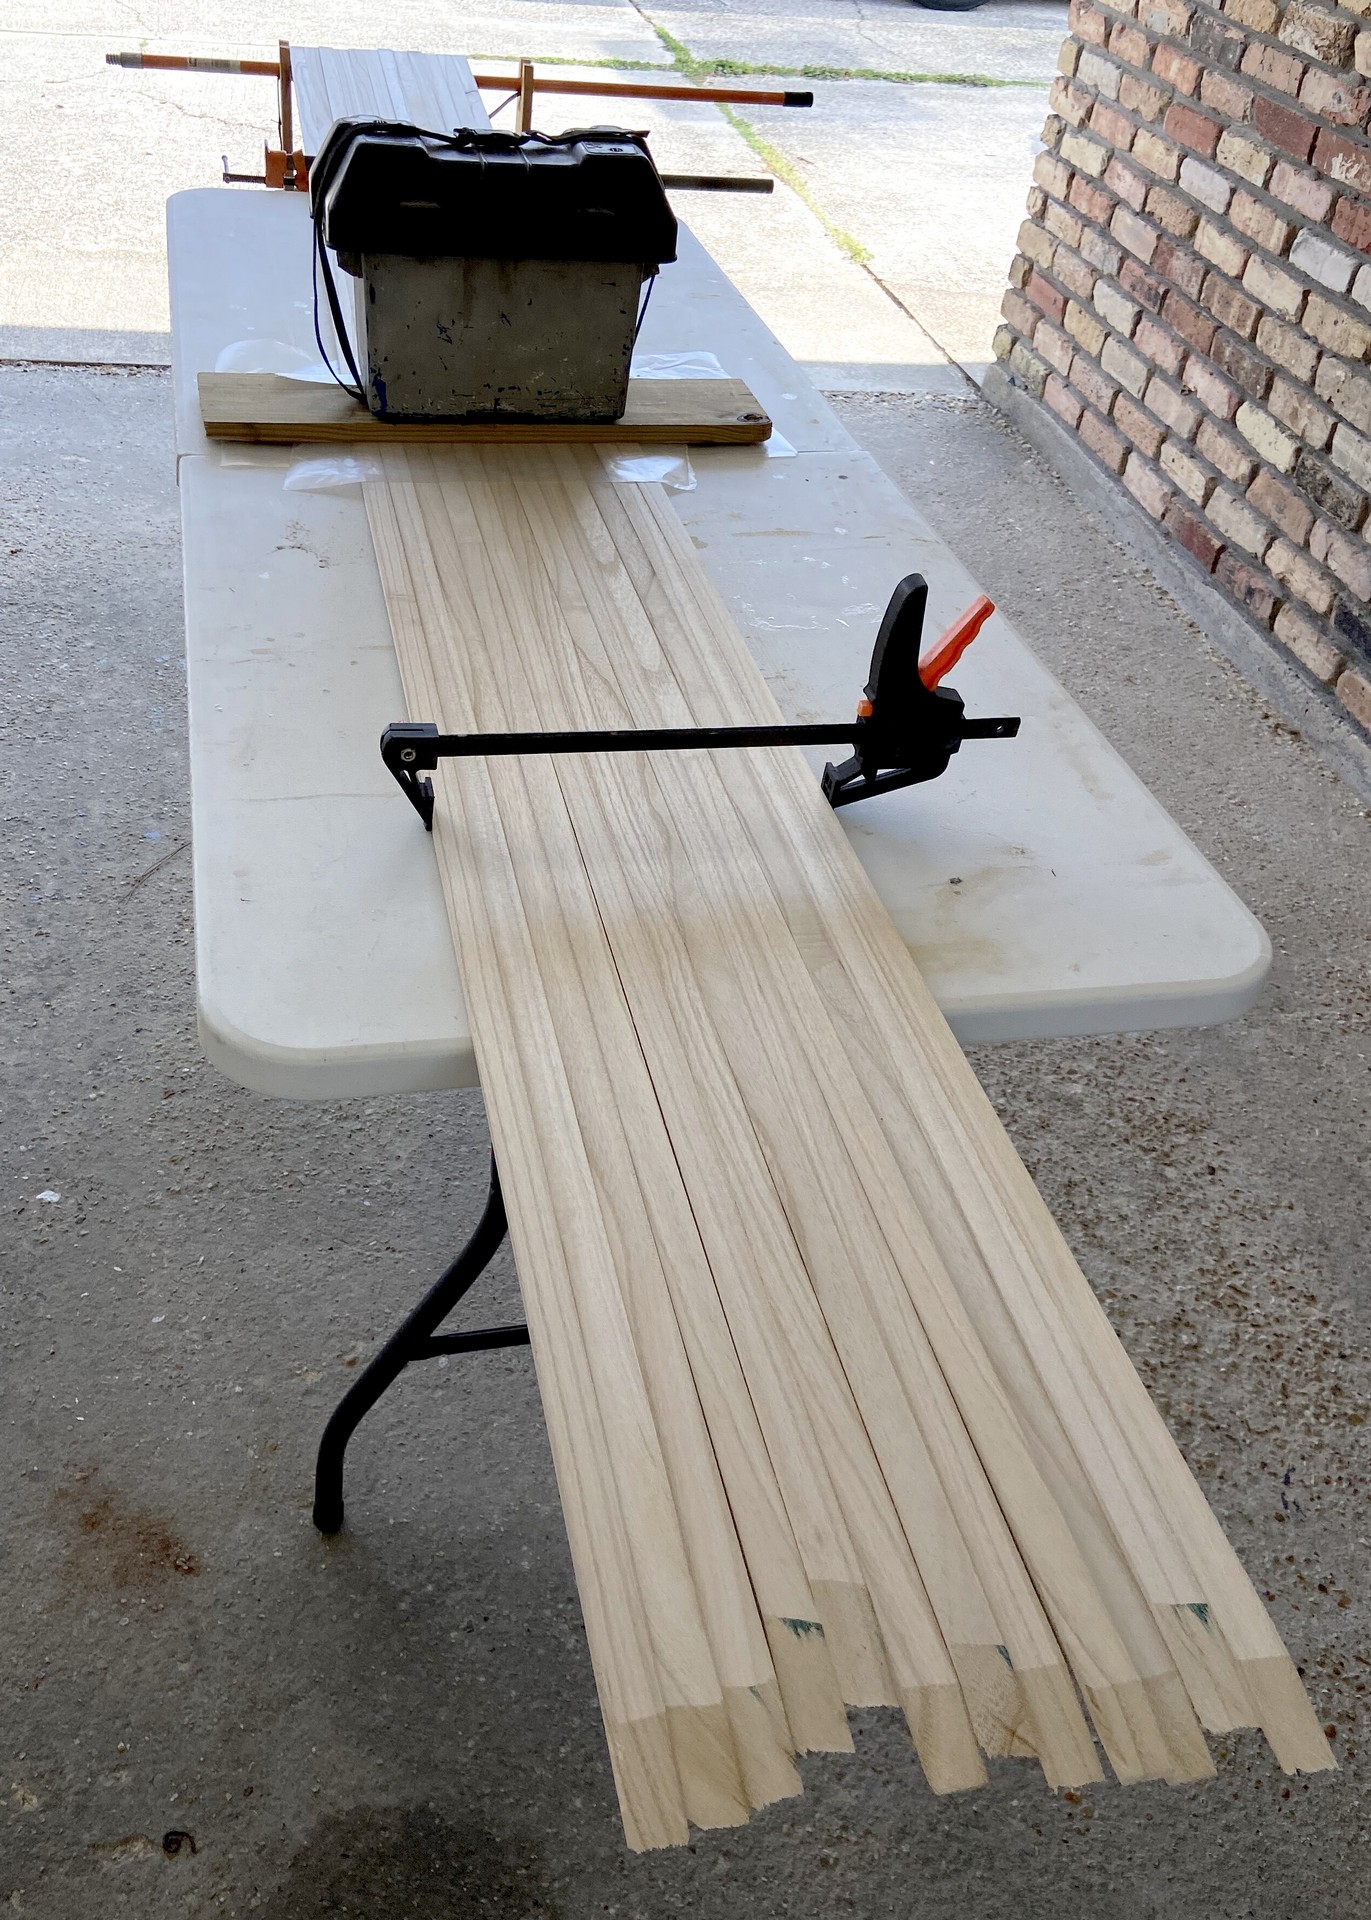
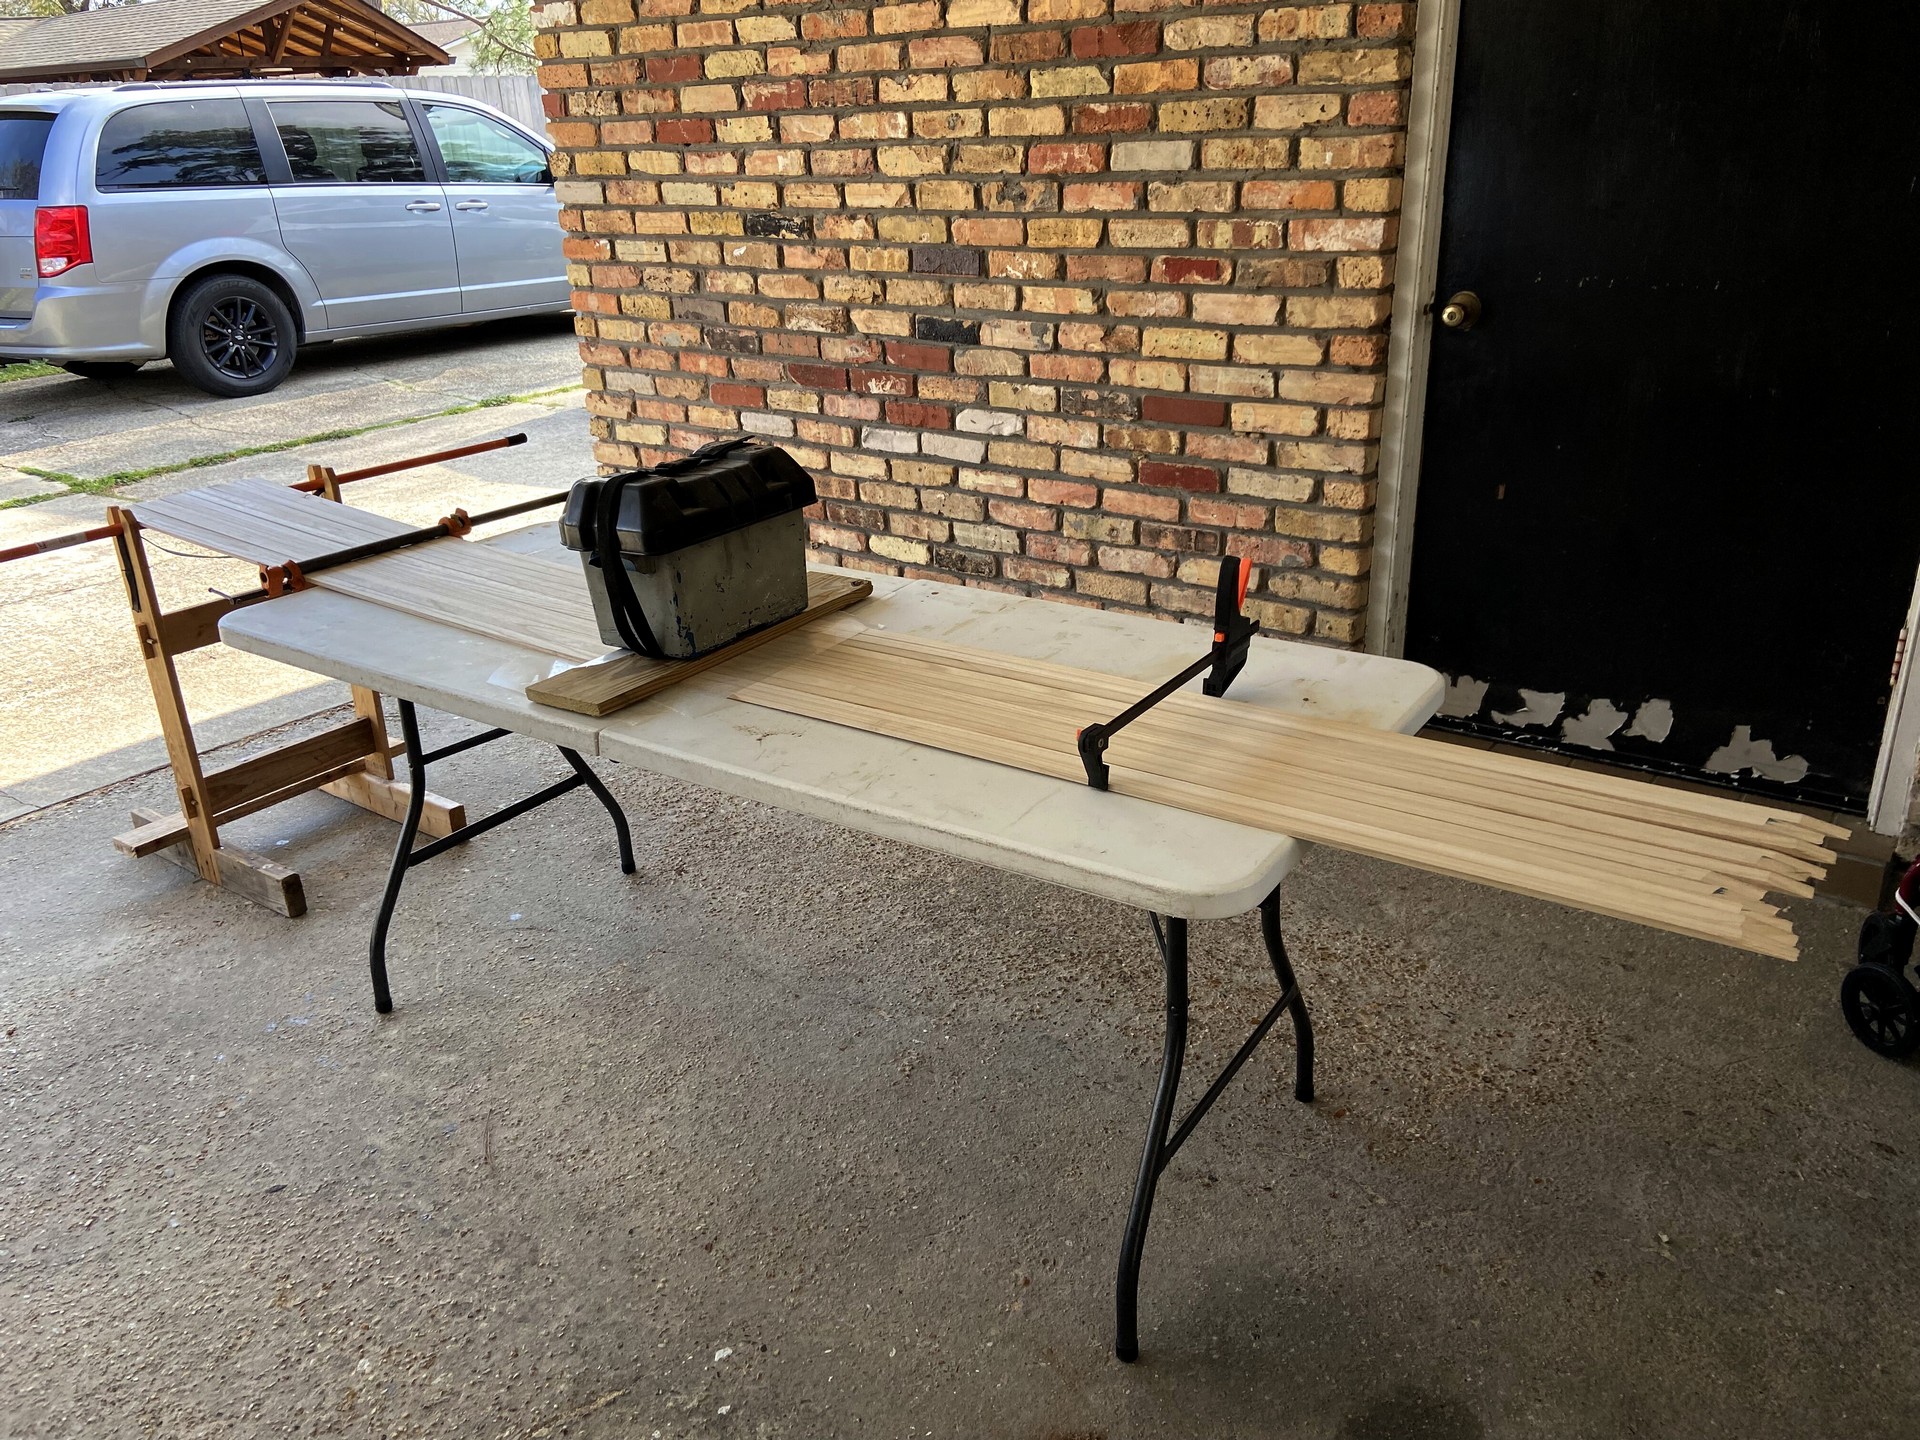
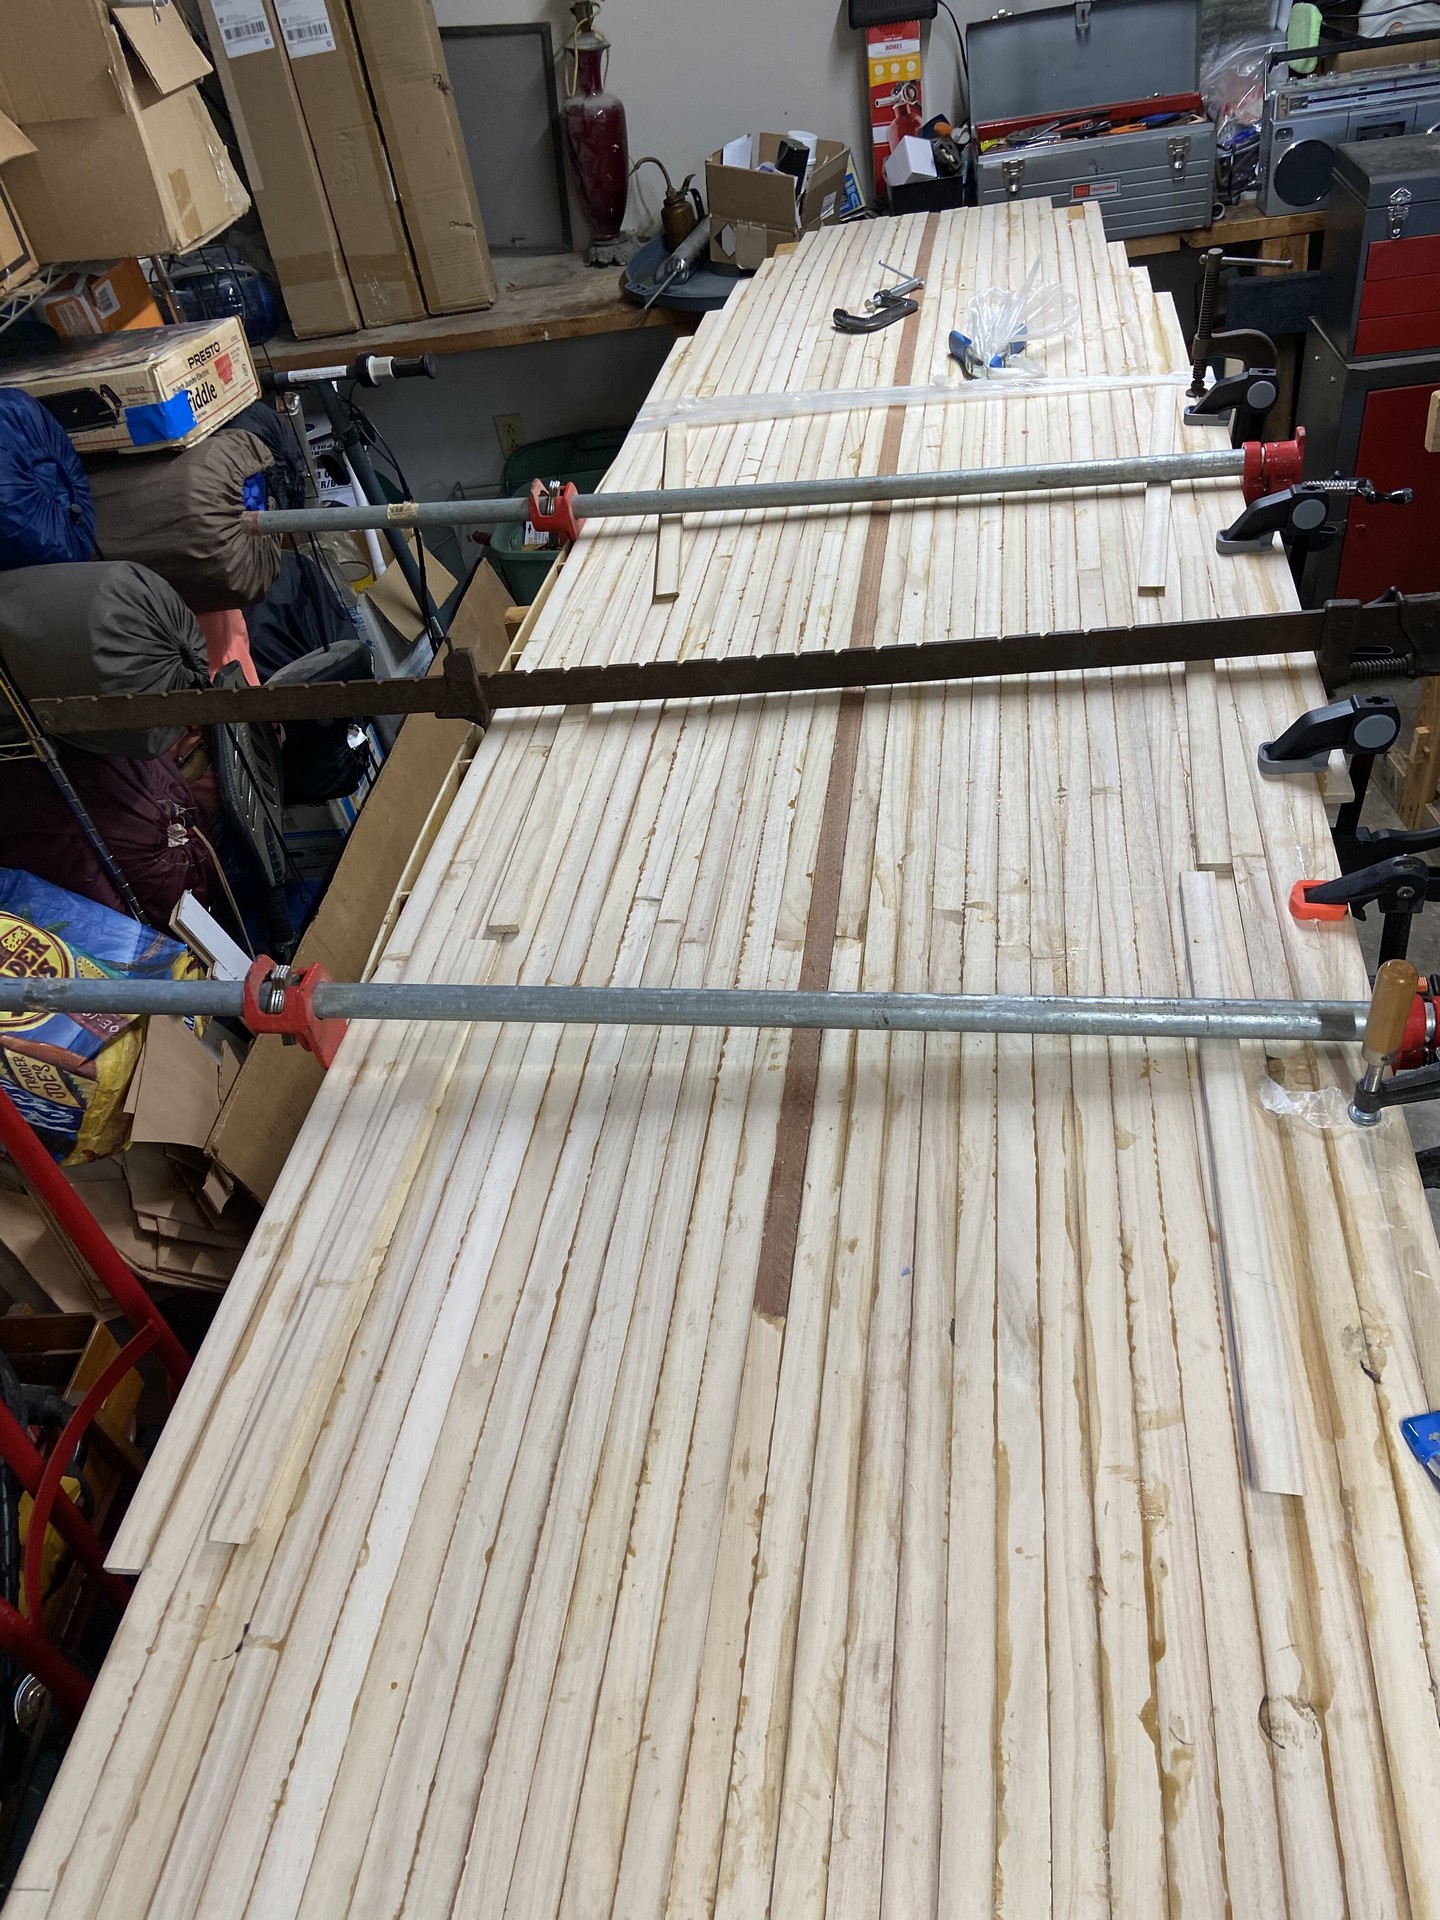
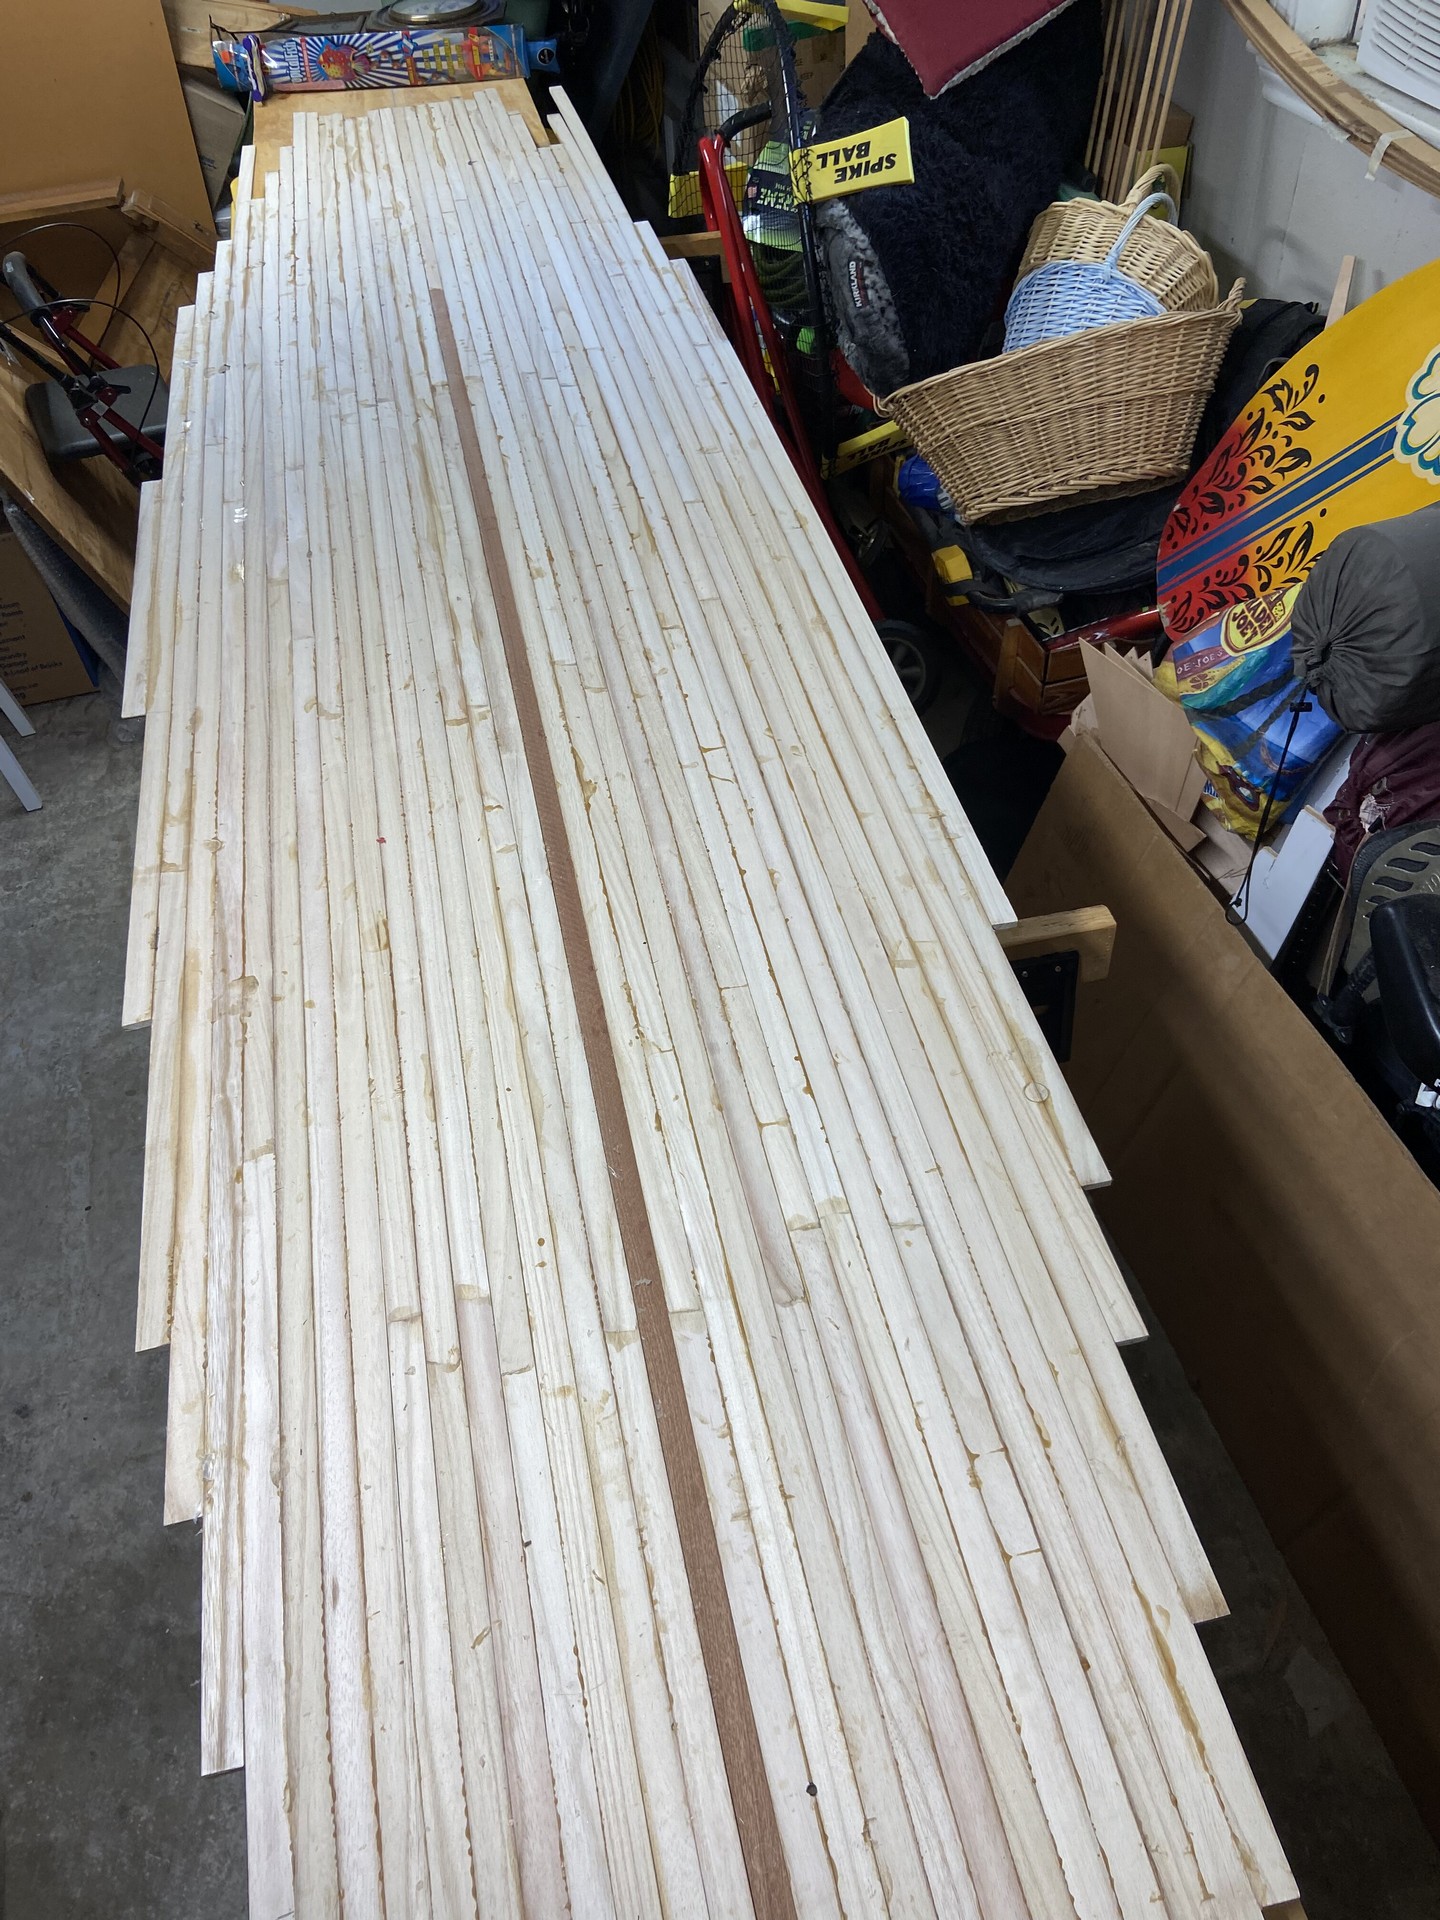
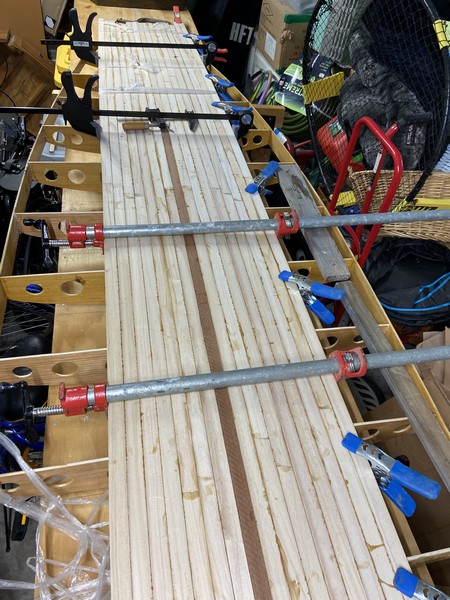
Tasks included some sanding and dry fitting the frame pieces together. I popped a center line down the strongback table with a chalk line. Scarf joints were cut on over a dozen 5’ Paulownia strips and I began gluing them together to create ~12’ long strips. I revisited the video tutorials to ensure I understood the next steps for coming weekends and had all necessary materials.
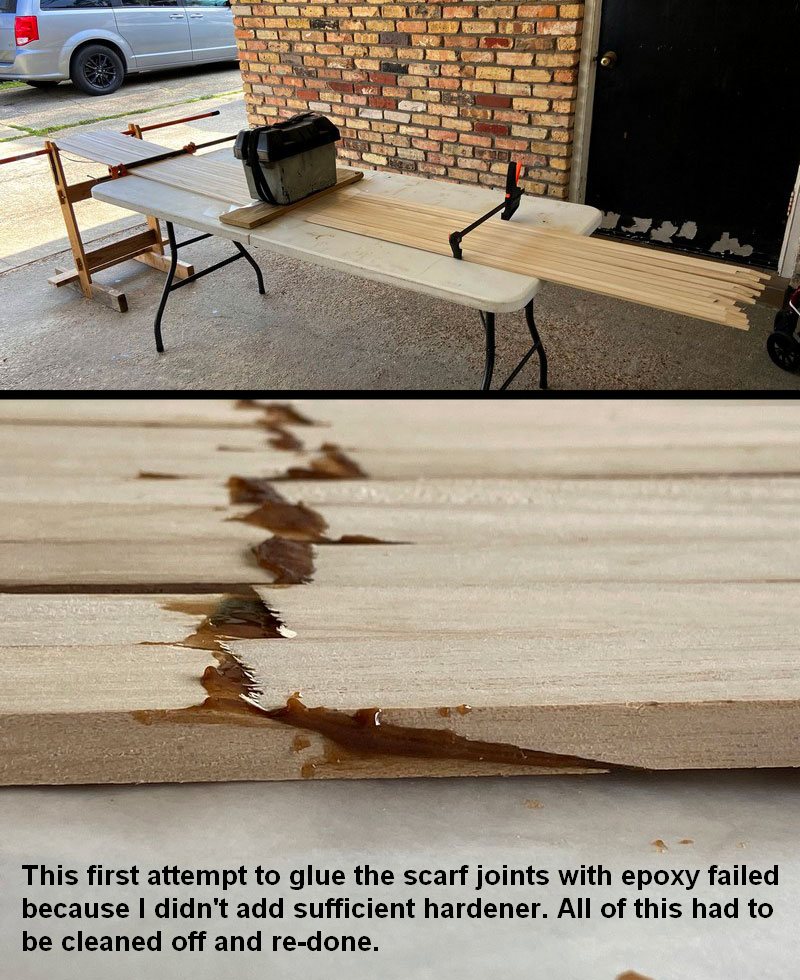
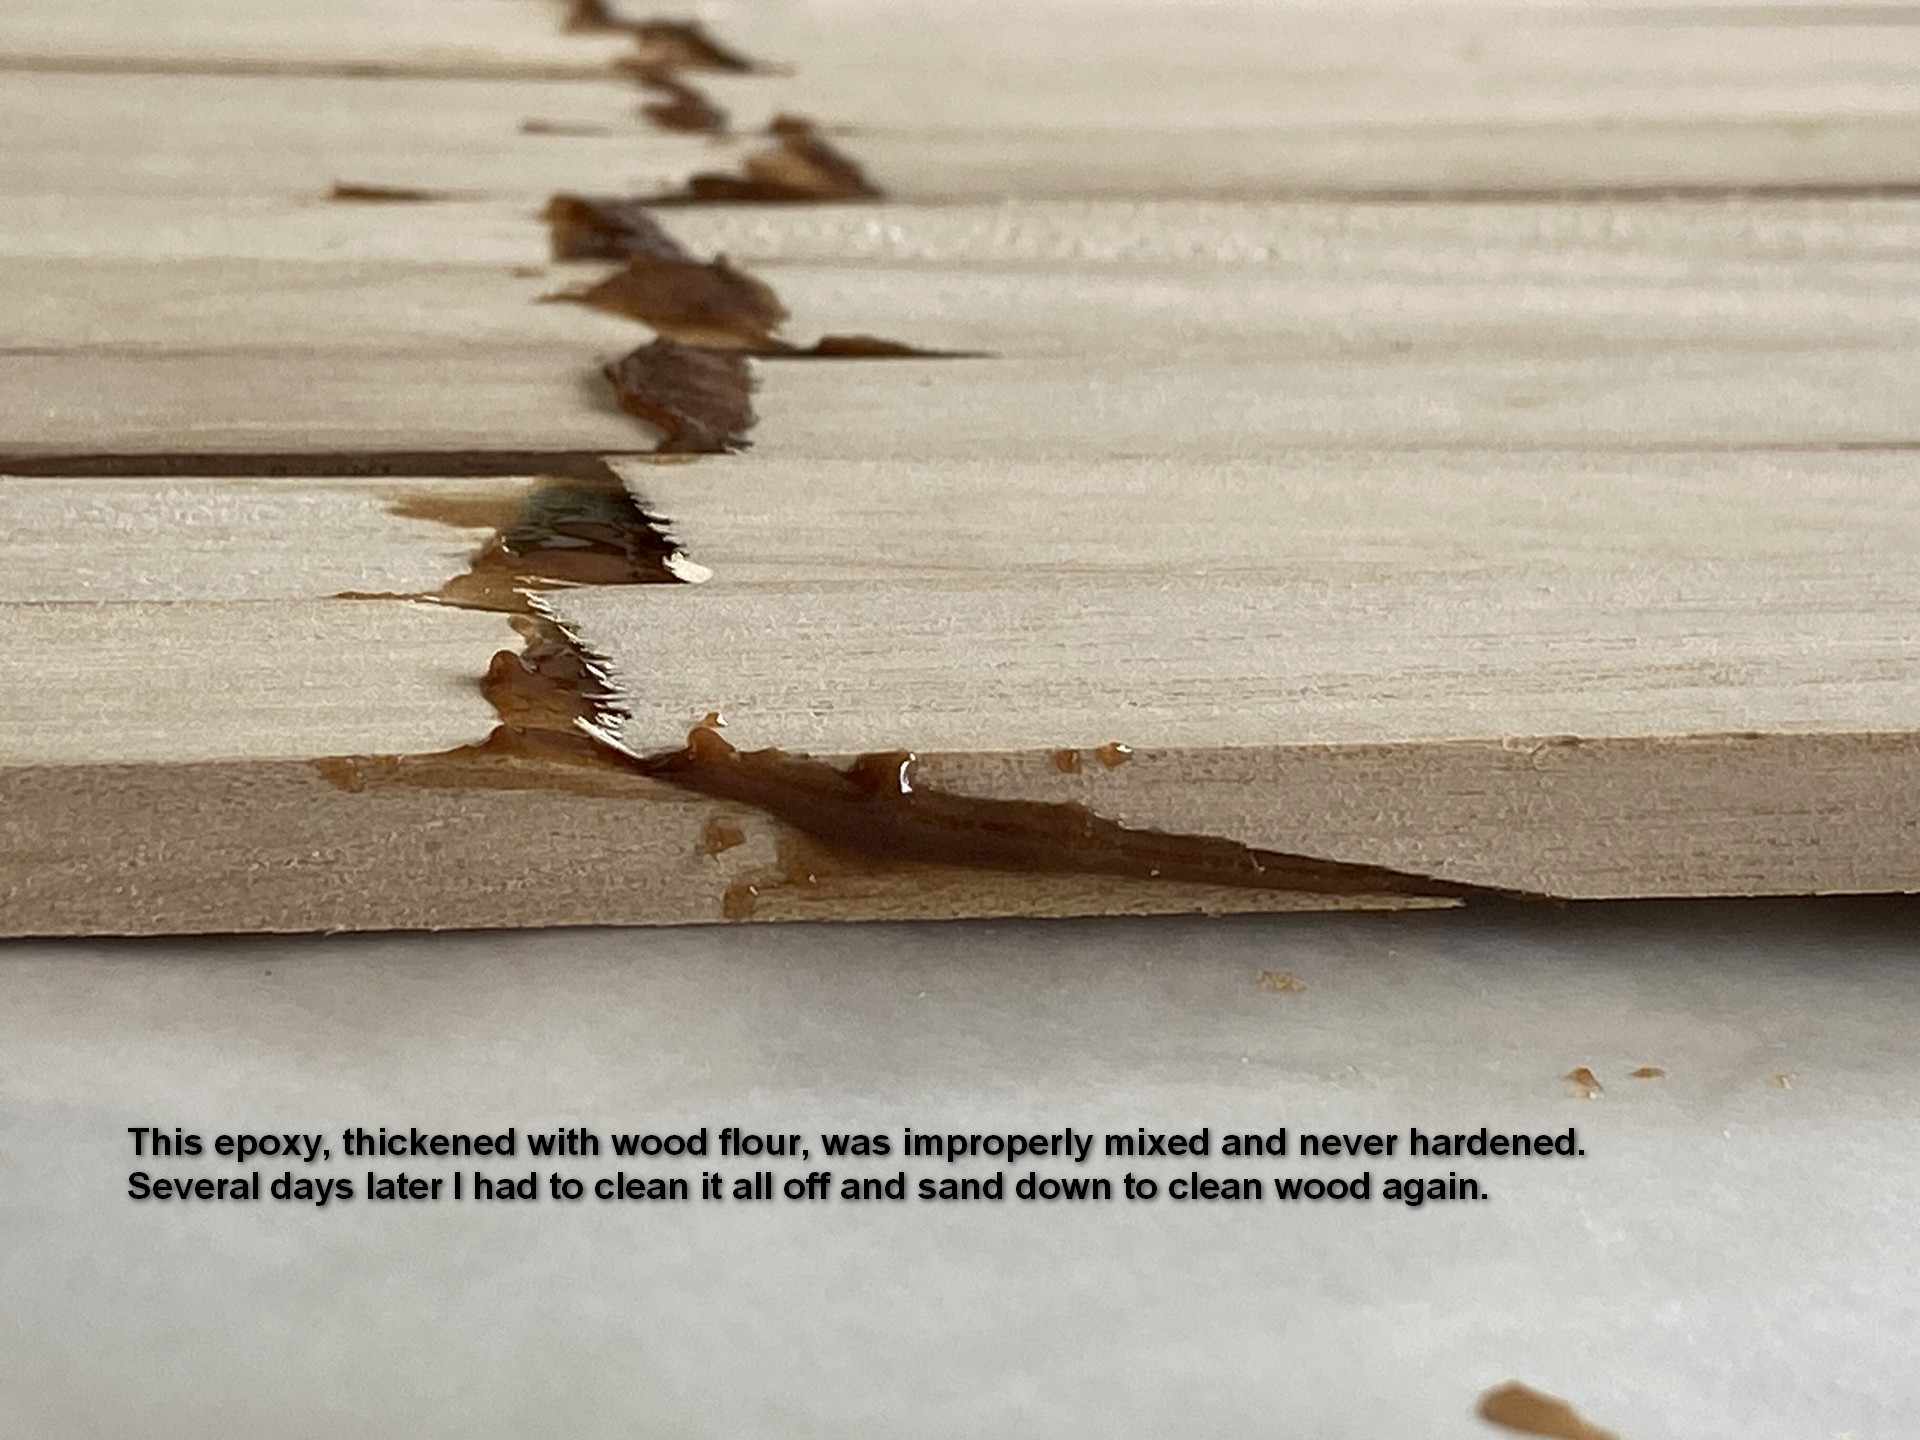
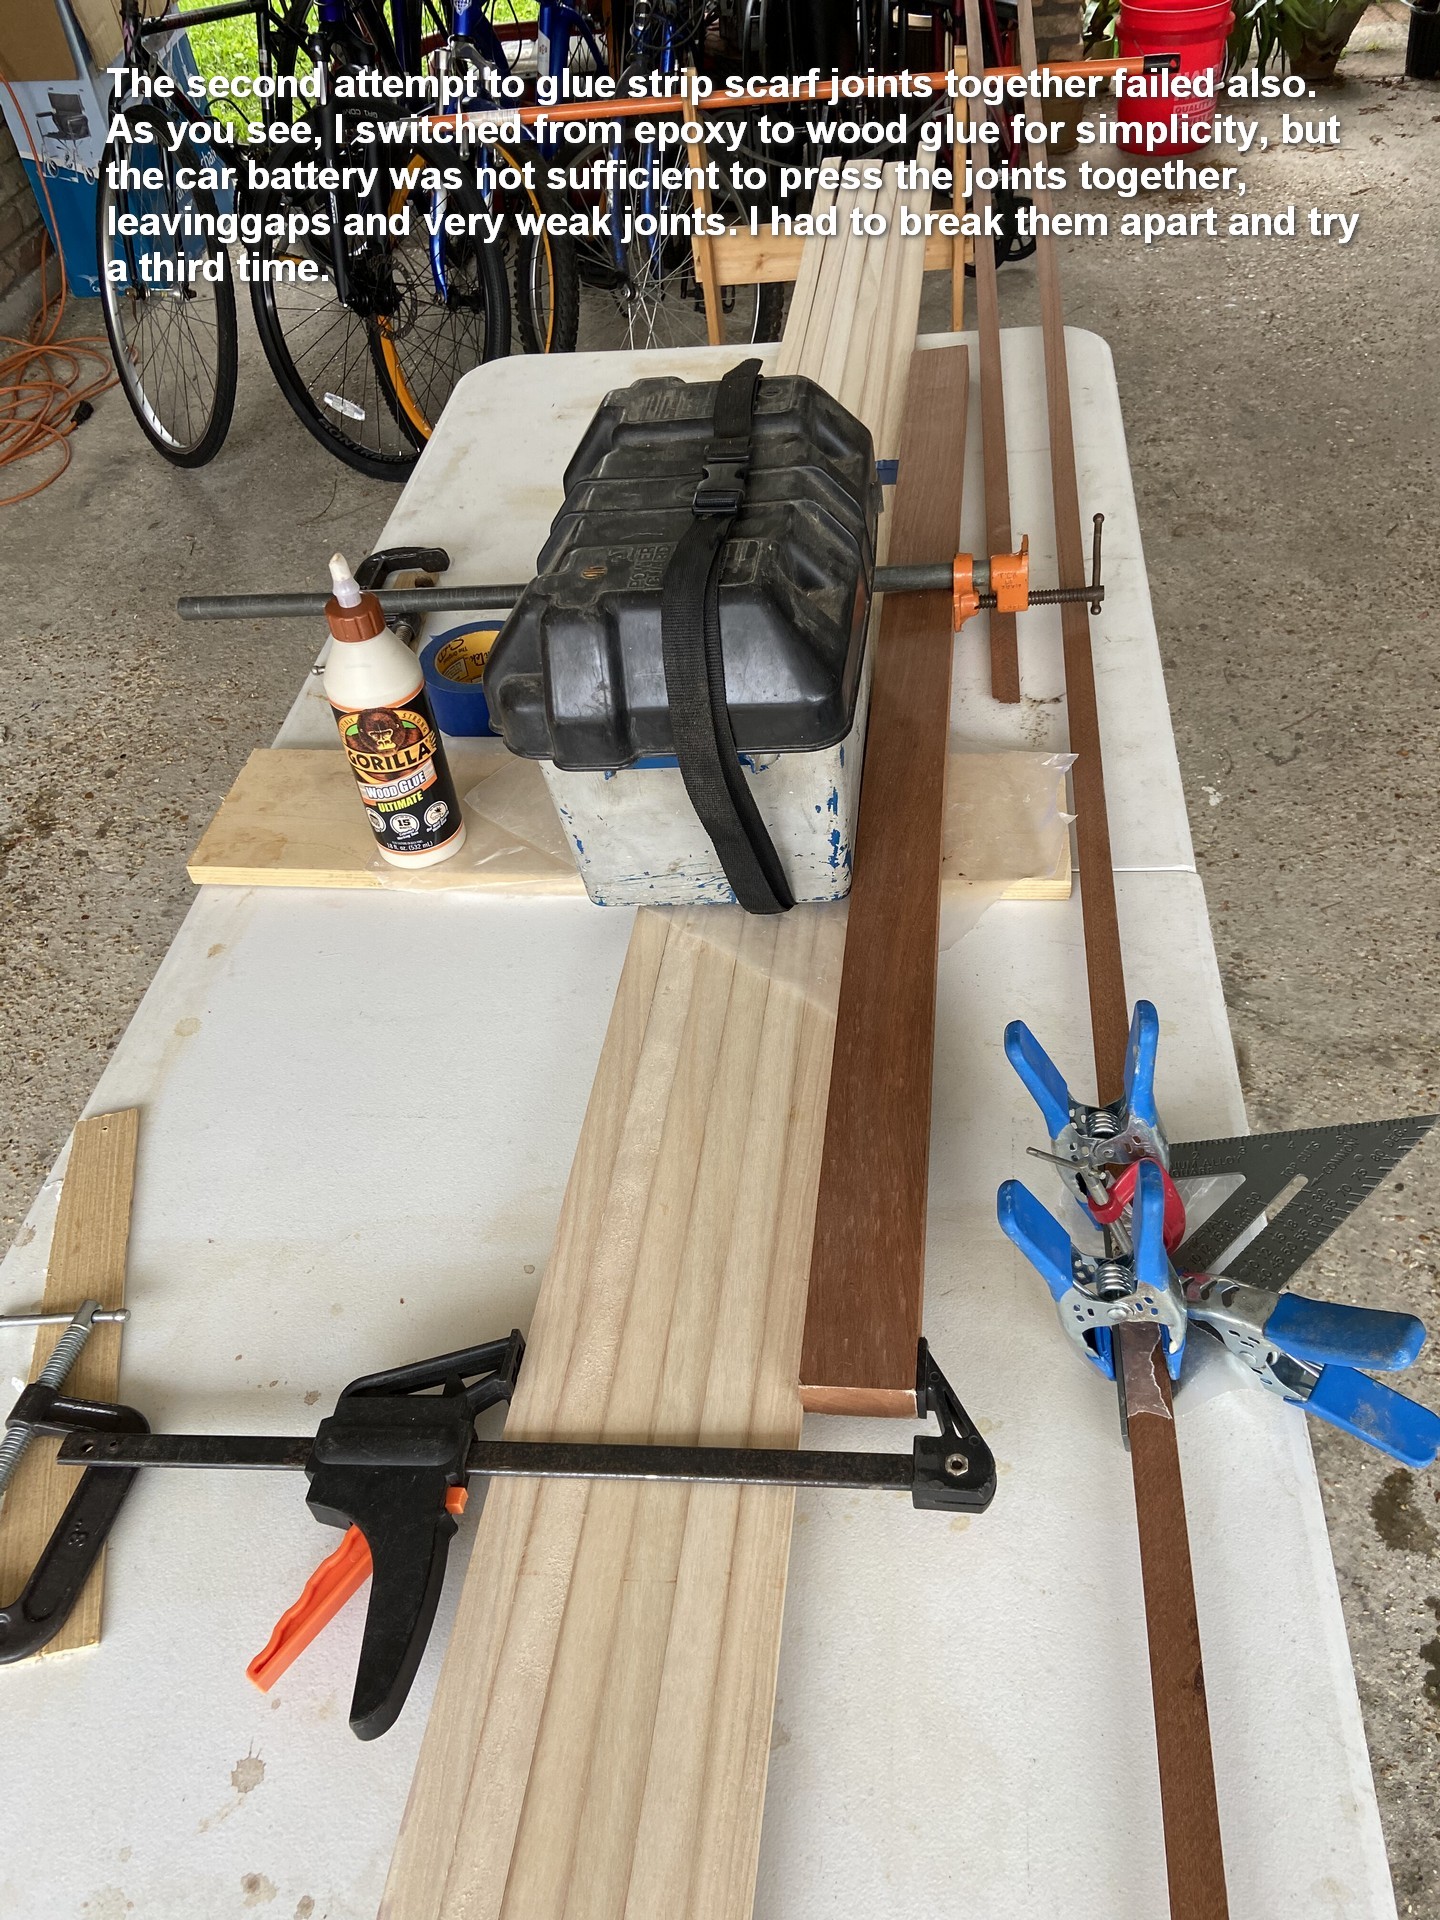
Turns out I botched my epoxy mix despite having plenty of experience building three stitch-n-glue kayaks and it didn’t set up overnight. Splicing together the Paulownia strips will be a total redo next weekend. It is just as well. In hindsight, the epoxy thickened with wood flour is way too dark and I’d never hide that on the finished board. I’ll use regular wood glue on future attempts. But watching a video series by Jenkins Boatworks clued me in to the possibility of blending wood flour and silica thickening agents into the epoxy resin to produce a lighter colored paste.
Weekend #6
March 9, 2024
It started out rainy but the weather improved over the weekend. I accomplished the following tasks:
- Coat the frame pieces with epoxy resin. This is to provide some waterproofing recommended by other builders, though not by Jarvis.
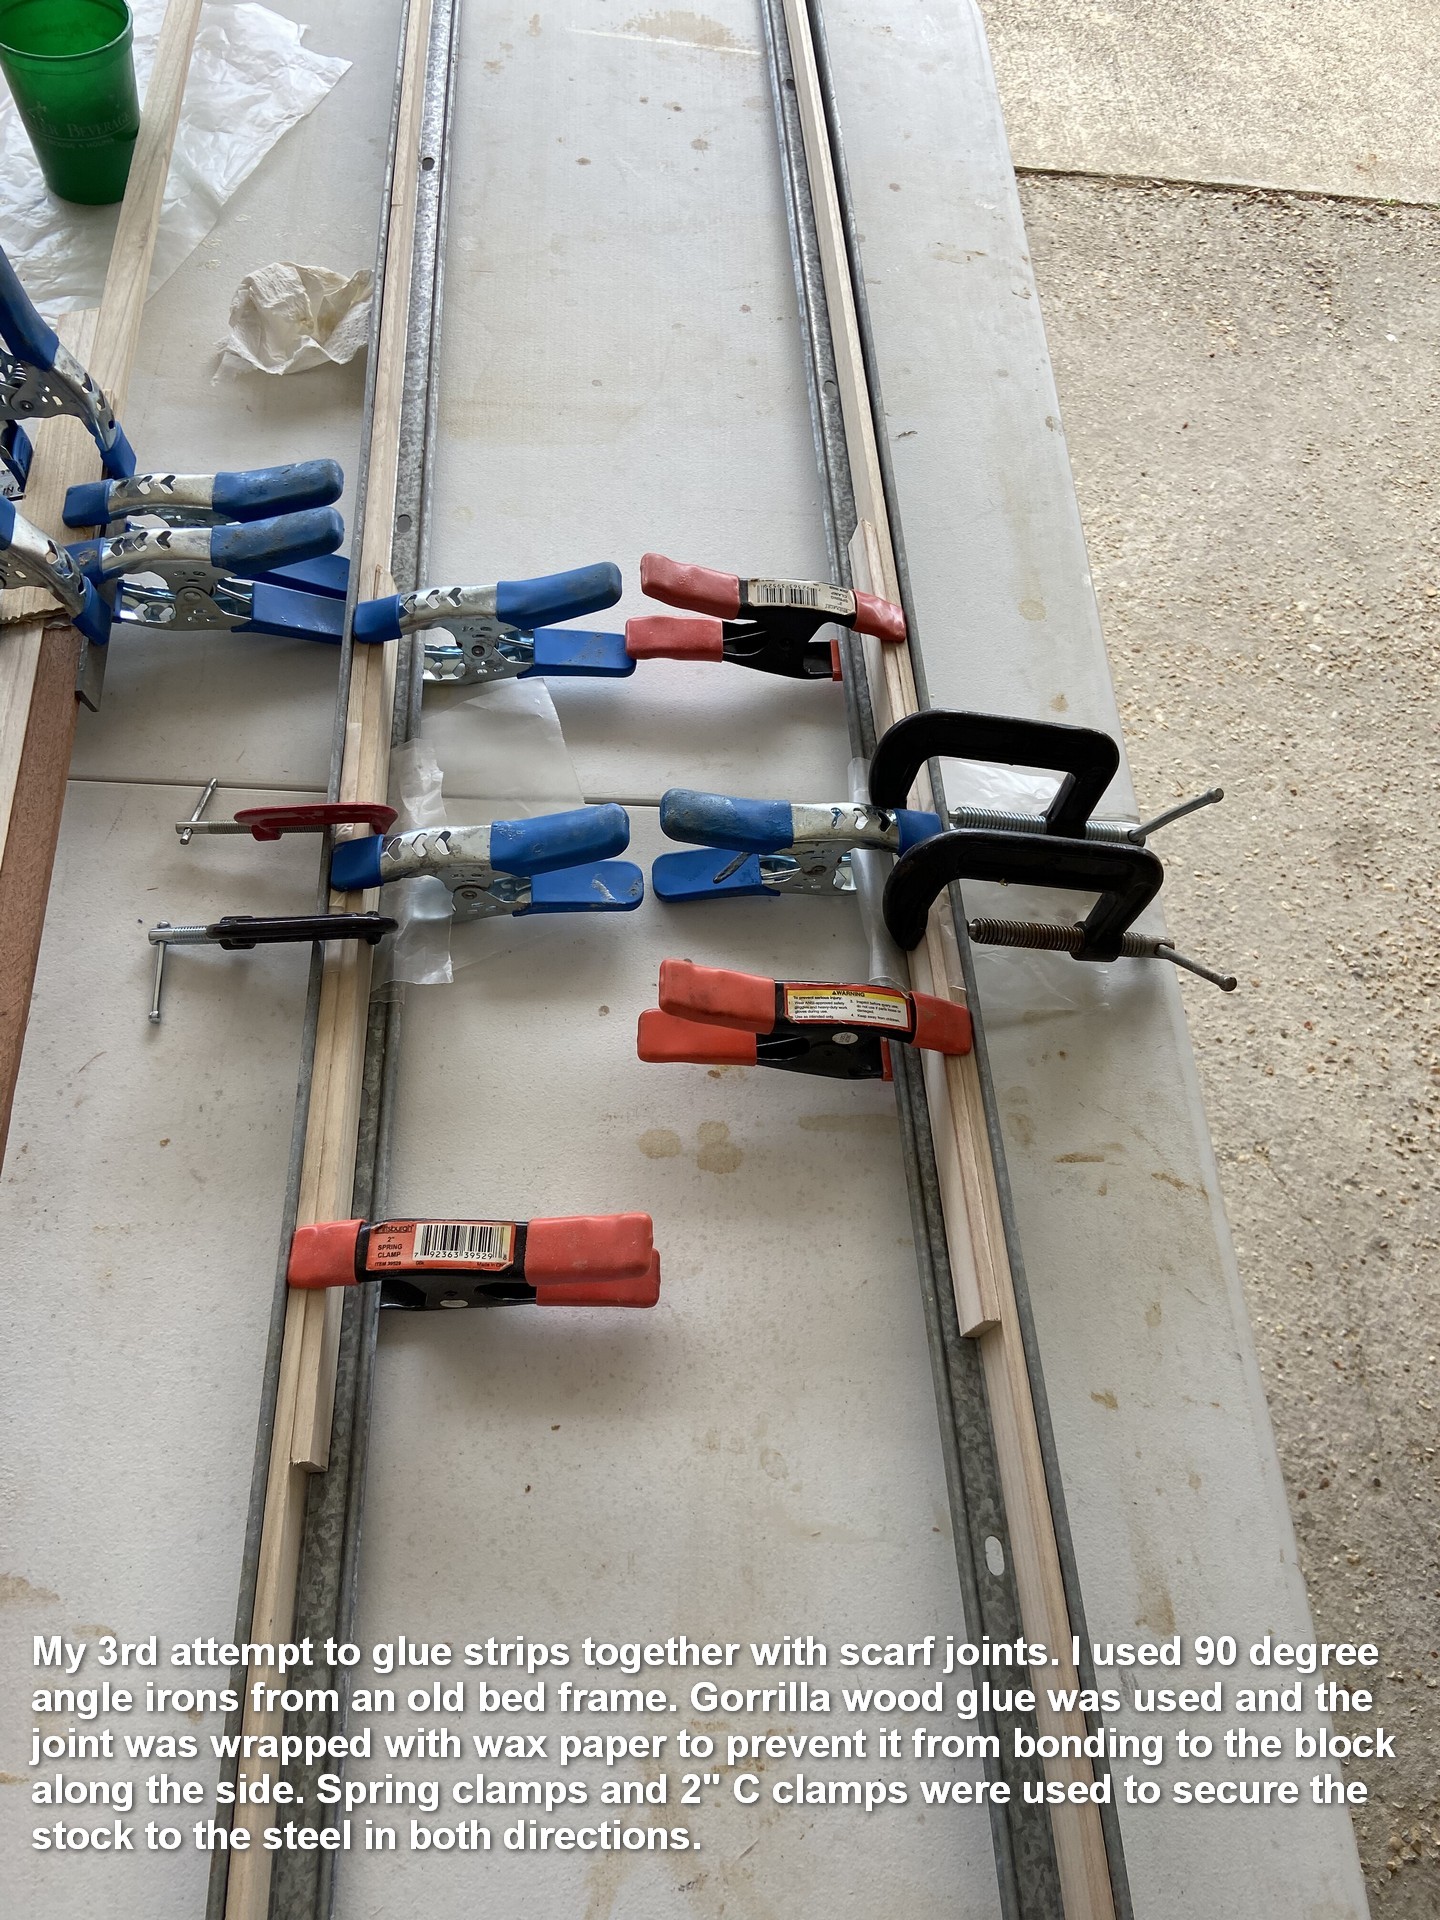
- Re-glue the Paulownia strips’ scarf joints. Since they’re fouled with uncured epoxy I’ll have to recut them to get to bare wood again. This time I’m using Gorilla ™ wood glue.
Mid-week Tasks
- Continue gluing Paulownia strip segments together, two at a time.
- Mark pencil lines for SUP frame rib positions (perpendicular to center line) on strongback table.
- Frame assembly and glue-down to table.
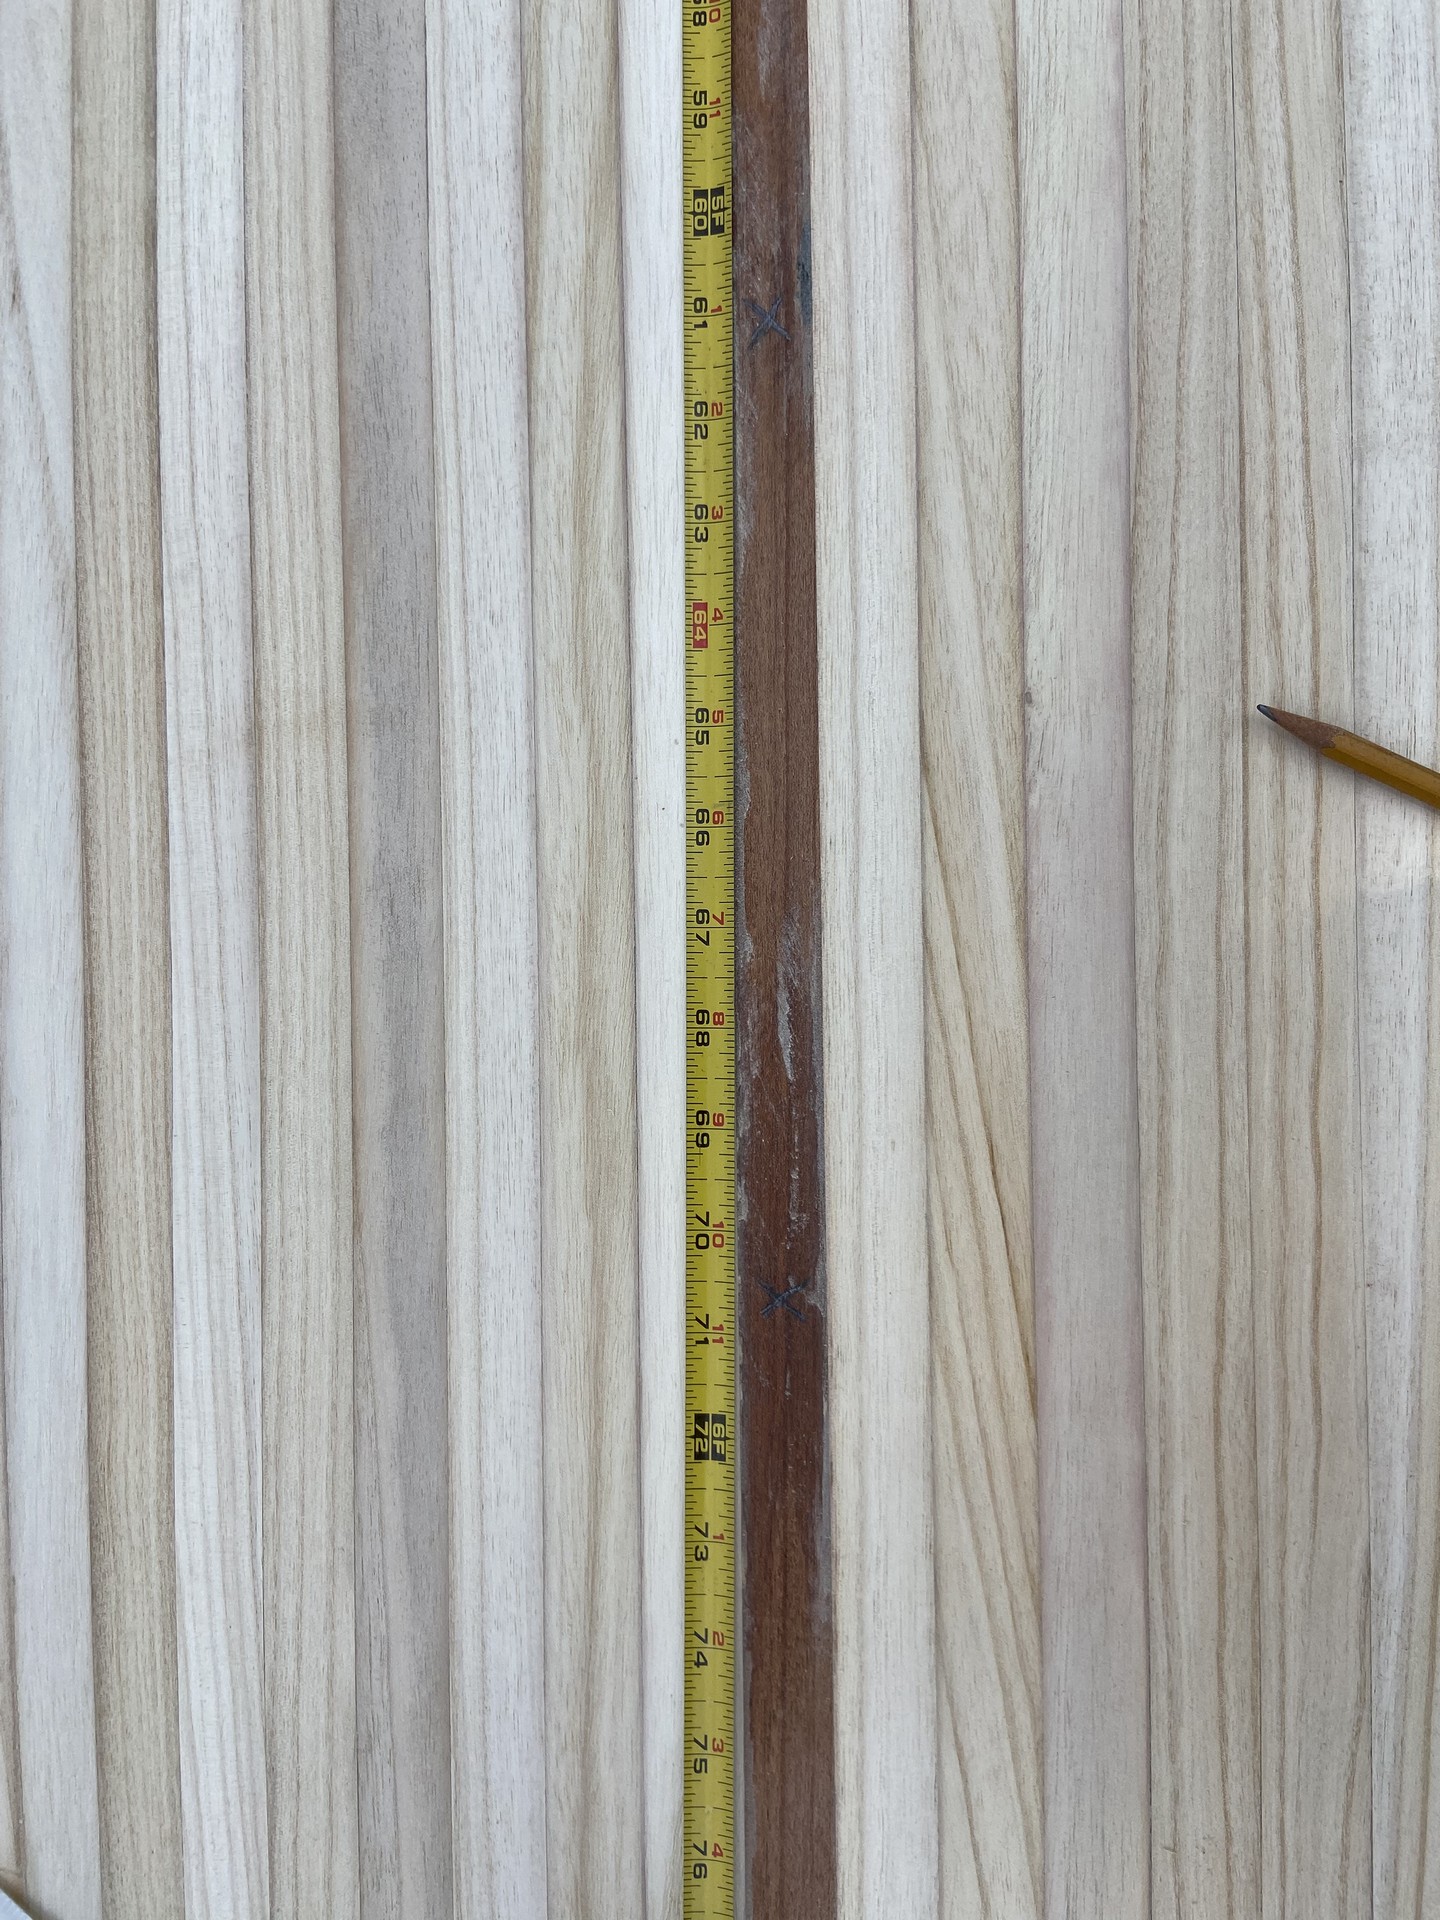
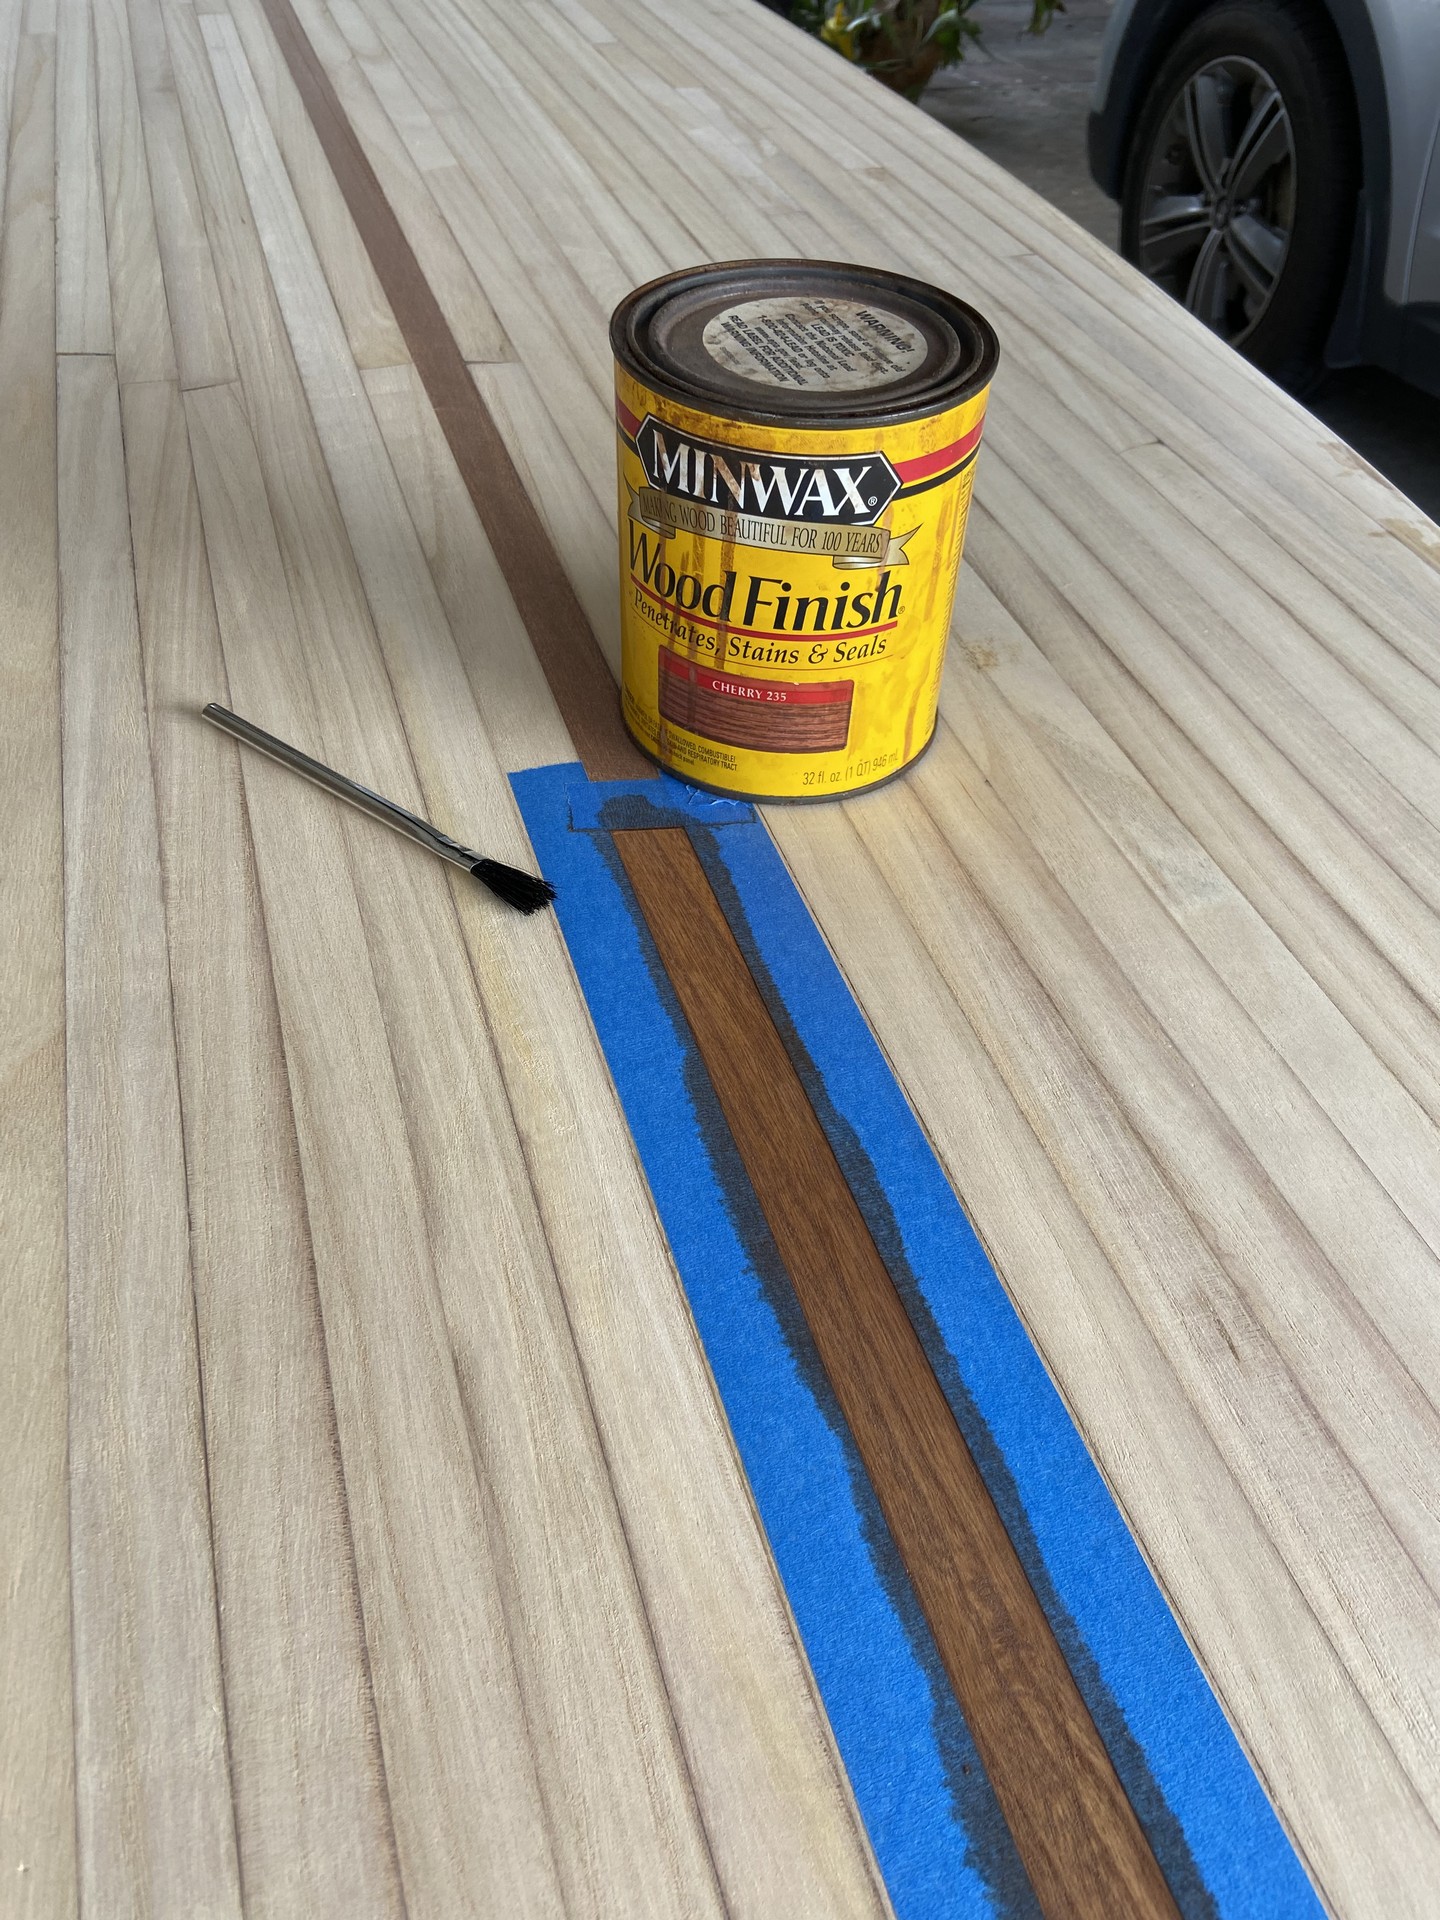
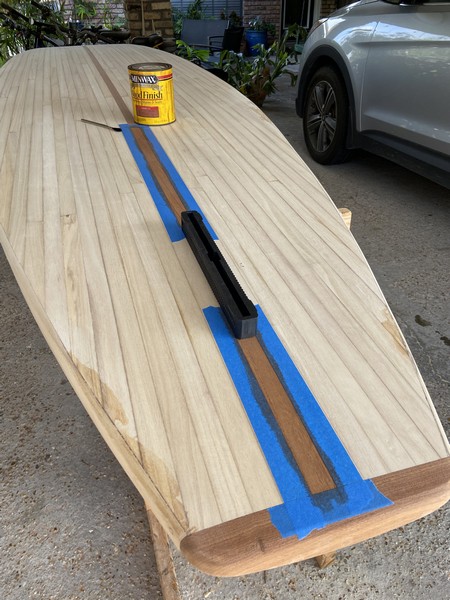
- Align and glue down center strip using contrasting colored wood (mahogany.)
Weekend #7
March 17, 2024
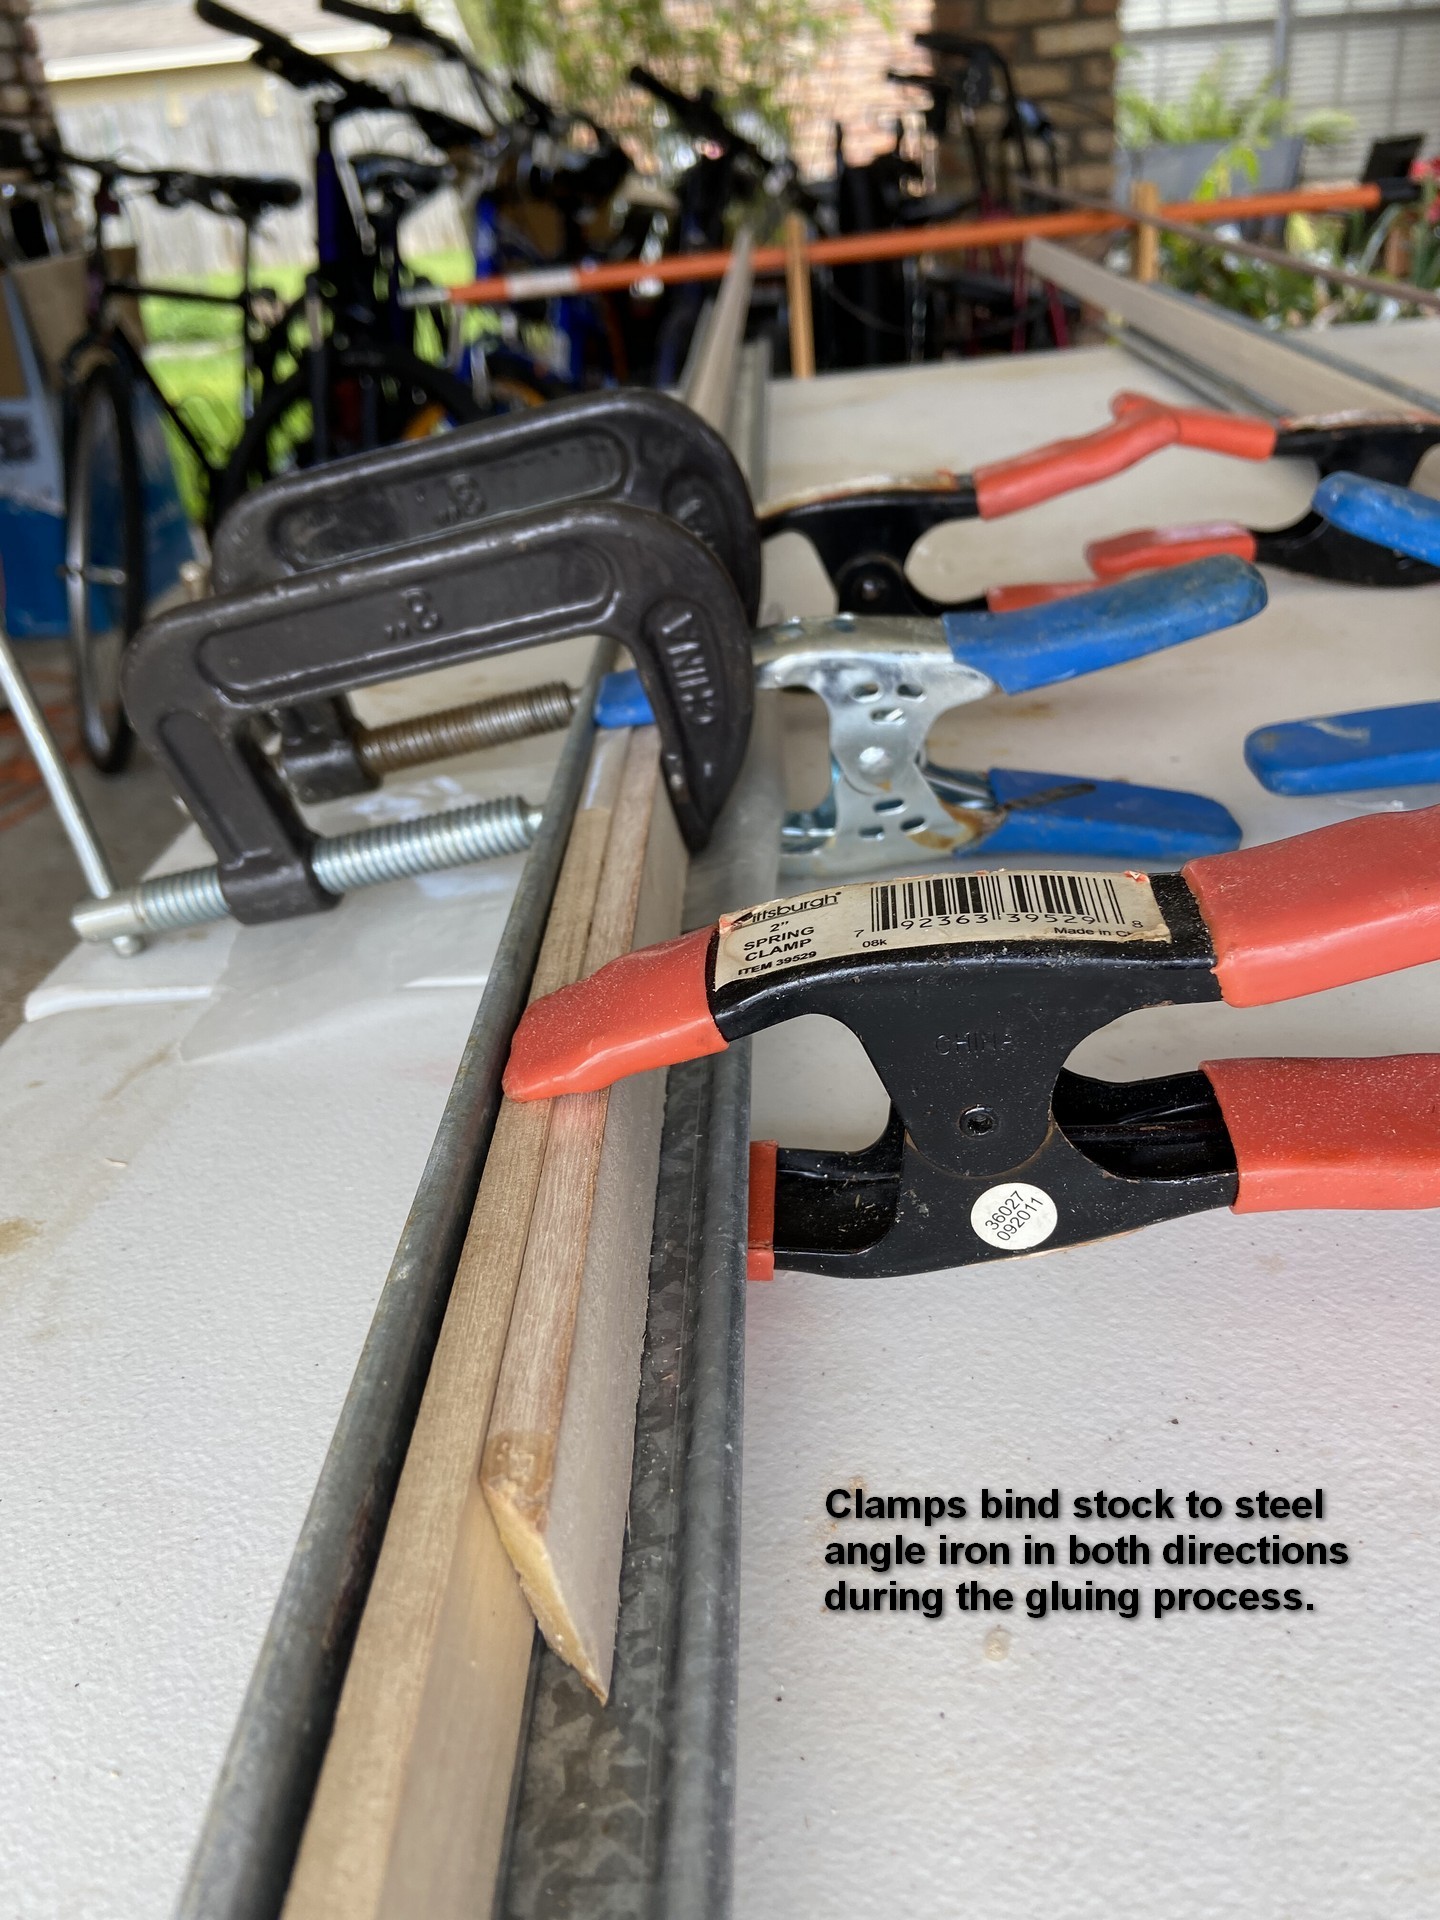
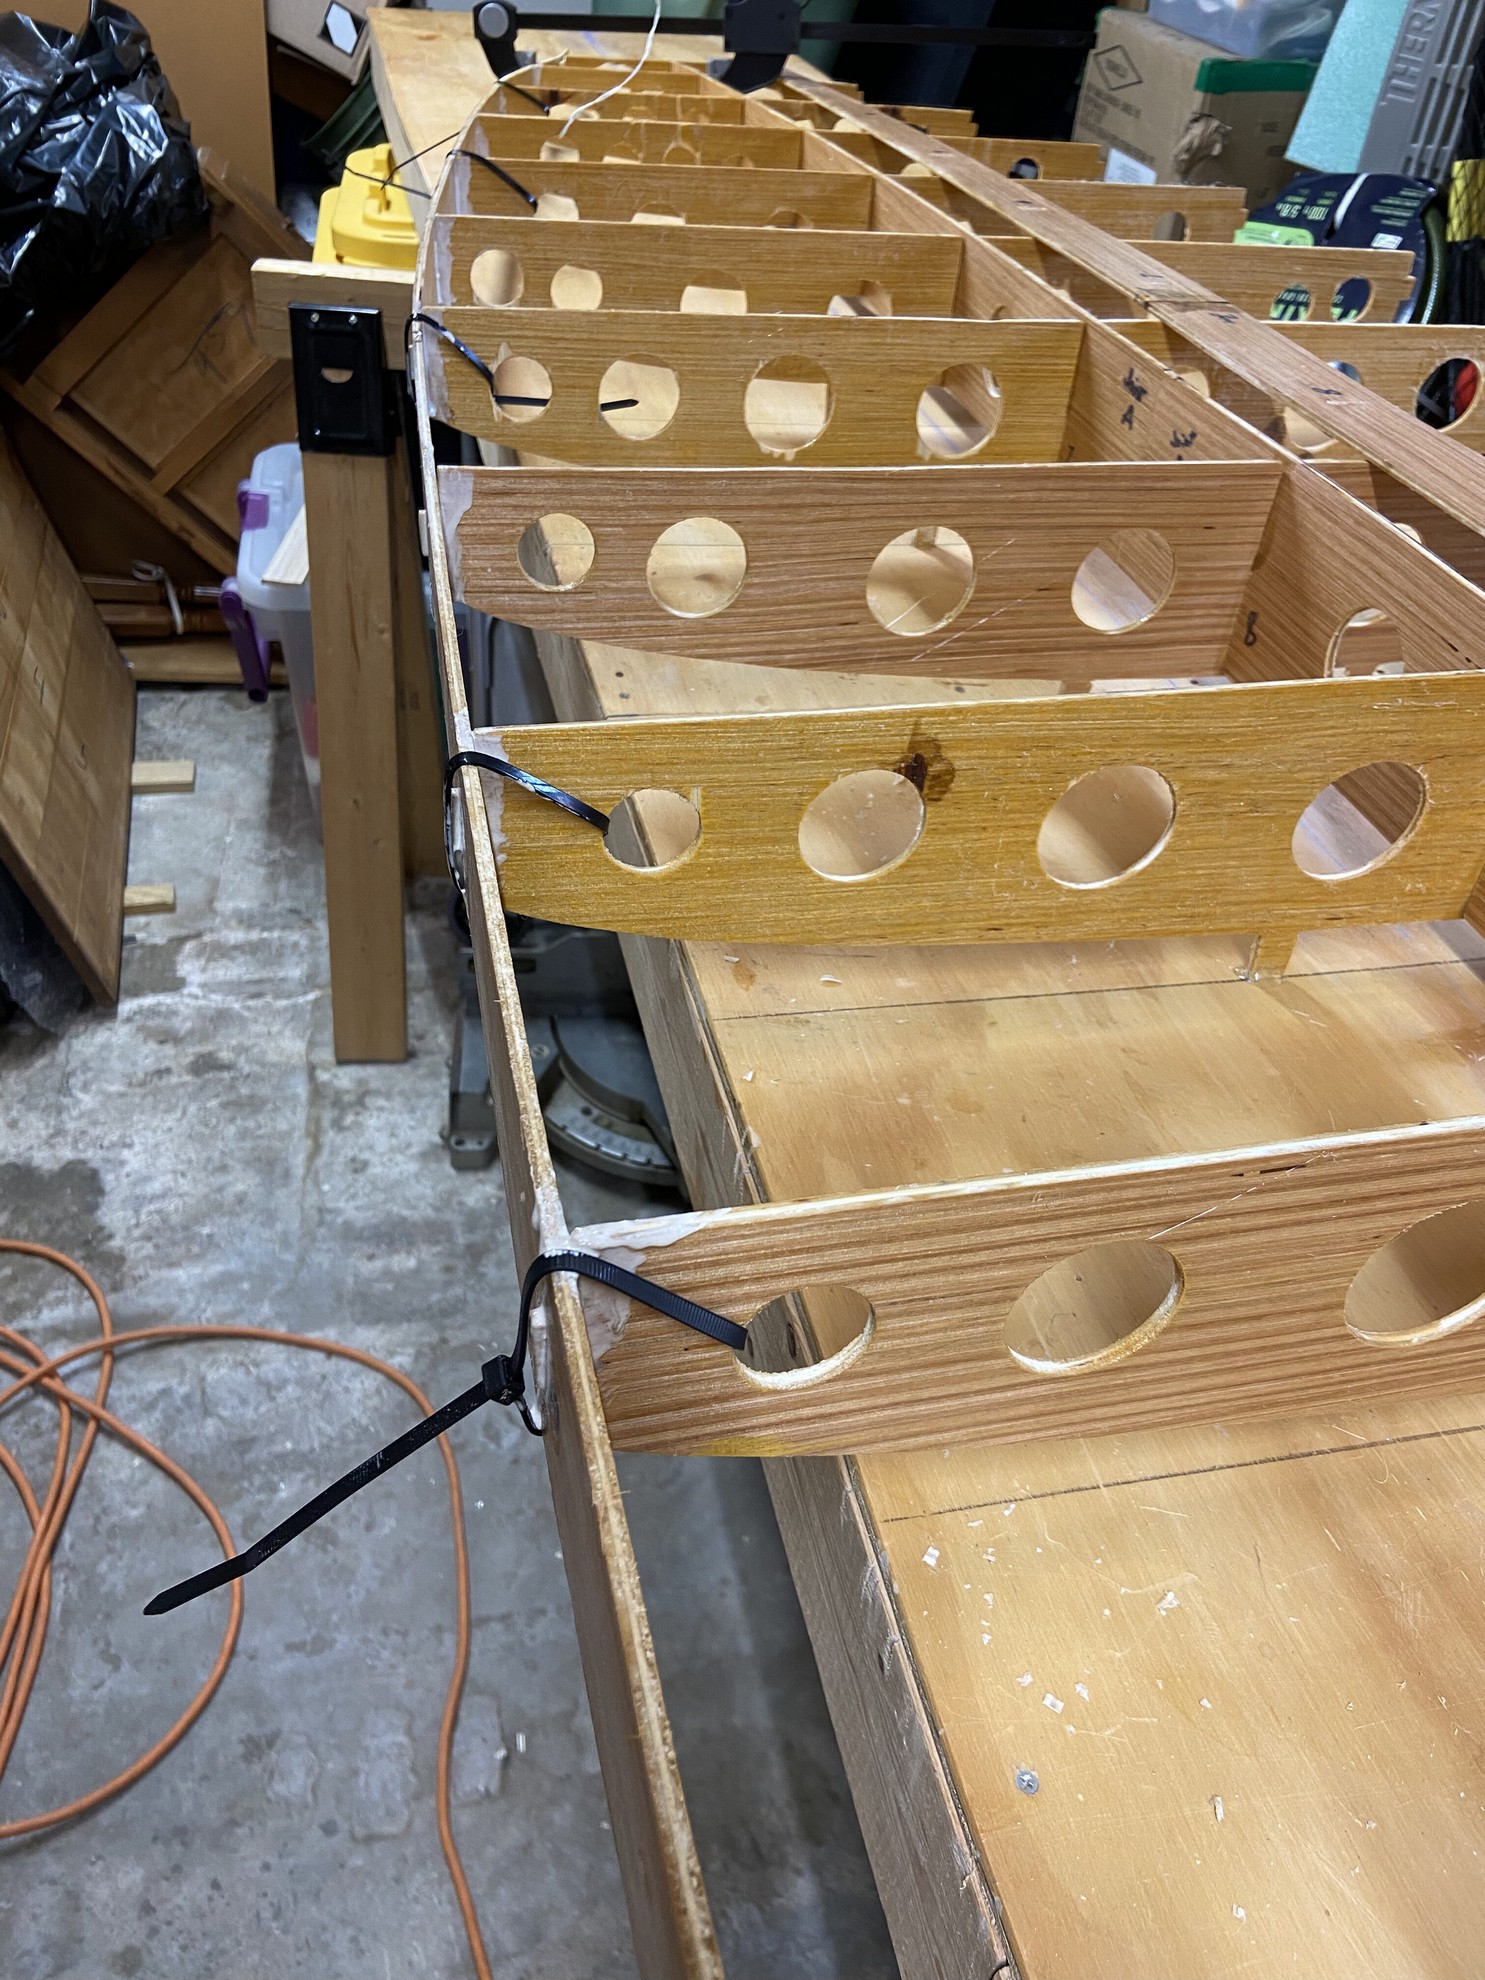
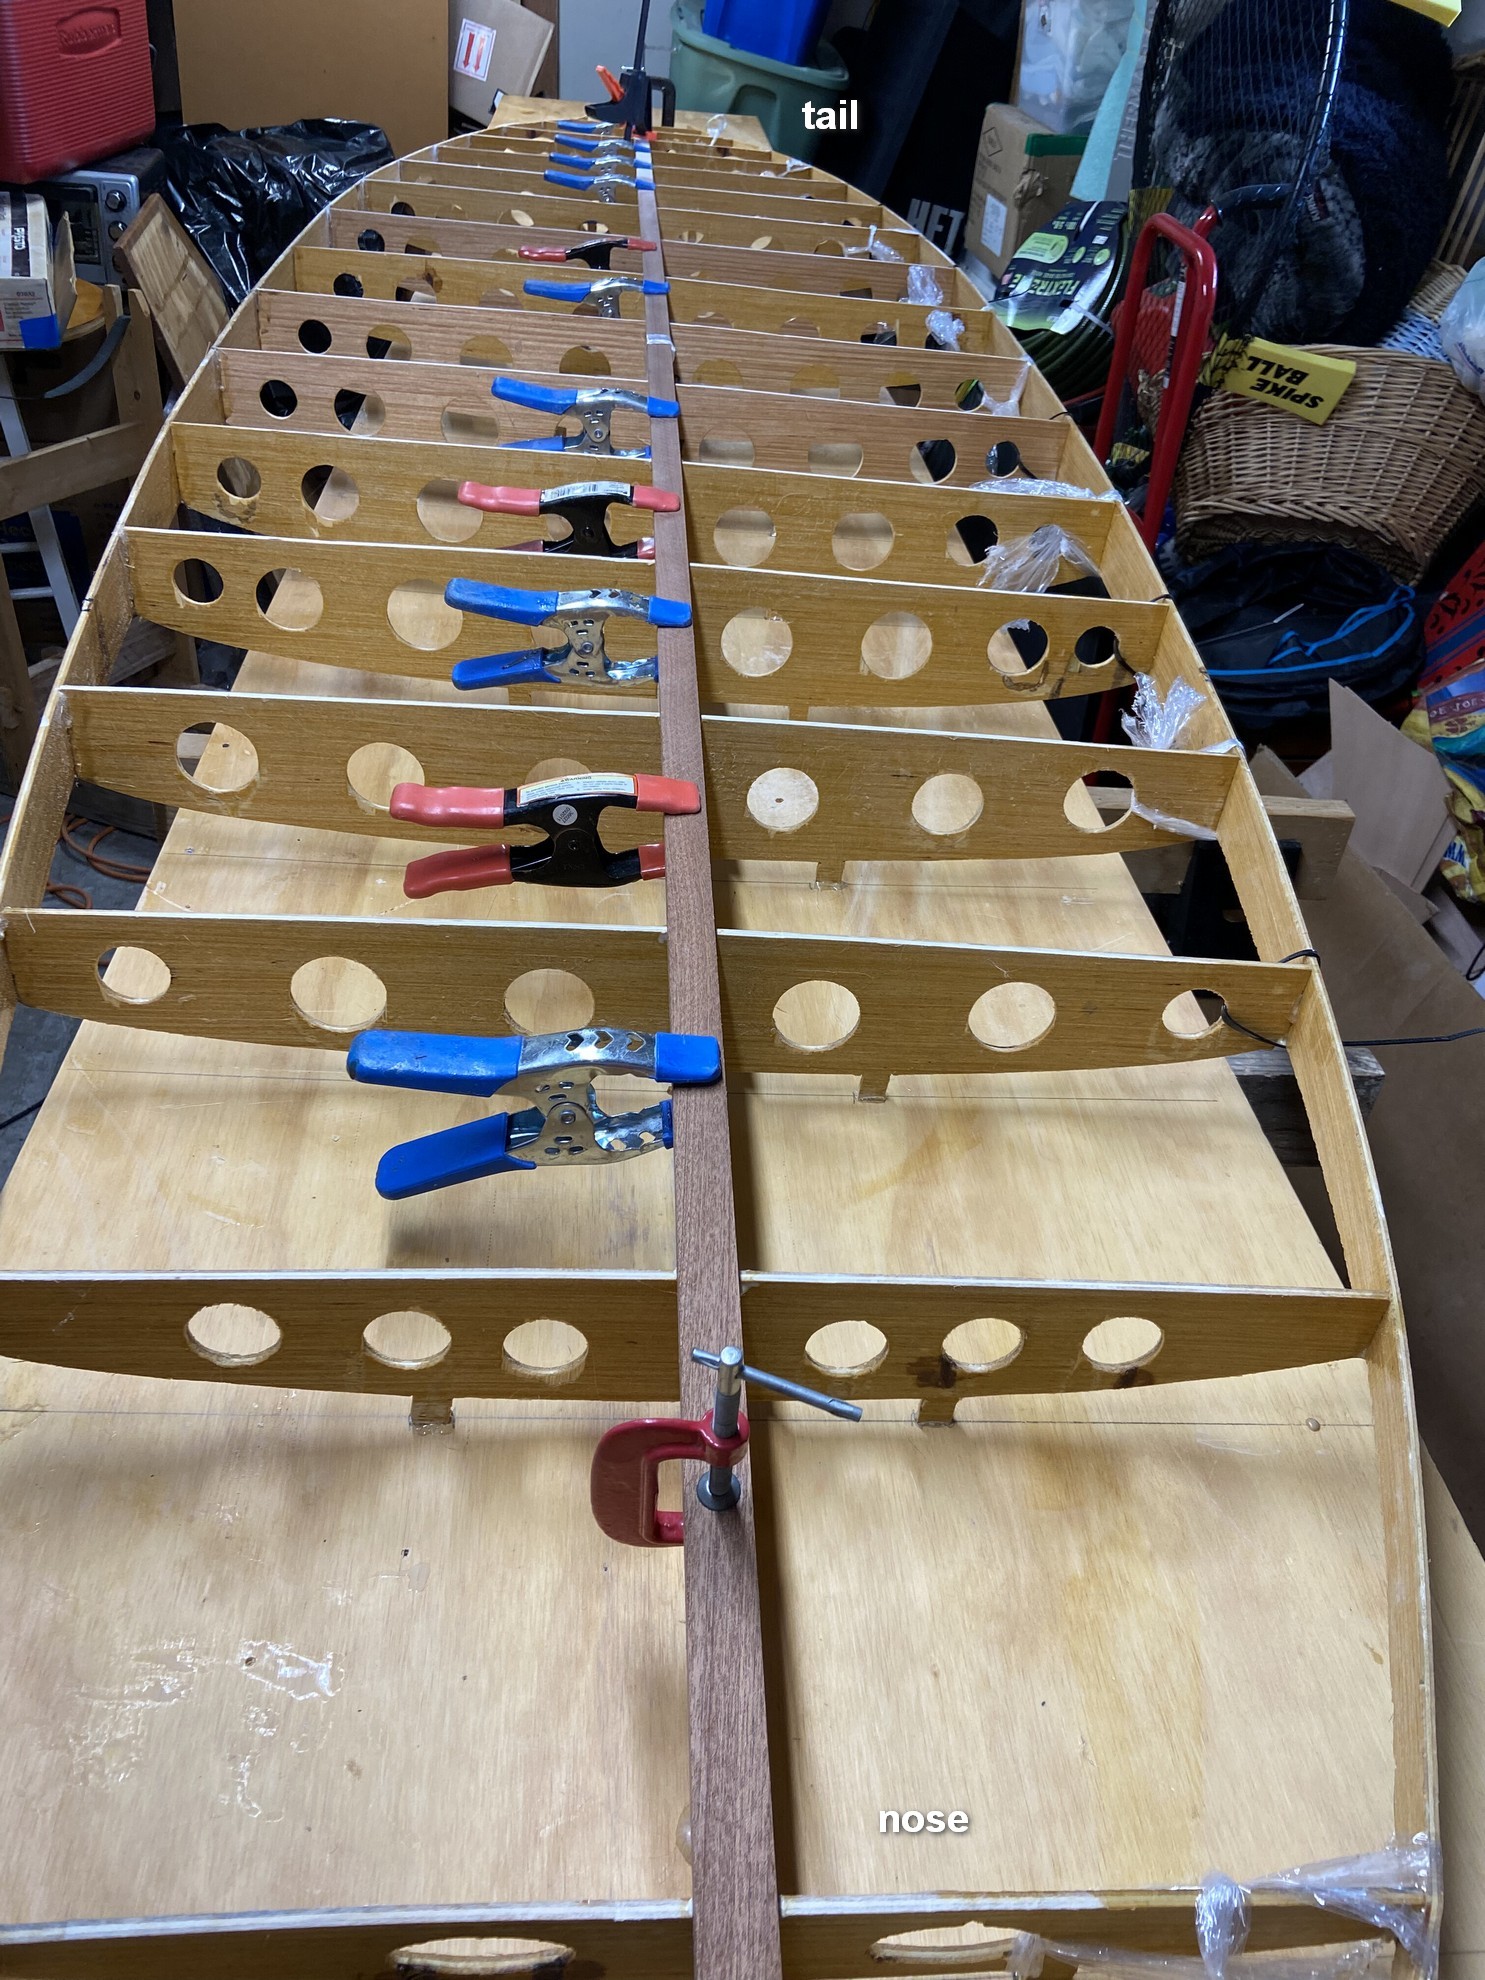
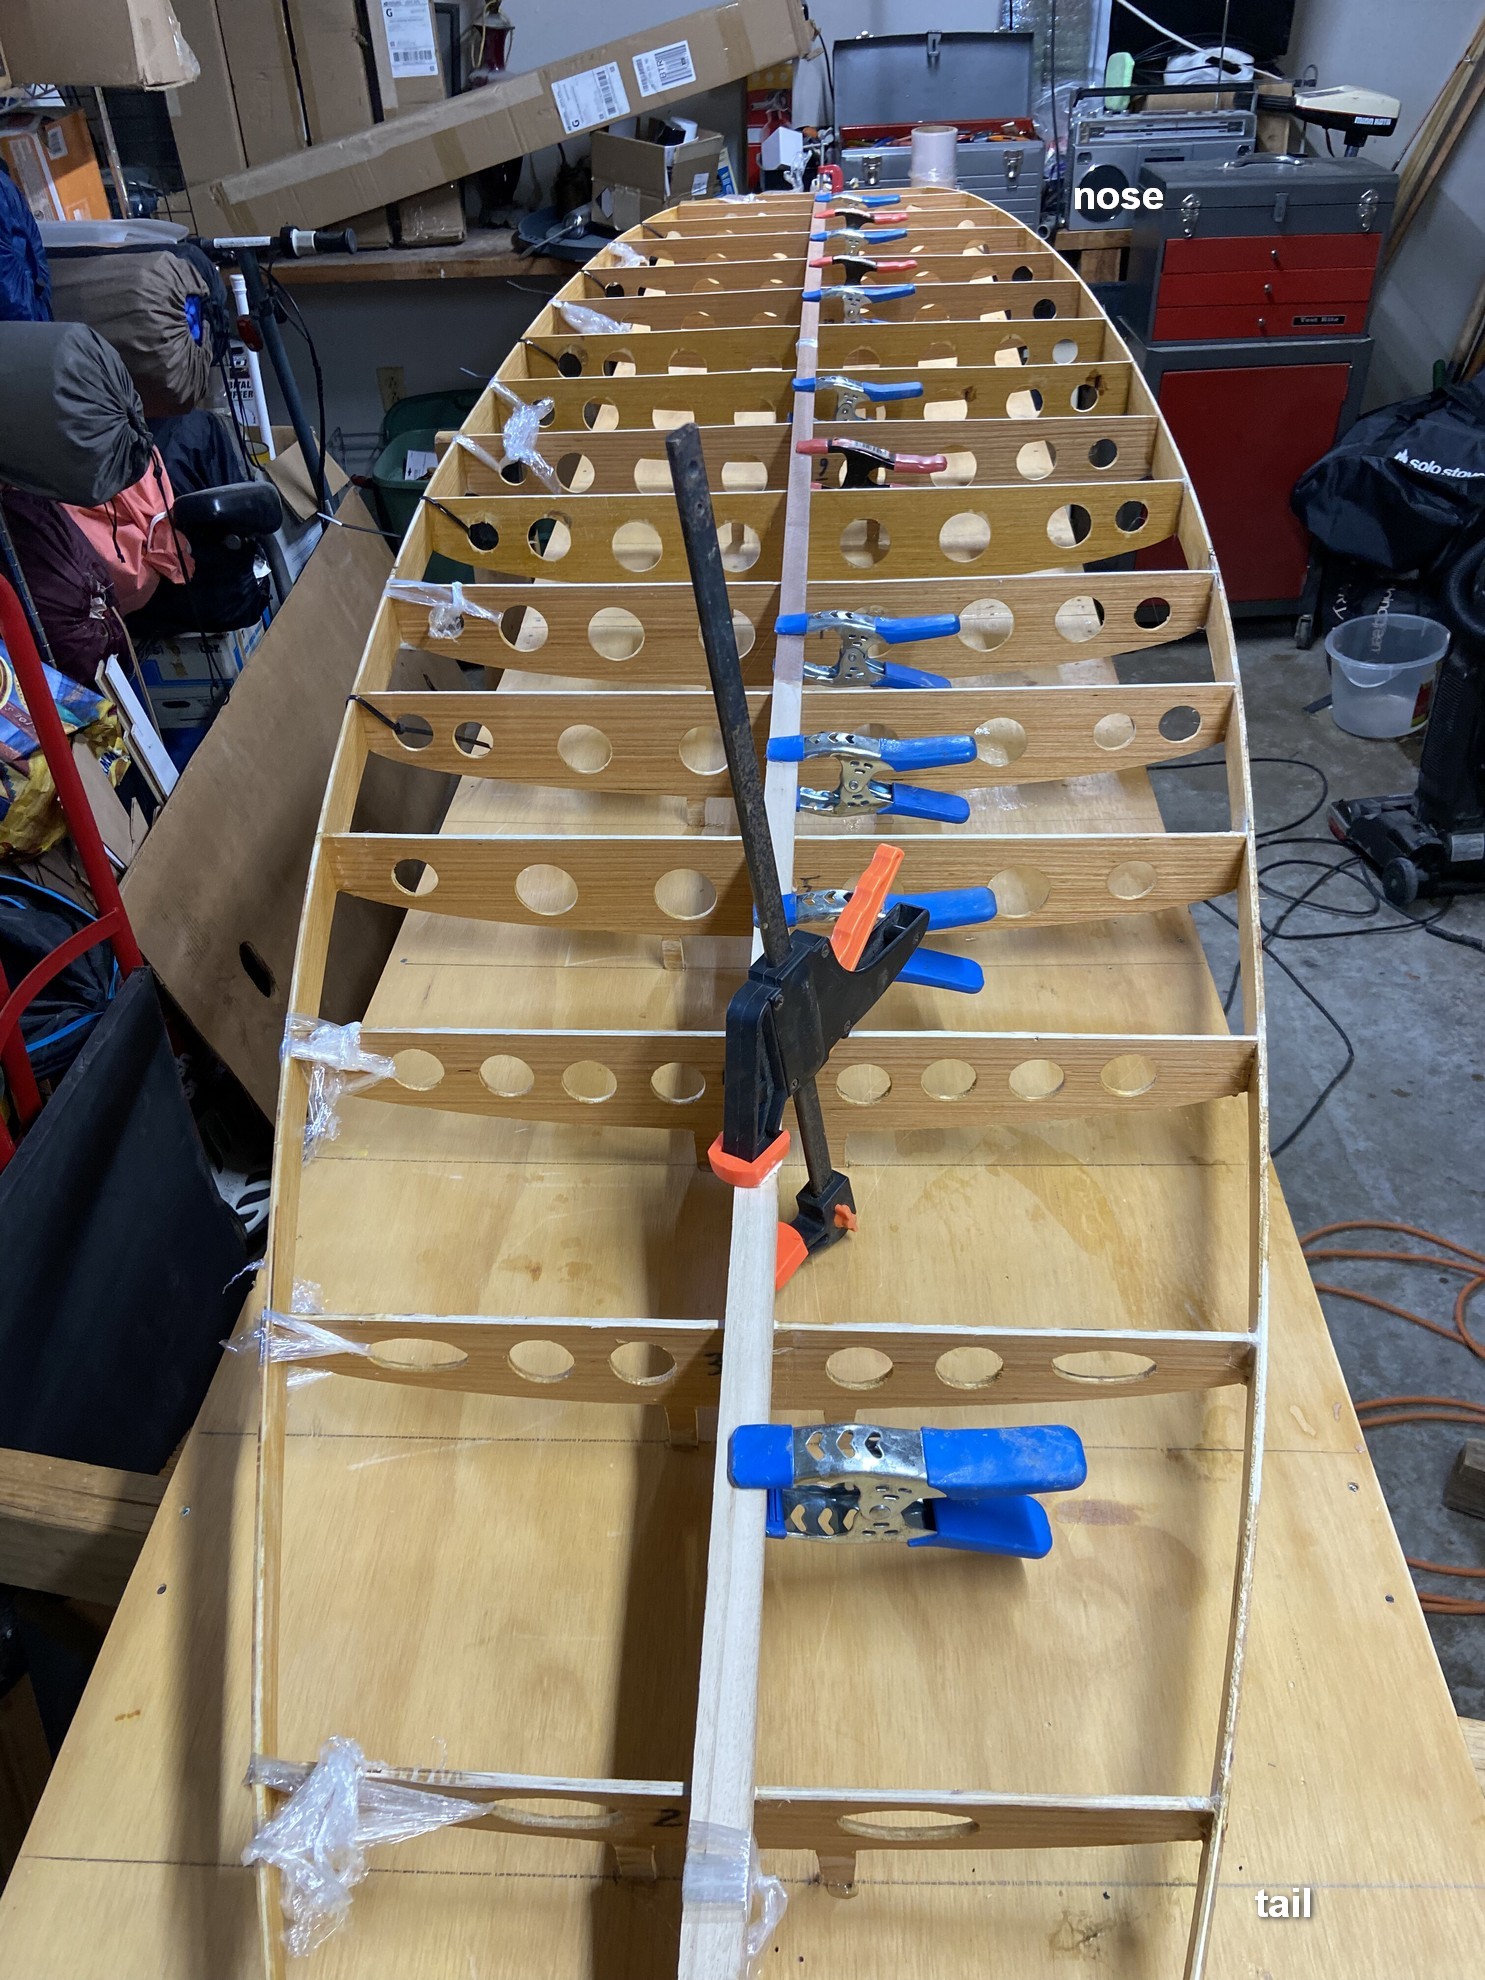
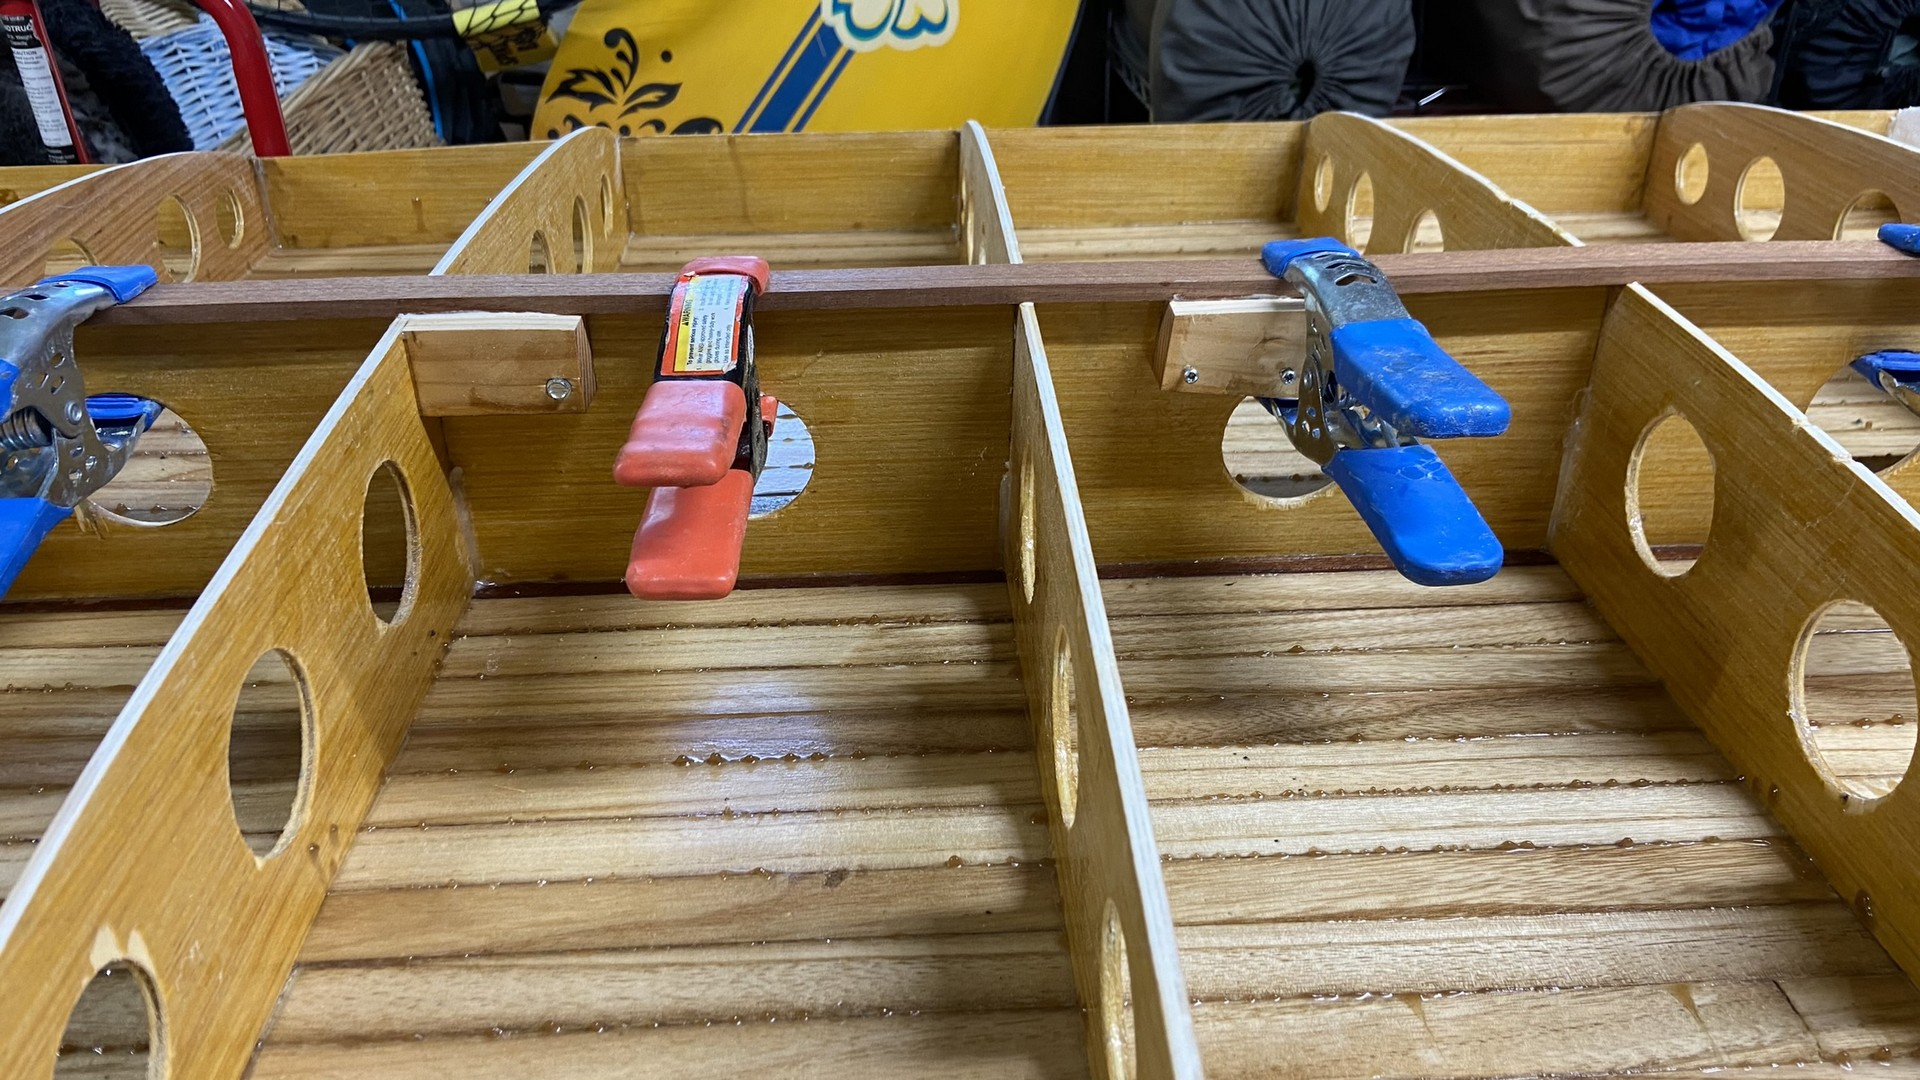
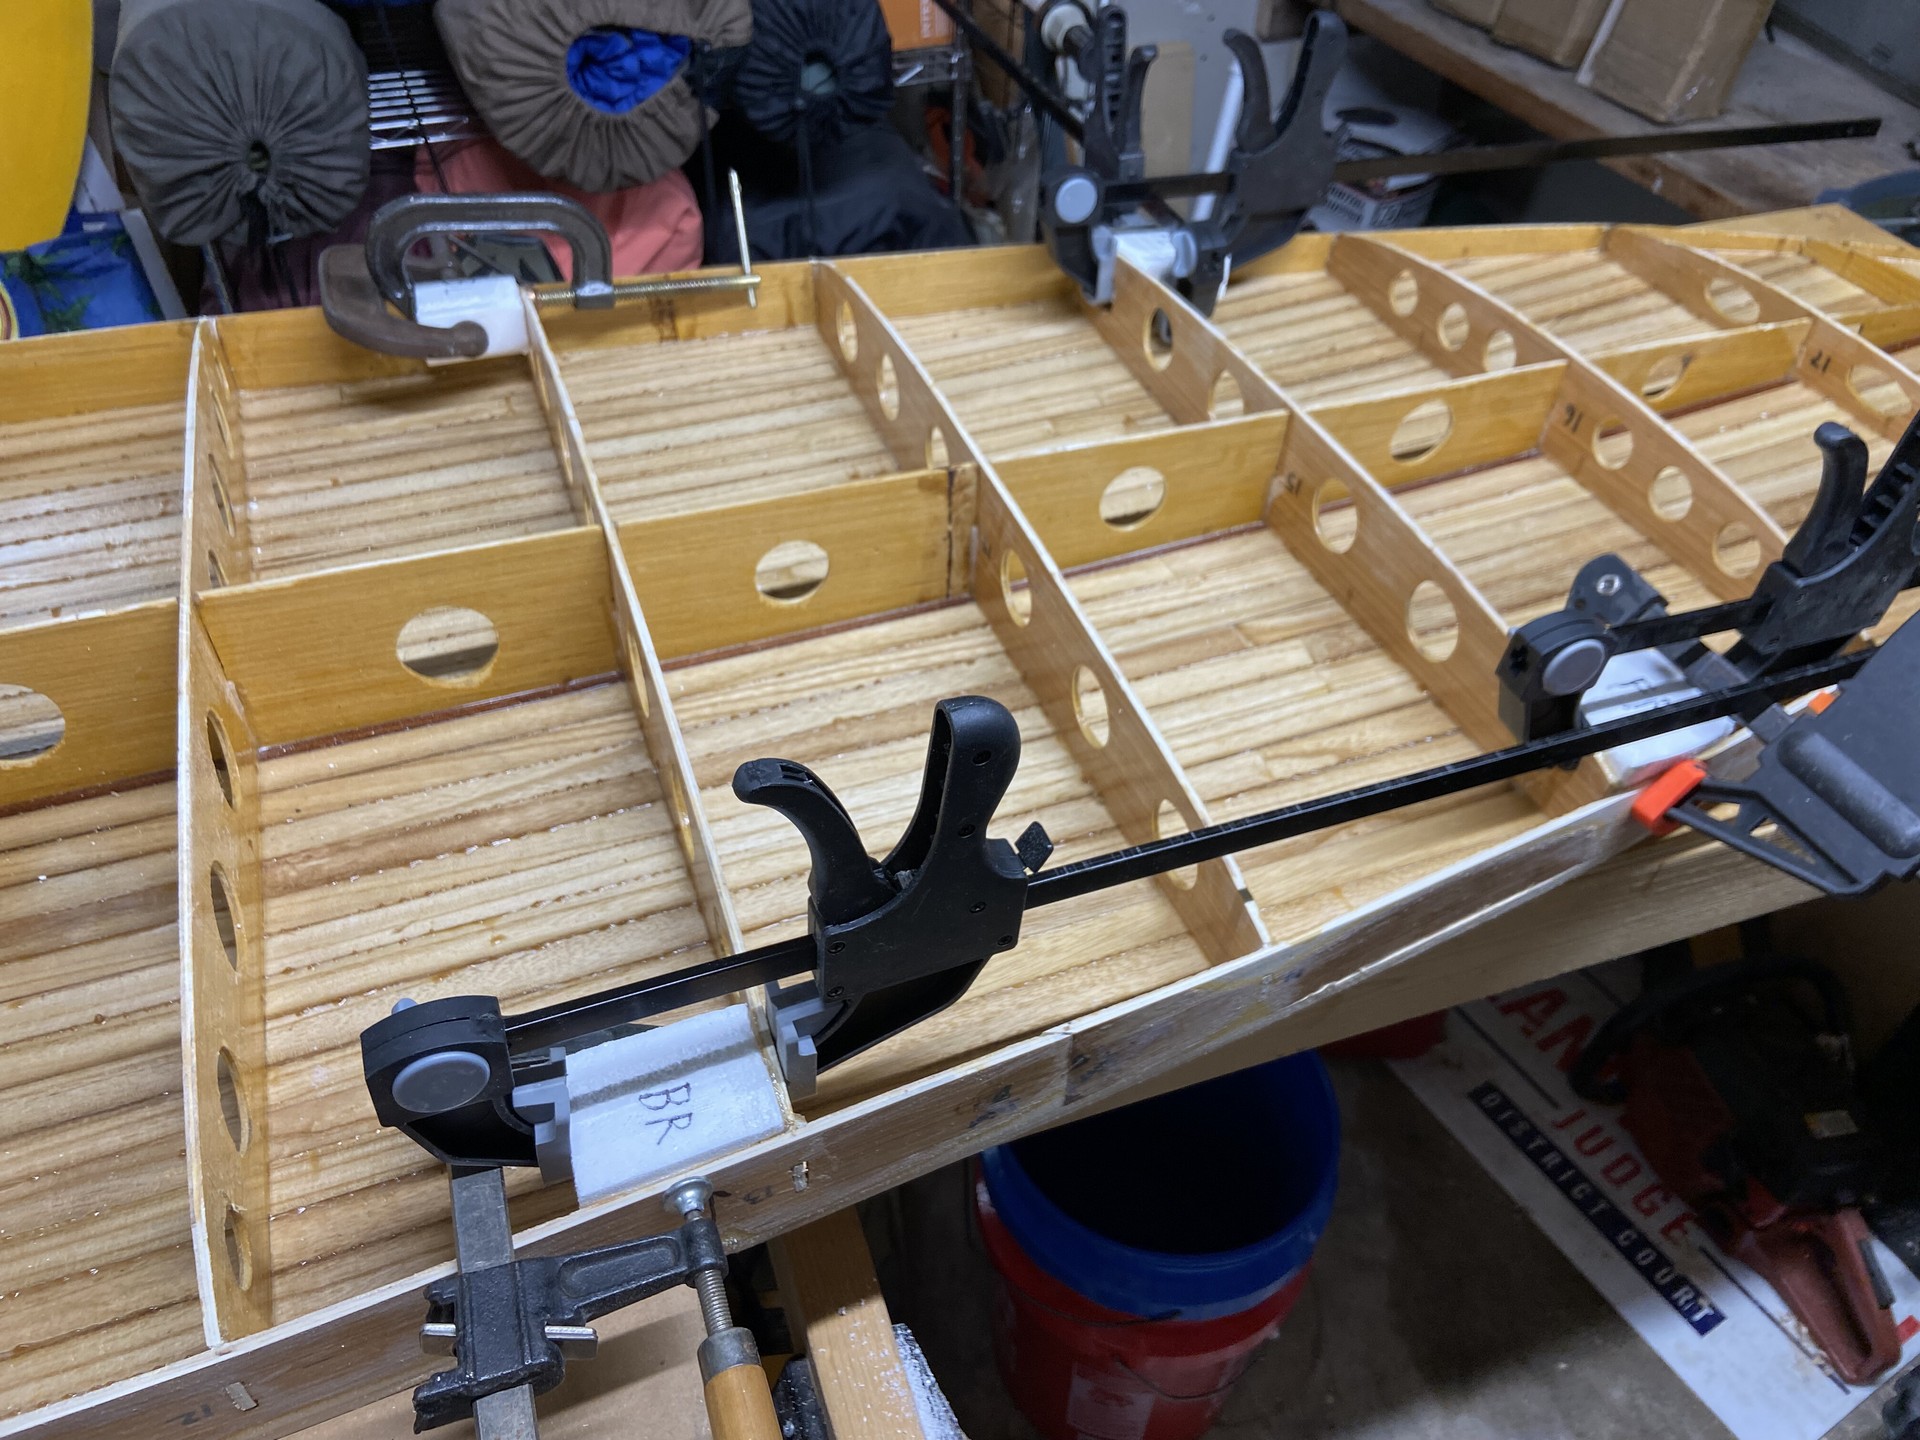
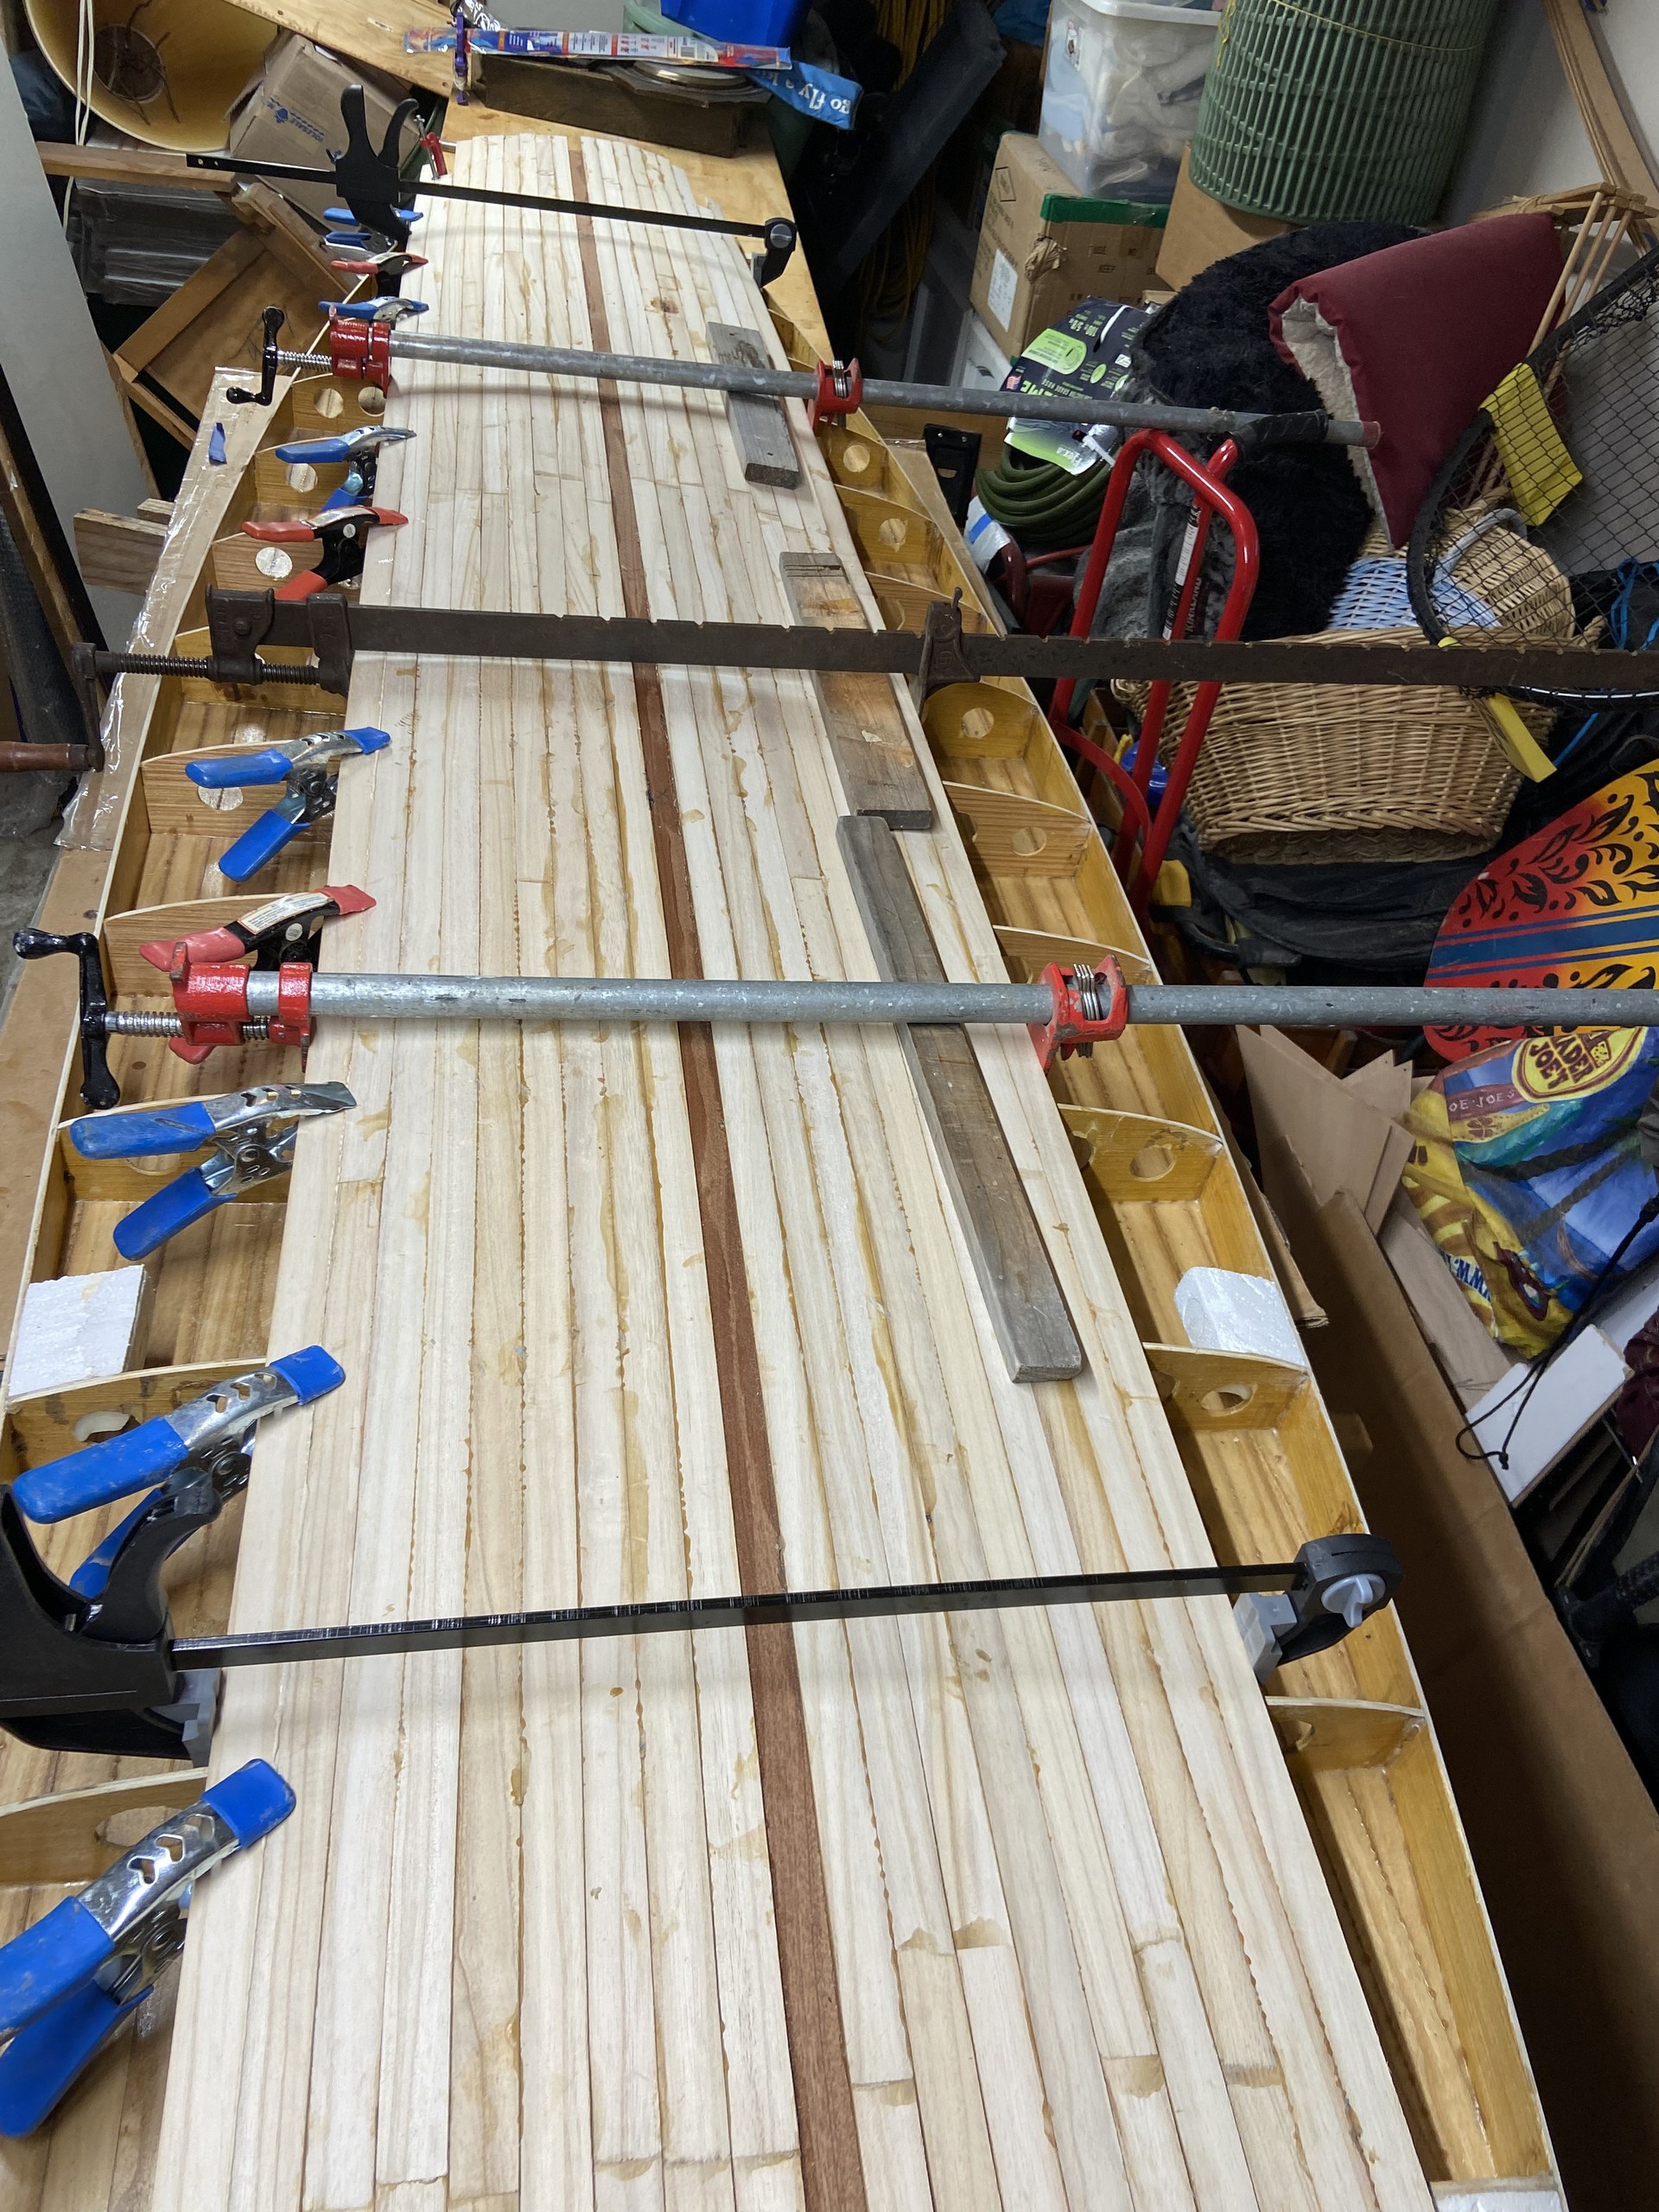
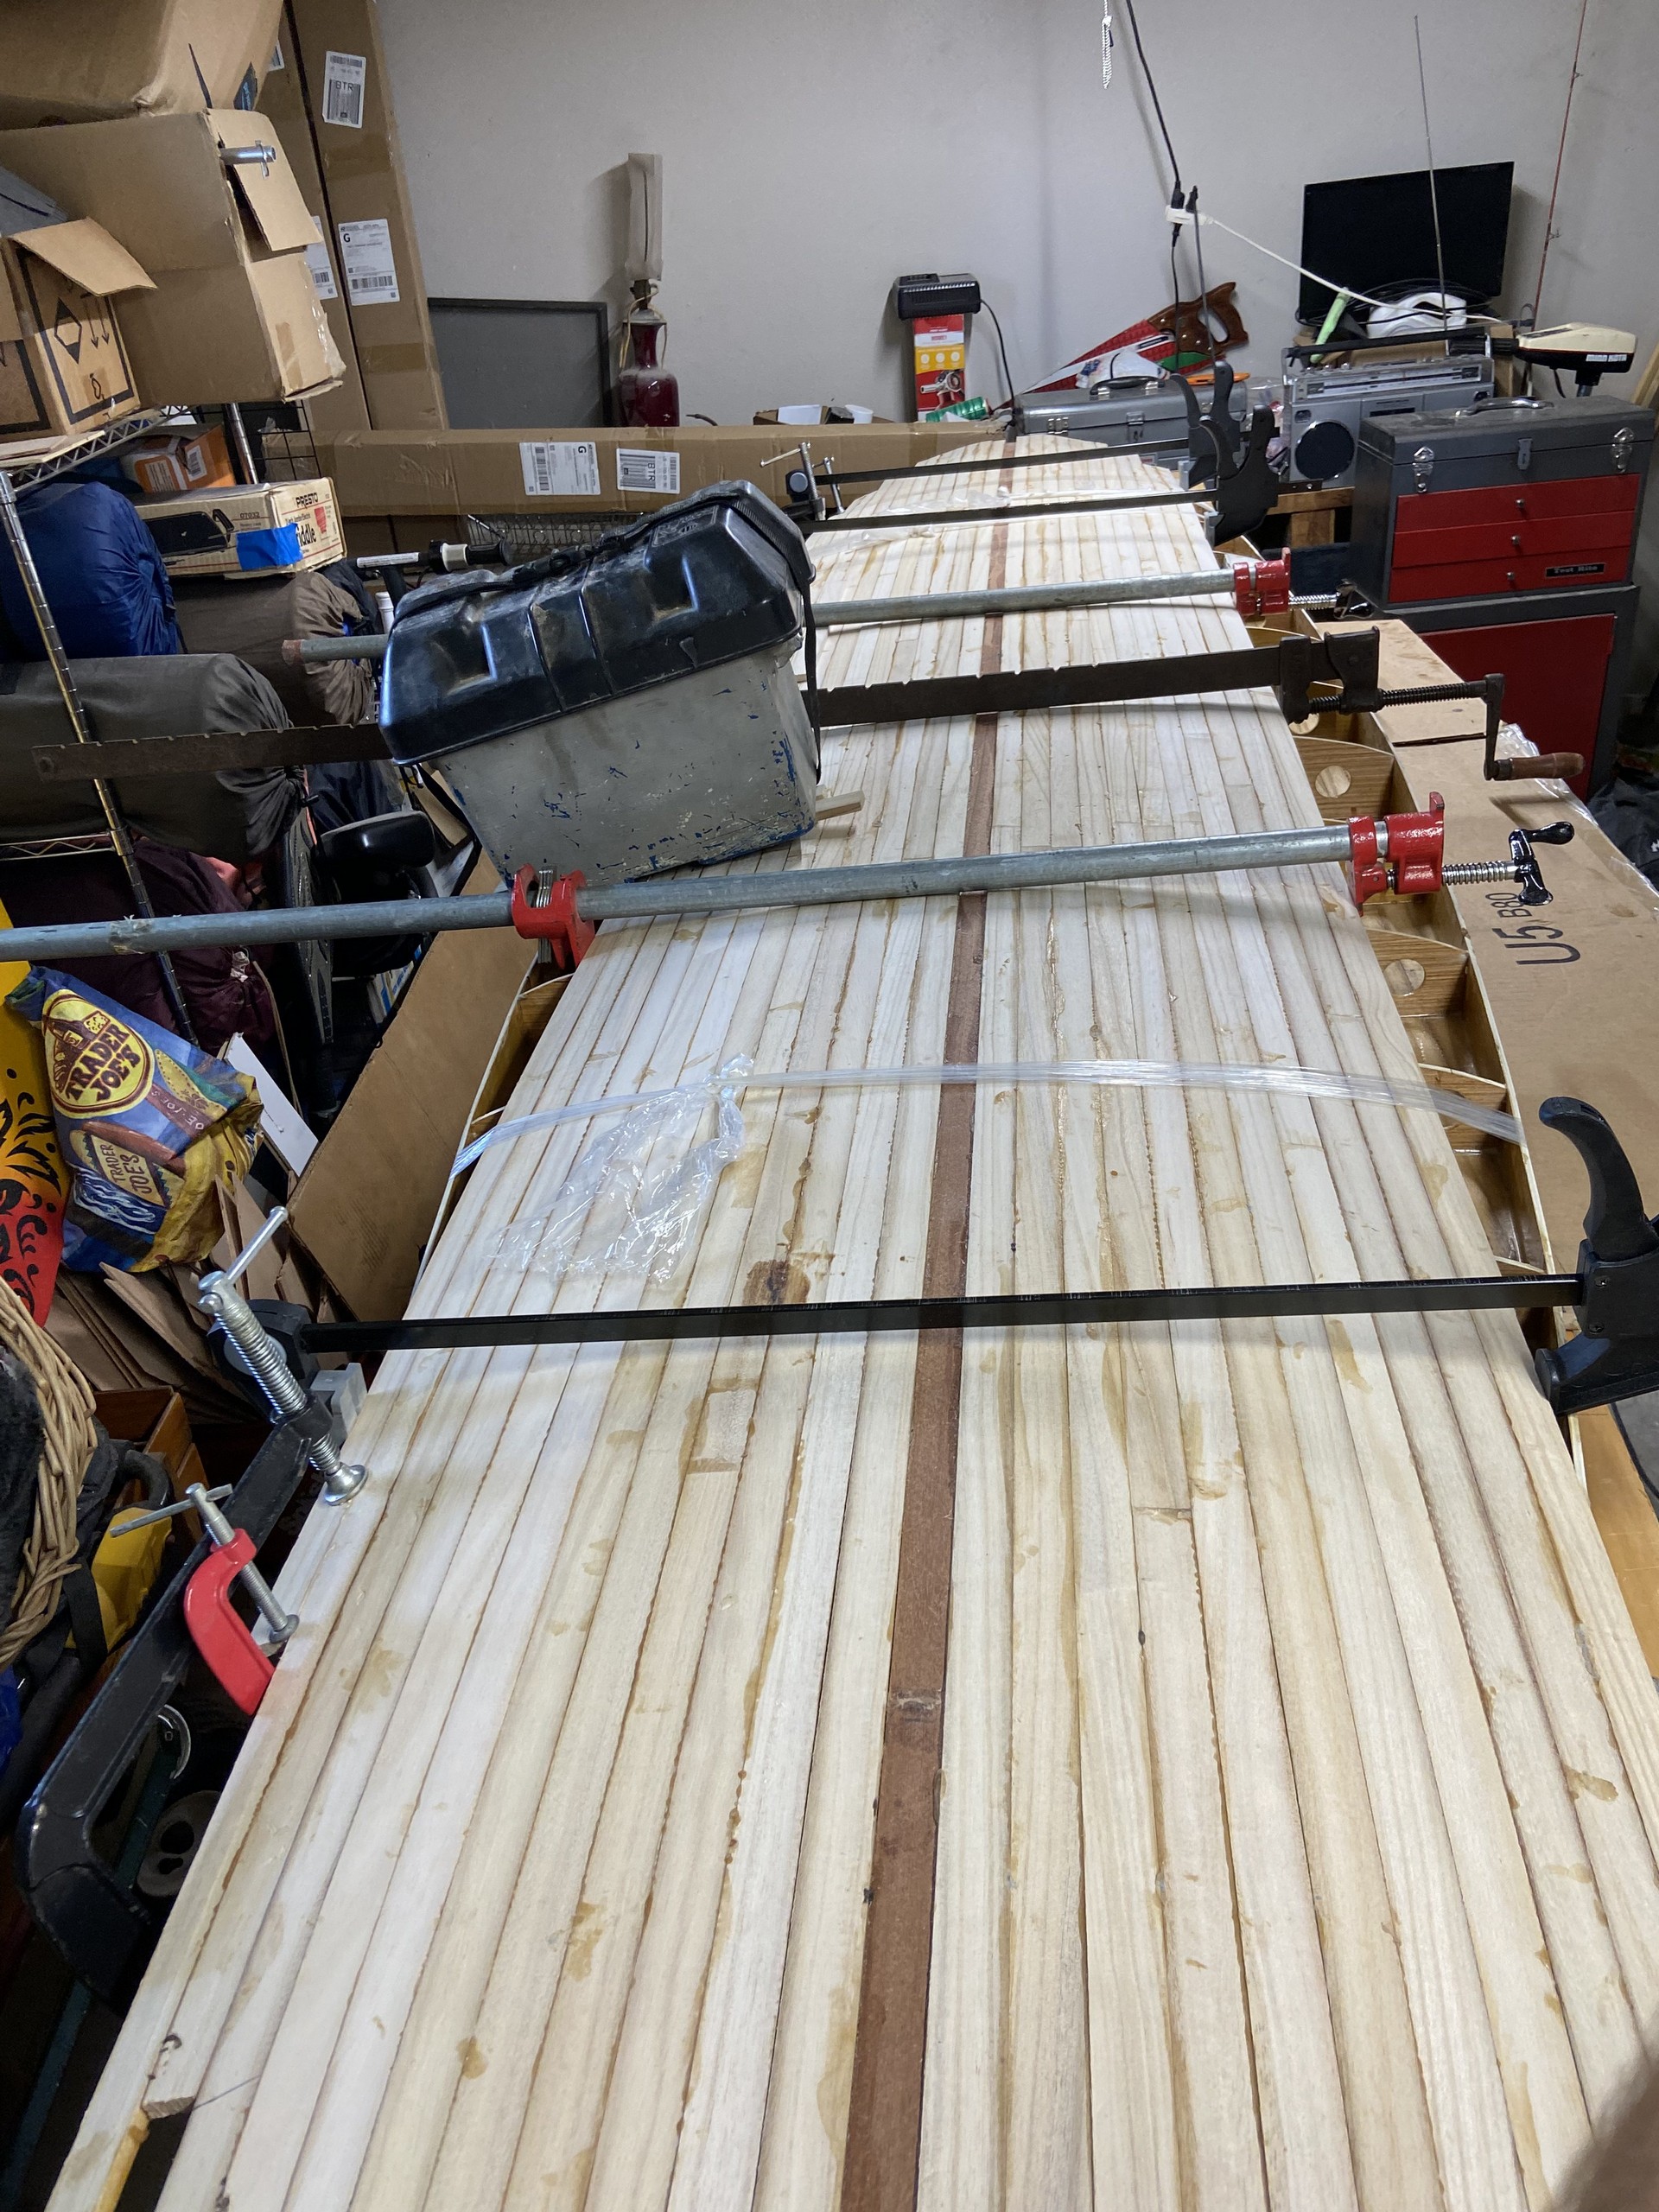
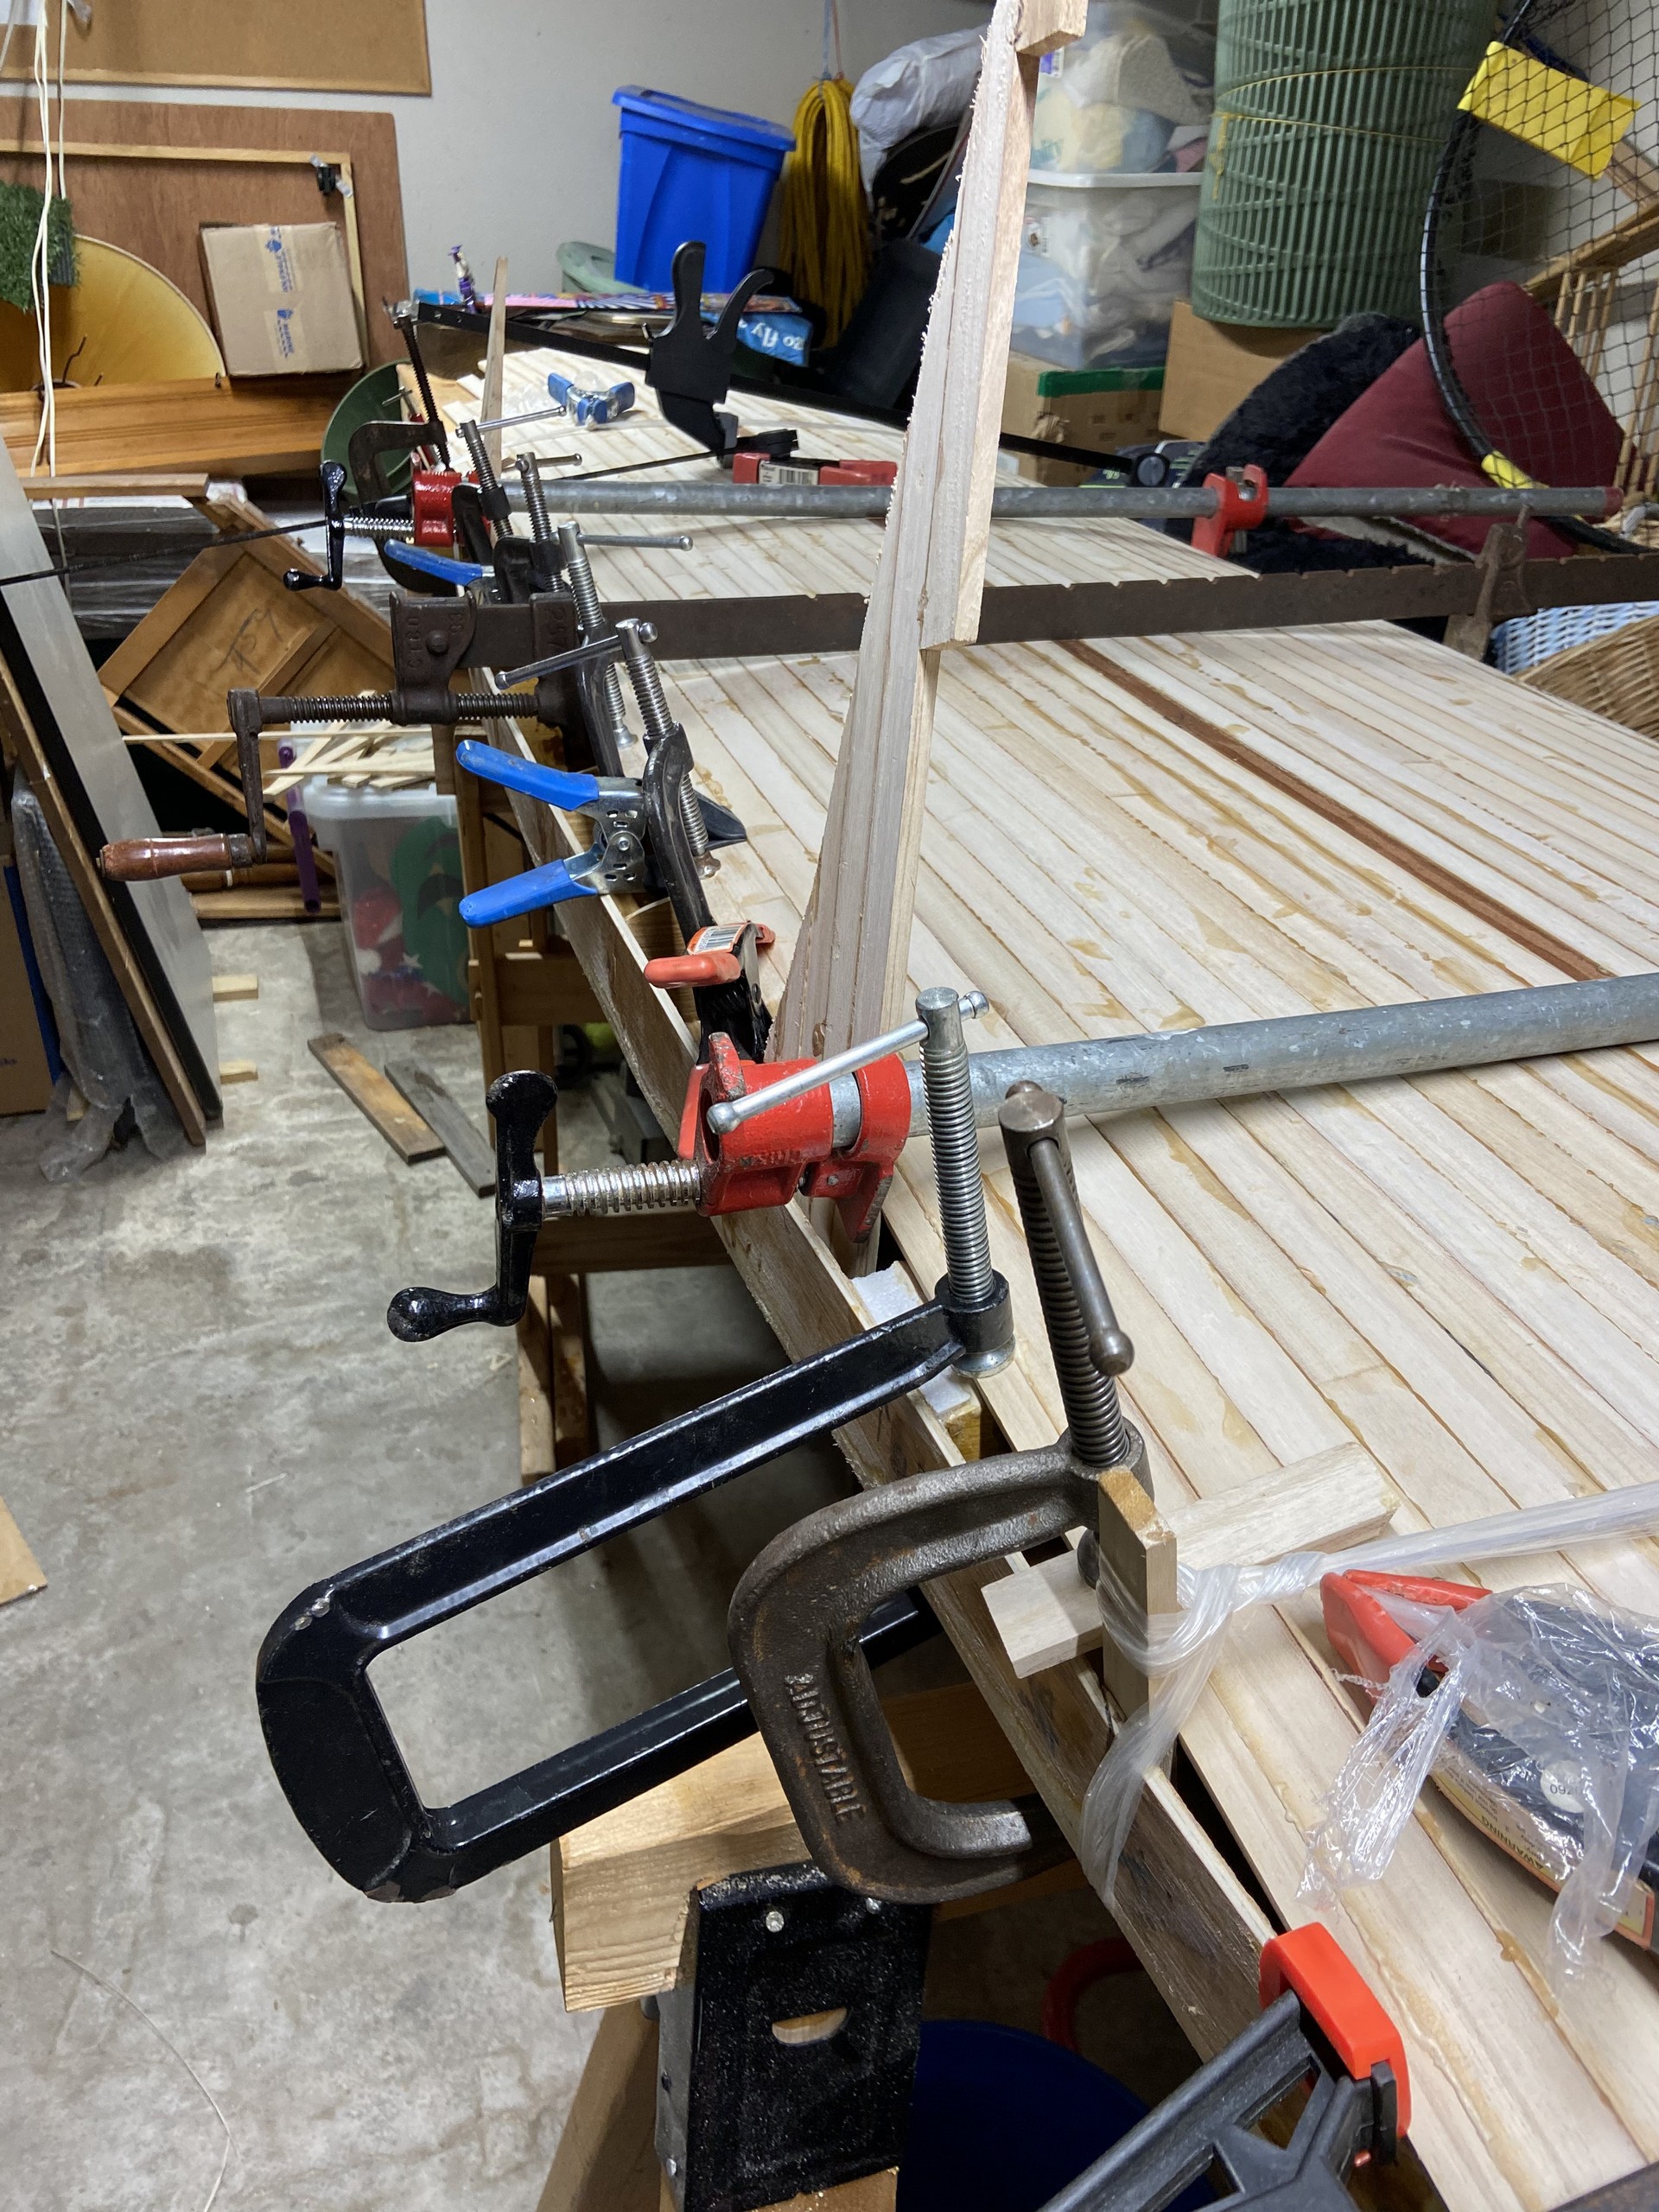
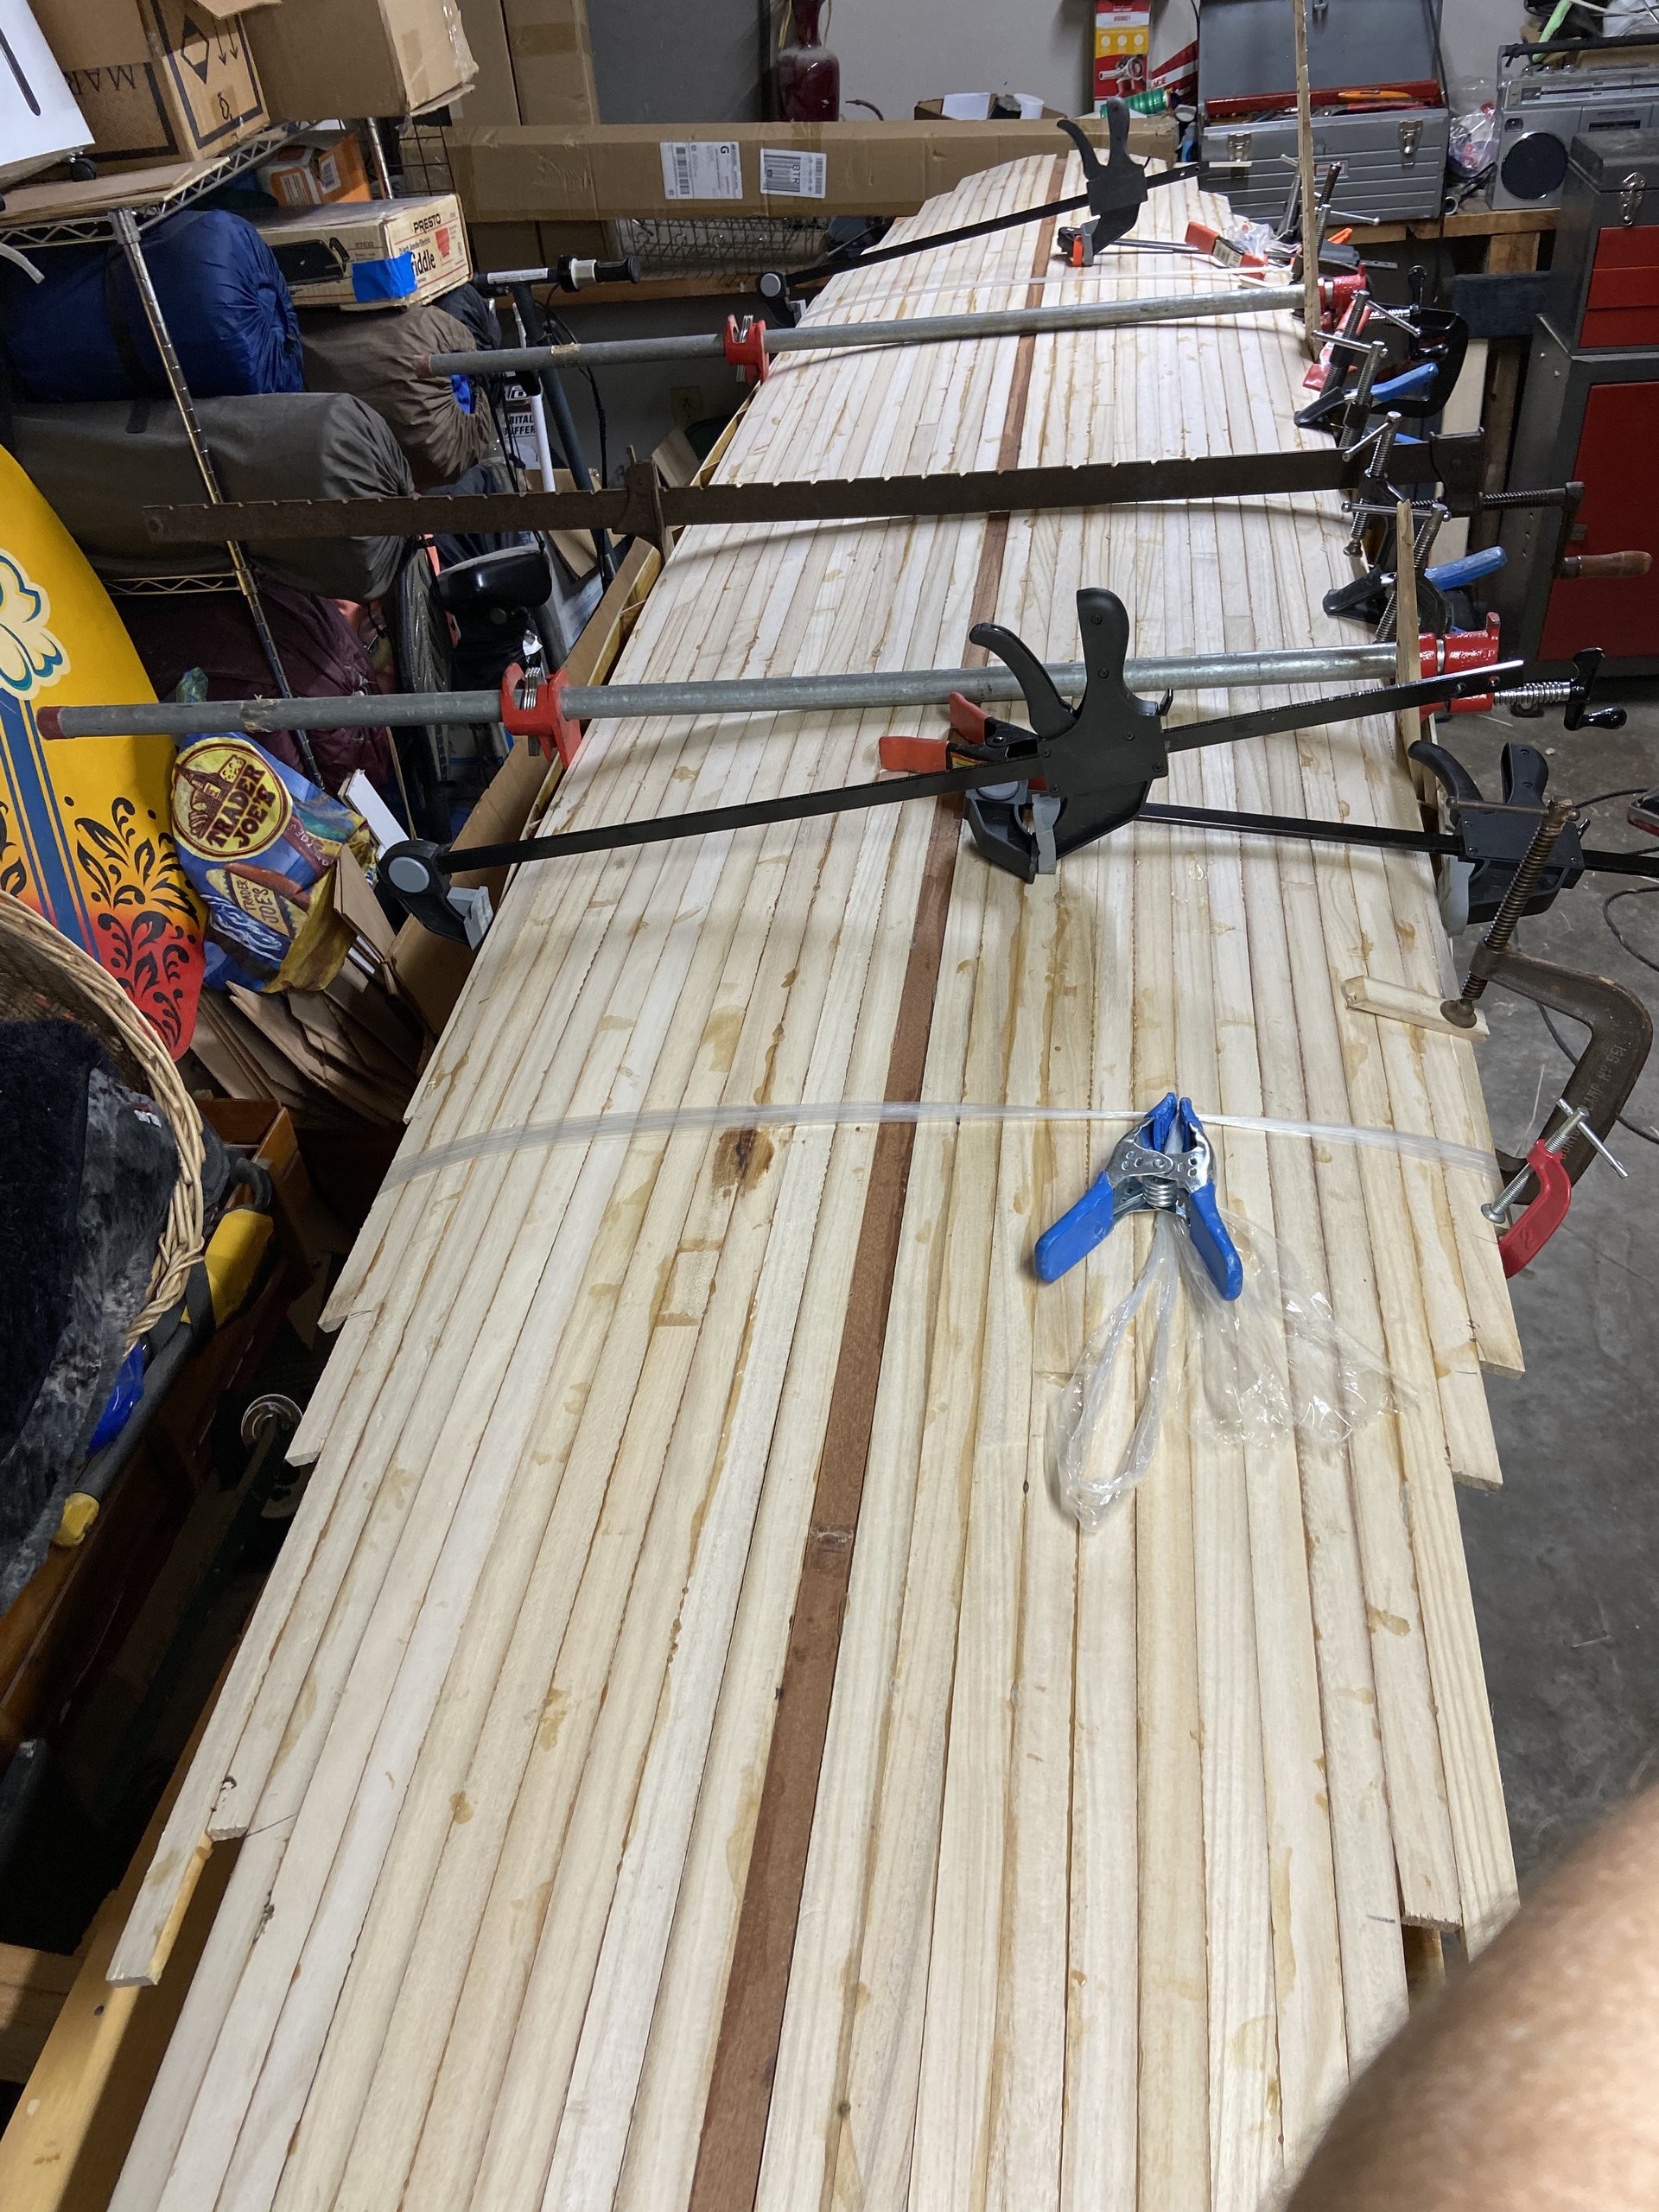
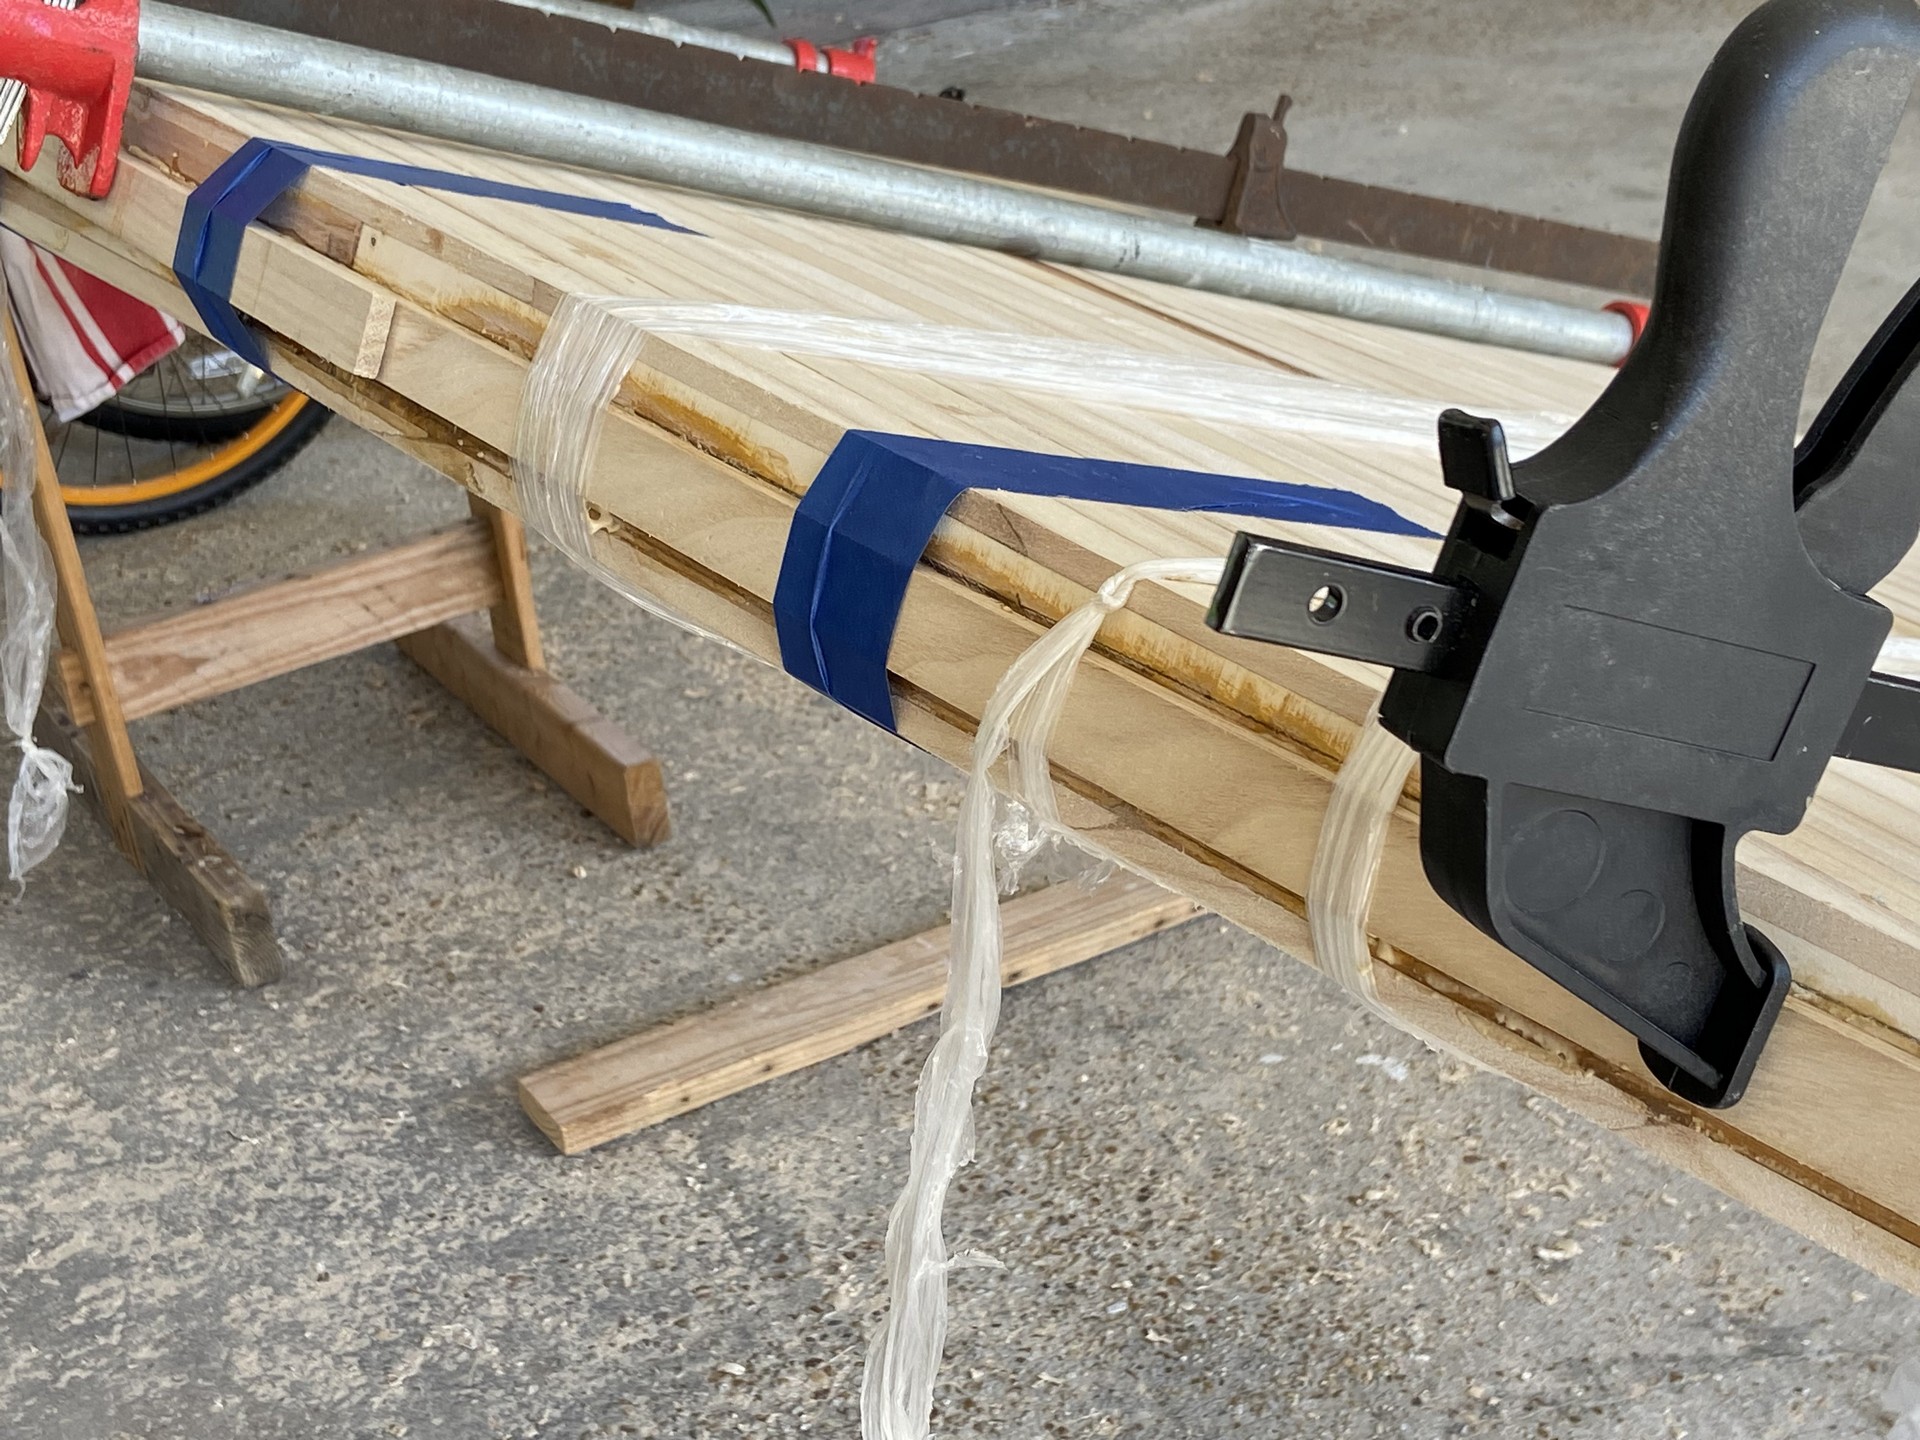
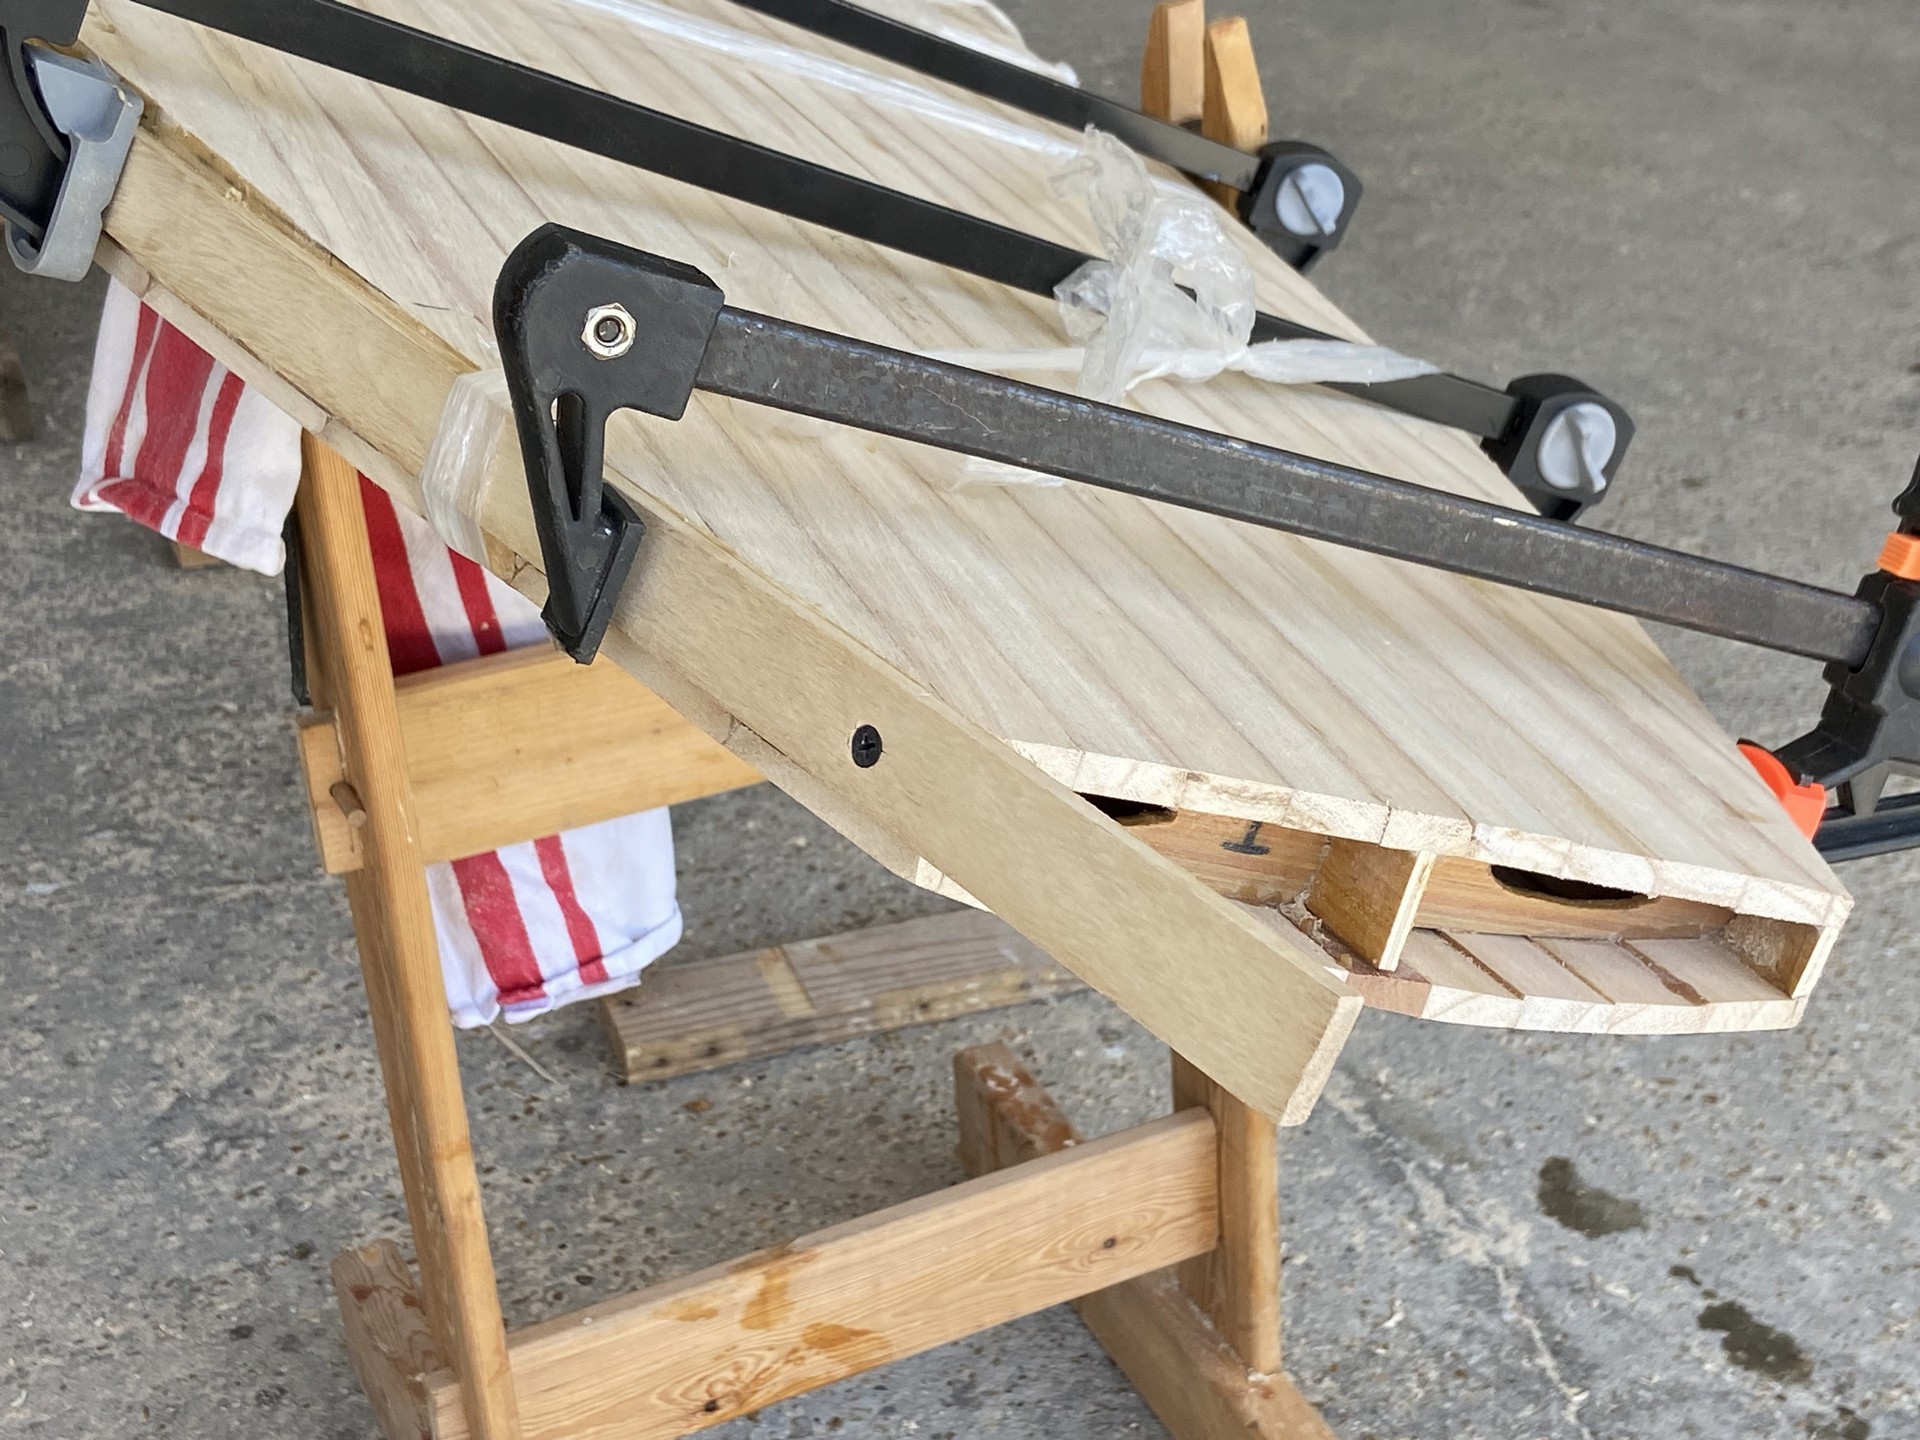
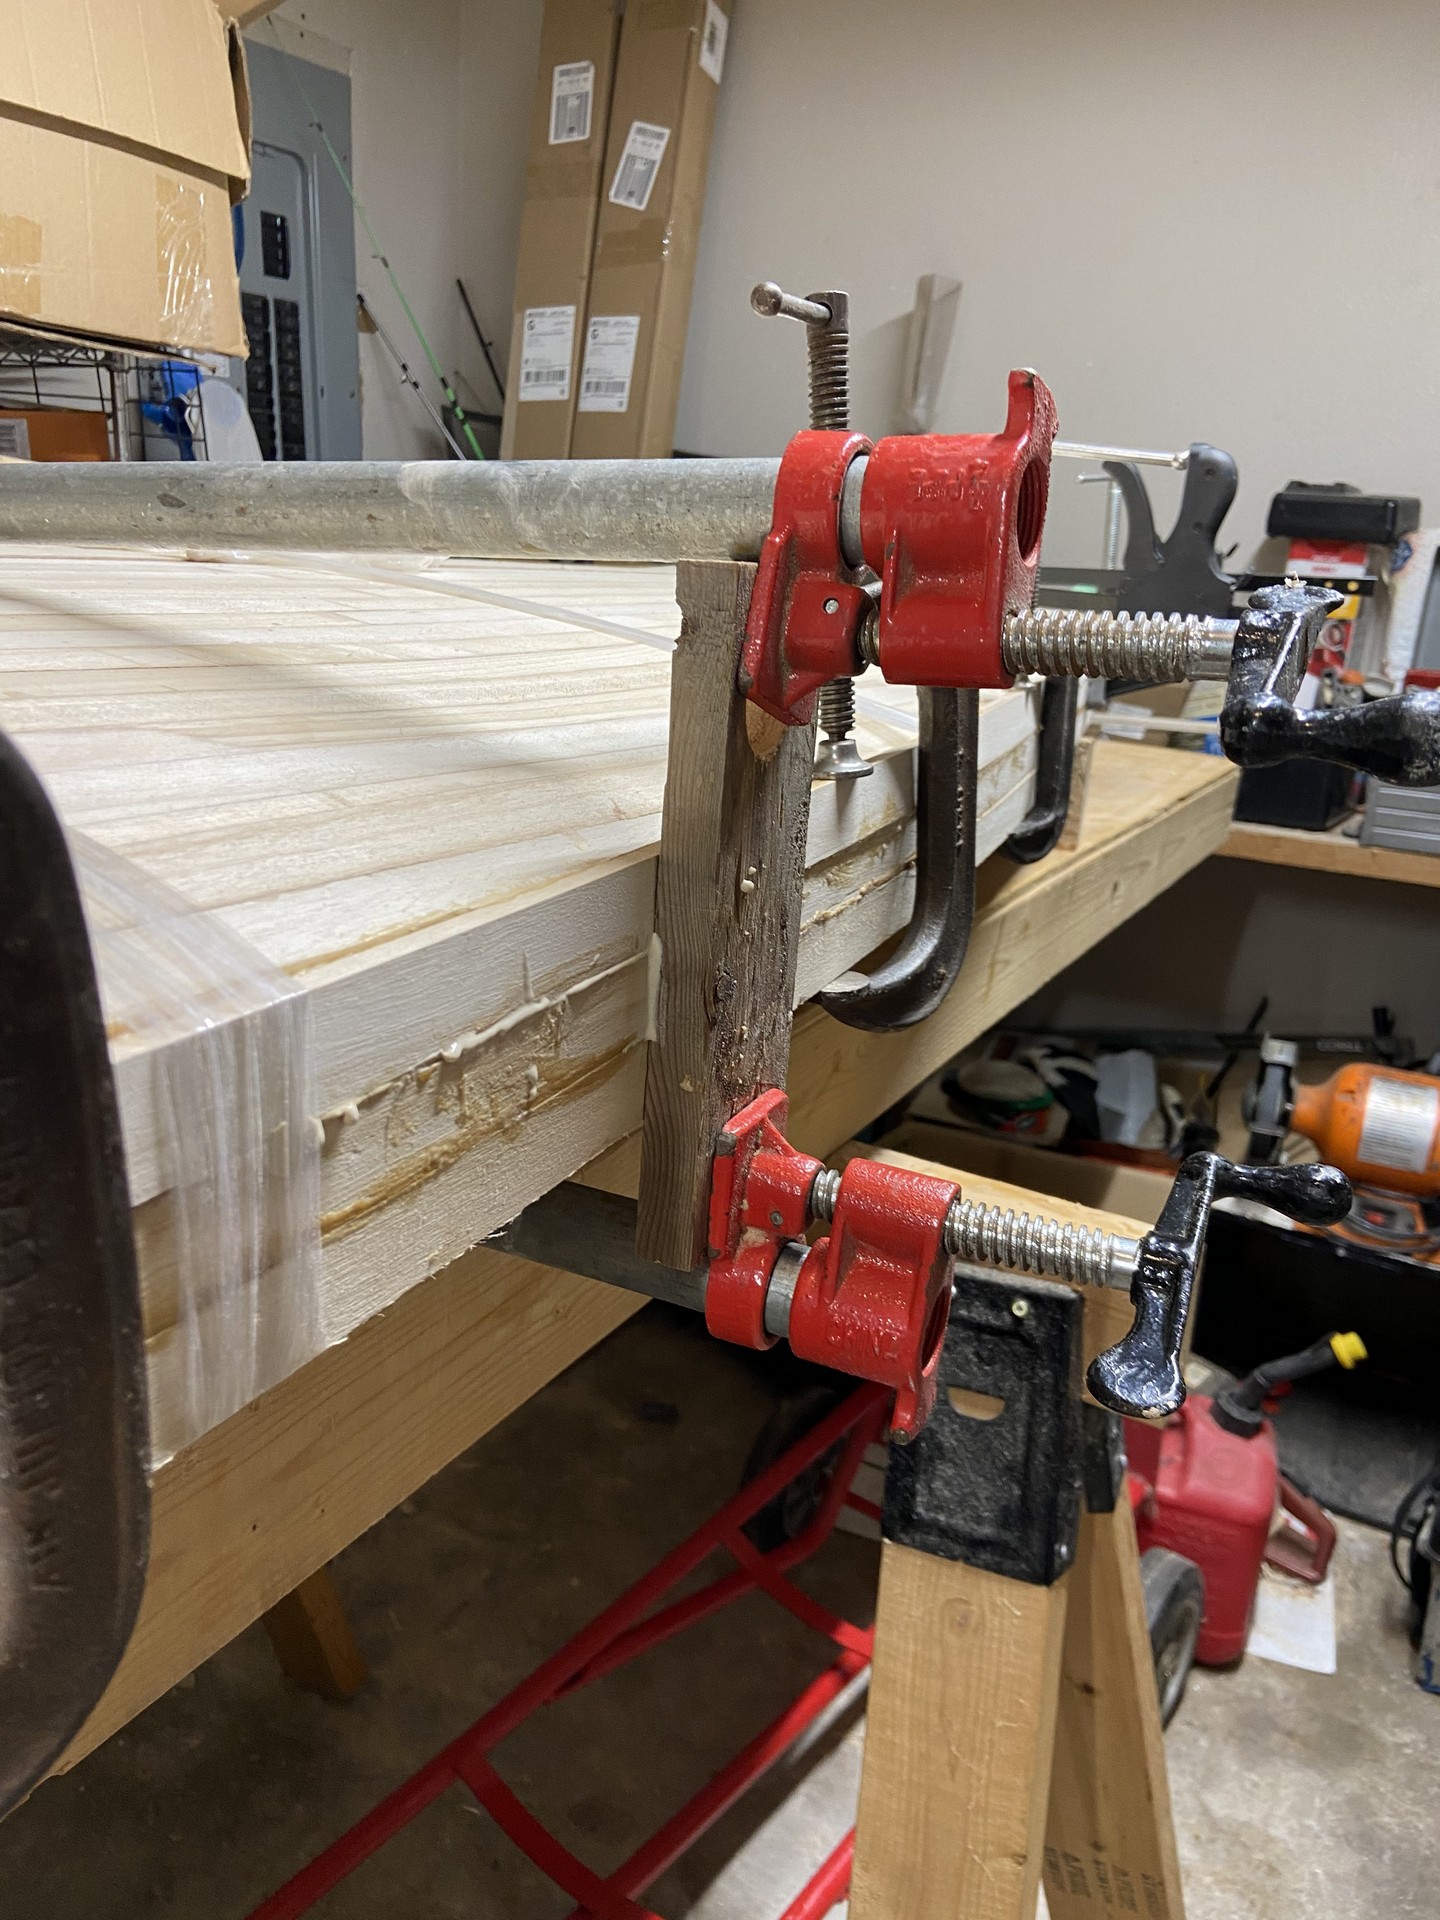
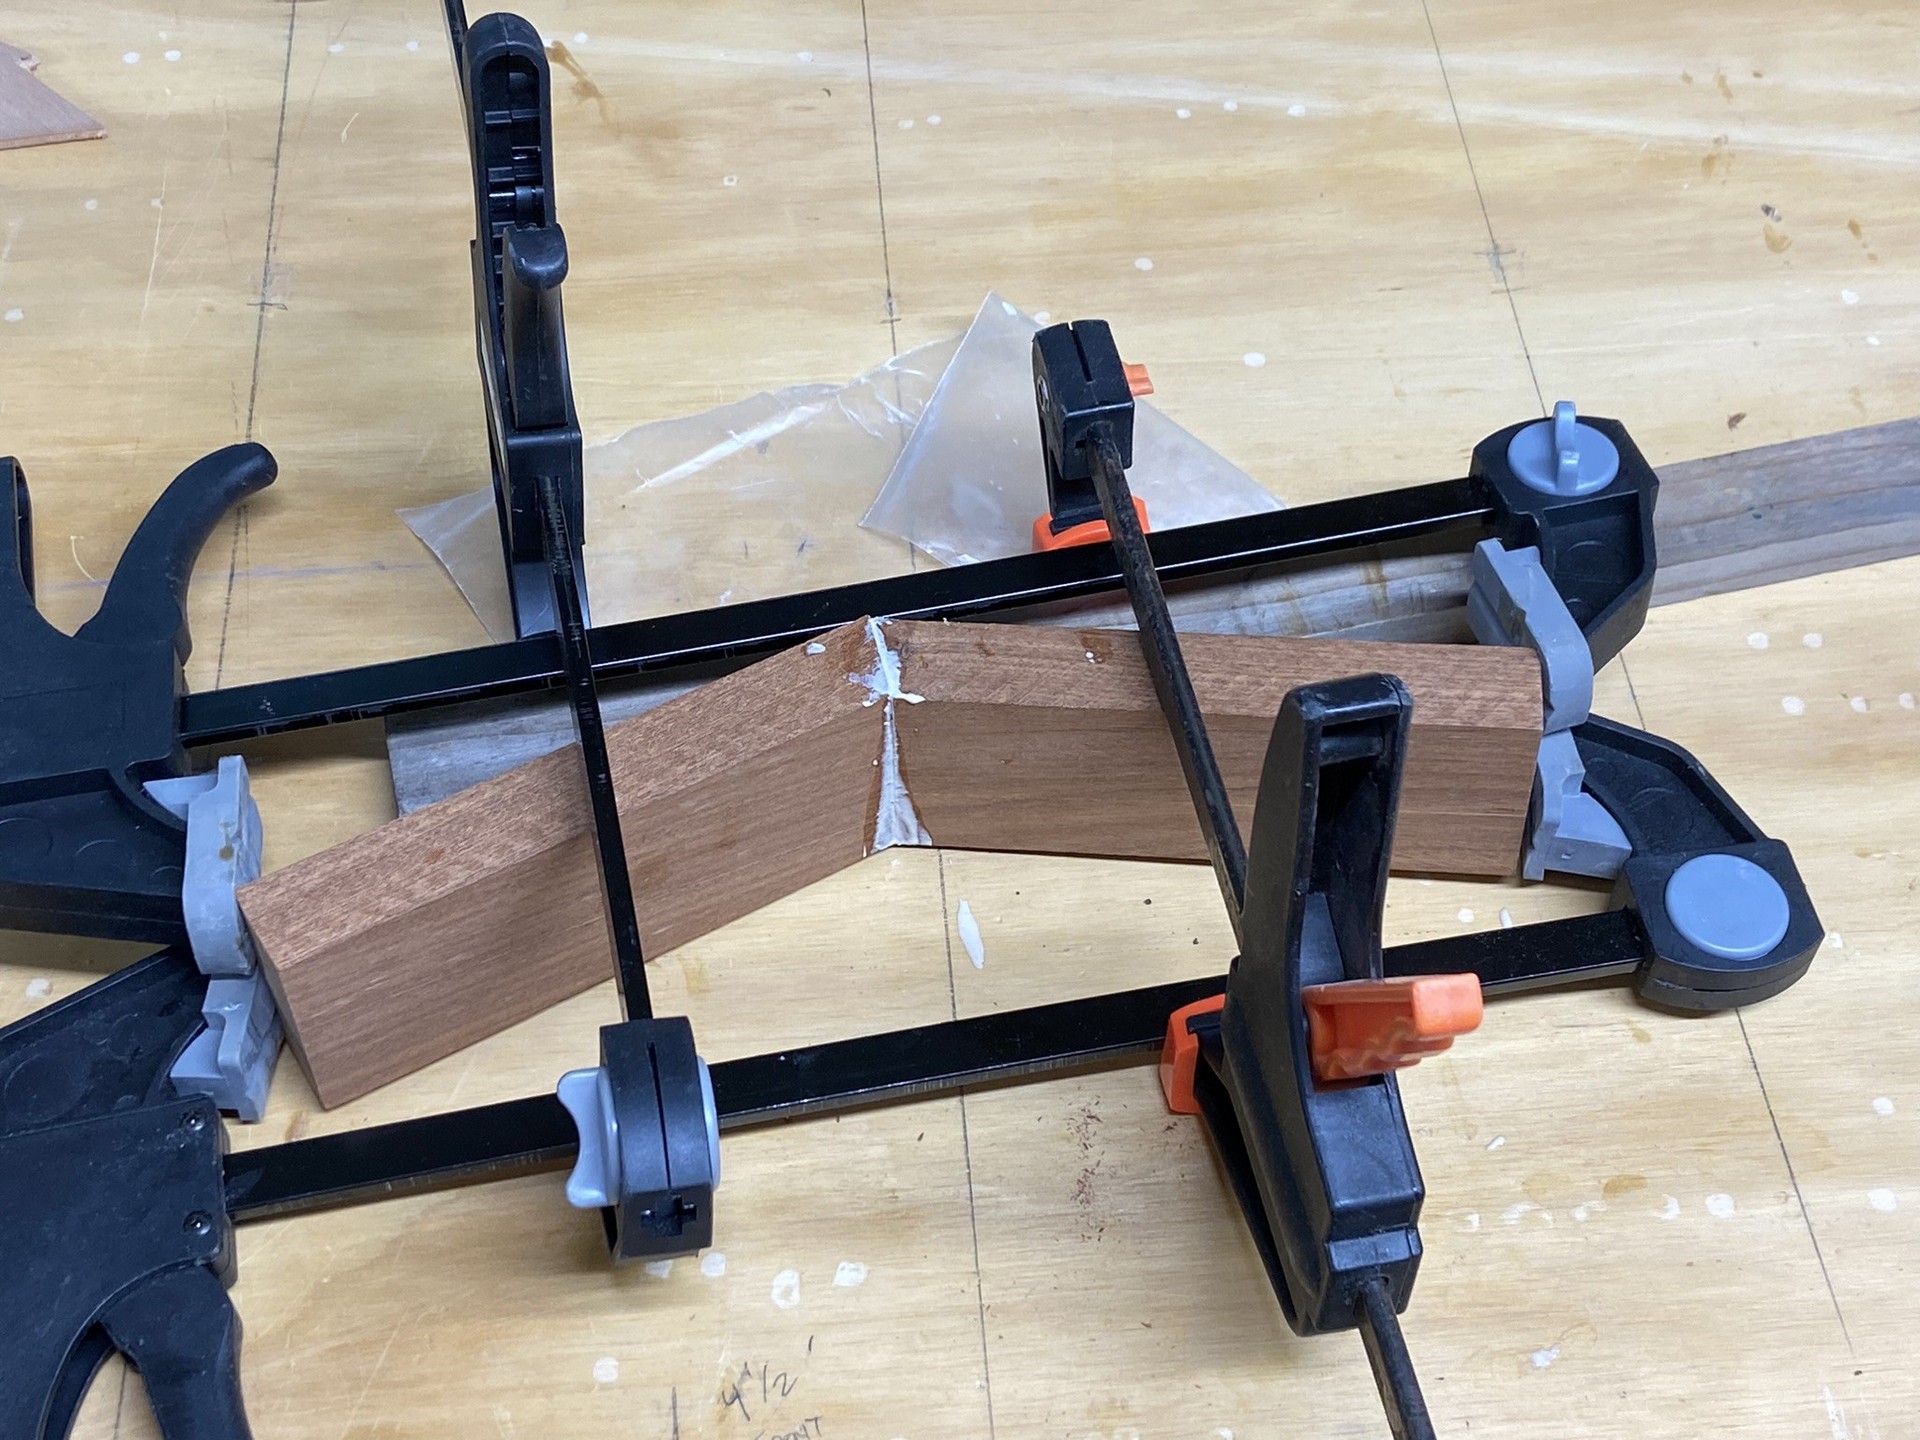
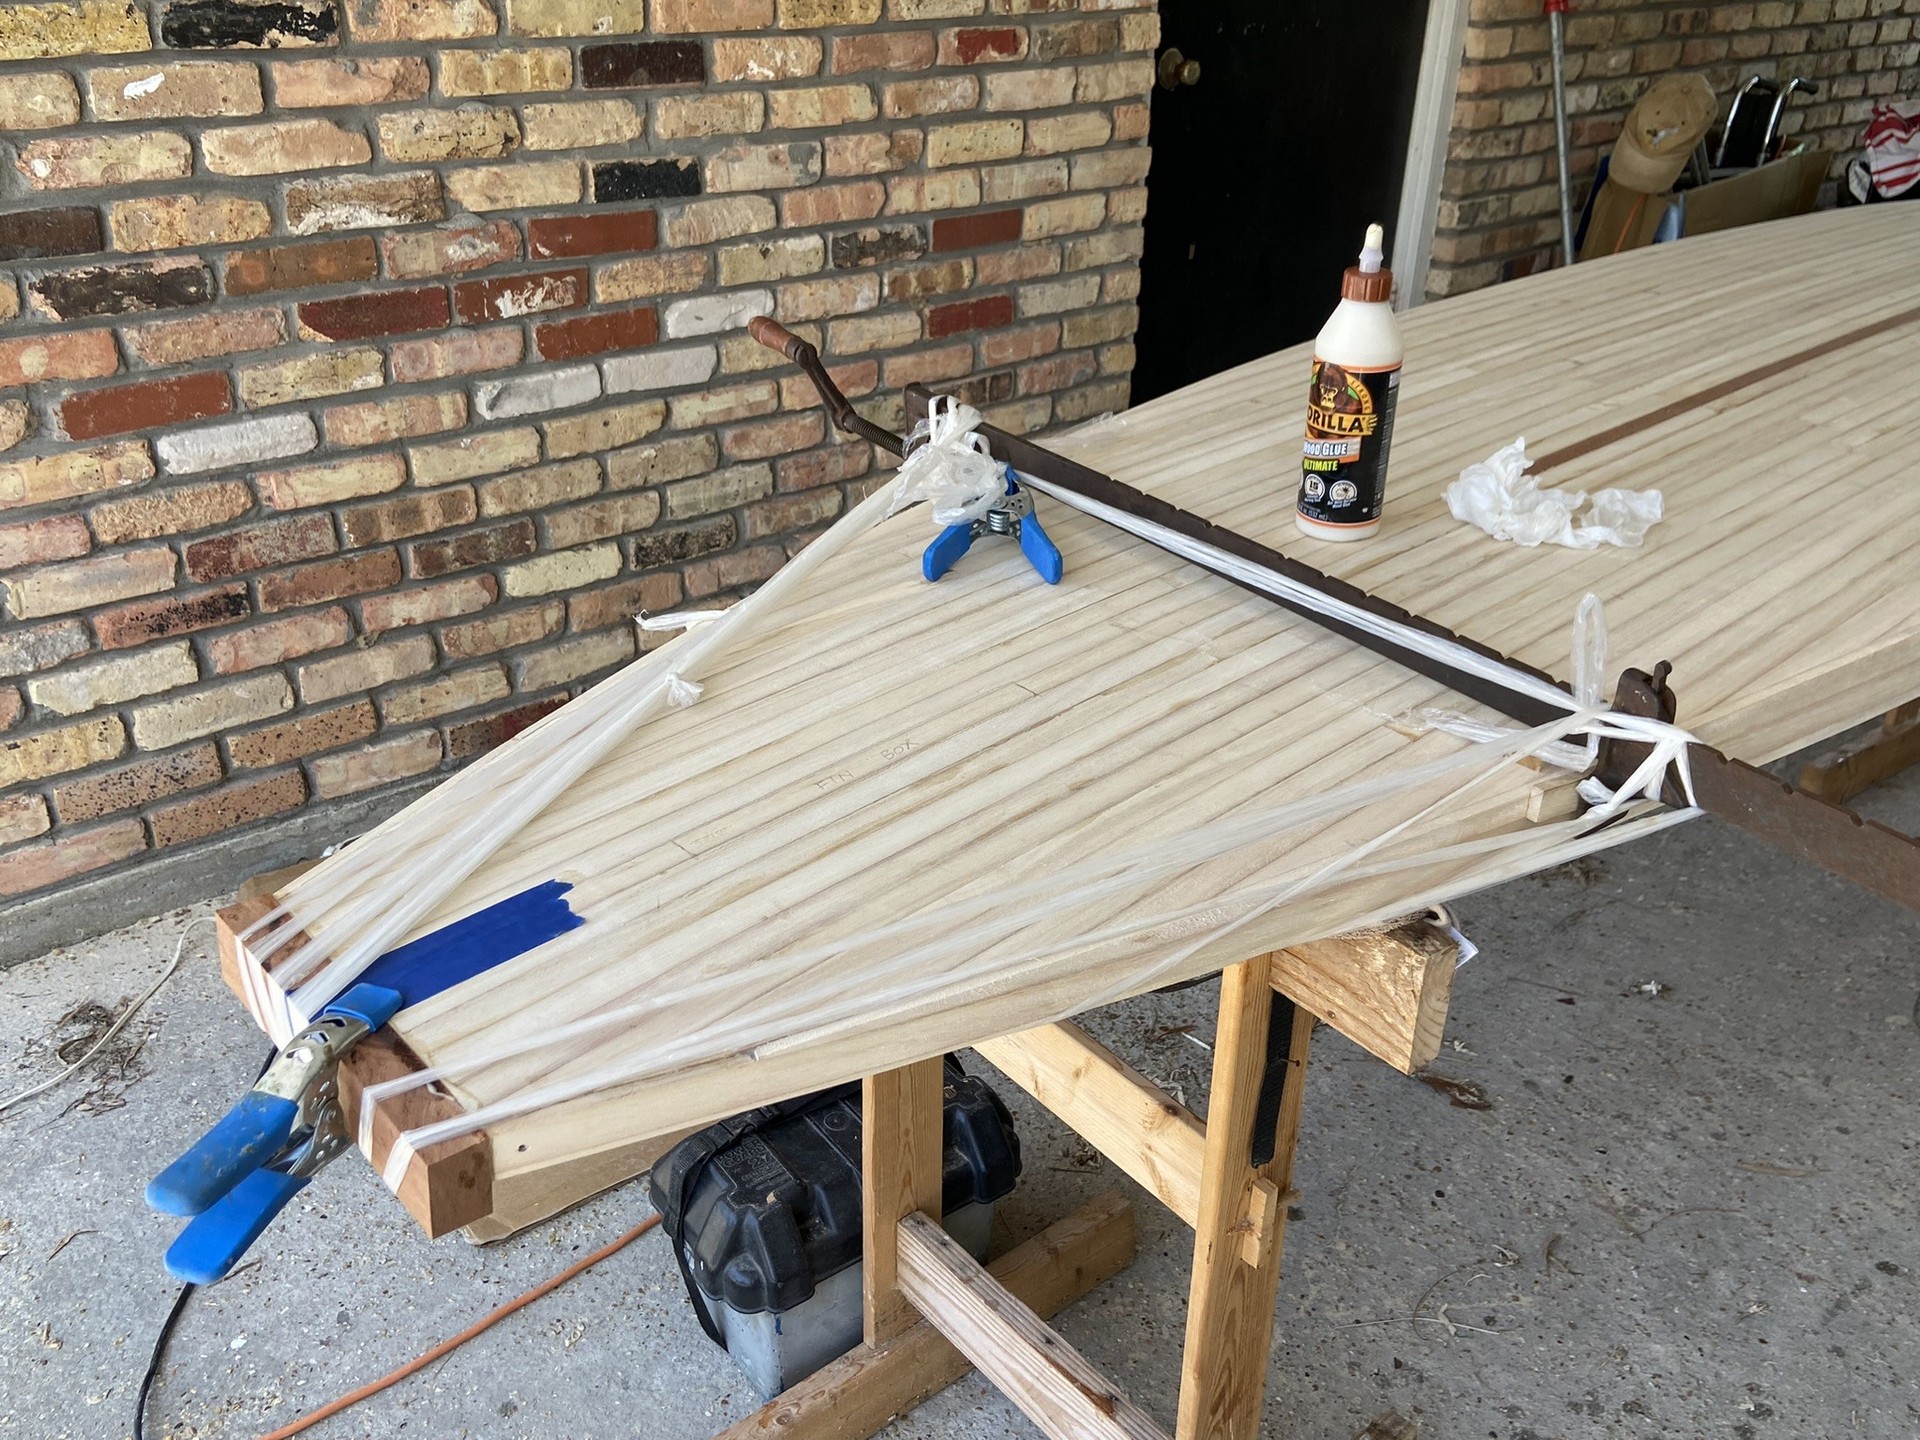
I suspect that assembling precise CNC-cut frame pieces would be easier than working with components hand cut from paper plans. In my case, affixing the side rails to the ribs was a bit slow because additional sanding and carving with a utility knife was required to get things to fit. Eventually they did fit and I got the rails and the very first stip (center, bottom) glued on using Gorilla ™ Ultimate wood glue. Various clamps and twisted plastic wrap were used to hold things in place overnight.

Weekends #8 - #10
thru April 7, 2024
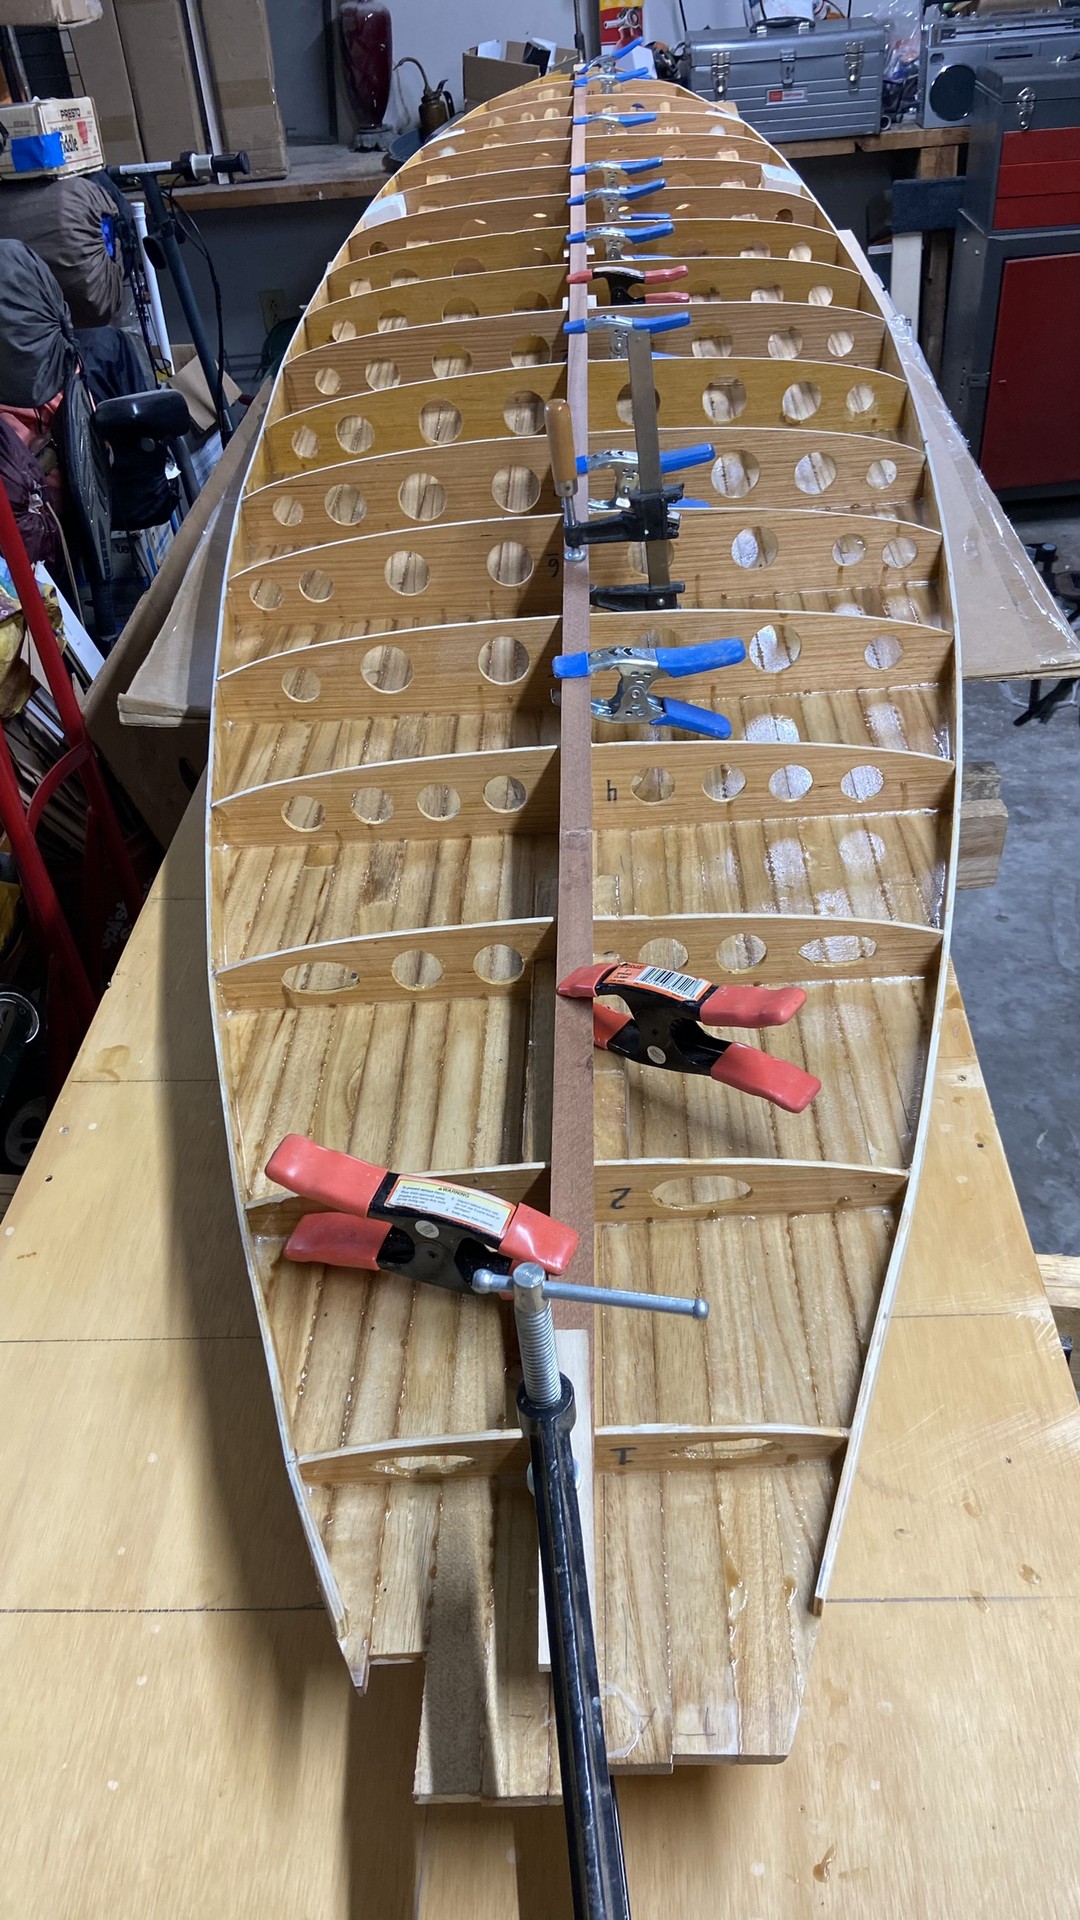
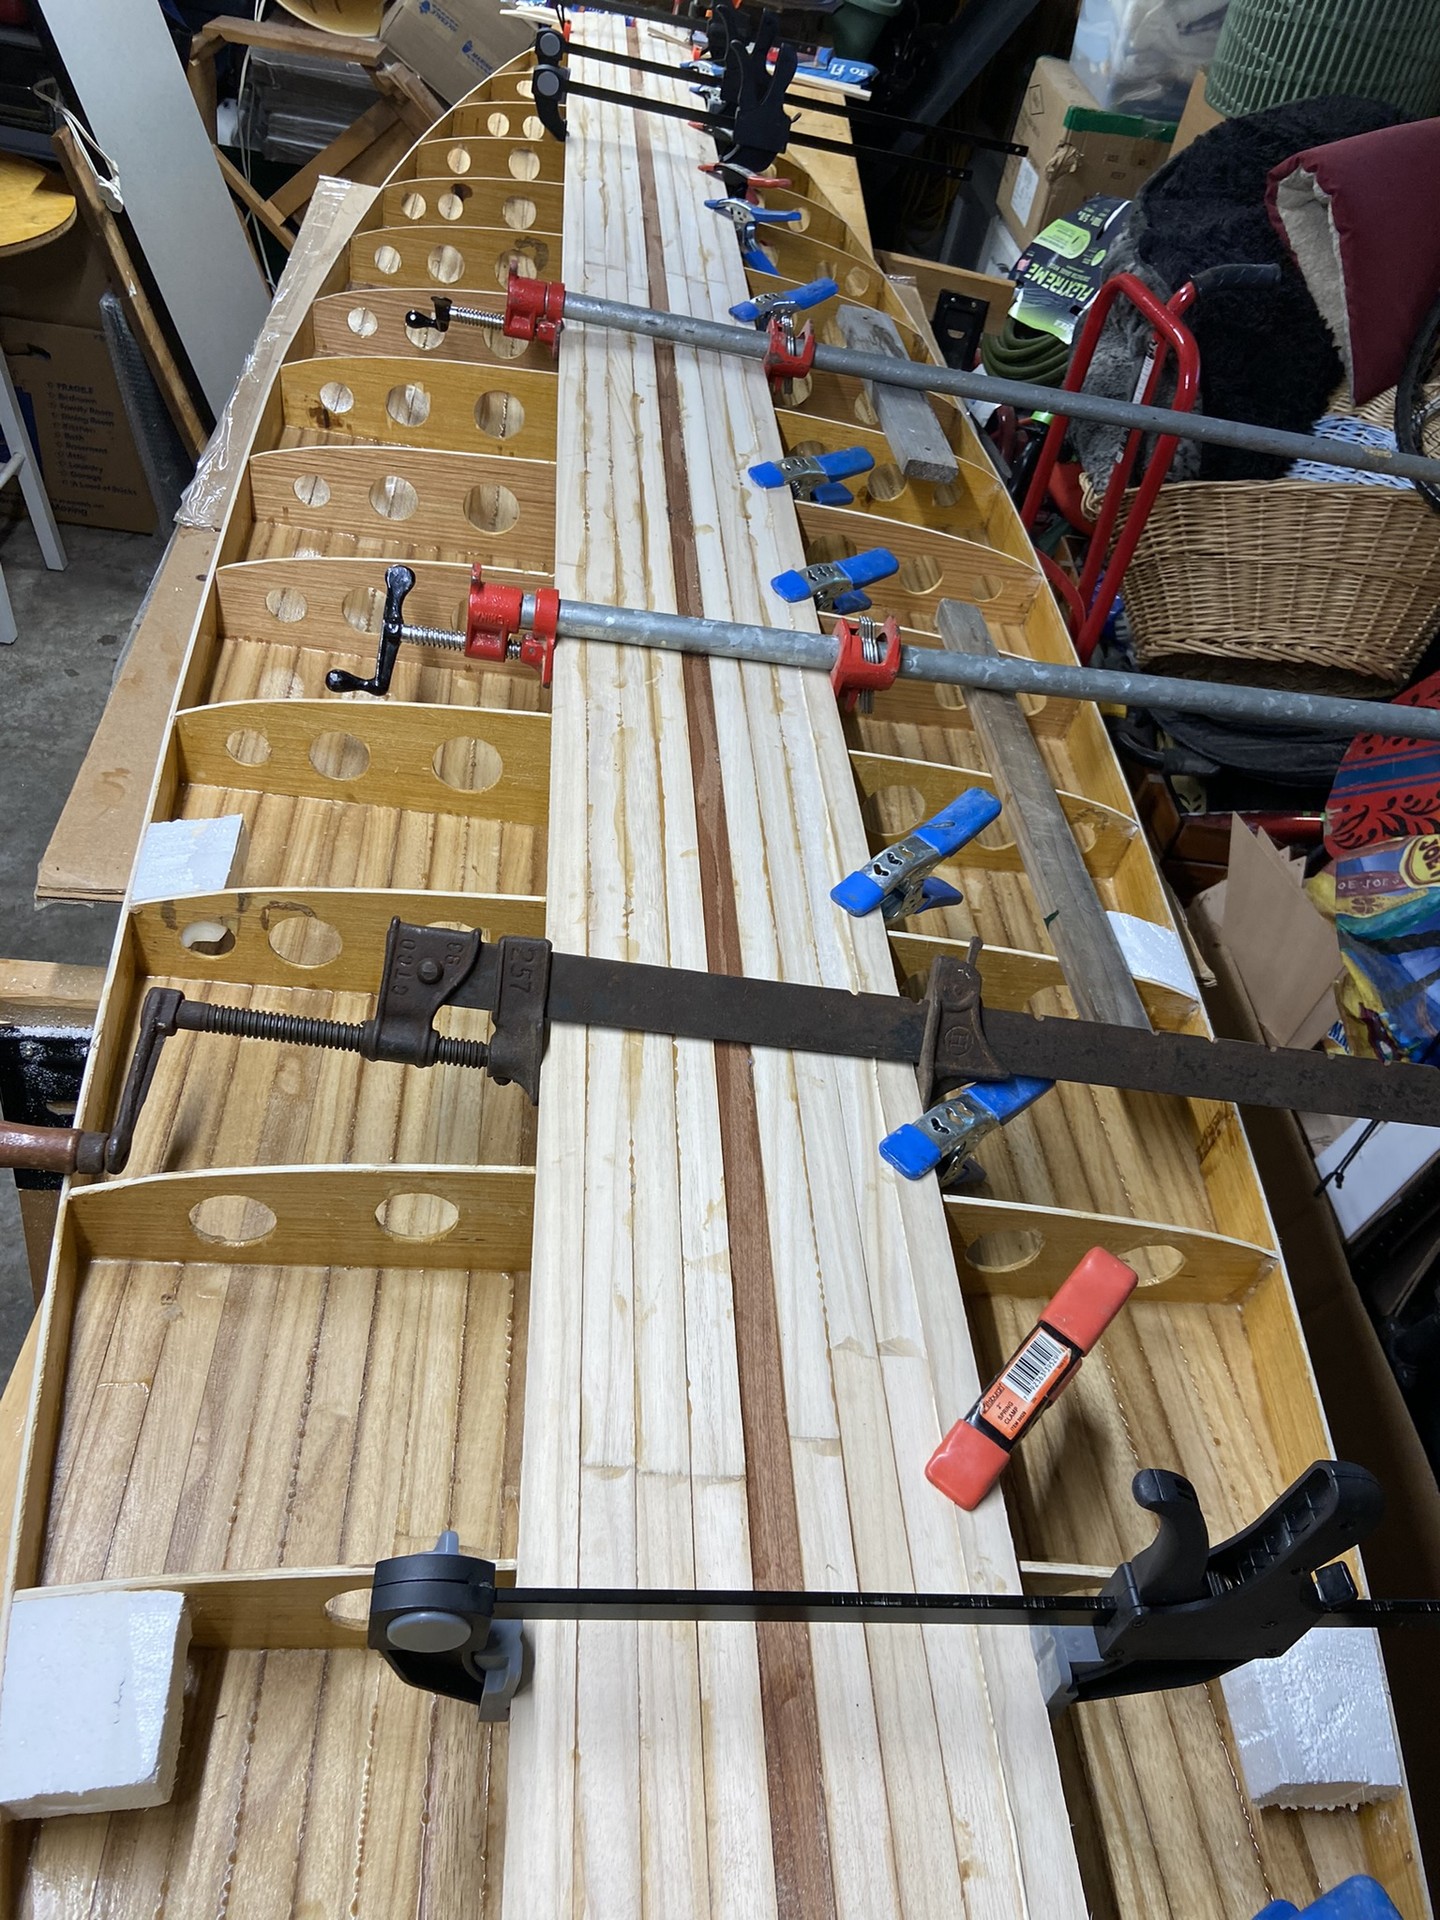
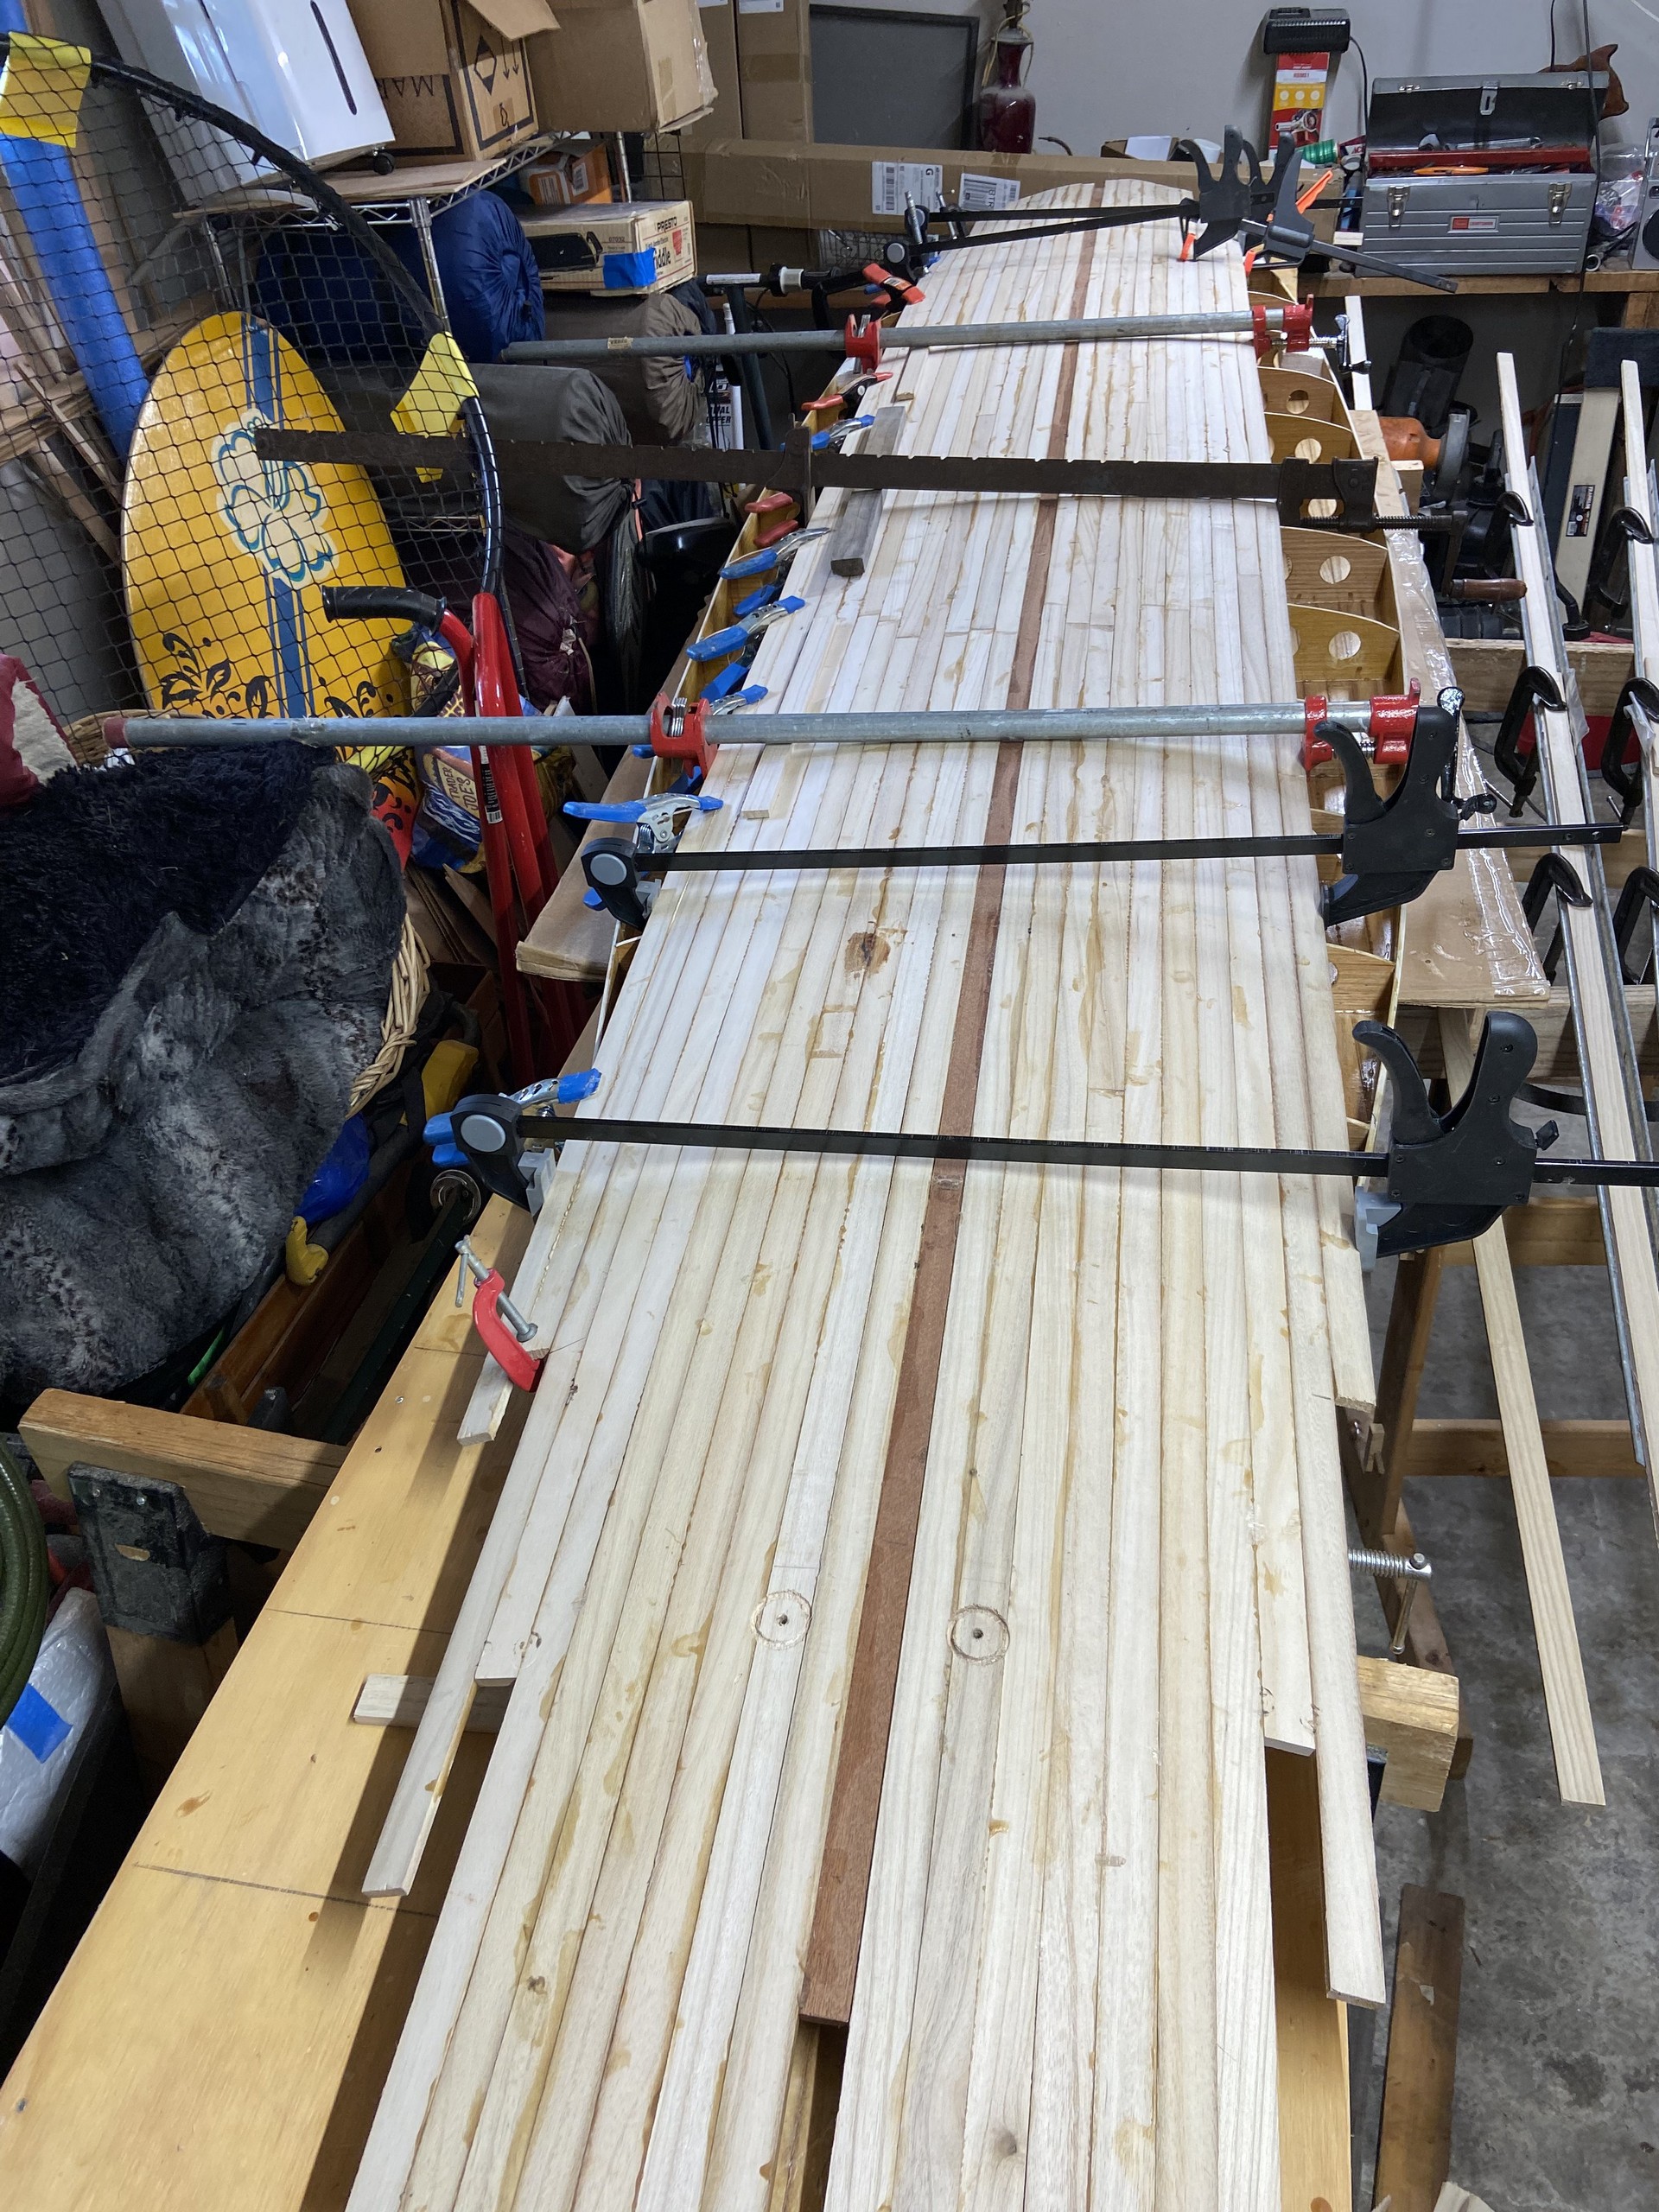
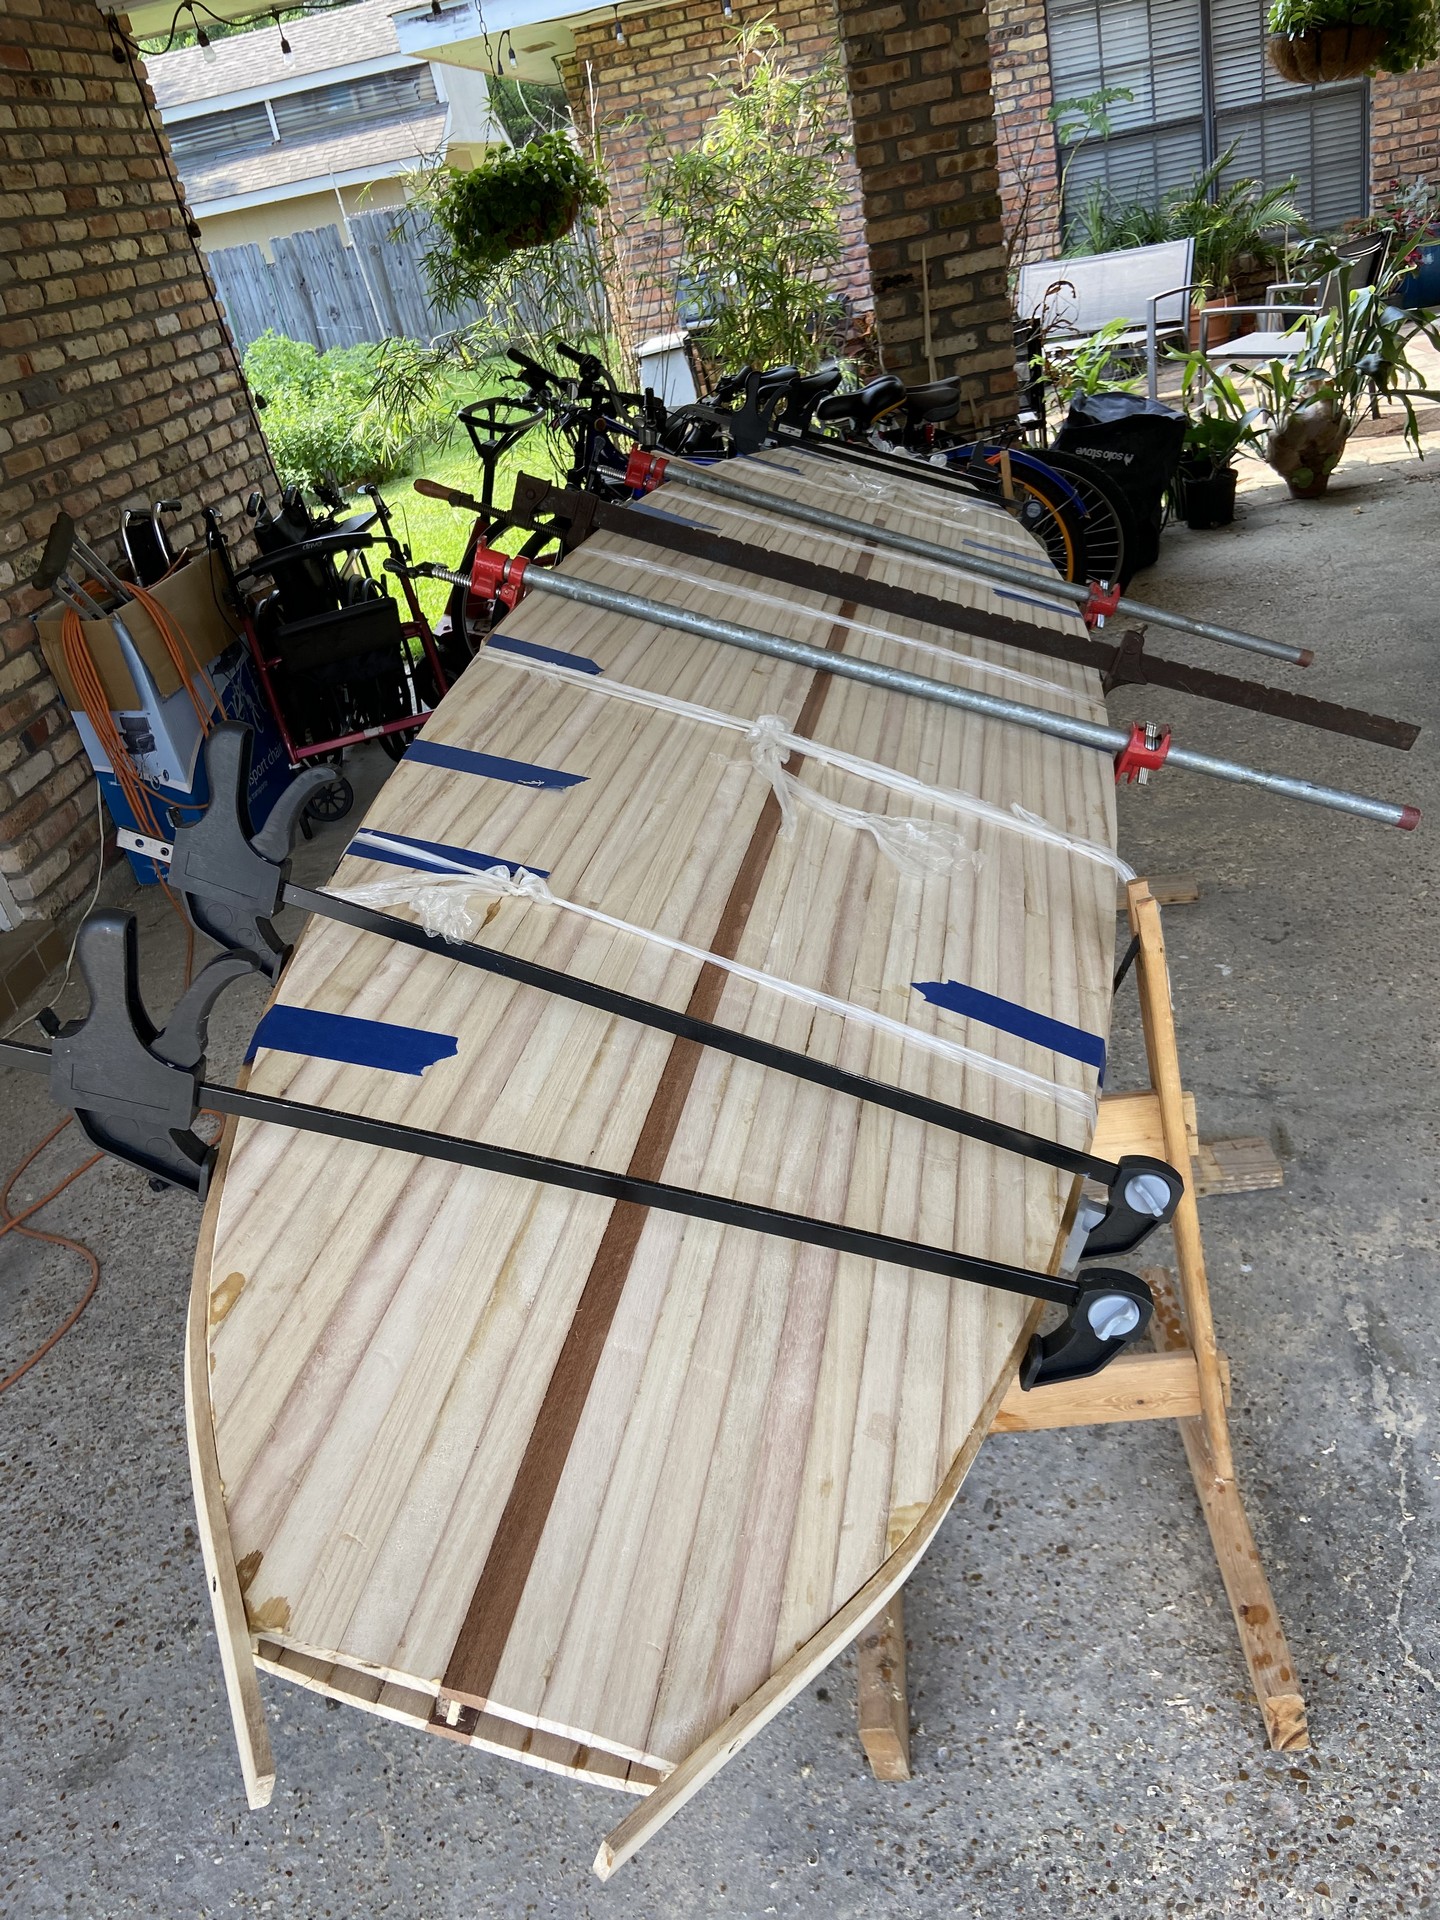
Following a break from working on the project during the Easter weekend, I’ve resumed splicing together 5’ strips to make long 12-foot strips (two and one half pieces each) and gluing the long strips to the bottom of the paddleboard frame. For me this is a slow process as I’m only able to glue on two strips per day - one in the morning and a second in the evening. Of course on some days life or work prevents me from keeping up this twice daily schedule. At the end of this weekend (April 6 & 7) I will have glued 19 strips, leaving I predict 6 more pairs of strips to complete the bottom. I anticipate gluing the last strip to the bottom next Sunday evening.
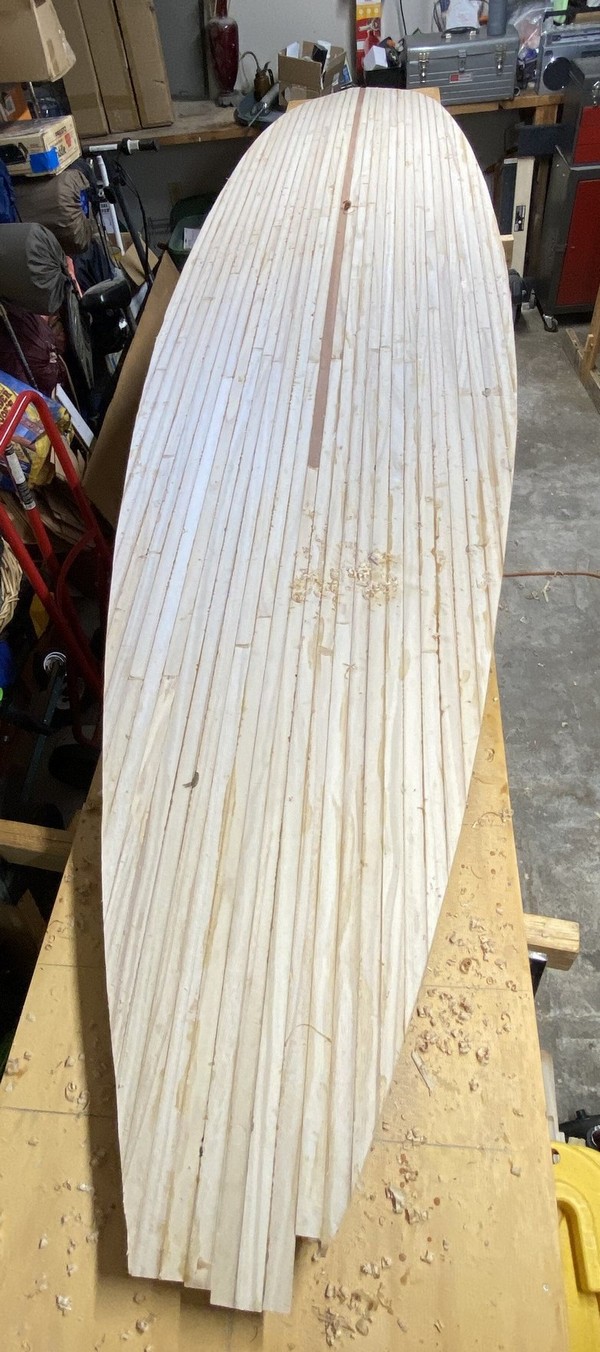
Weekend #11
April 13 - 16, 2024
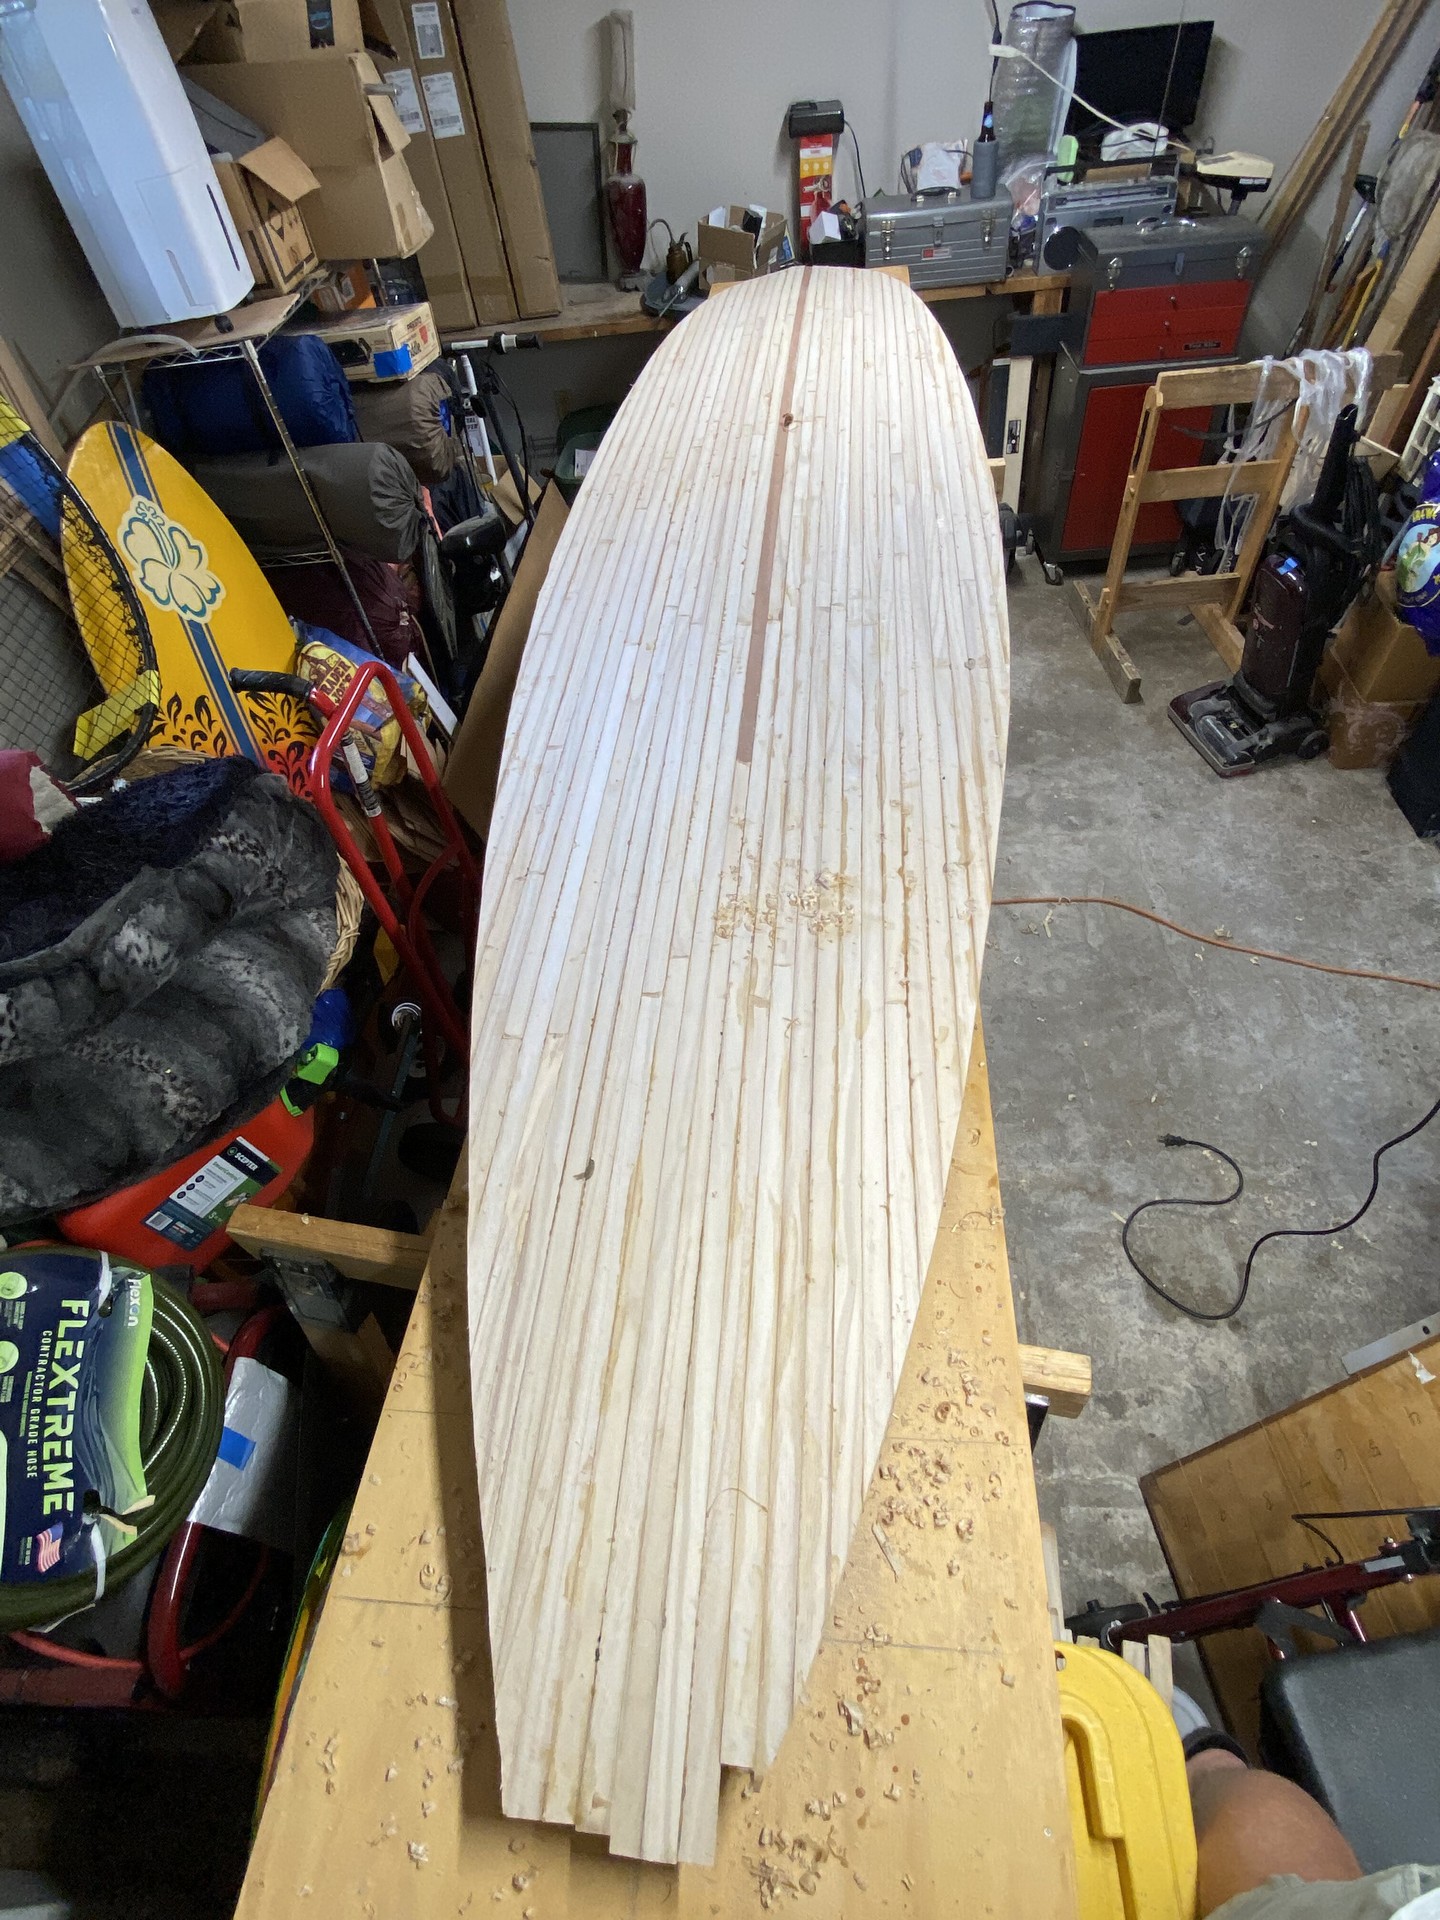
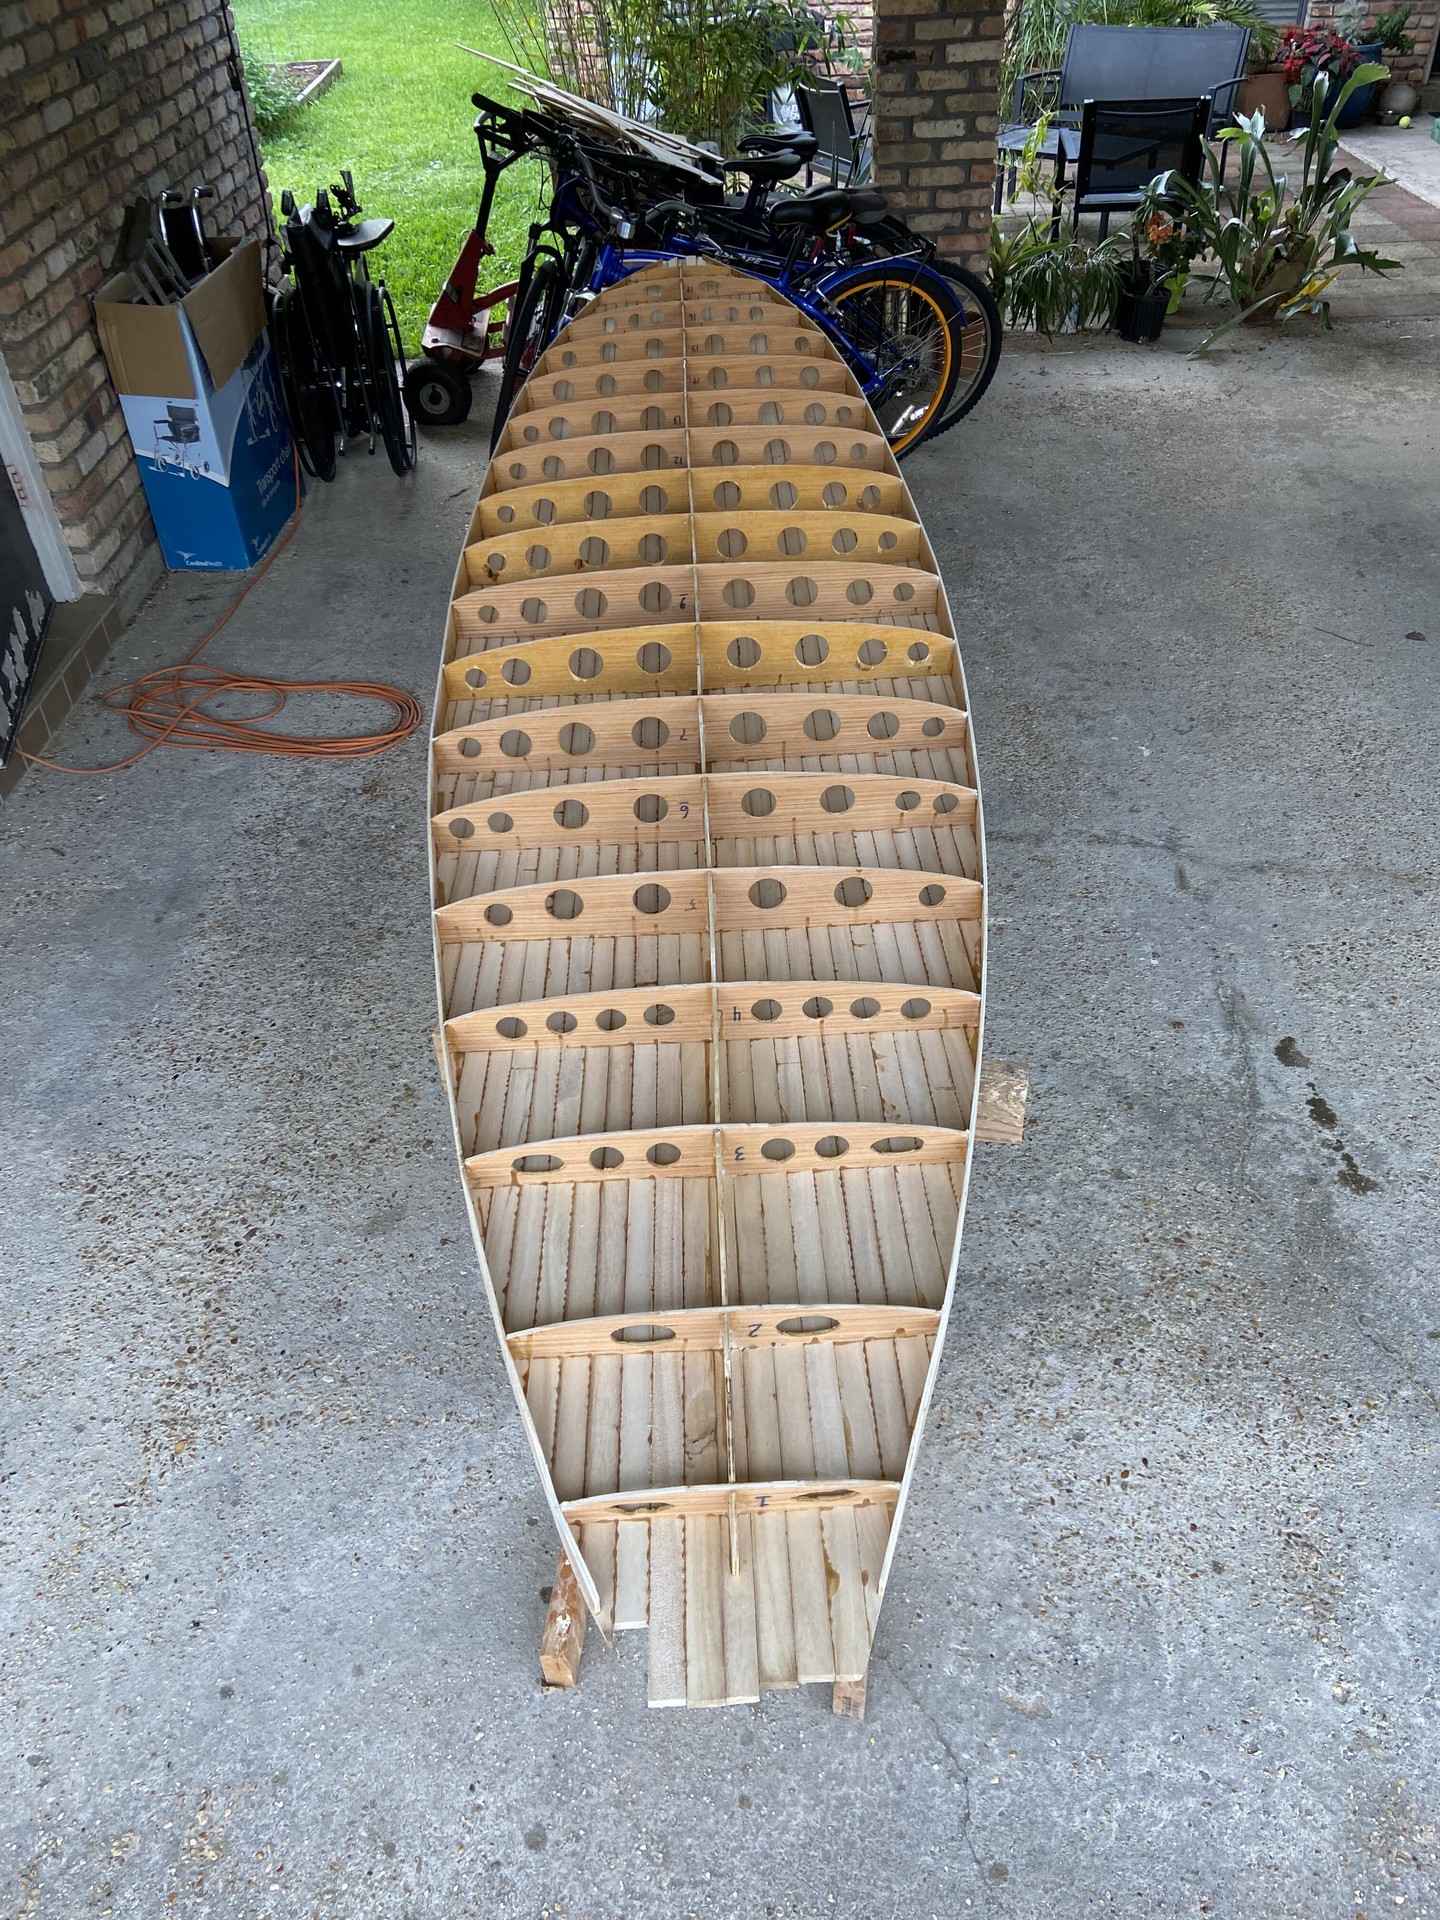
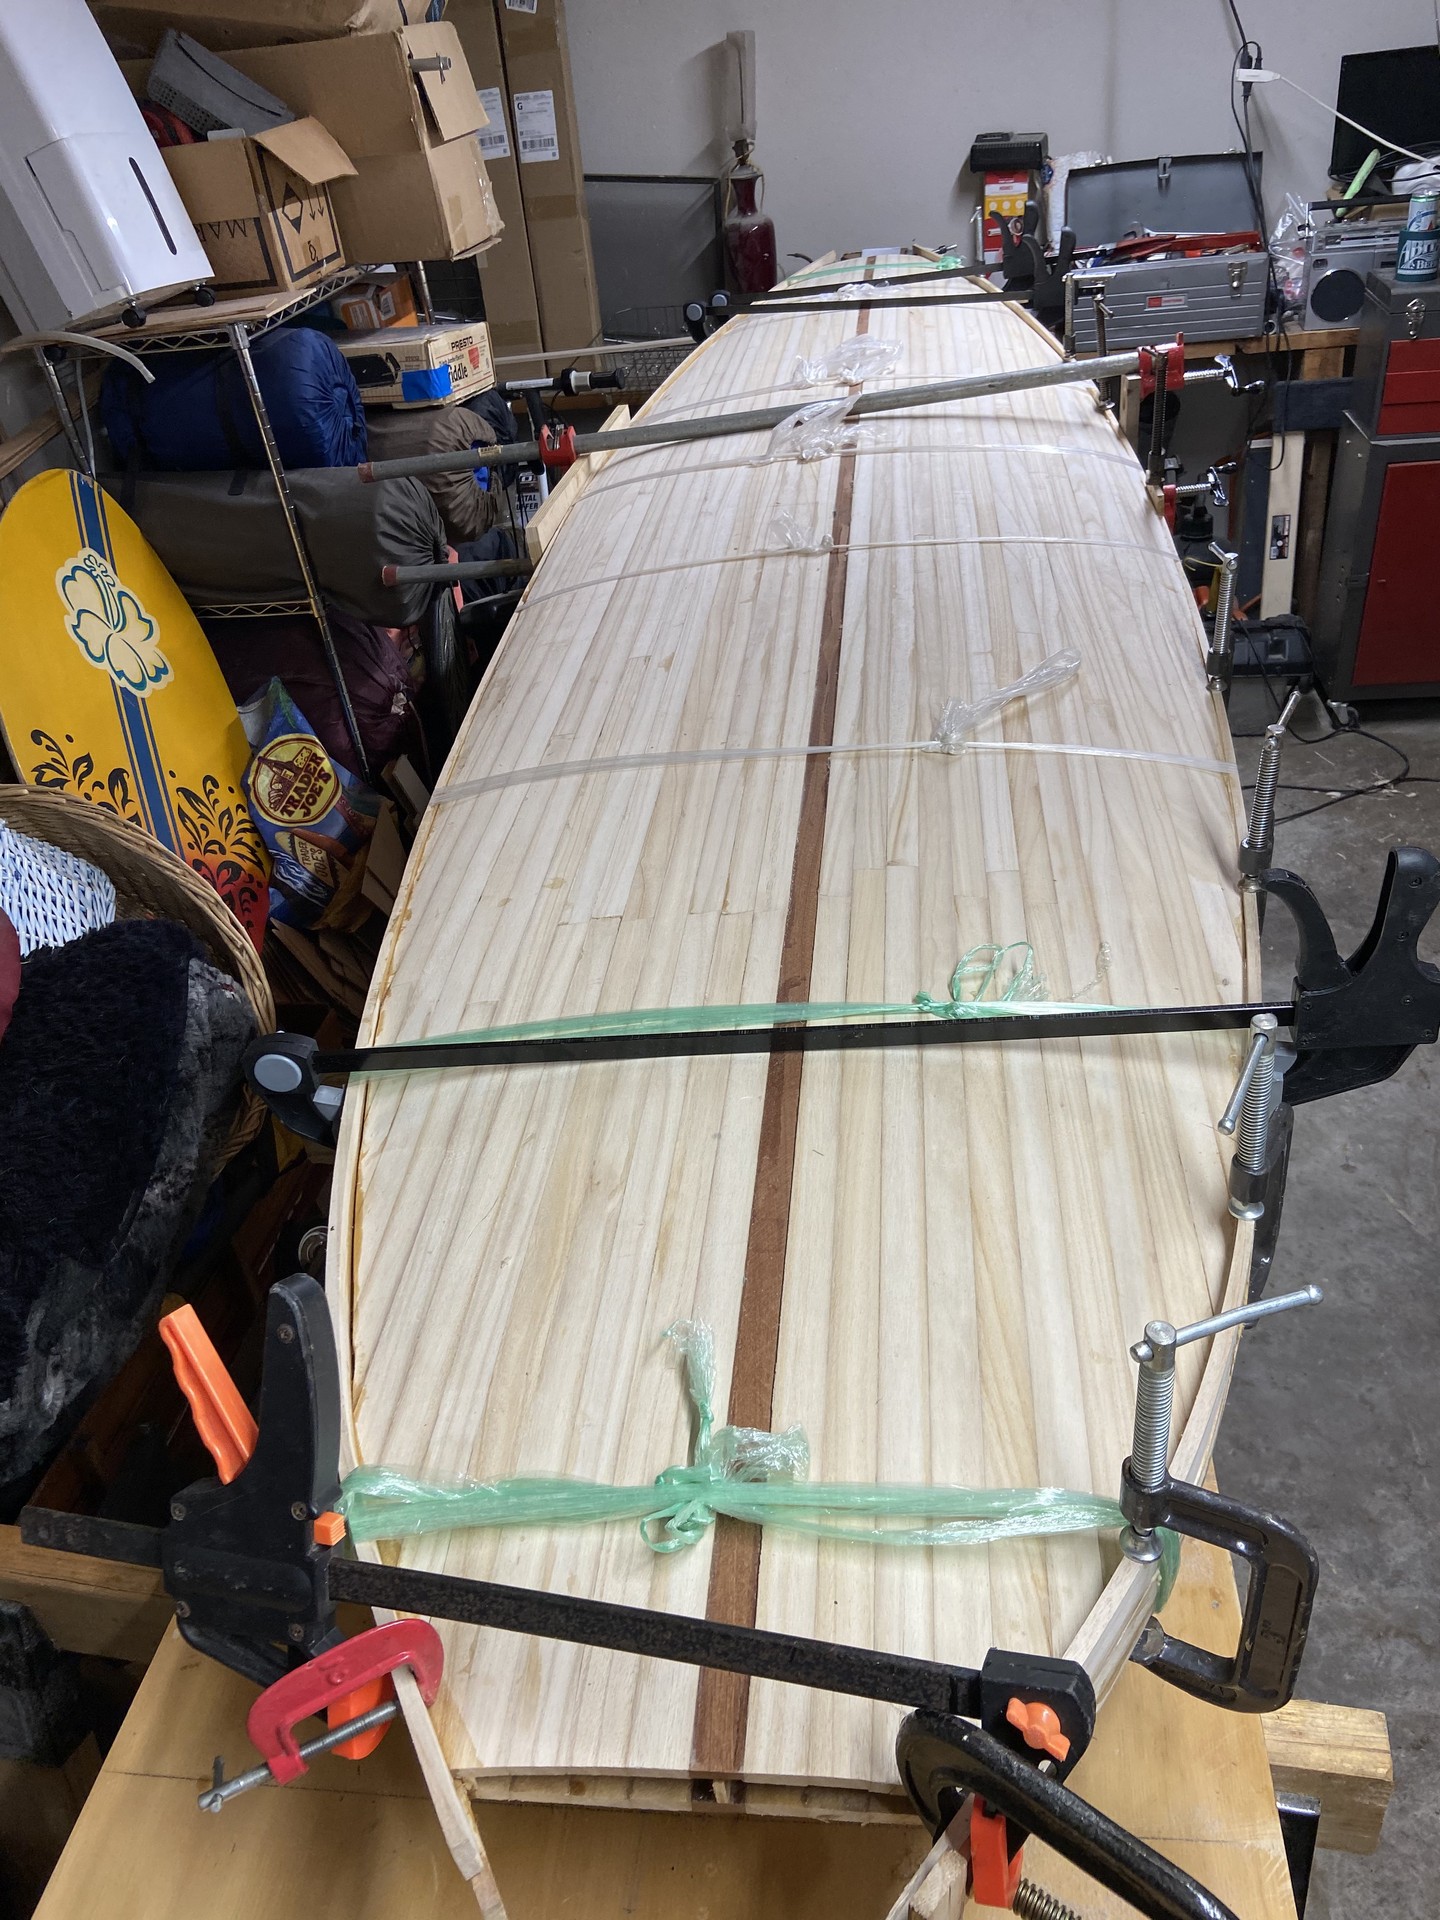
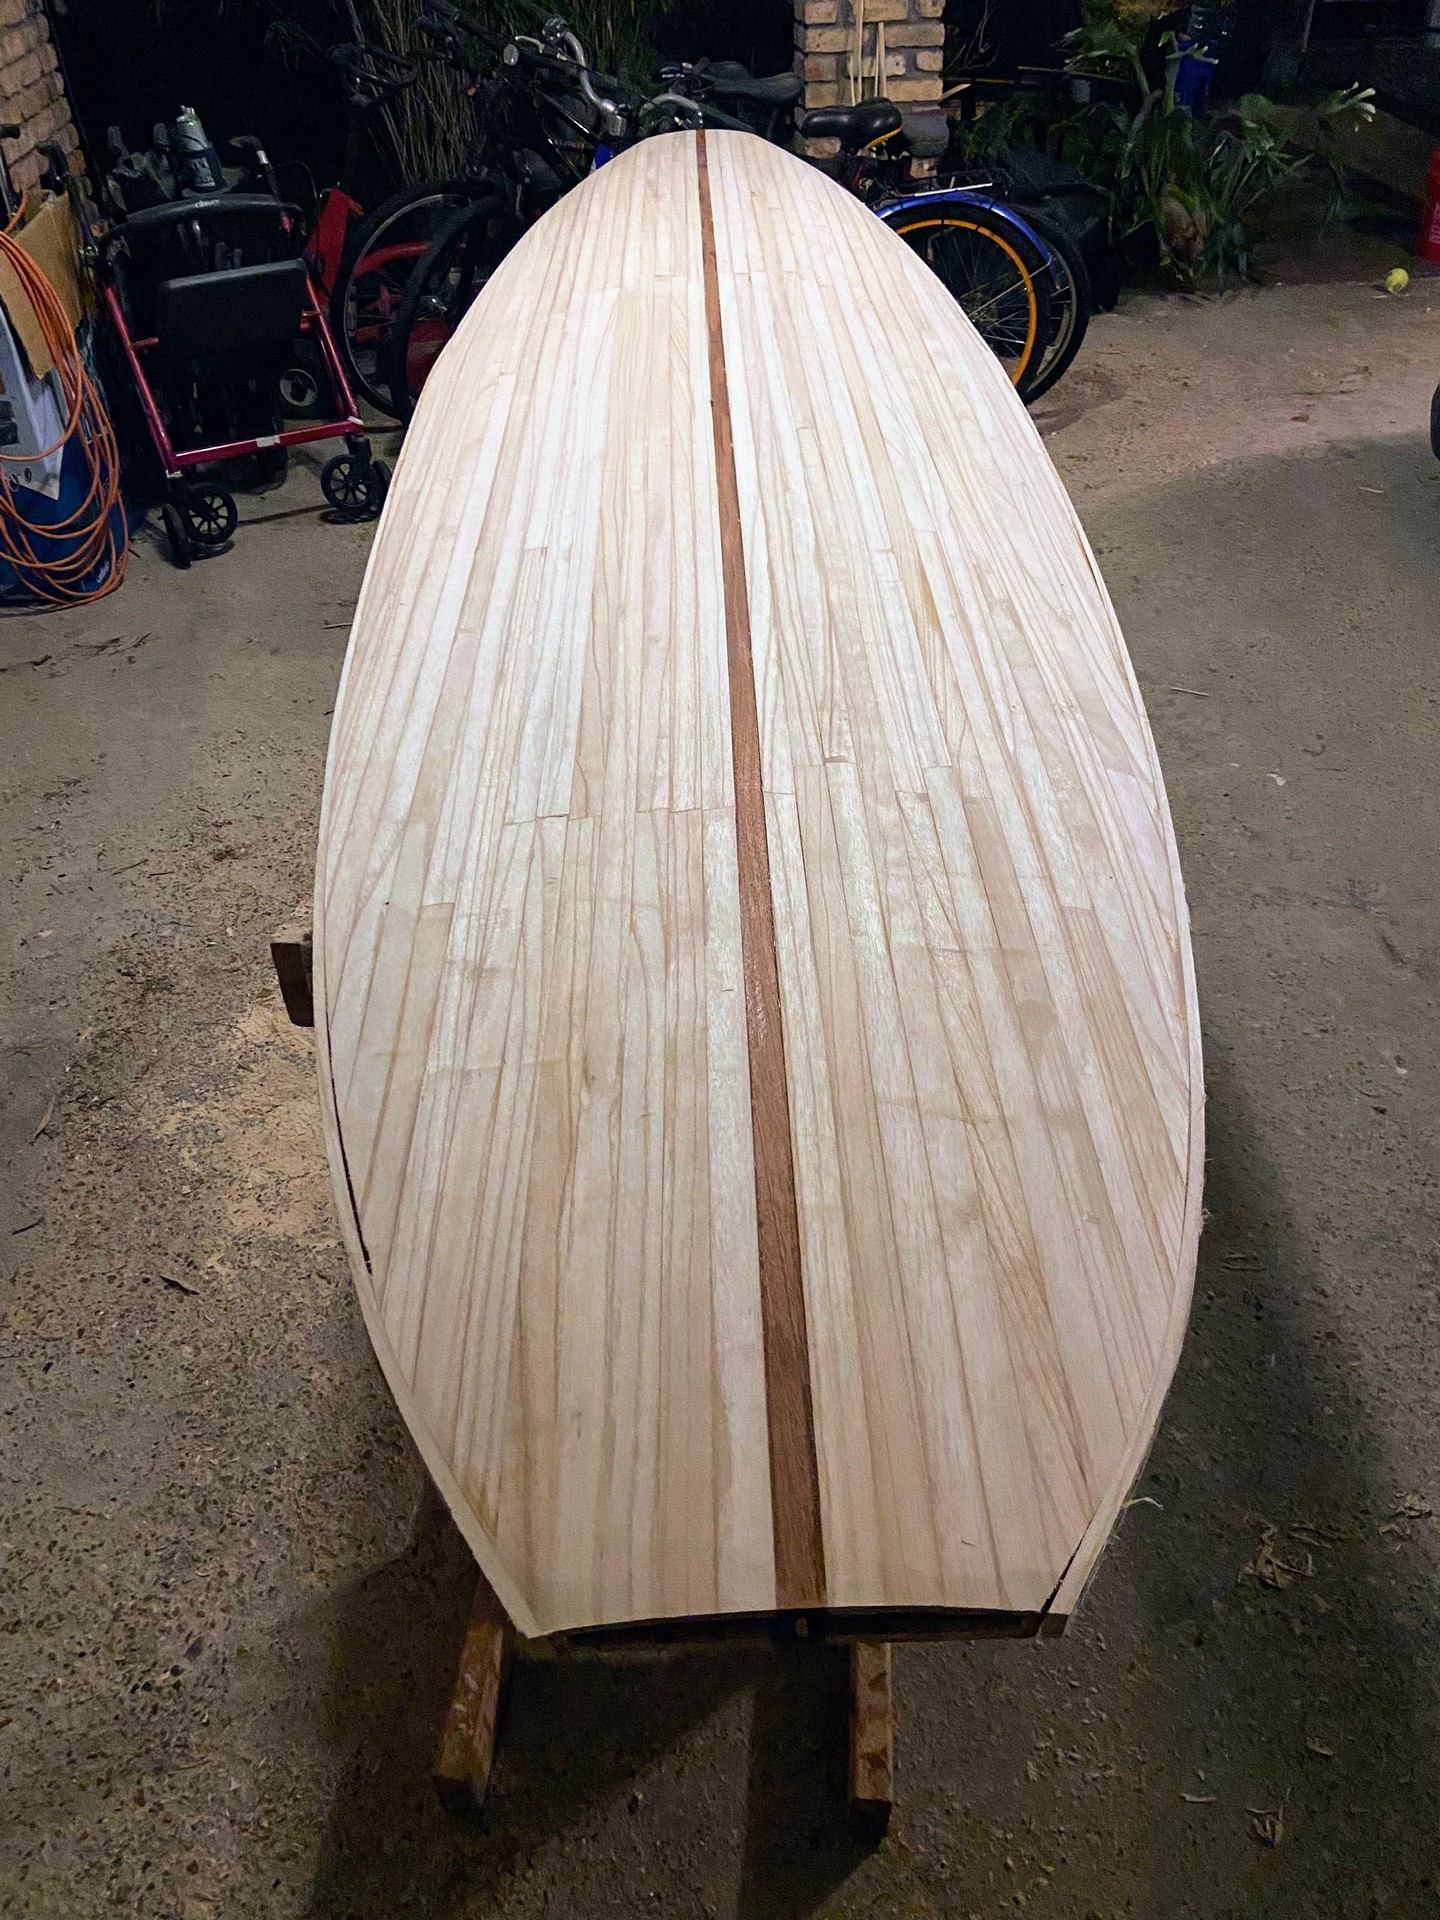
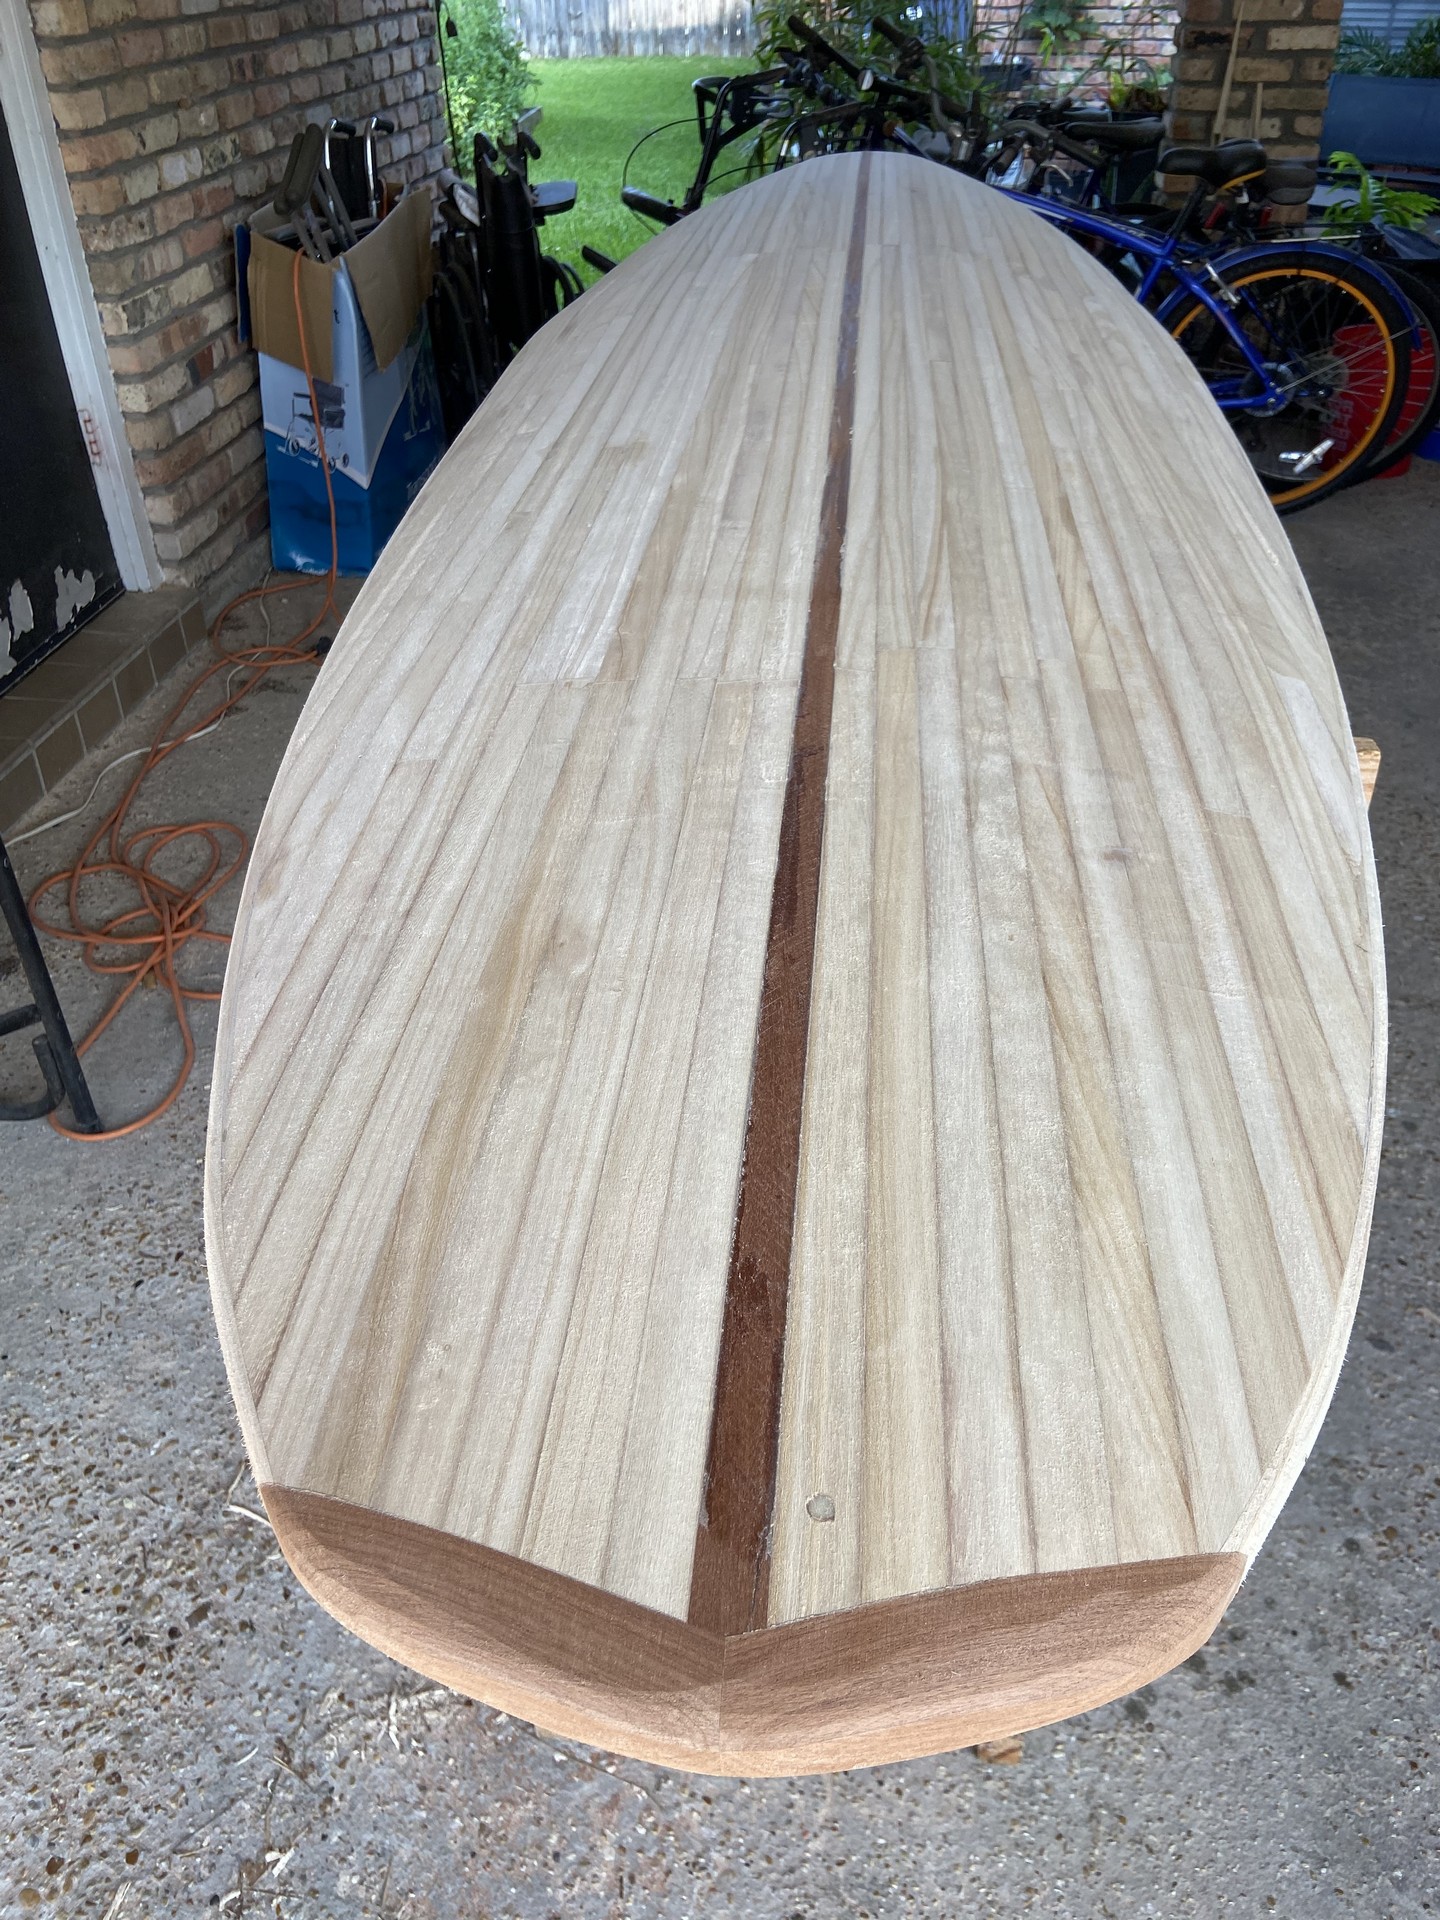
This weekend was a milepost in the SUP construction journey as I completed the gluing of strips to the bottom, and rough-cut the overhanging strips to the shape of the board with a jigsaw. I used my block plane to clean up the edges and also to remove lumps of glue from the surface of the strips, and then used the belt sander to give the bottom a rough sanding and remove most of the waste glue. It seems the builder videos I’ve seen all featured cutting the board free from the construction surface, and then trimming off the overhanging wood strips. I felt it would be advantageous to use the jigsaw while the board was still firmly secured (hot glued) to the table, preventing it from shifting during work.
Anticipating future efforts, I cut scarf joints on two dozen 5’ Paulownia strips so I can resume the process of glueing them together, two per day, over the coming weeks to create full length strips for the top of the board. At least 32 will be required for the top. Additional strips will be required to cover the sides / rails.
During this week I will cut the board free from the work surface, trim down the “feet” or tabs on the frame, and sand it smooth.
Weekend #12
April 20, 2024
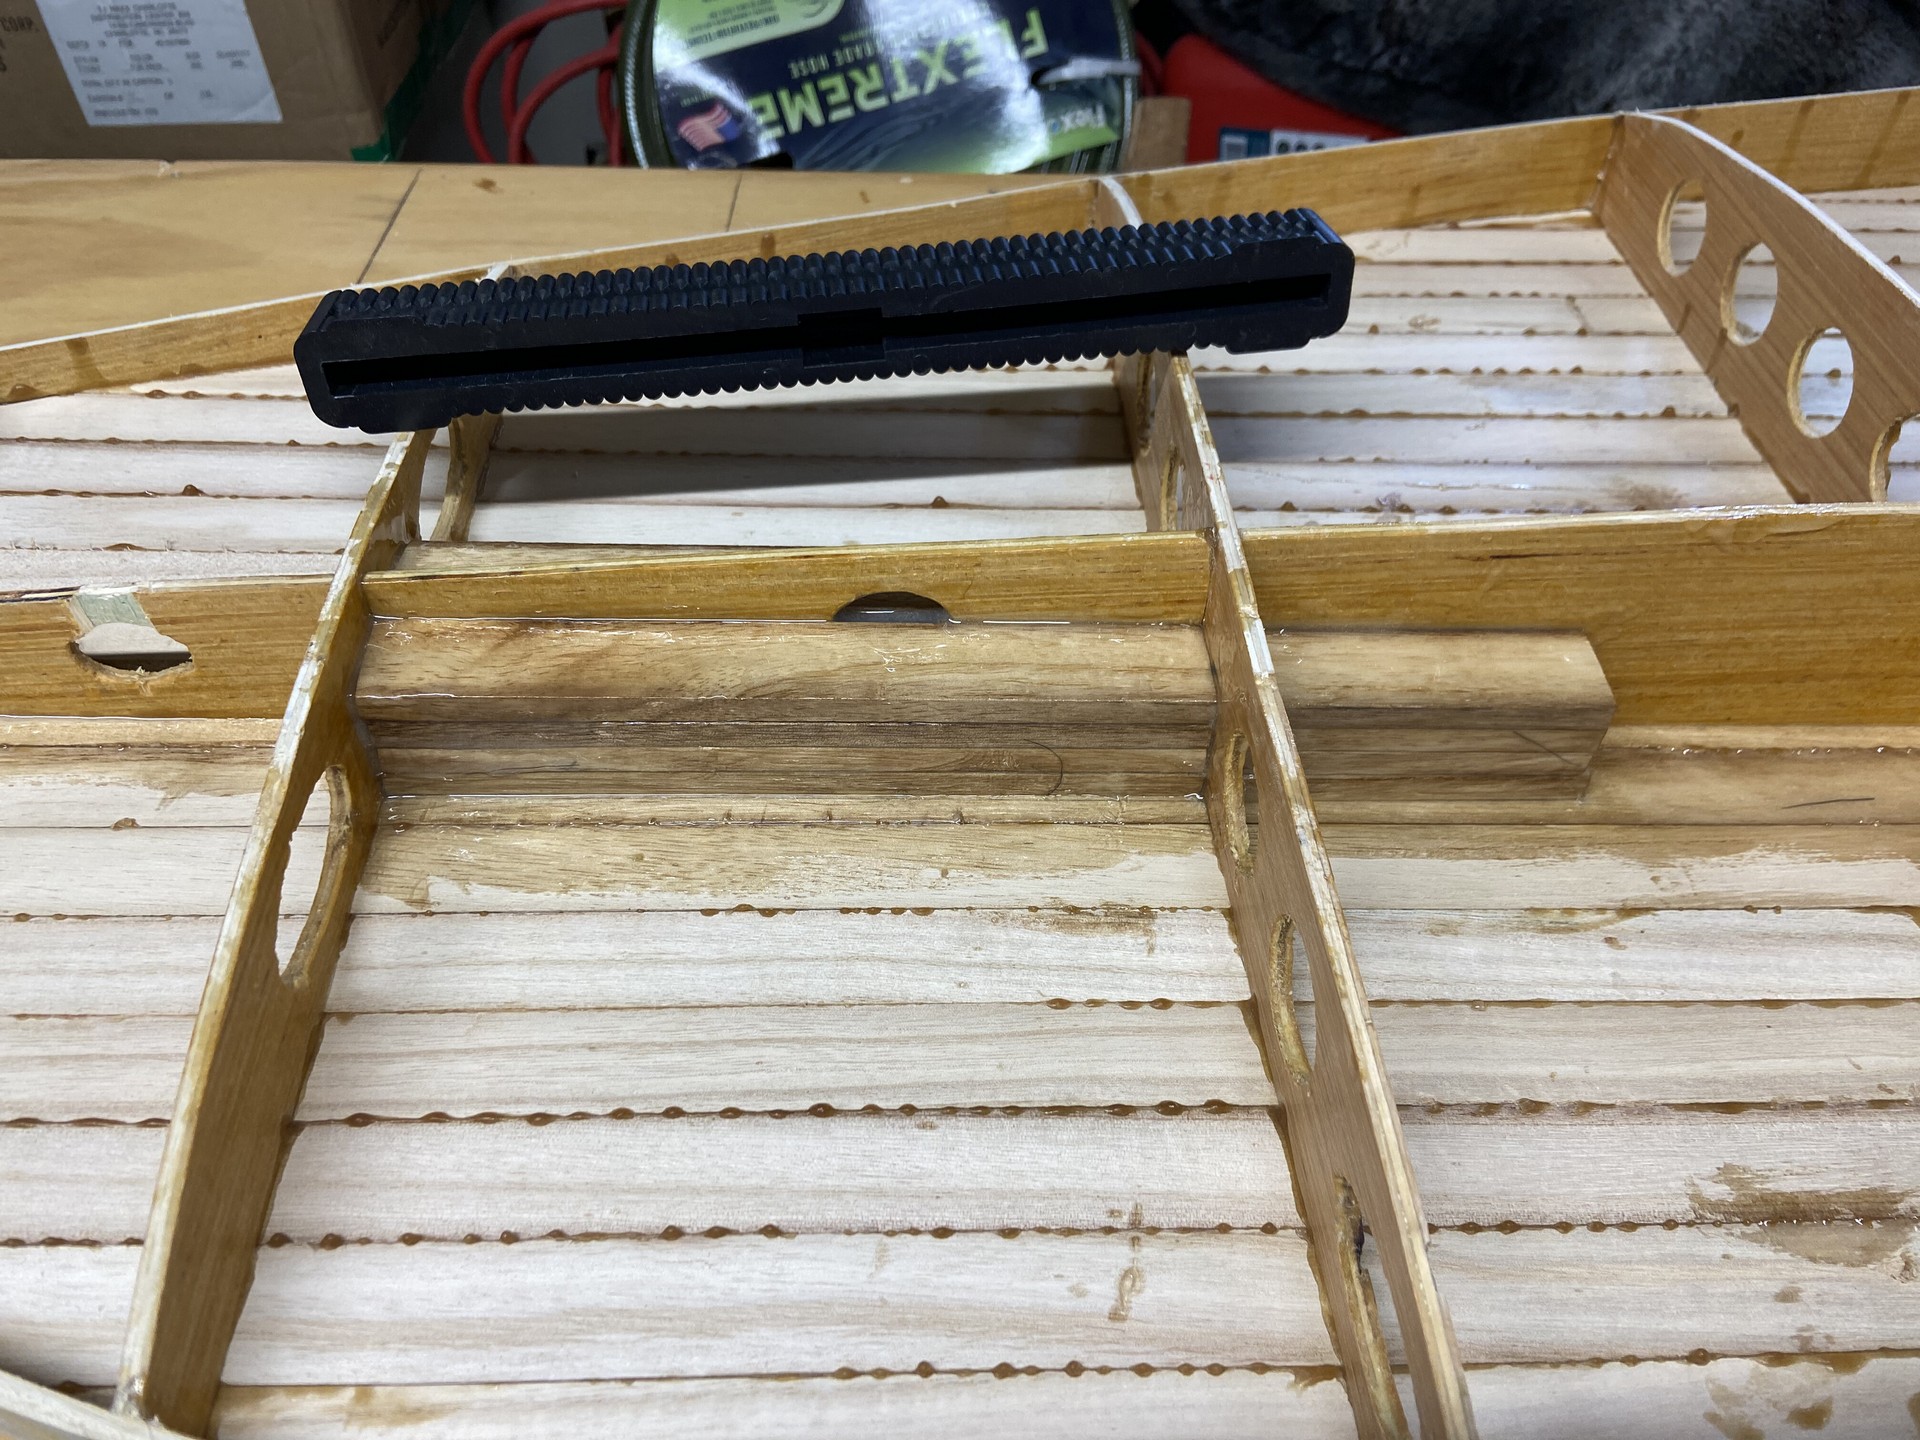
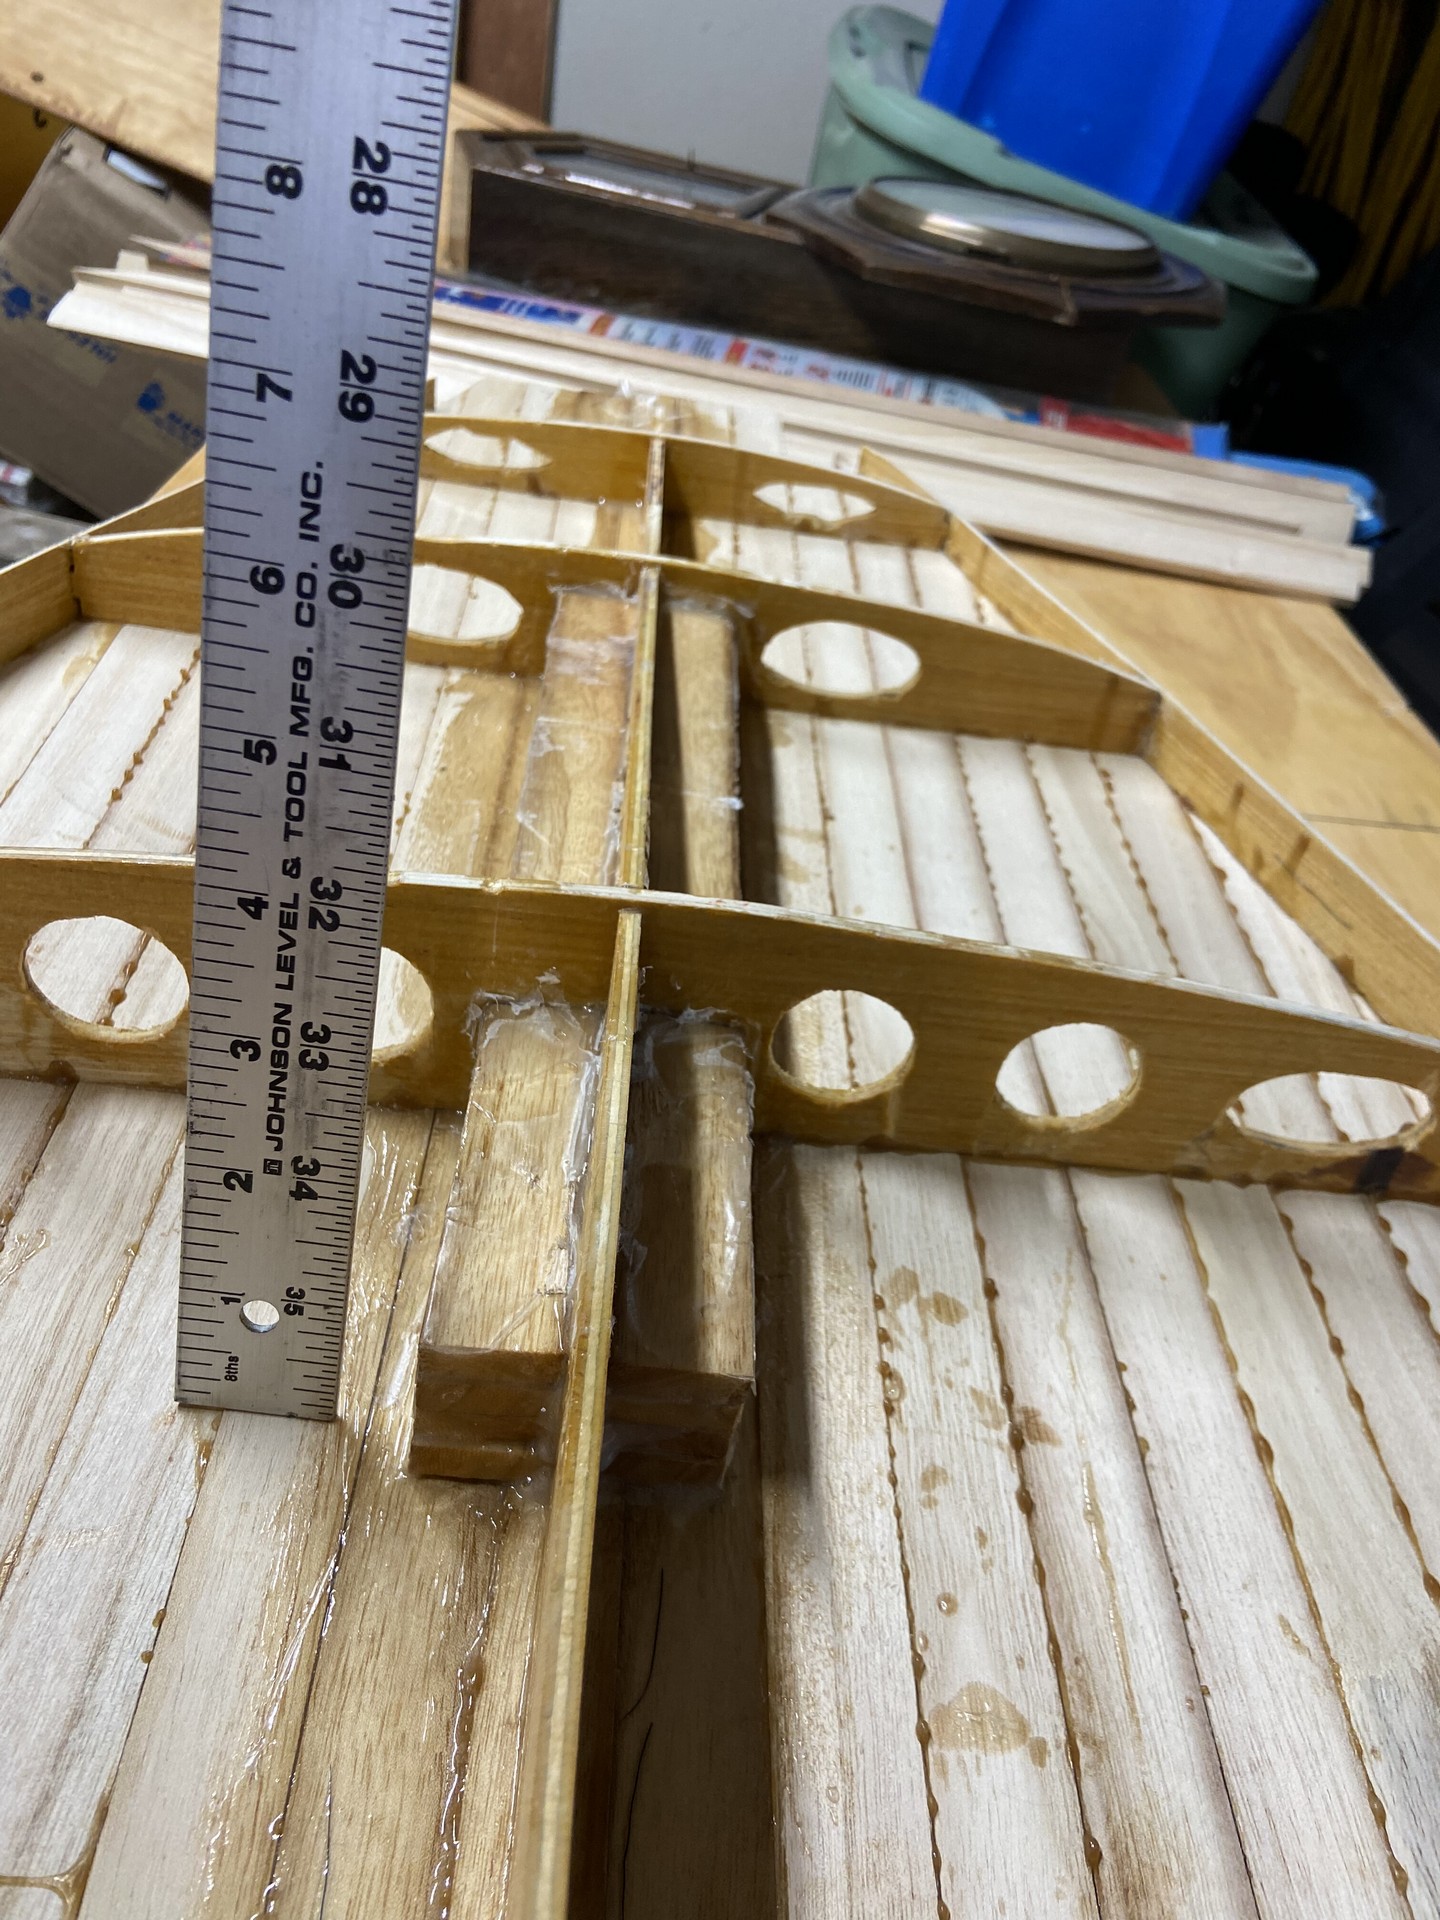
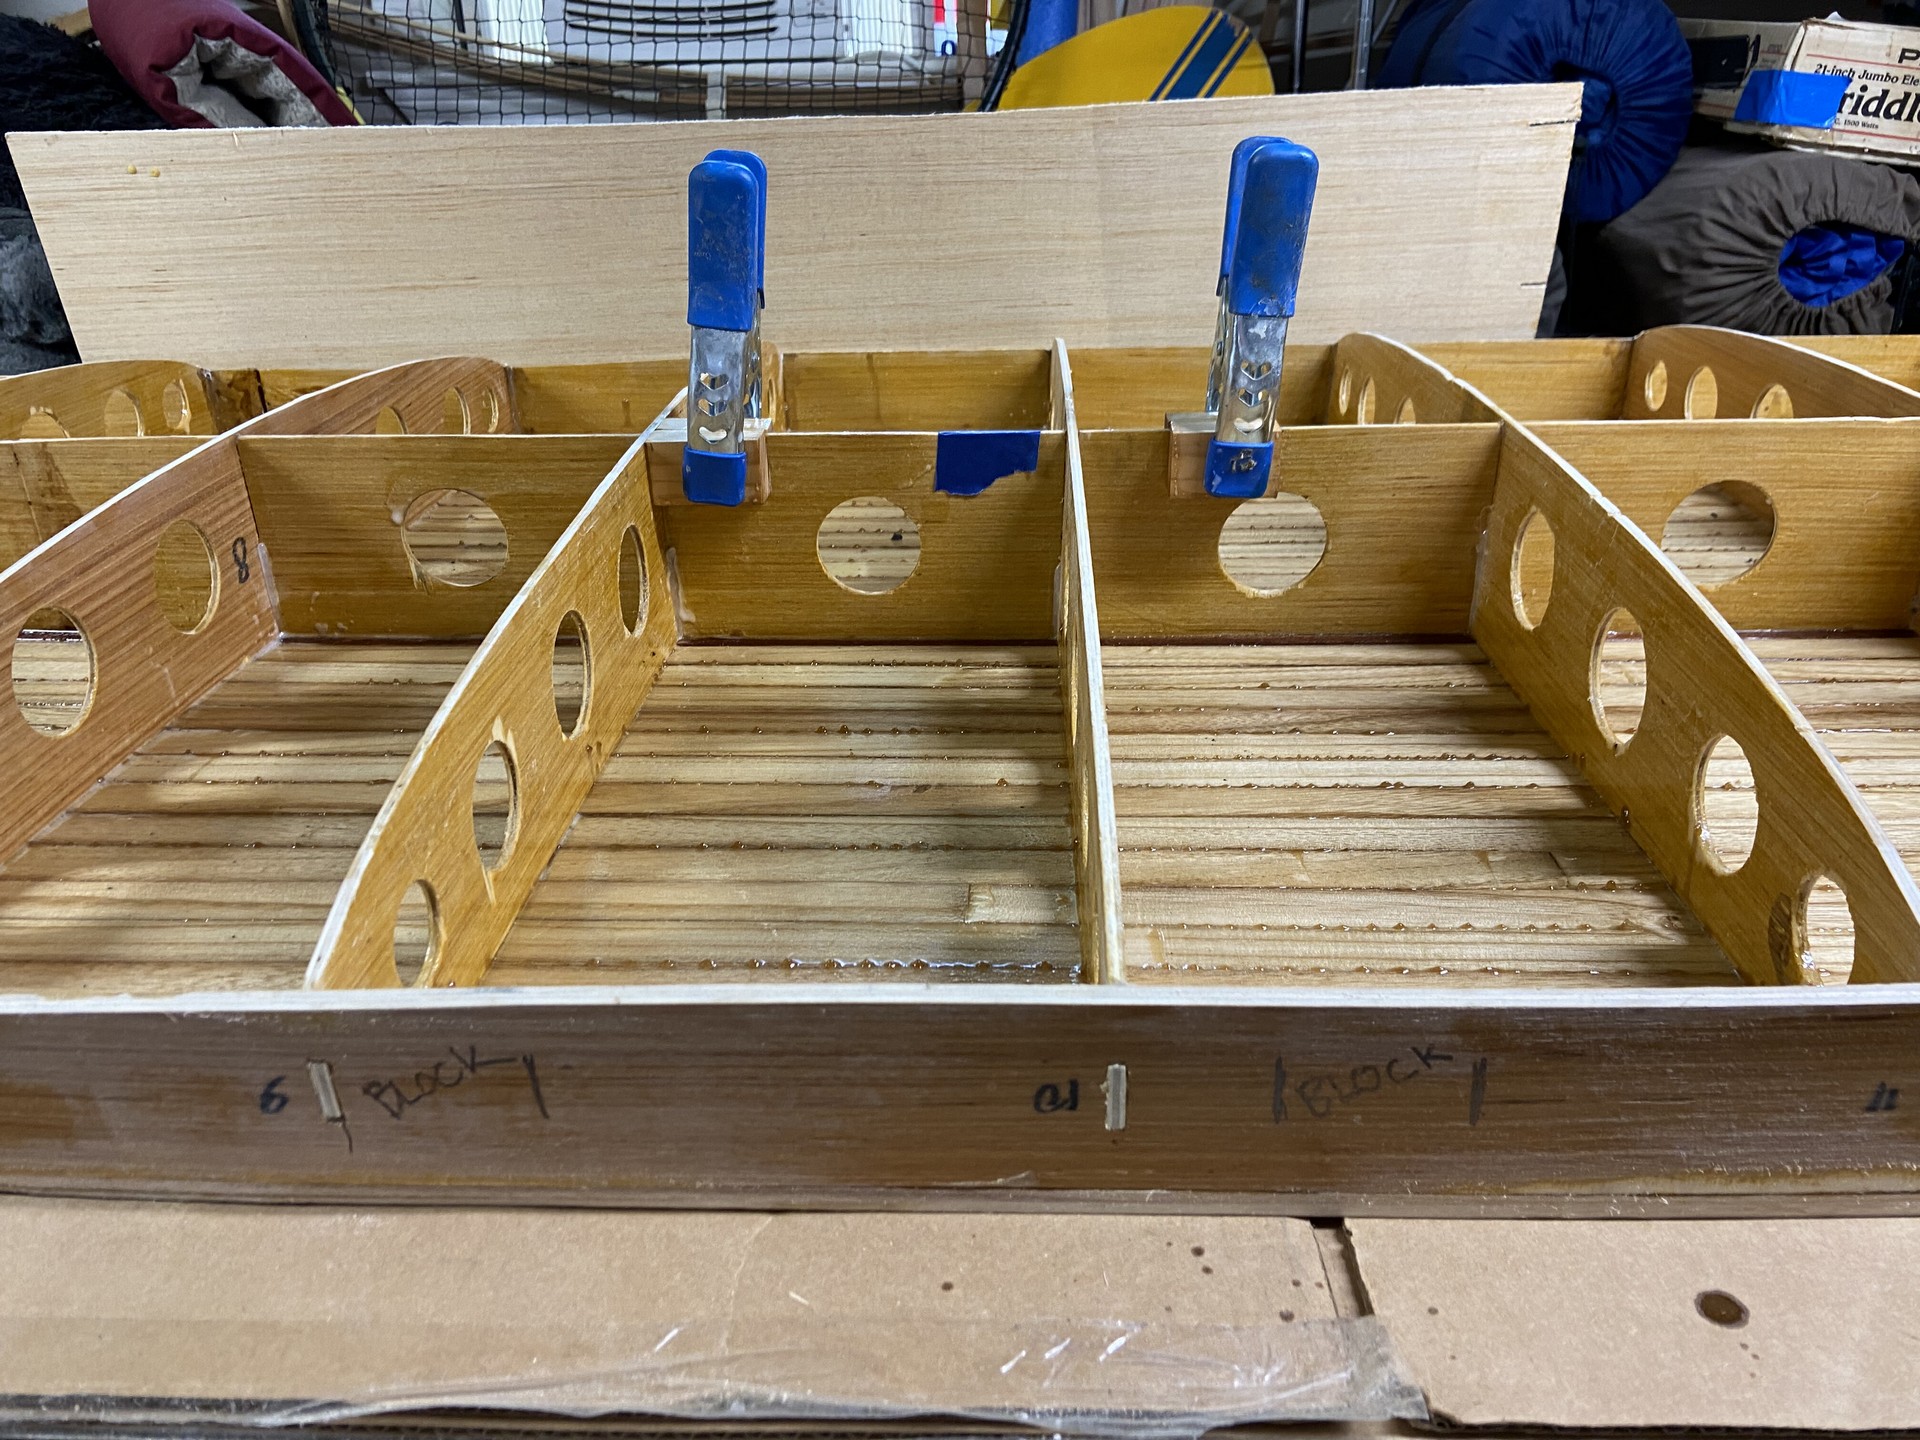
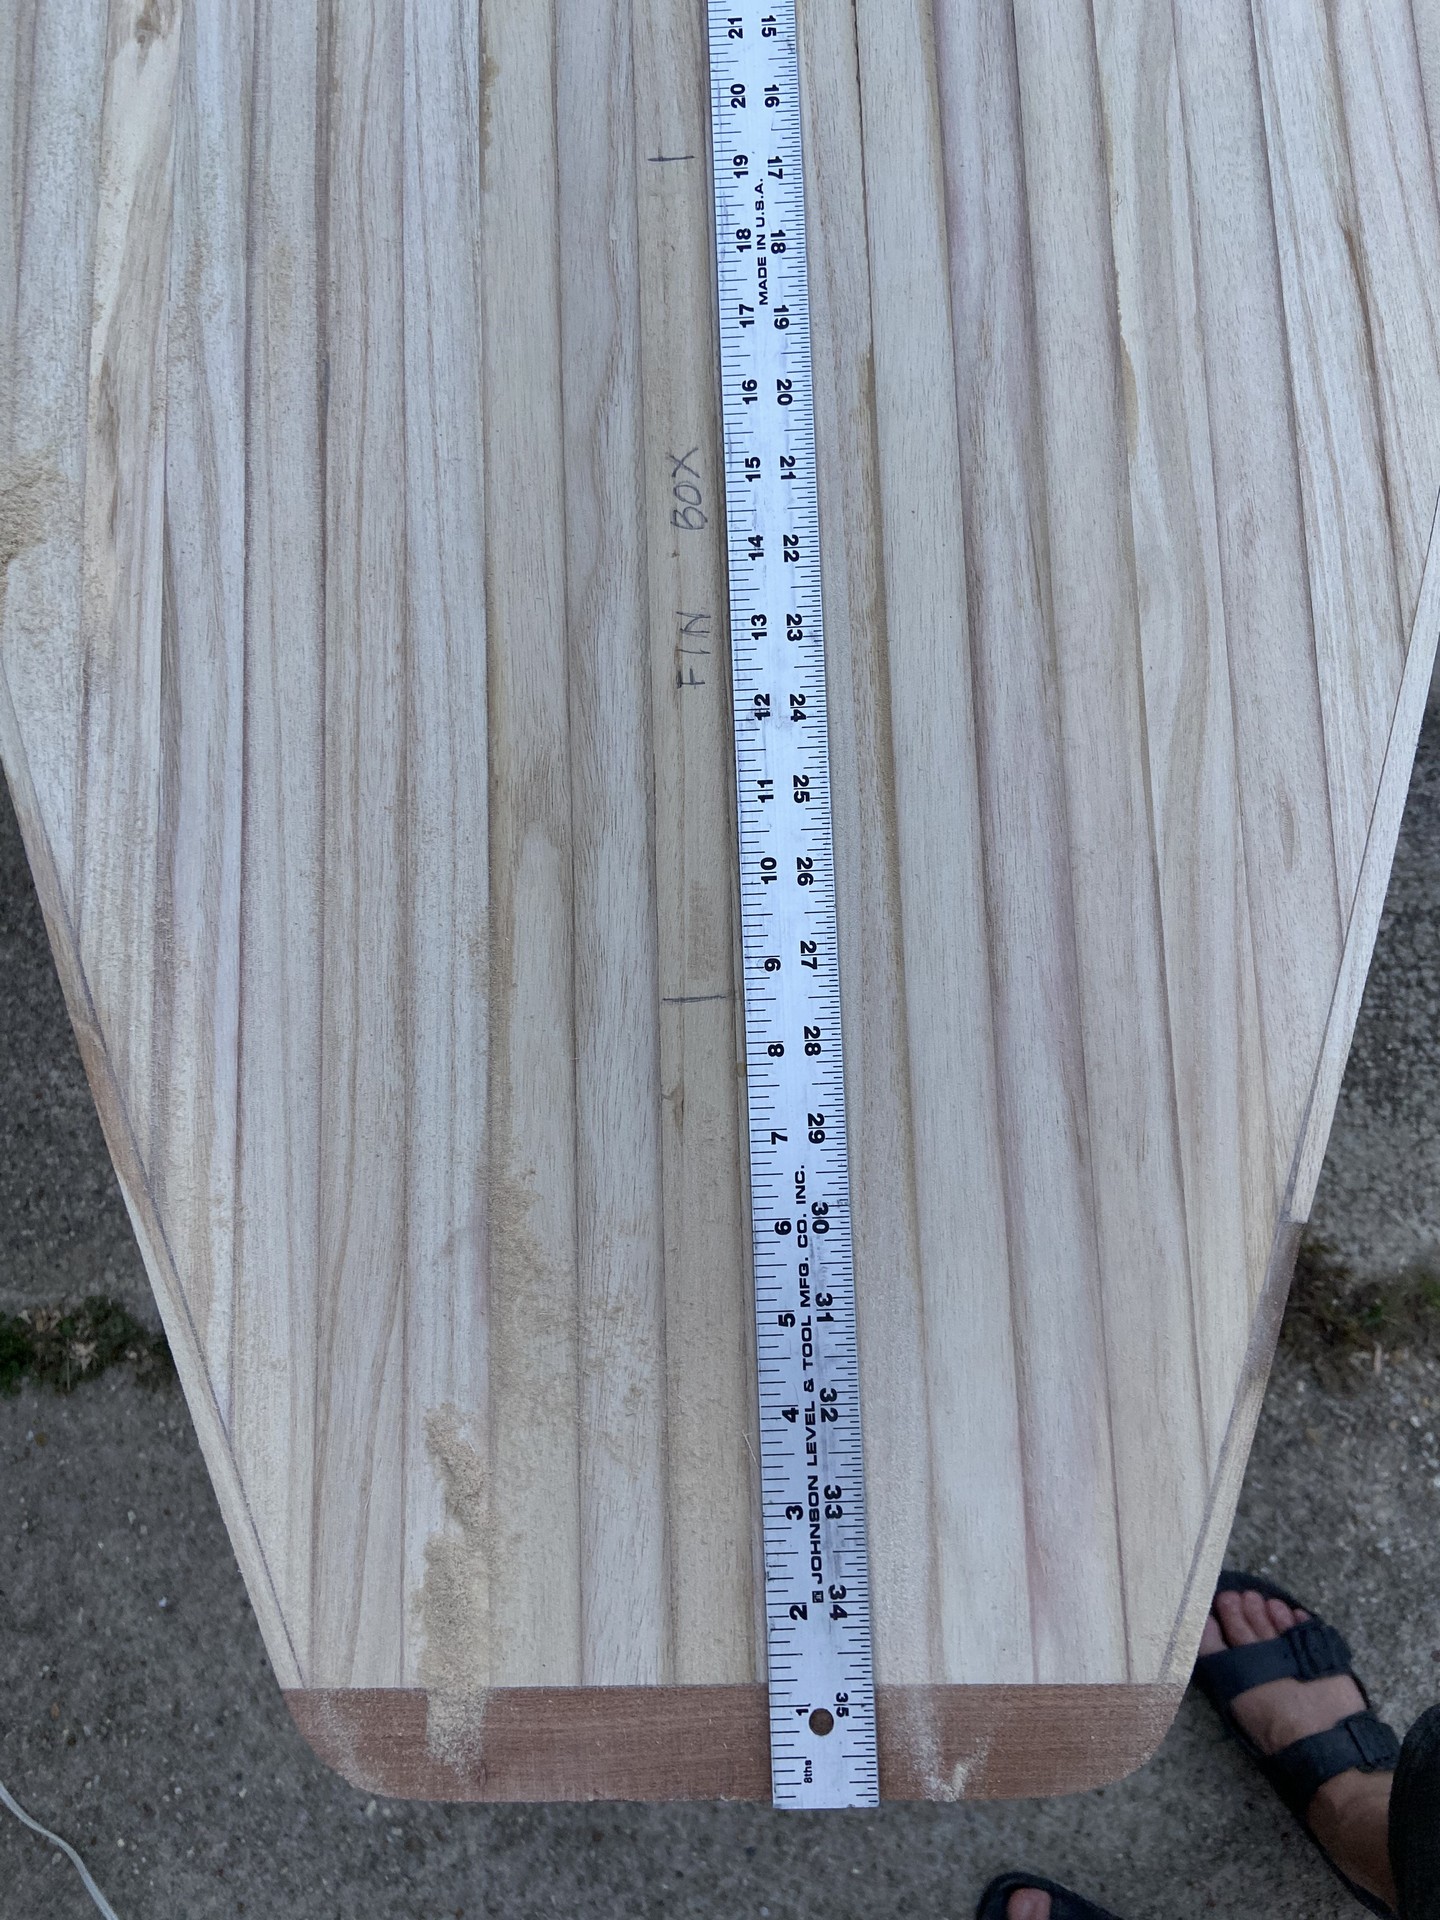
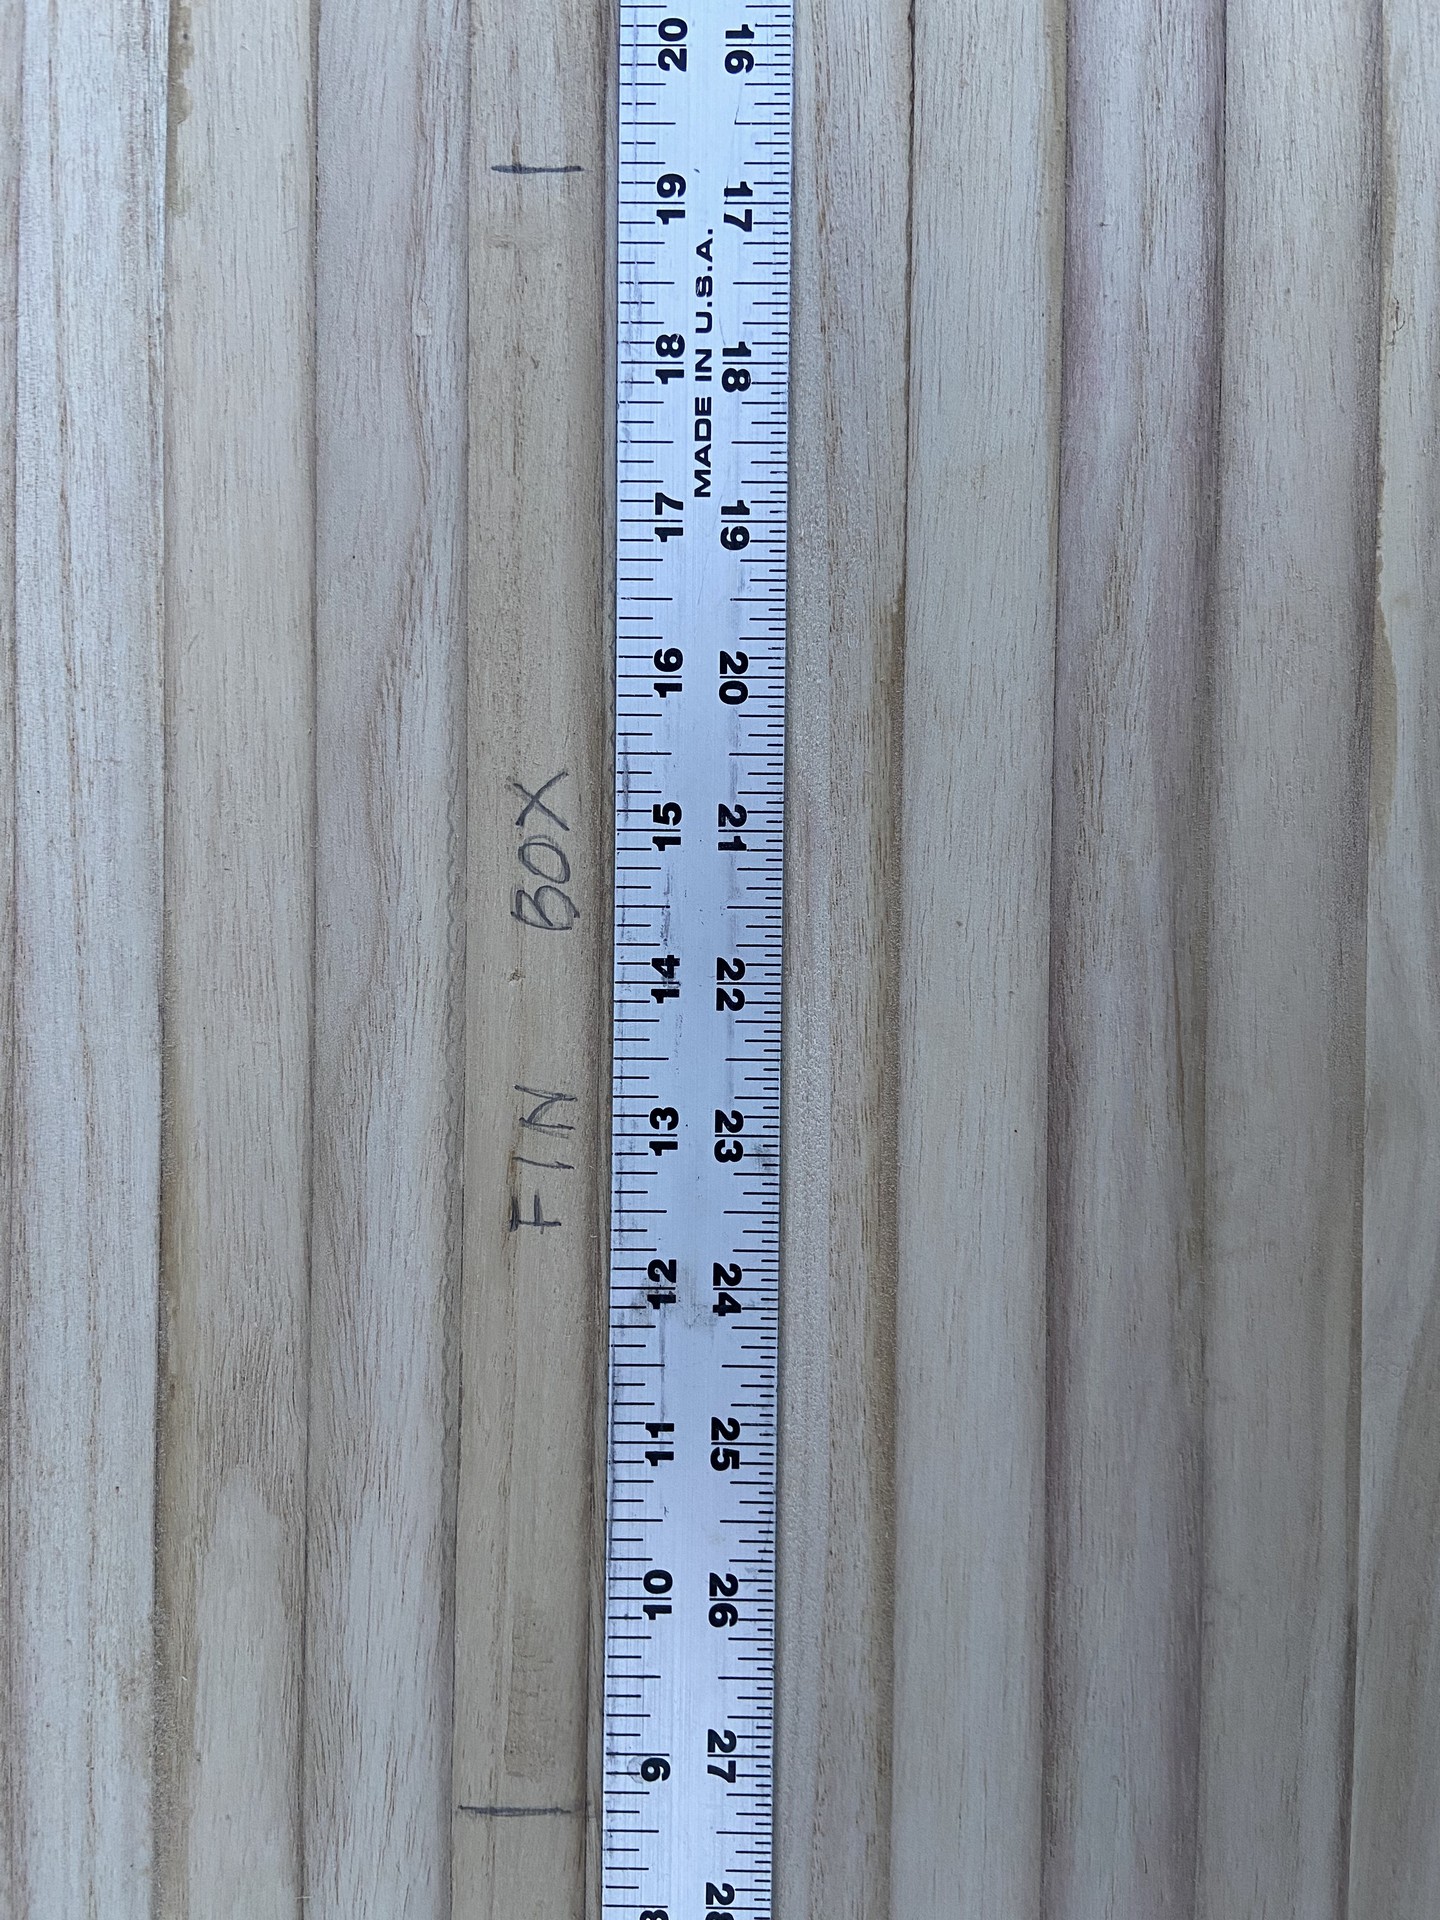
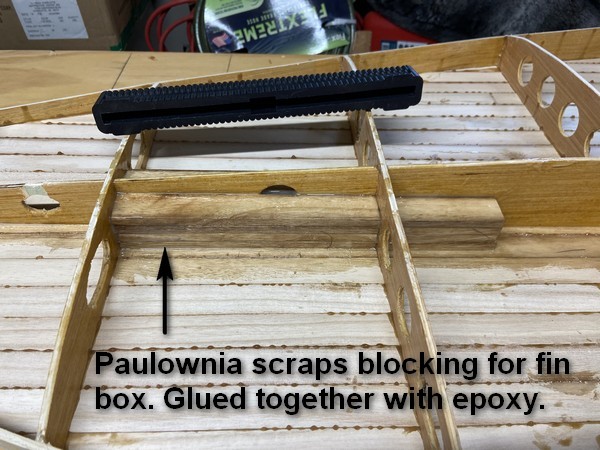
Blocking was the word for this weekend. I installed styrofoam blocking for the four foreward anchor plug locations. These will provide tie downs for a bungee cord to make an “X” for holding gear on the paddleboard’s deck. For the fin box blocking I used strips of paulownia glued together with thickened epoxy. This will provide sturdy reinforcement for installing the plastic fin box on the bottom after routing out a void - which will also remove much of the weight of the wood. Lastly, I bonded some scraps of pine to the center spine at the middle of the board for securing the carry handle on the deck.
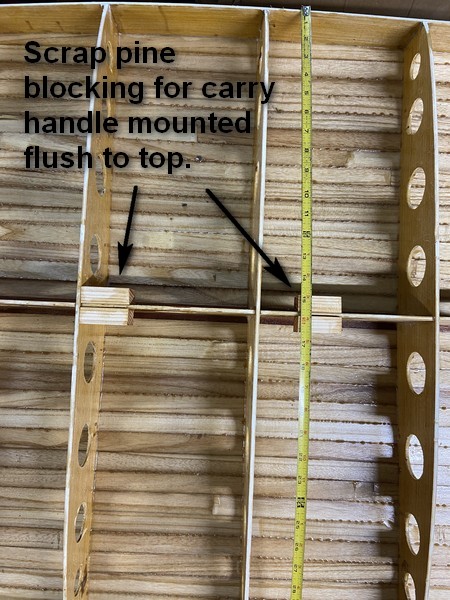
The less enjoyable task I accomplished Saturday was the waterproofing of the interior bottom of the board strips with epoxy resin. On Sunday I trimmed the carry handle blocking flush with the top of the frame ribs, and then glued down the center dark mahogany stip to begin the deck of the board.
Weekend #13
April 27, 2024
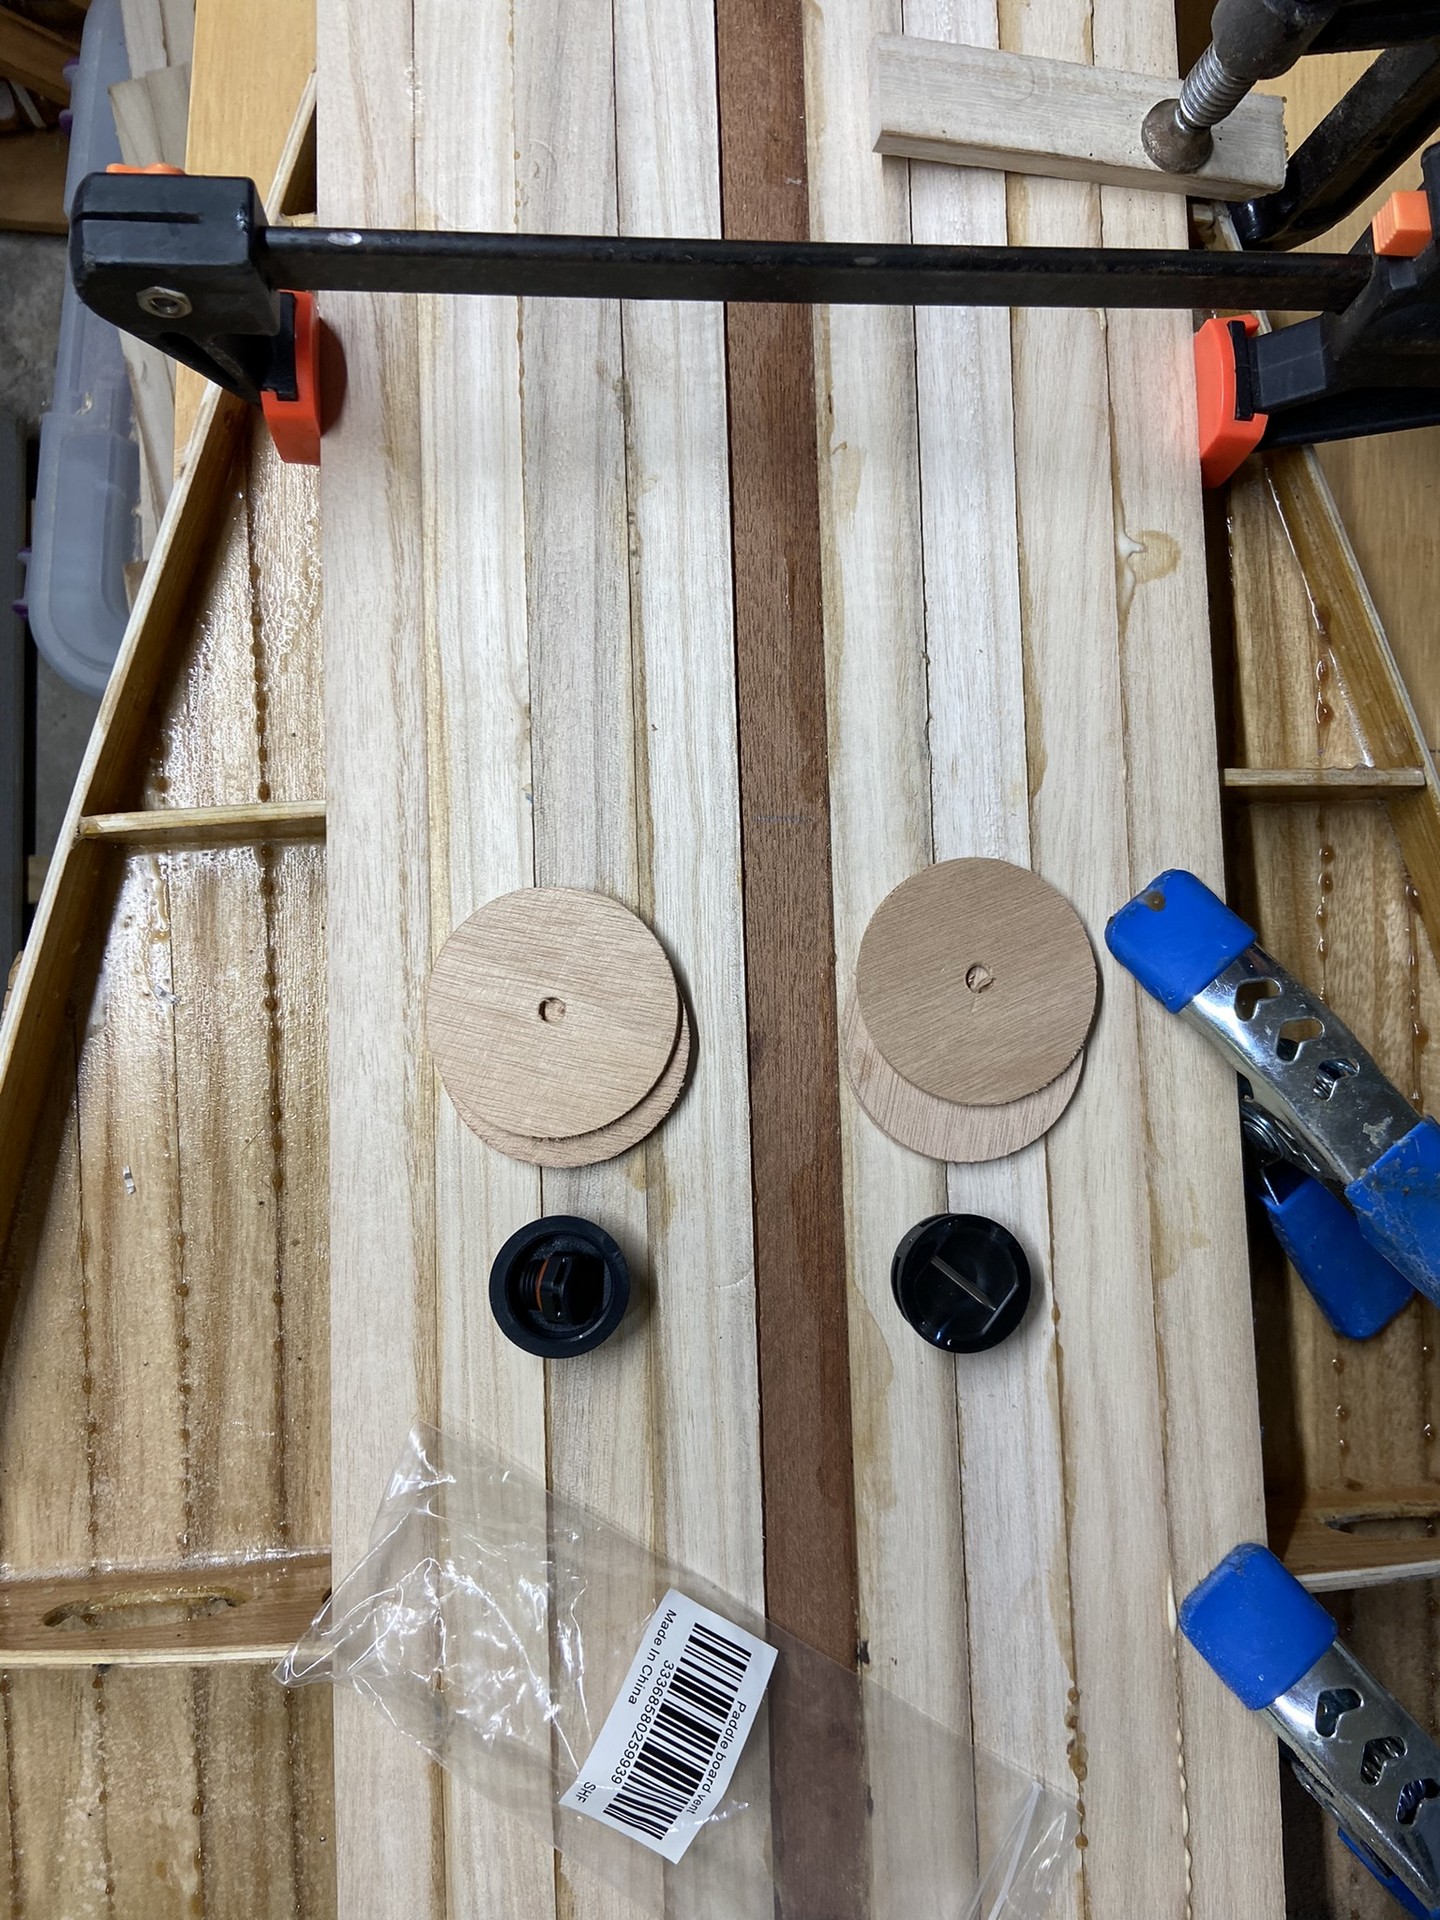
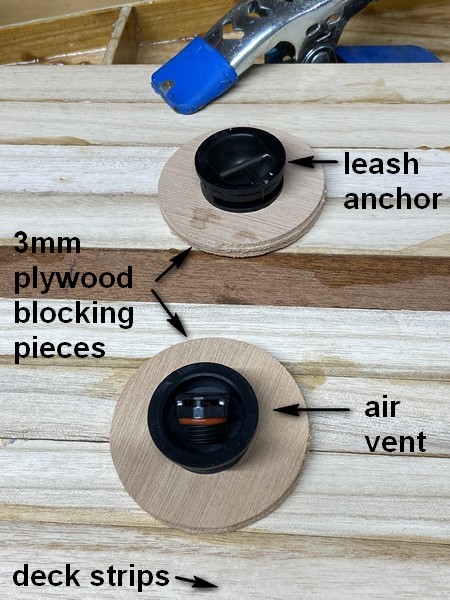
Three pairs of strips were glued to the deck during the preceding week and two more pairs were glued down this weekend. Additionally, I added blocking near the tail beneath the recently installed top strips for future installation of the leash anchor and air vent. Both are the same size (Not true! See Weekend #18 below) so I decided to put them side-by-side near the tail of the board. For the air vent a 2-1/2" circular piece of 3mm Okoume plywood was glued to the underside of the Paulownia strips, and for the anchor I built this up to three layers of Okoume plywood circles. This is sufficiently thick so that the recess for the leash anchor won’t penetrate the board. In contrast, the air vent must penetrate the hollow board to be of any effect, so one thickness of the plywood provides additional strength and surface area for the epoxy to bond with the edges of the air vent plug. I intend to use hole saws on a drill to cut the recesses for the plastic anchors as I do not own a router. I experimented on a block of scrap to determine the correct size.

The instructional videos I viewed show the use of styrofoam as the blocking material. I did use foam for the fore deck anchors, but it seemed pointless for the rear anchor, air vent and fin box where I used wood blocking. Along the side rails there were some gaps and looseness where the tabs of cross-members fit into slots crudely cut into the rails. I filled these voids with epoxy thickened with wood flour.
Weekend #14
May 5, 2024
Weekend #14 was spent splicing Paulownia strips end-to-end to make long strips and then gluing / clamping these to the deck of the paddleboard frame, two or sometimes three per day. During the coming week I will complete “stripping” the deck. I borrowed my neighbor’s table saw to rip one strip lengthwise, allowing me to glue down a half-width strip on each side before I got to the very edge of the board. I felt it would be stronger if that last strip on both sides was a full-width strip (leaving a slight surplus overhang) rather than a very narrow strip. Adding that last strip - the whiskey strip - is within sight!
Or is it?
Builders seem to celebrate adding that last strip to the deck of their boards with a shot of bourbon, but then they’ve still got to cover the plywood side rails, so we’re not really done here are we?
Weekend #15
May 11, 2024 - Mother’s Day weekend
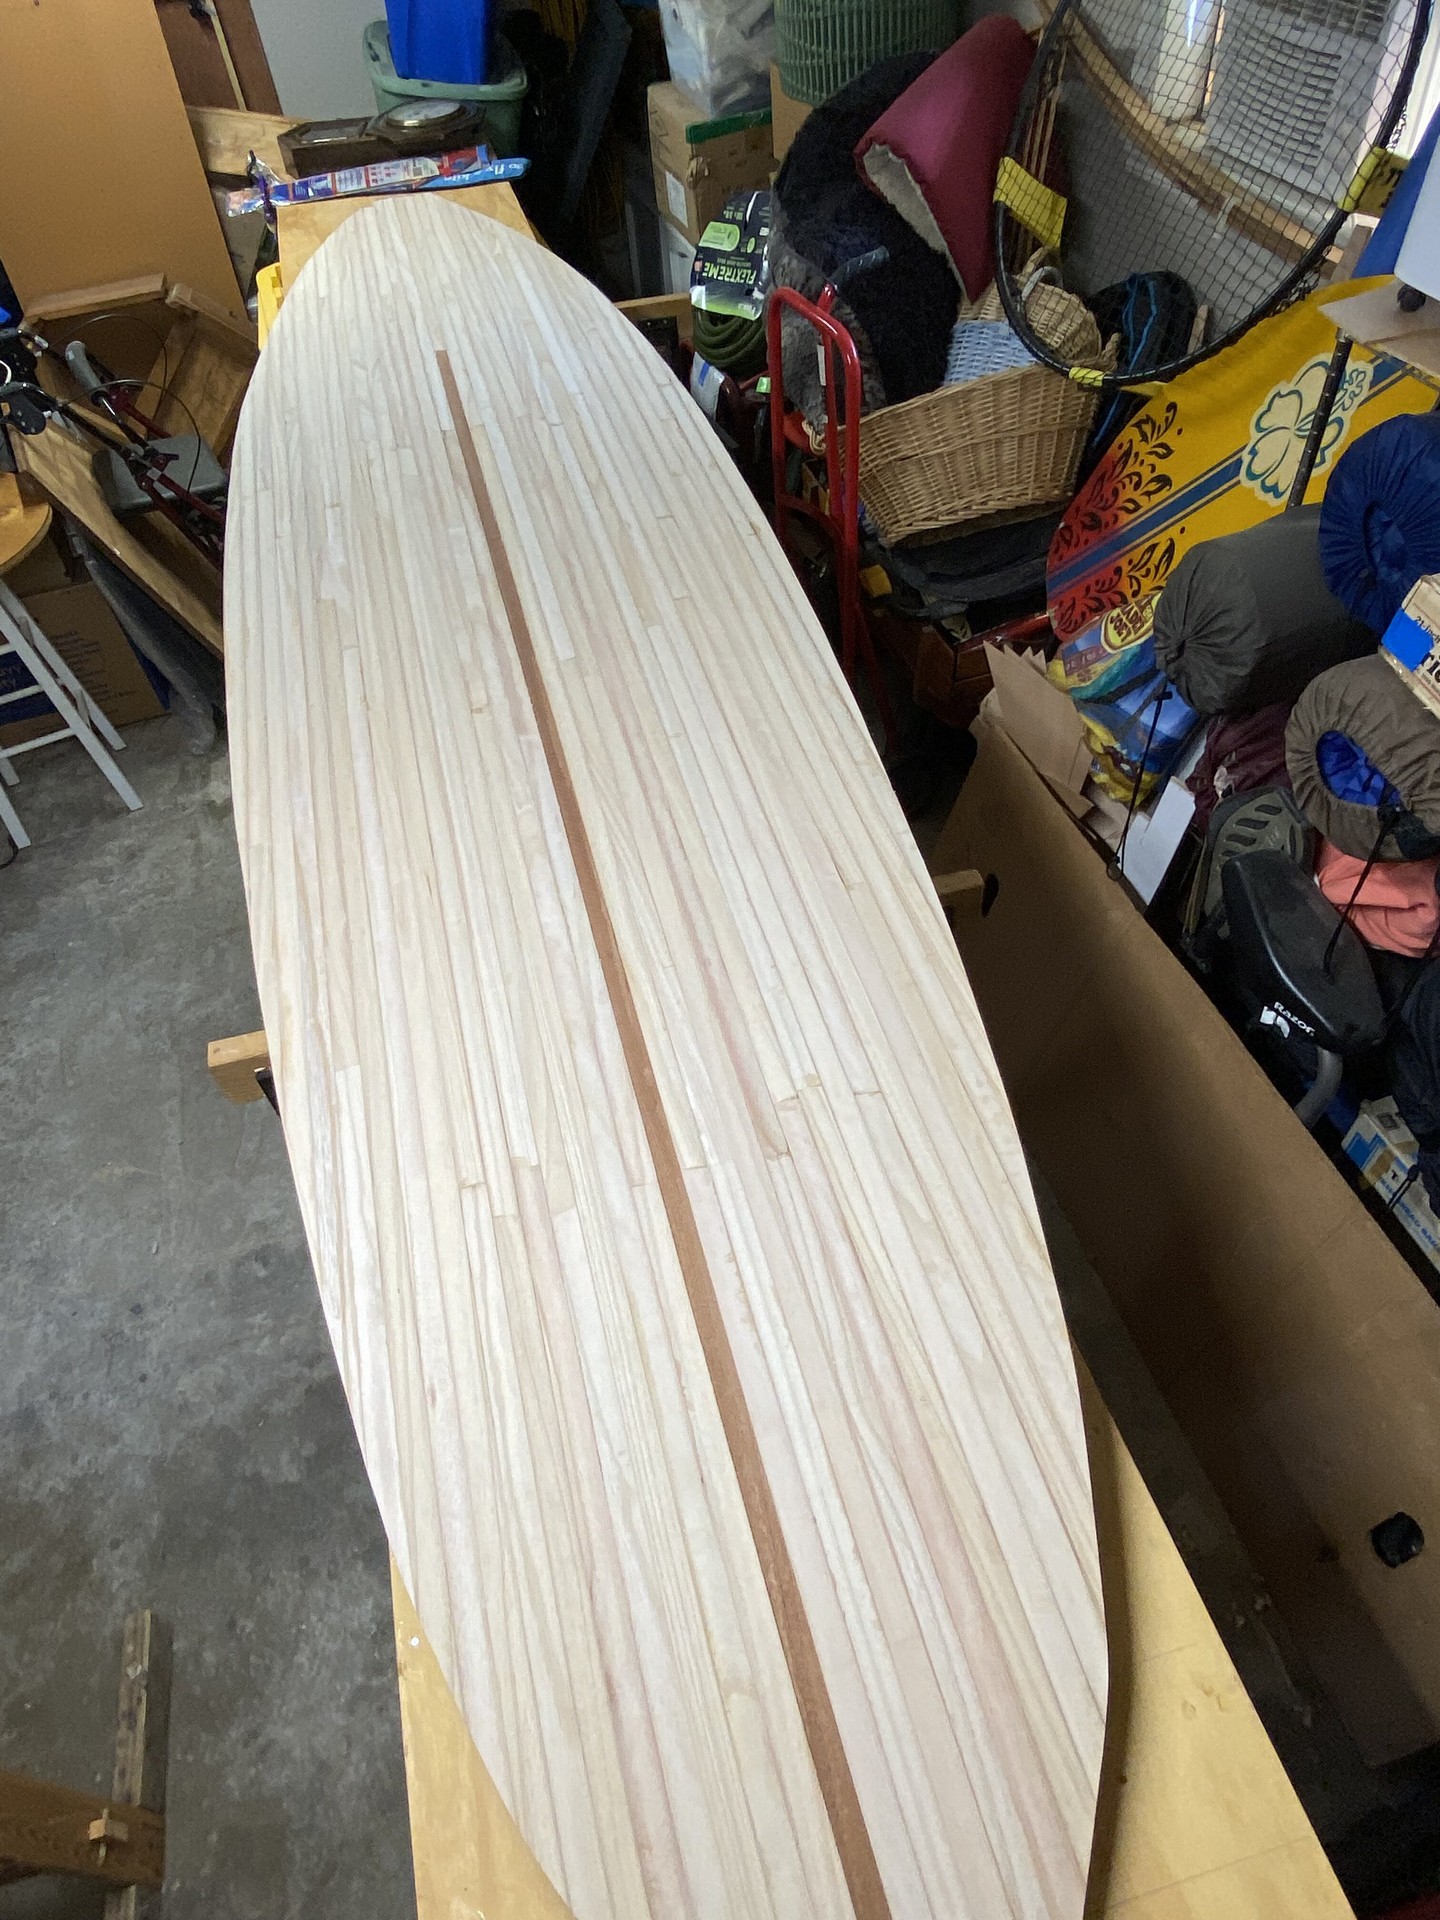
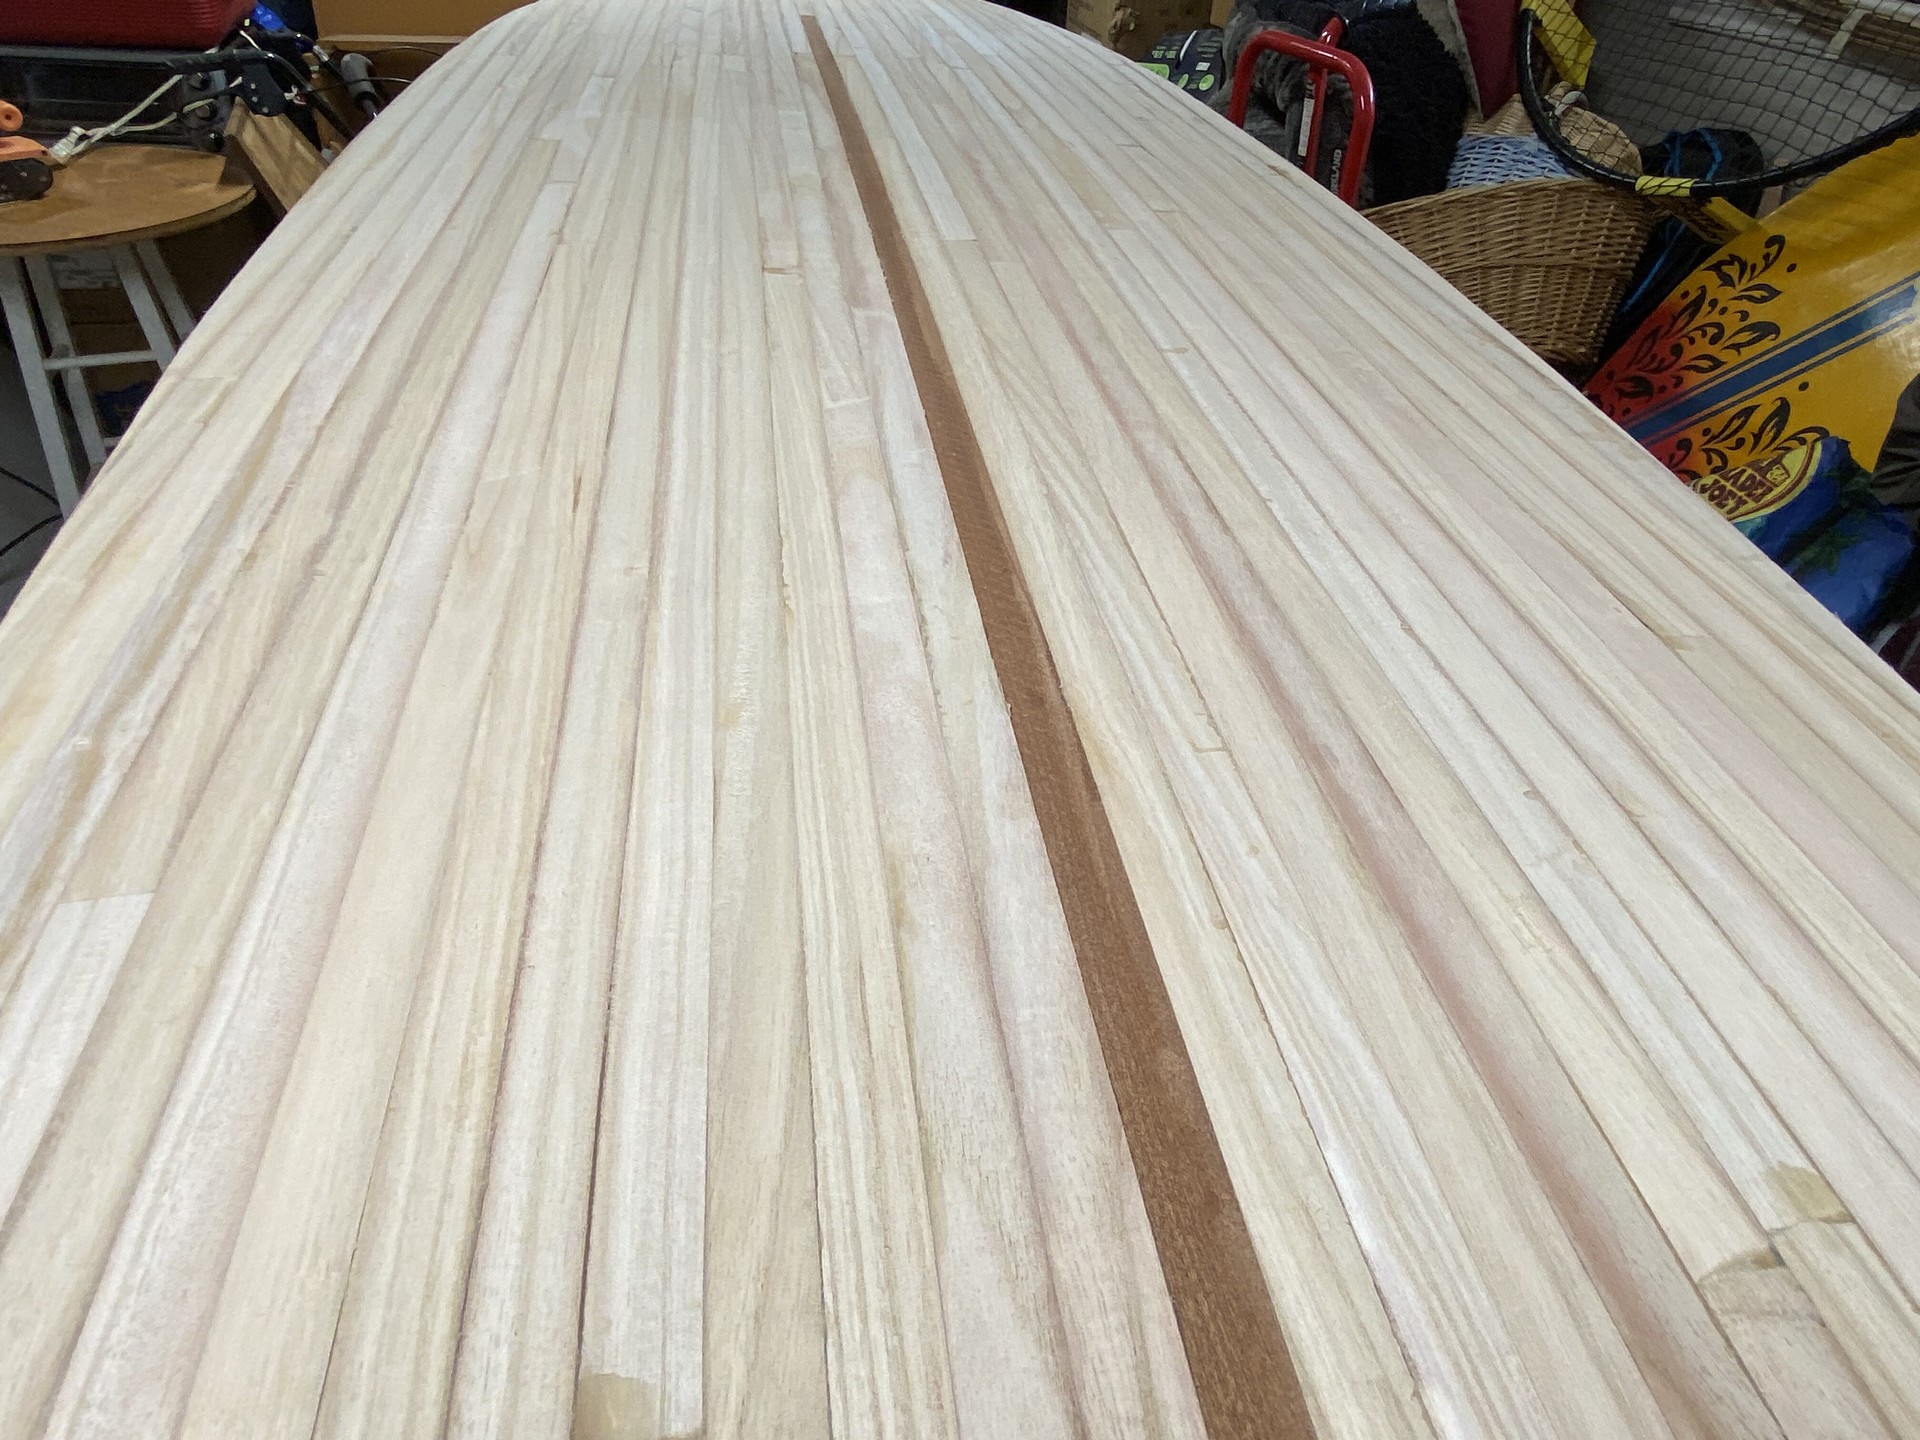
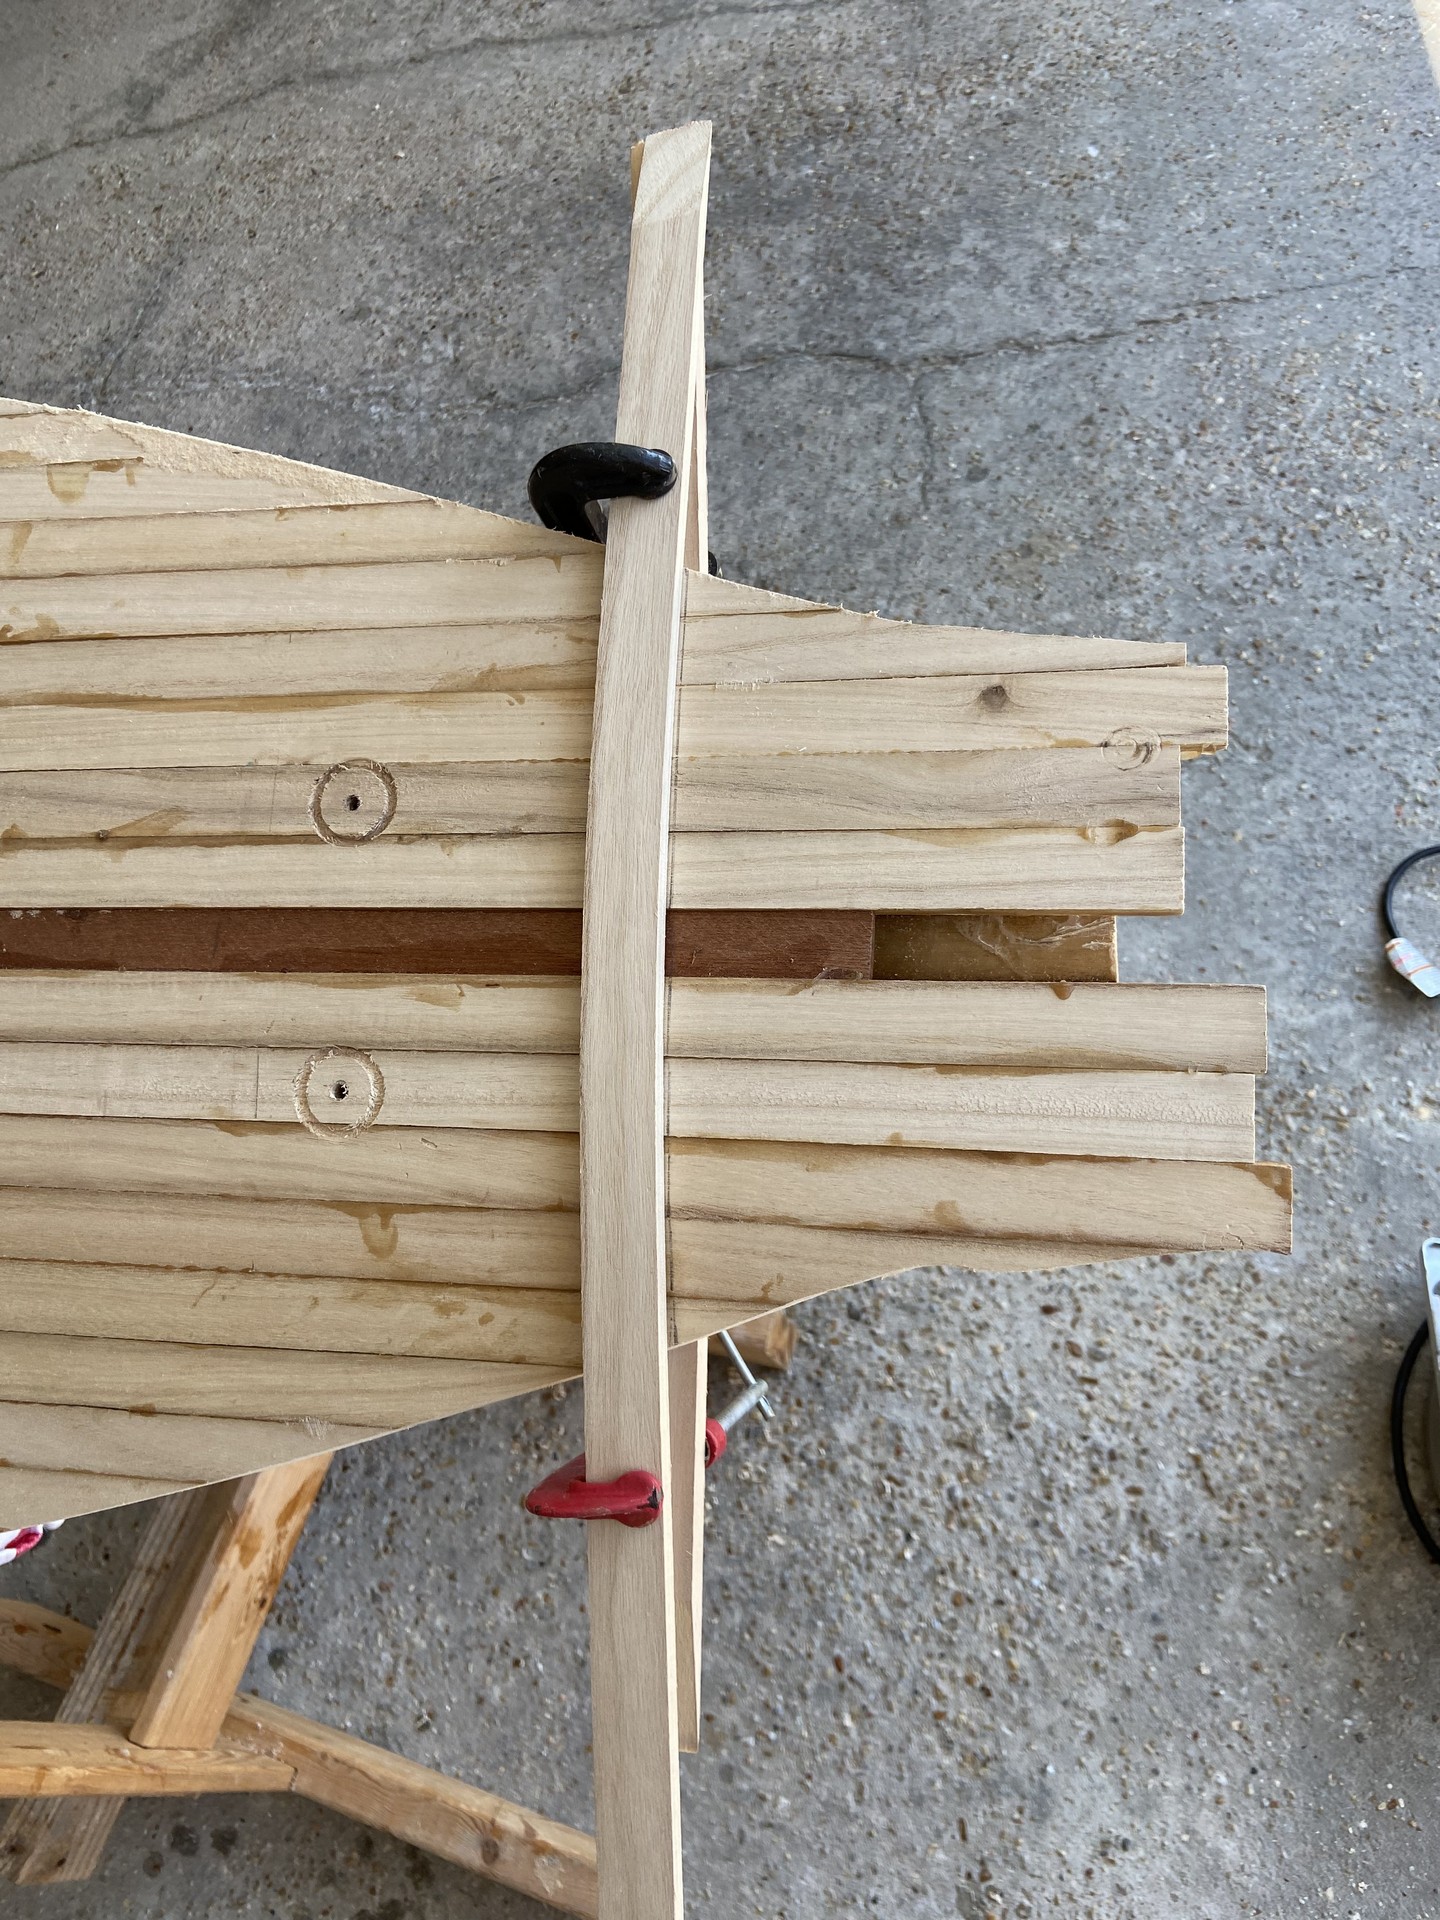
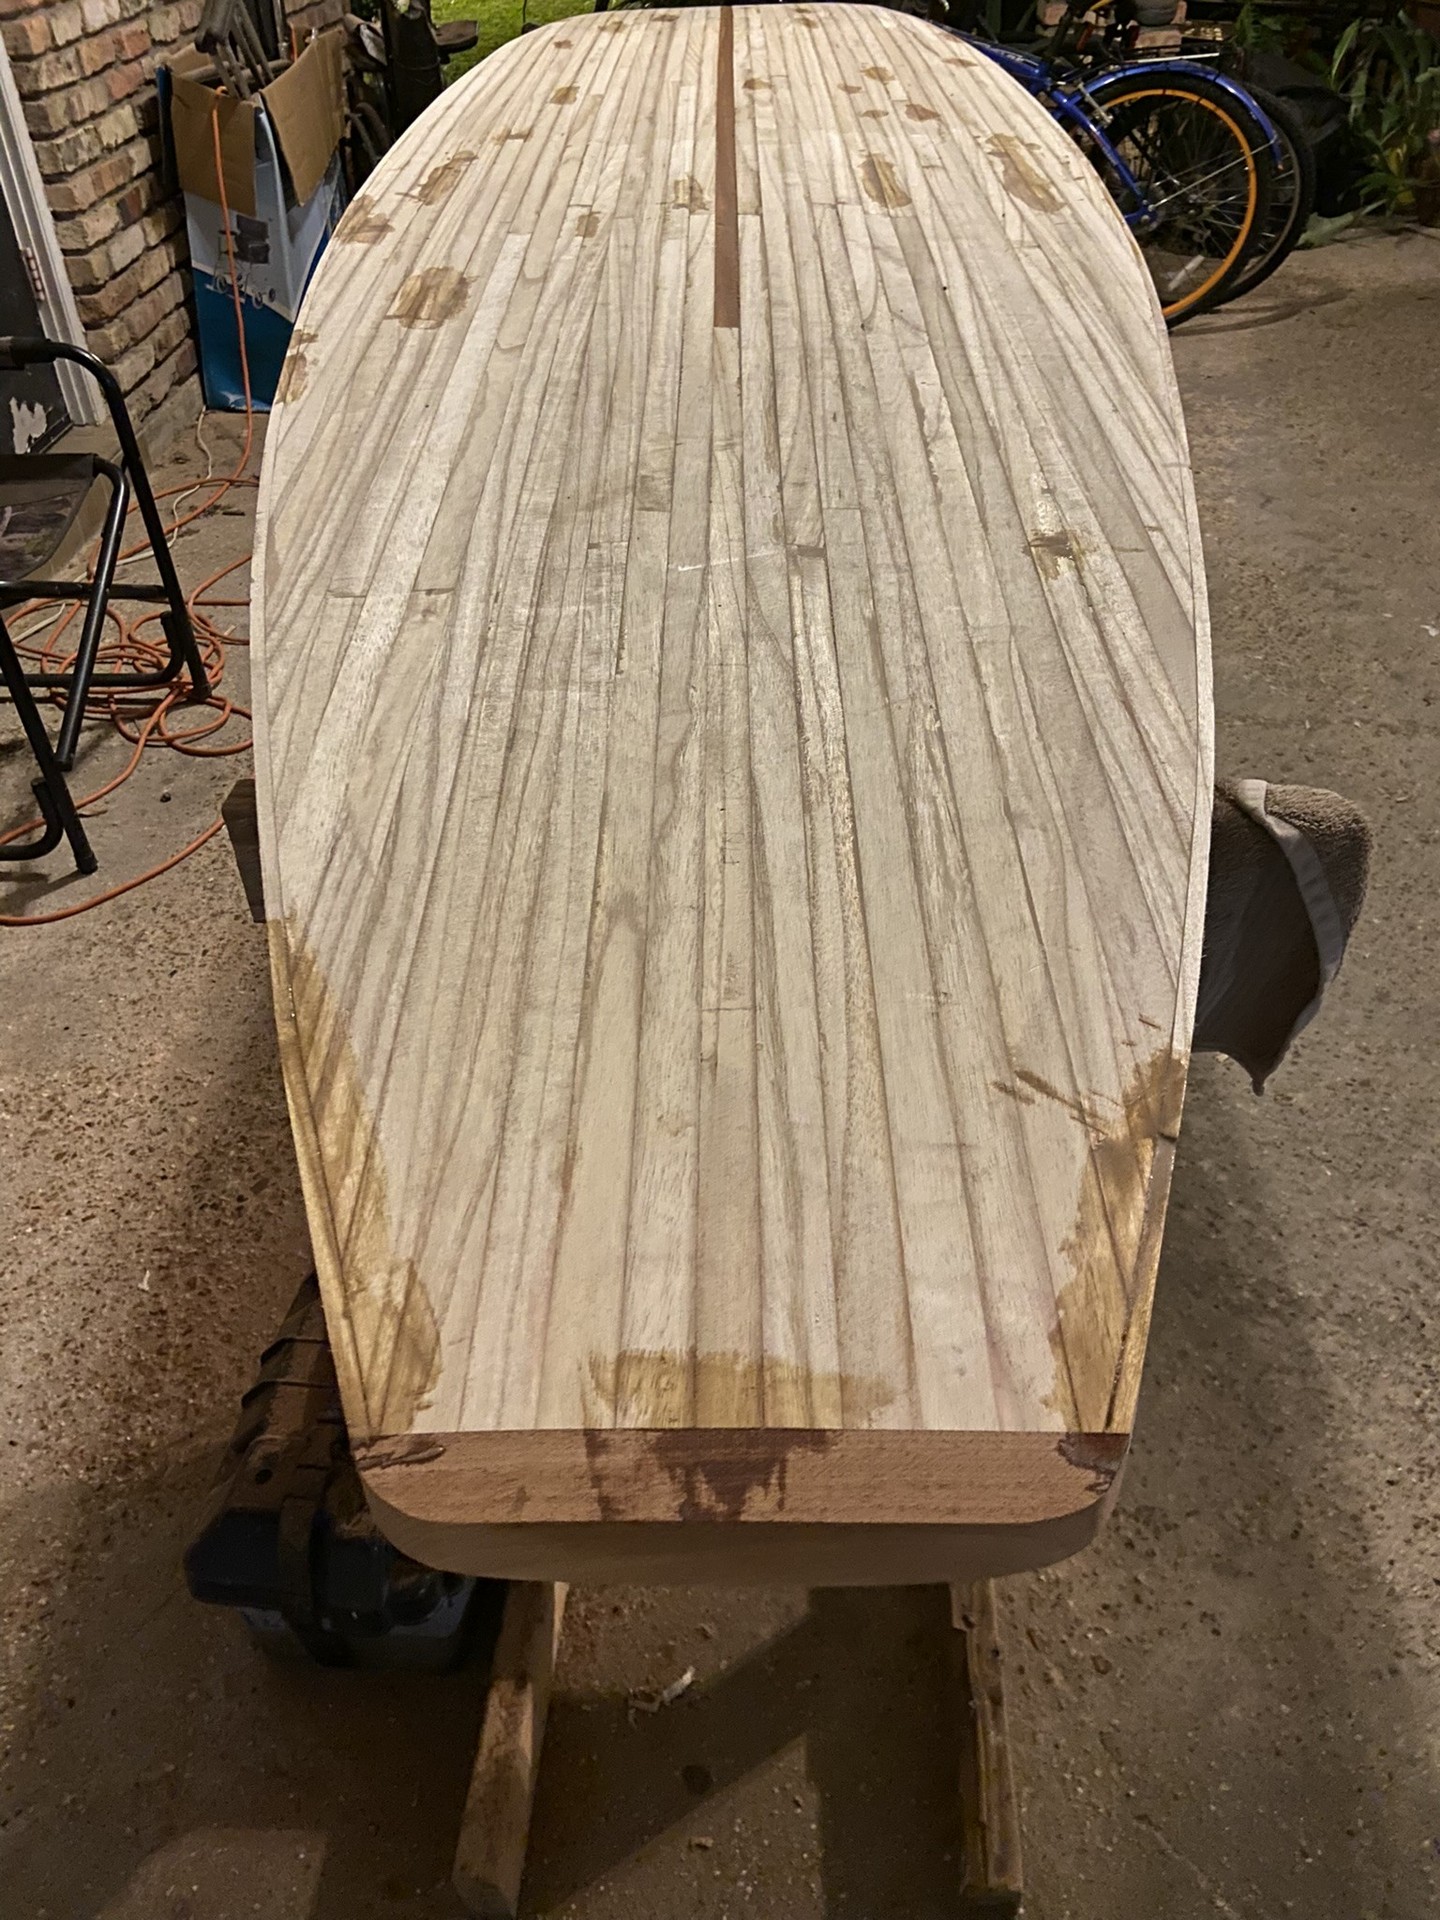
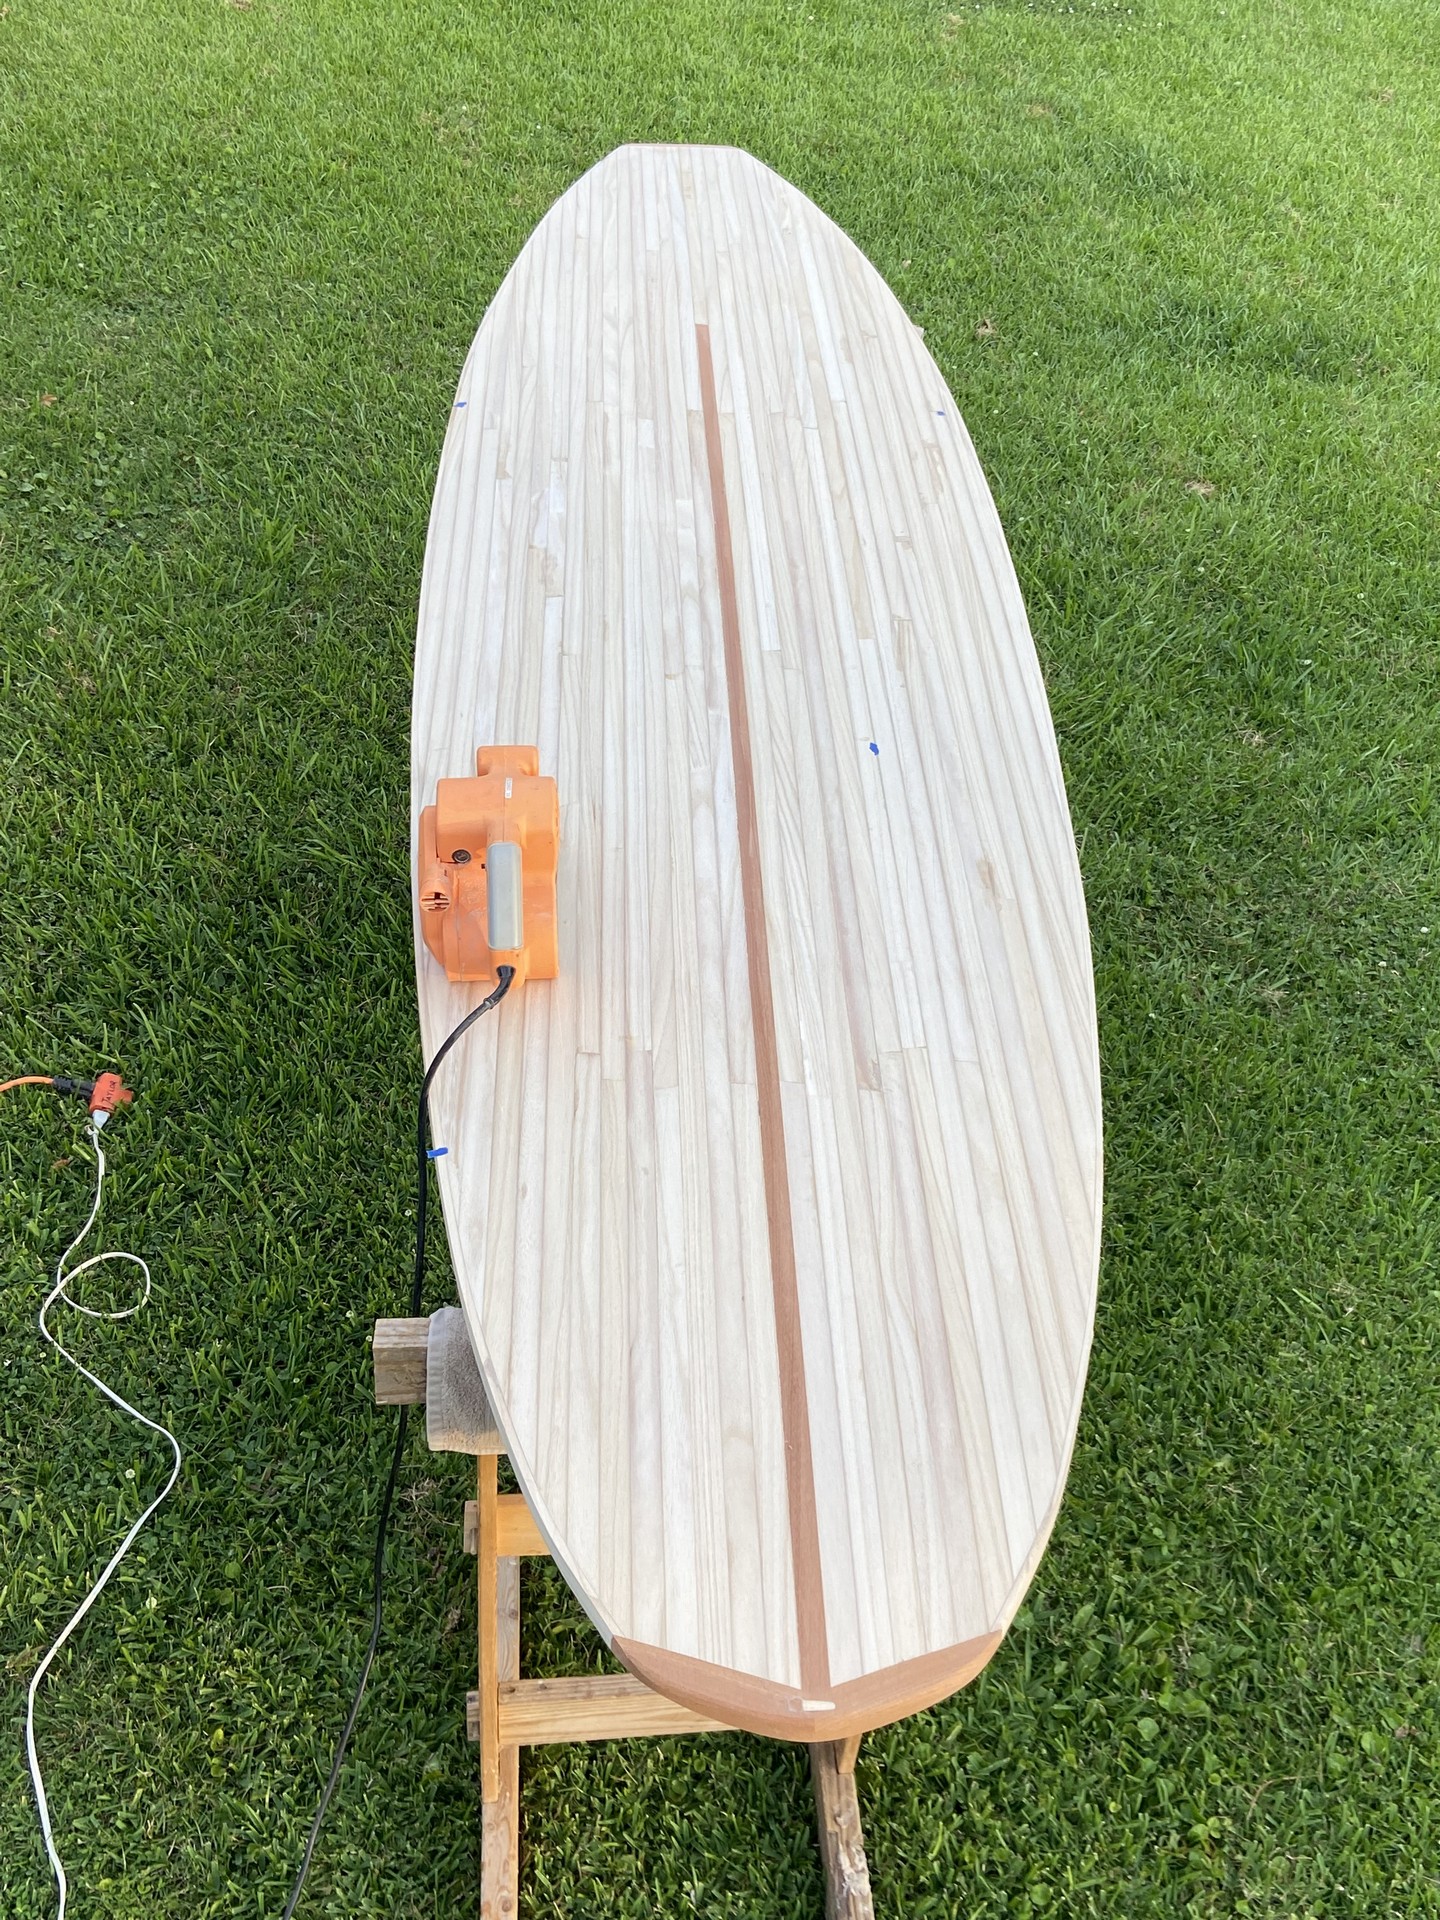
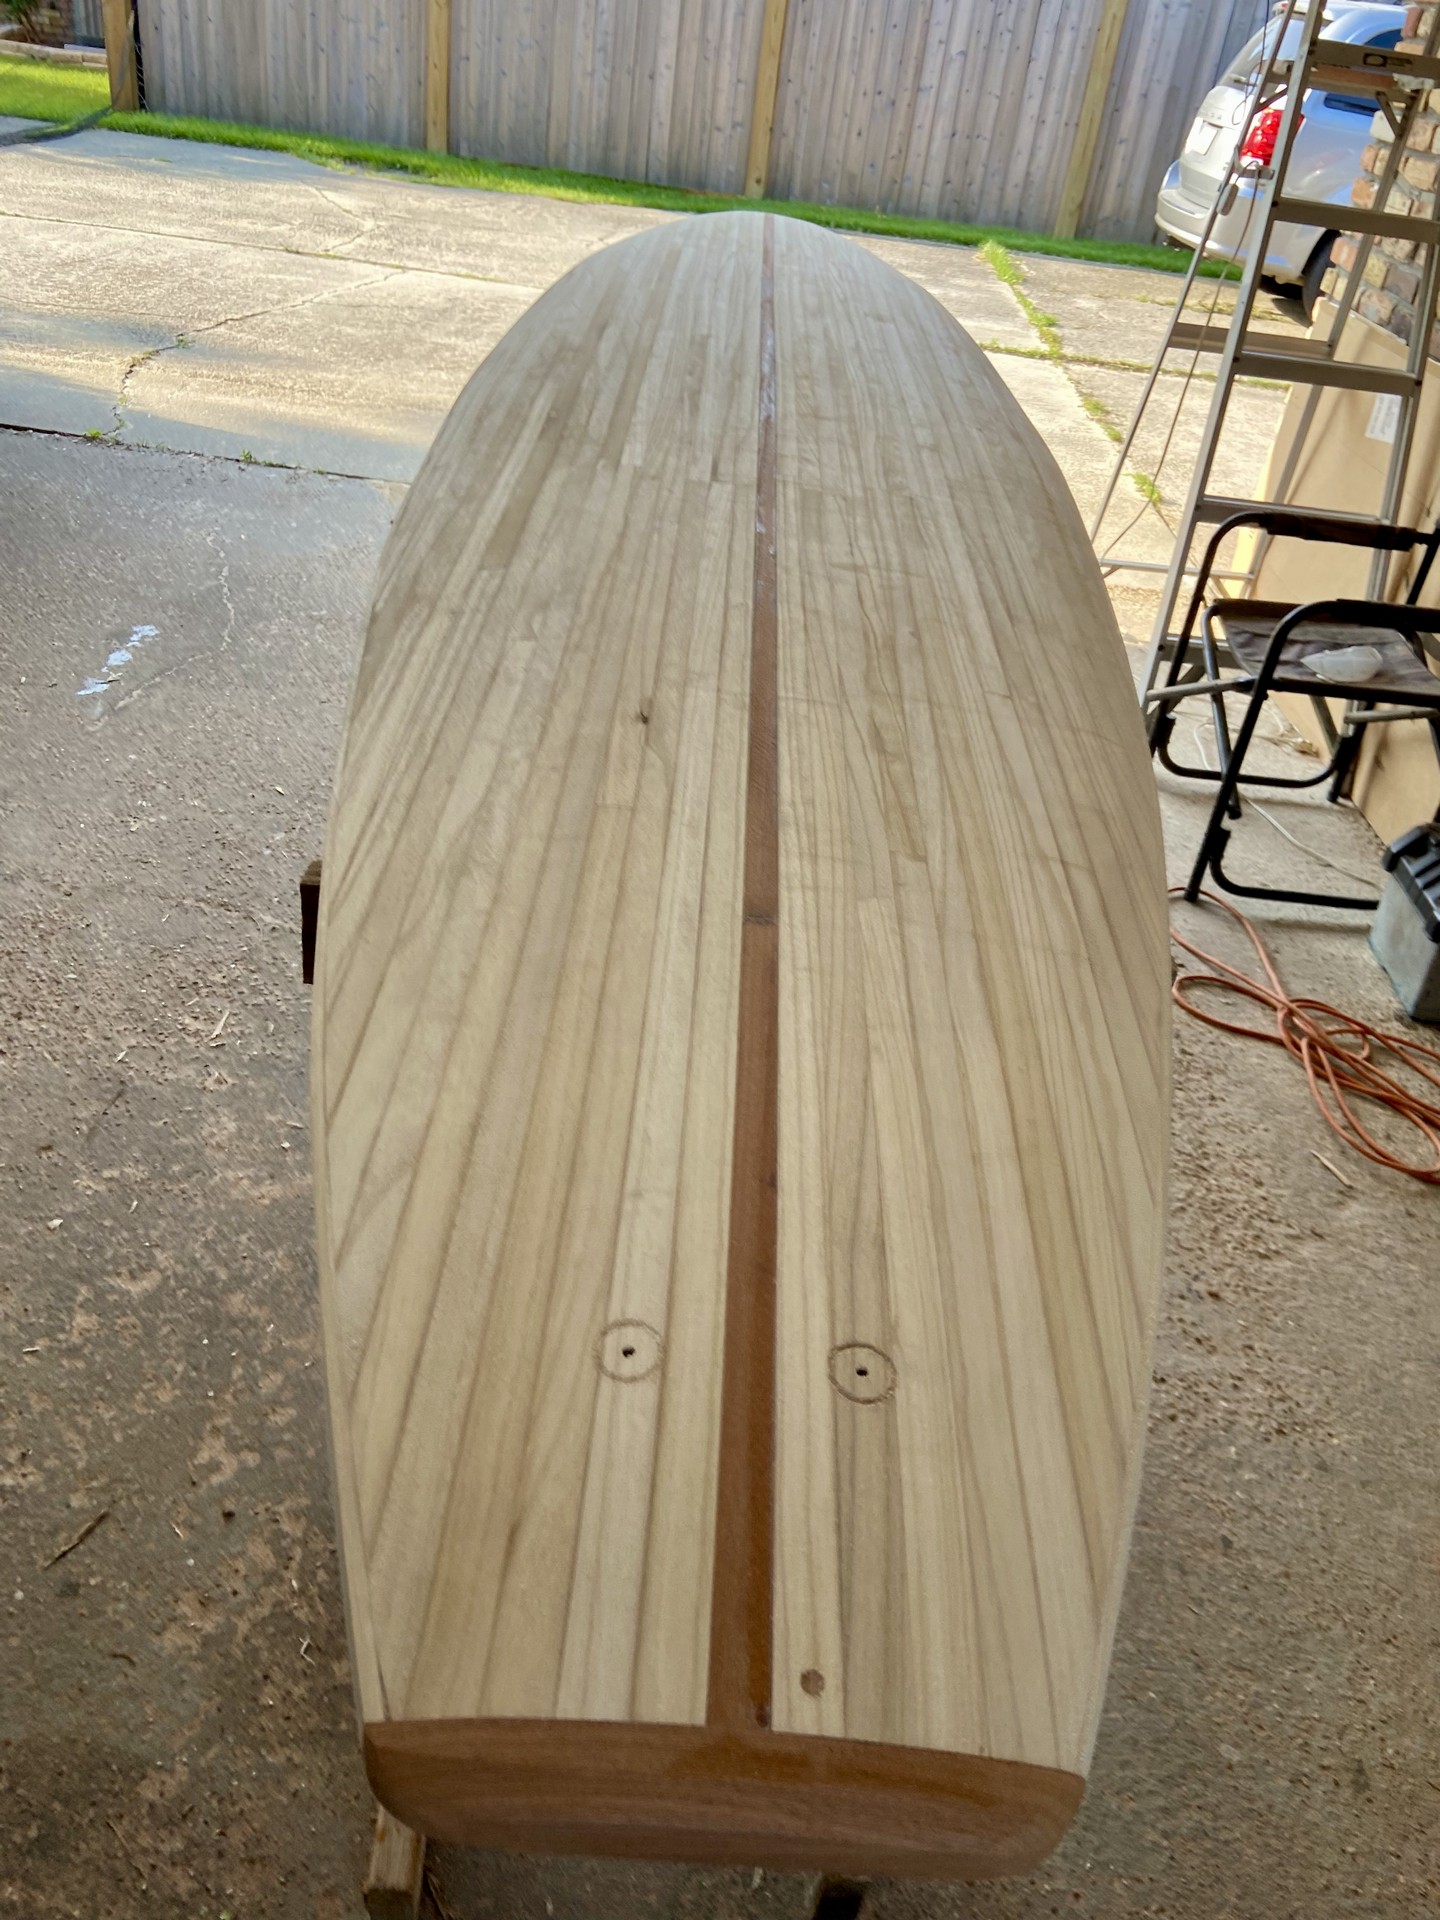
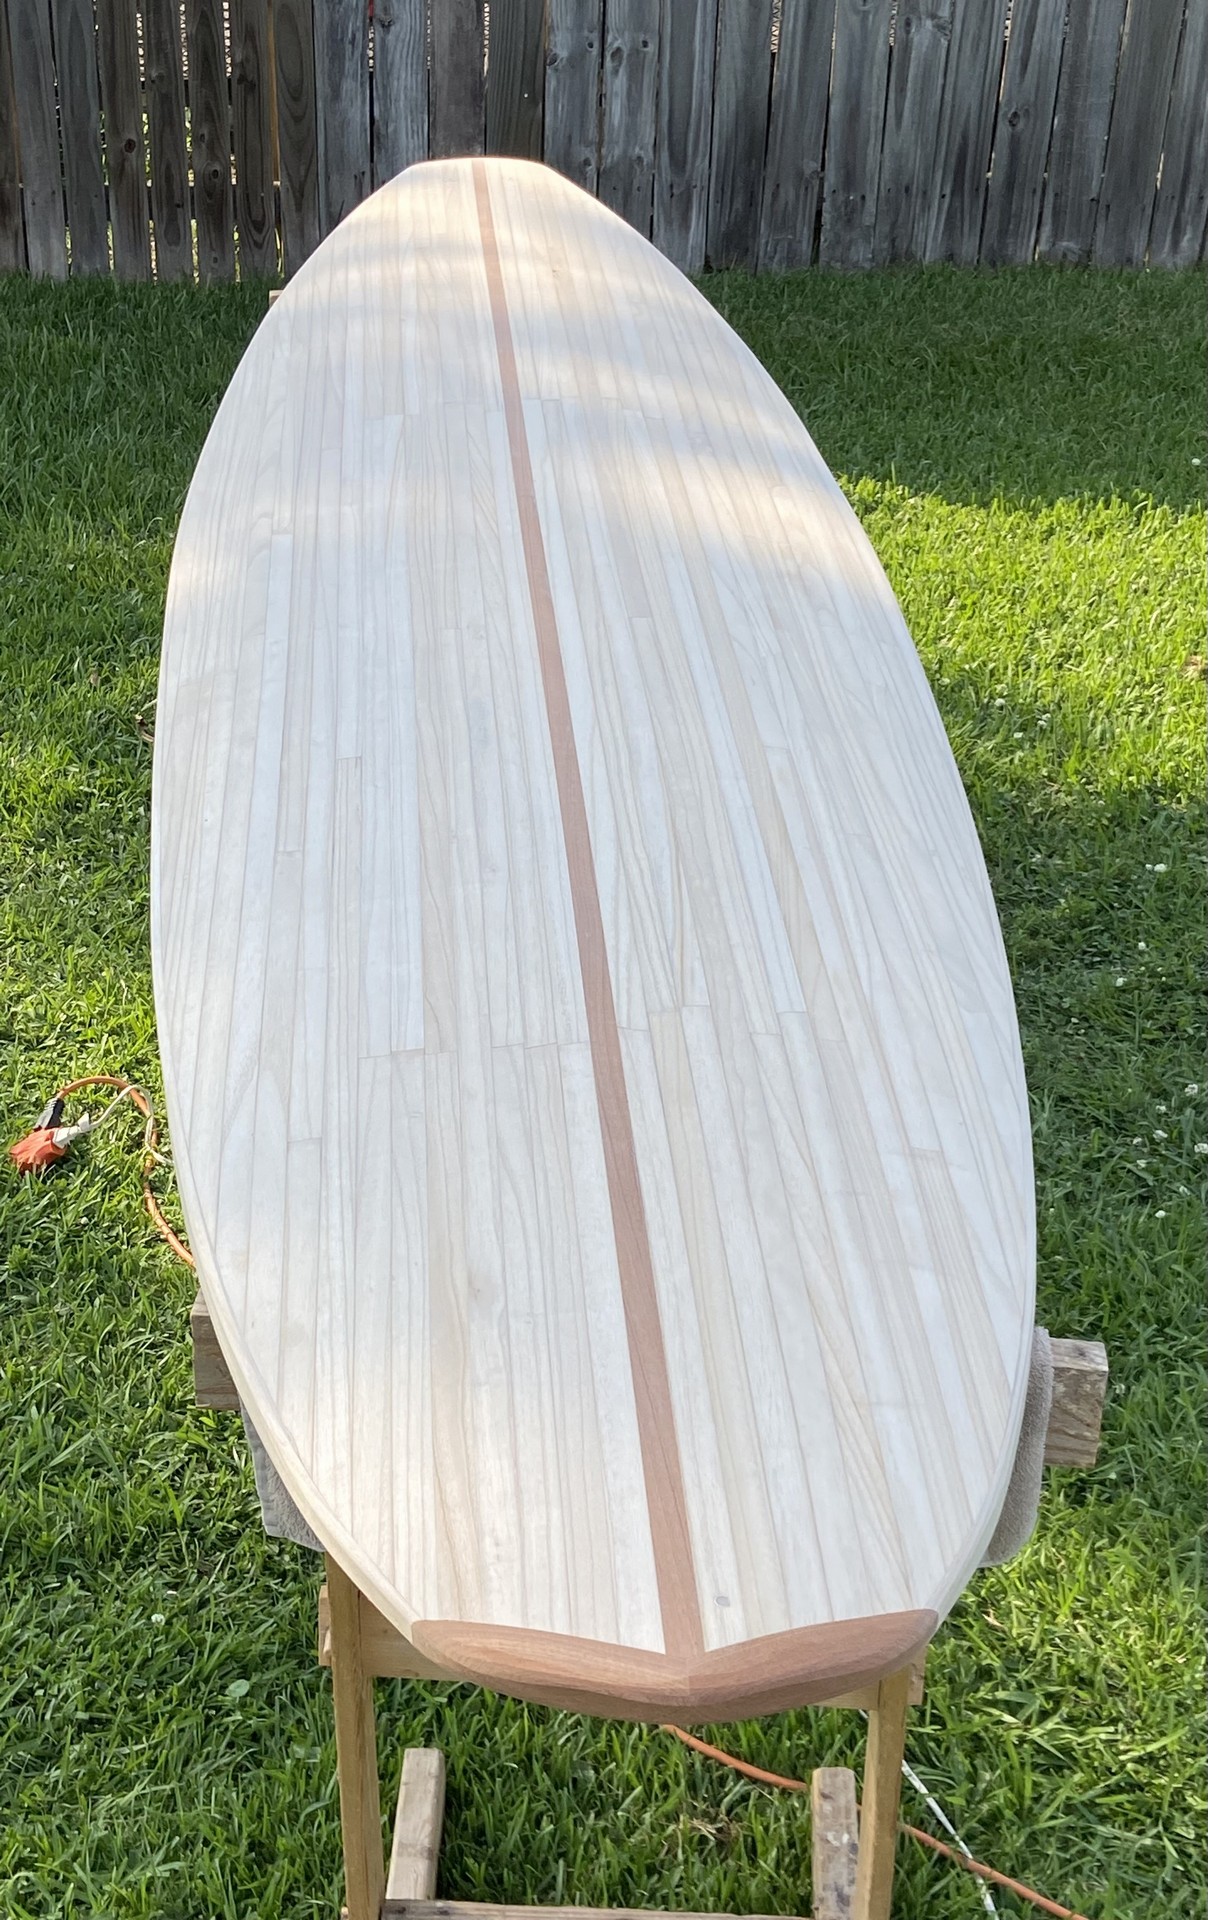
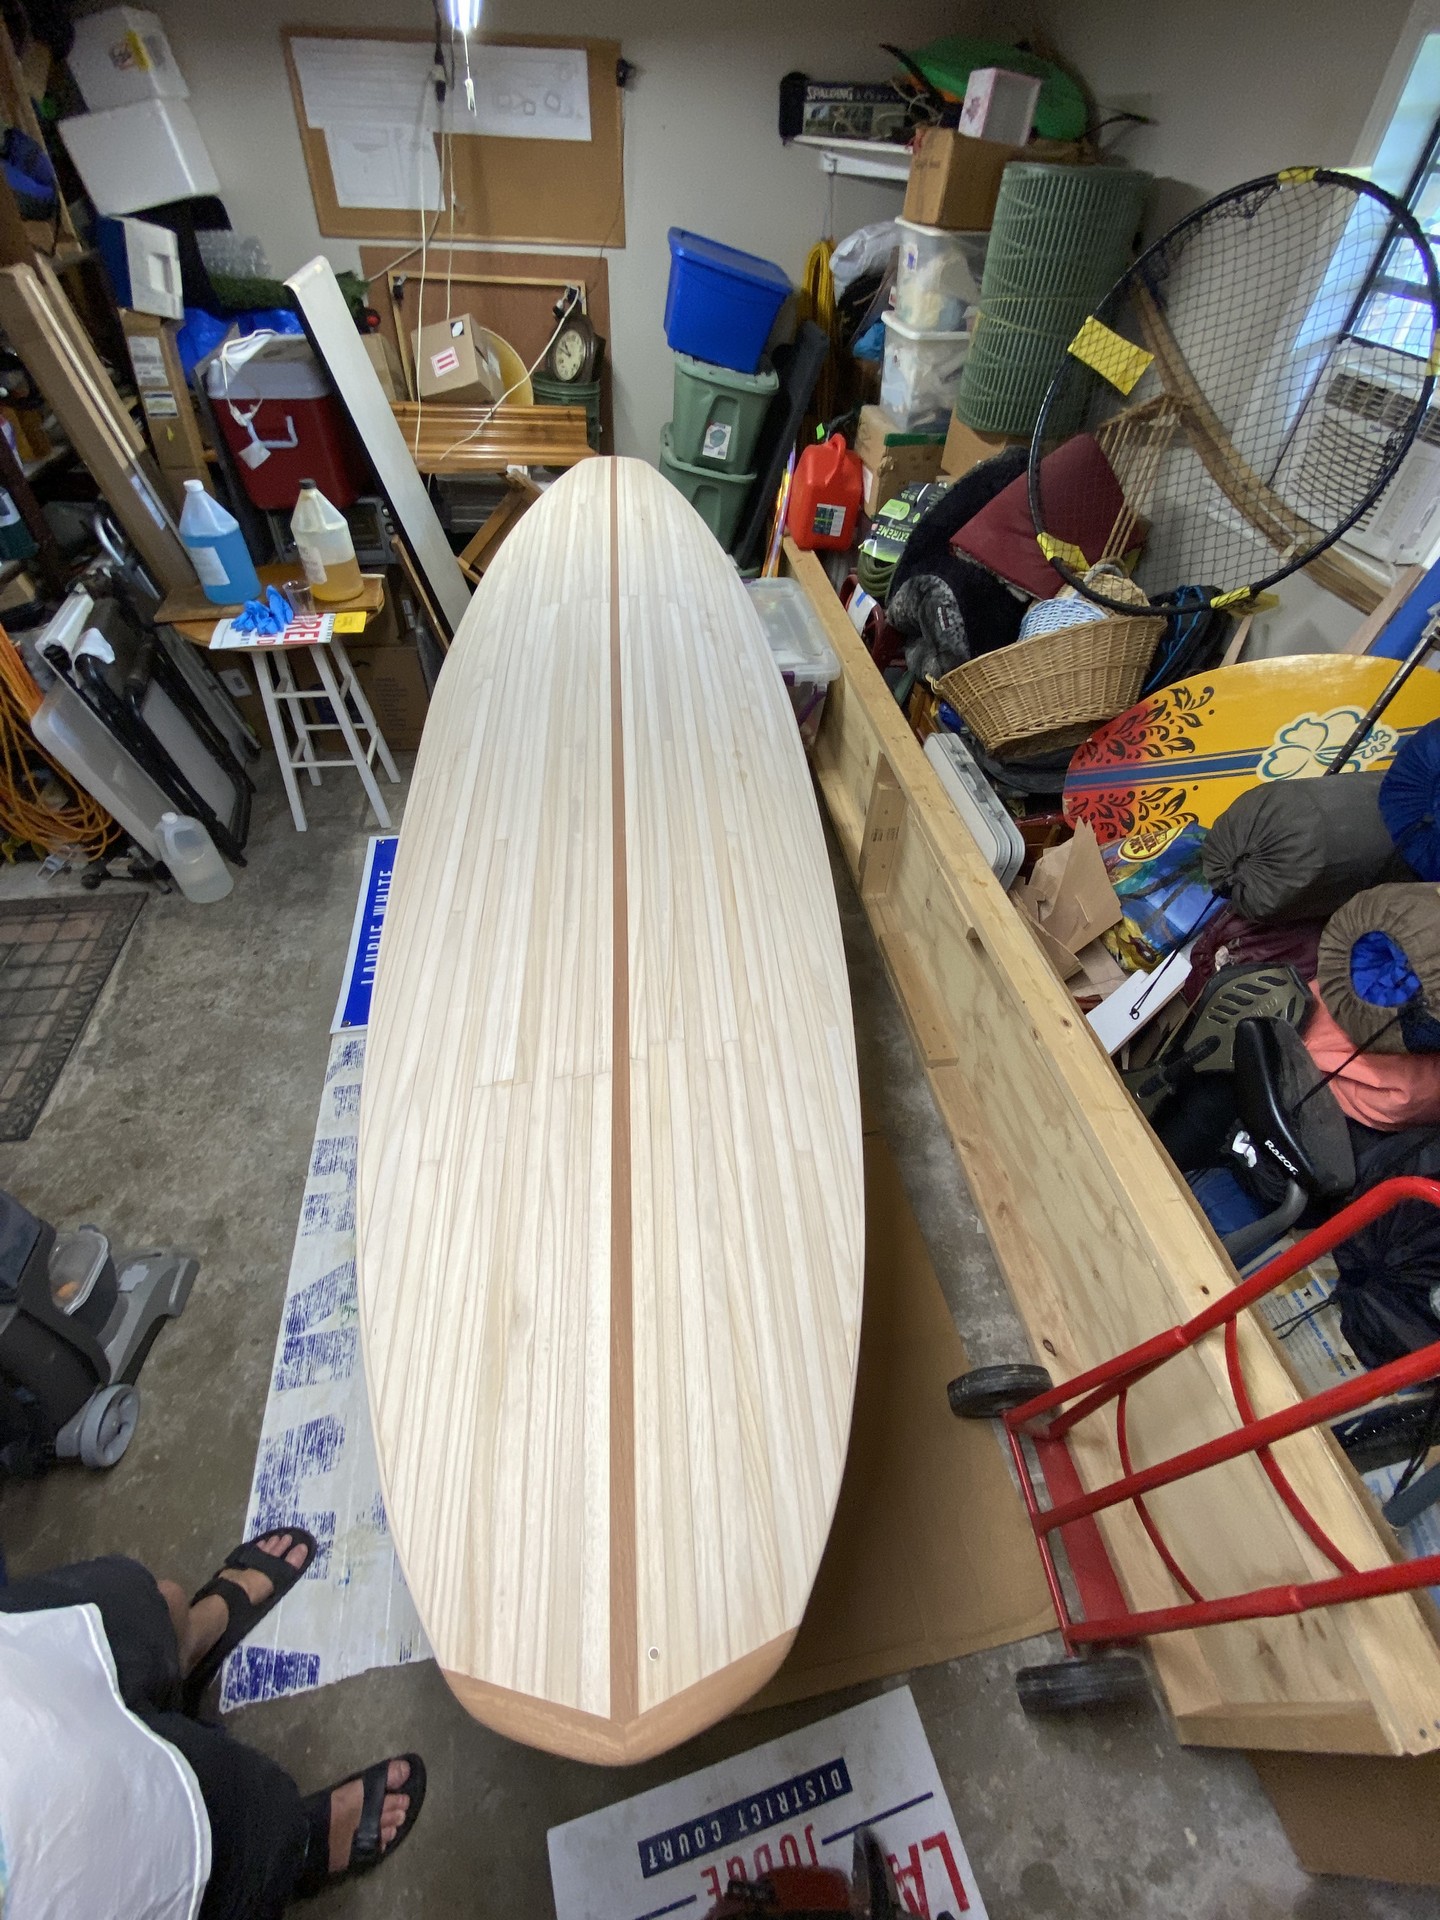
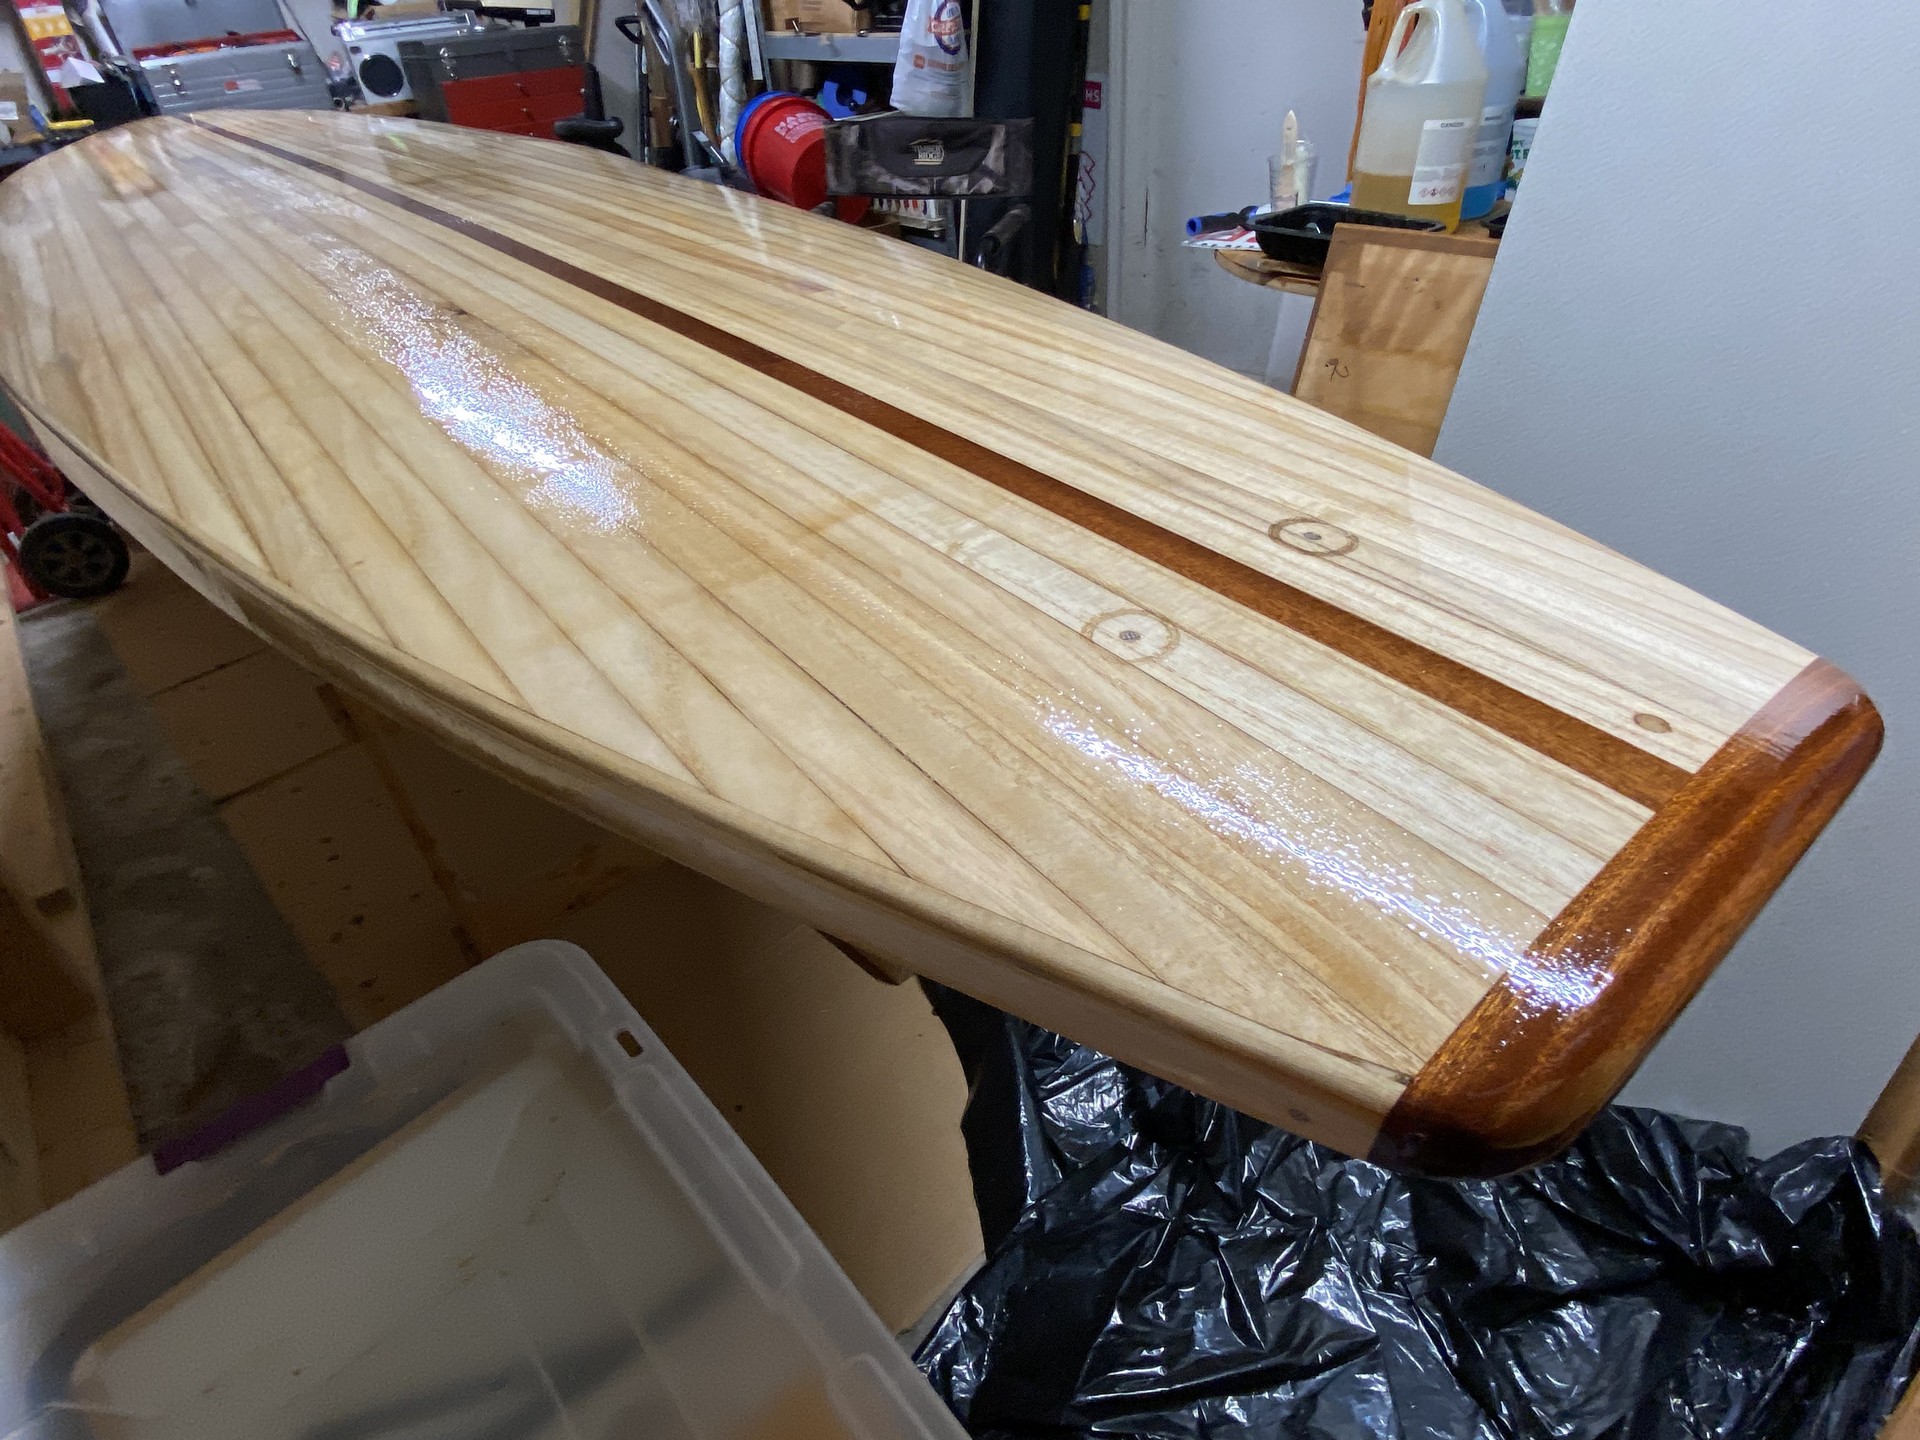
Saturday was productive beginning with trimming the overhanging strips from the paddleboard deck using a jigsaw. I also used a circular saw to cut excess length off the nose and tail and used a belt sander with 80 grit to remove glue globs and smooth out the deck. This isn’t the final cut before gluing on nose and tail blocks, but simply a cut to tidy up the overhanging strips. After a bit of planning and laying out tests, I glued and clamped a single strip down the middle of each side rail. Other tasks include making four additional long Paulownia strips to complete covering the rails.
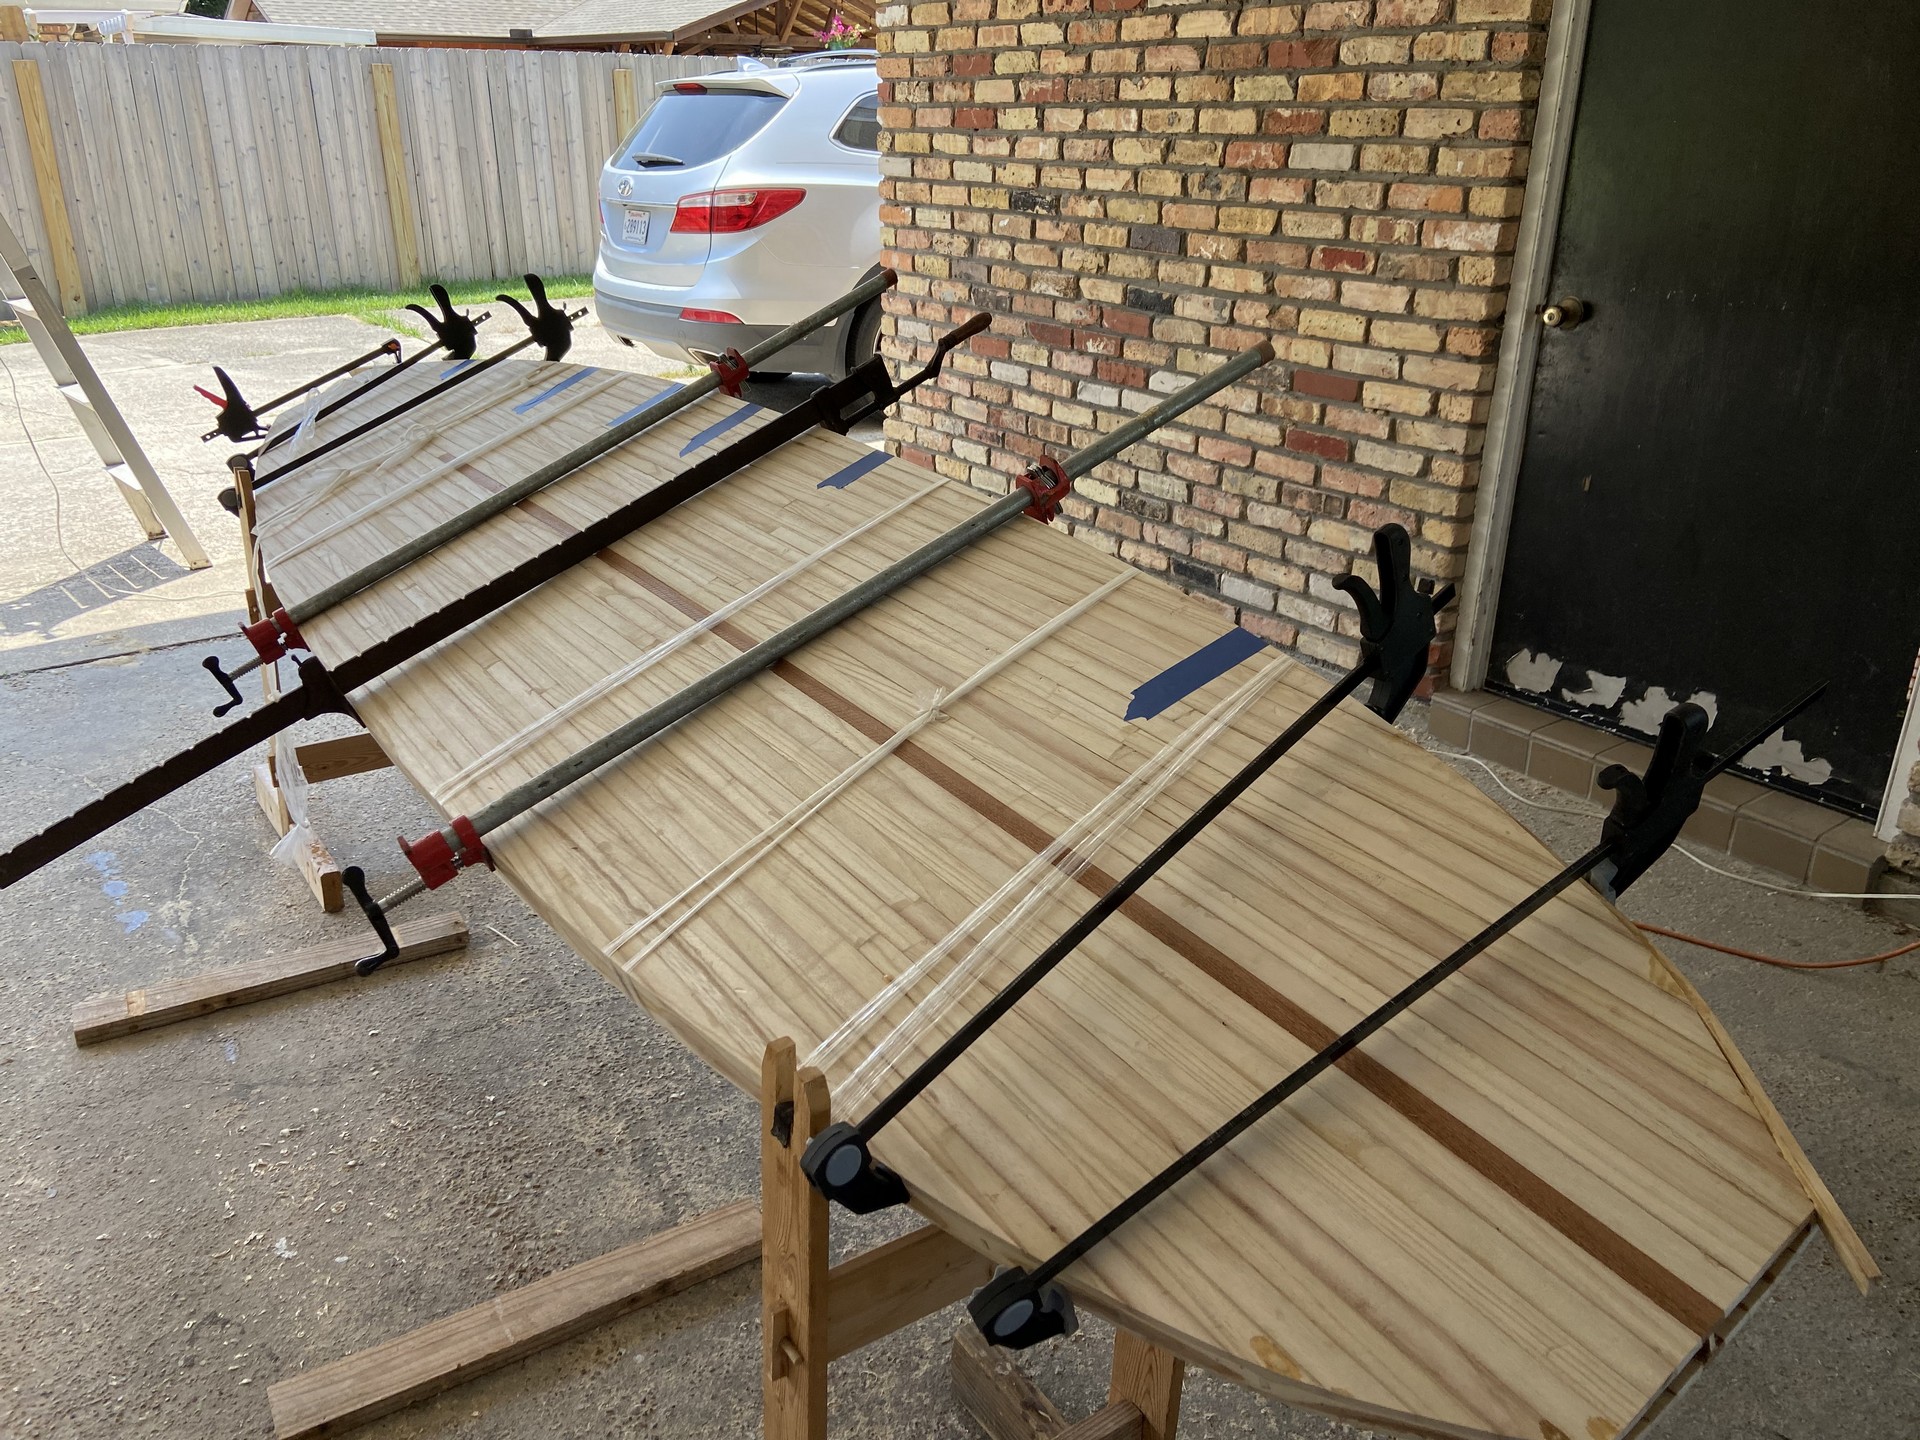
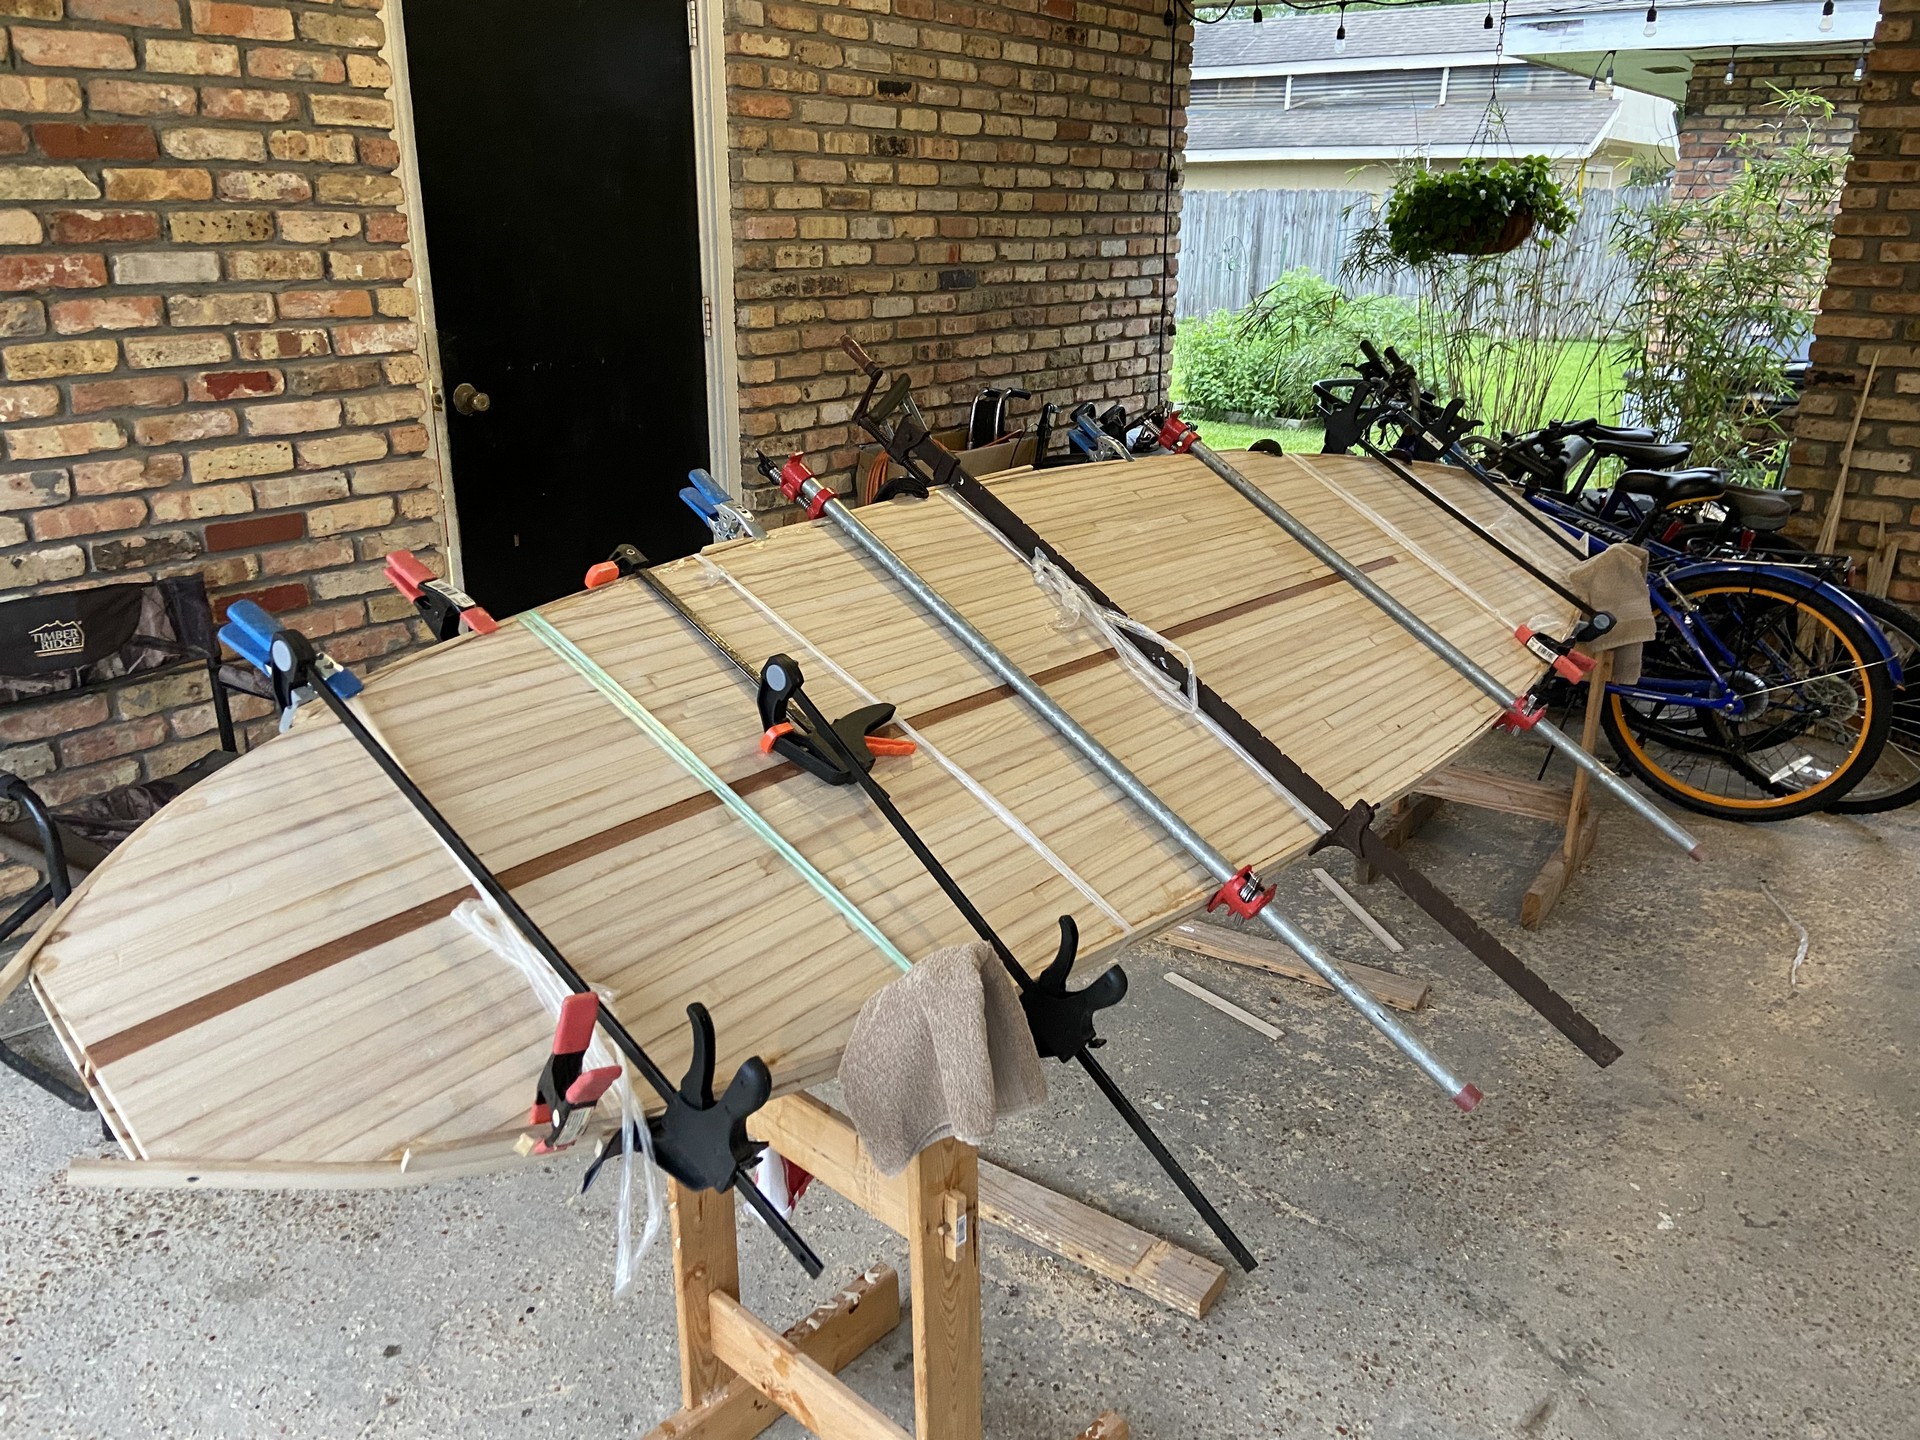
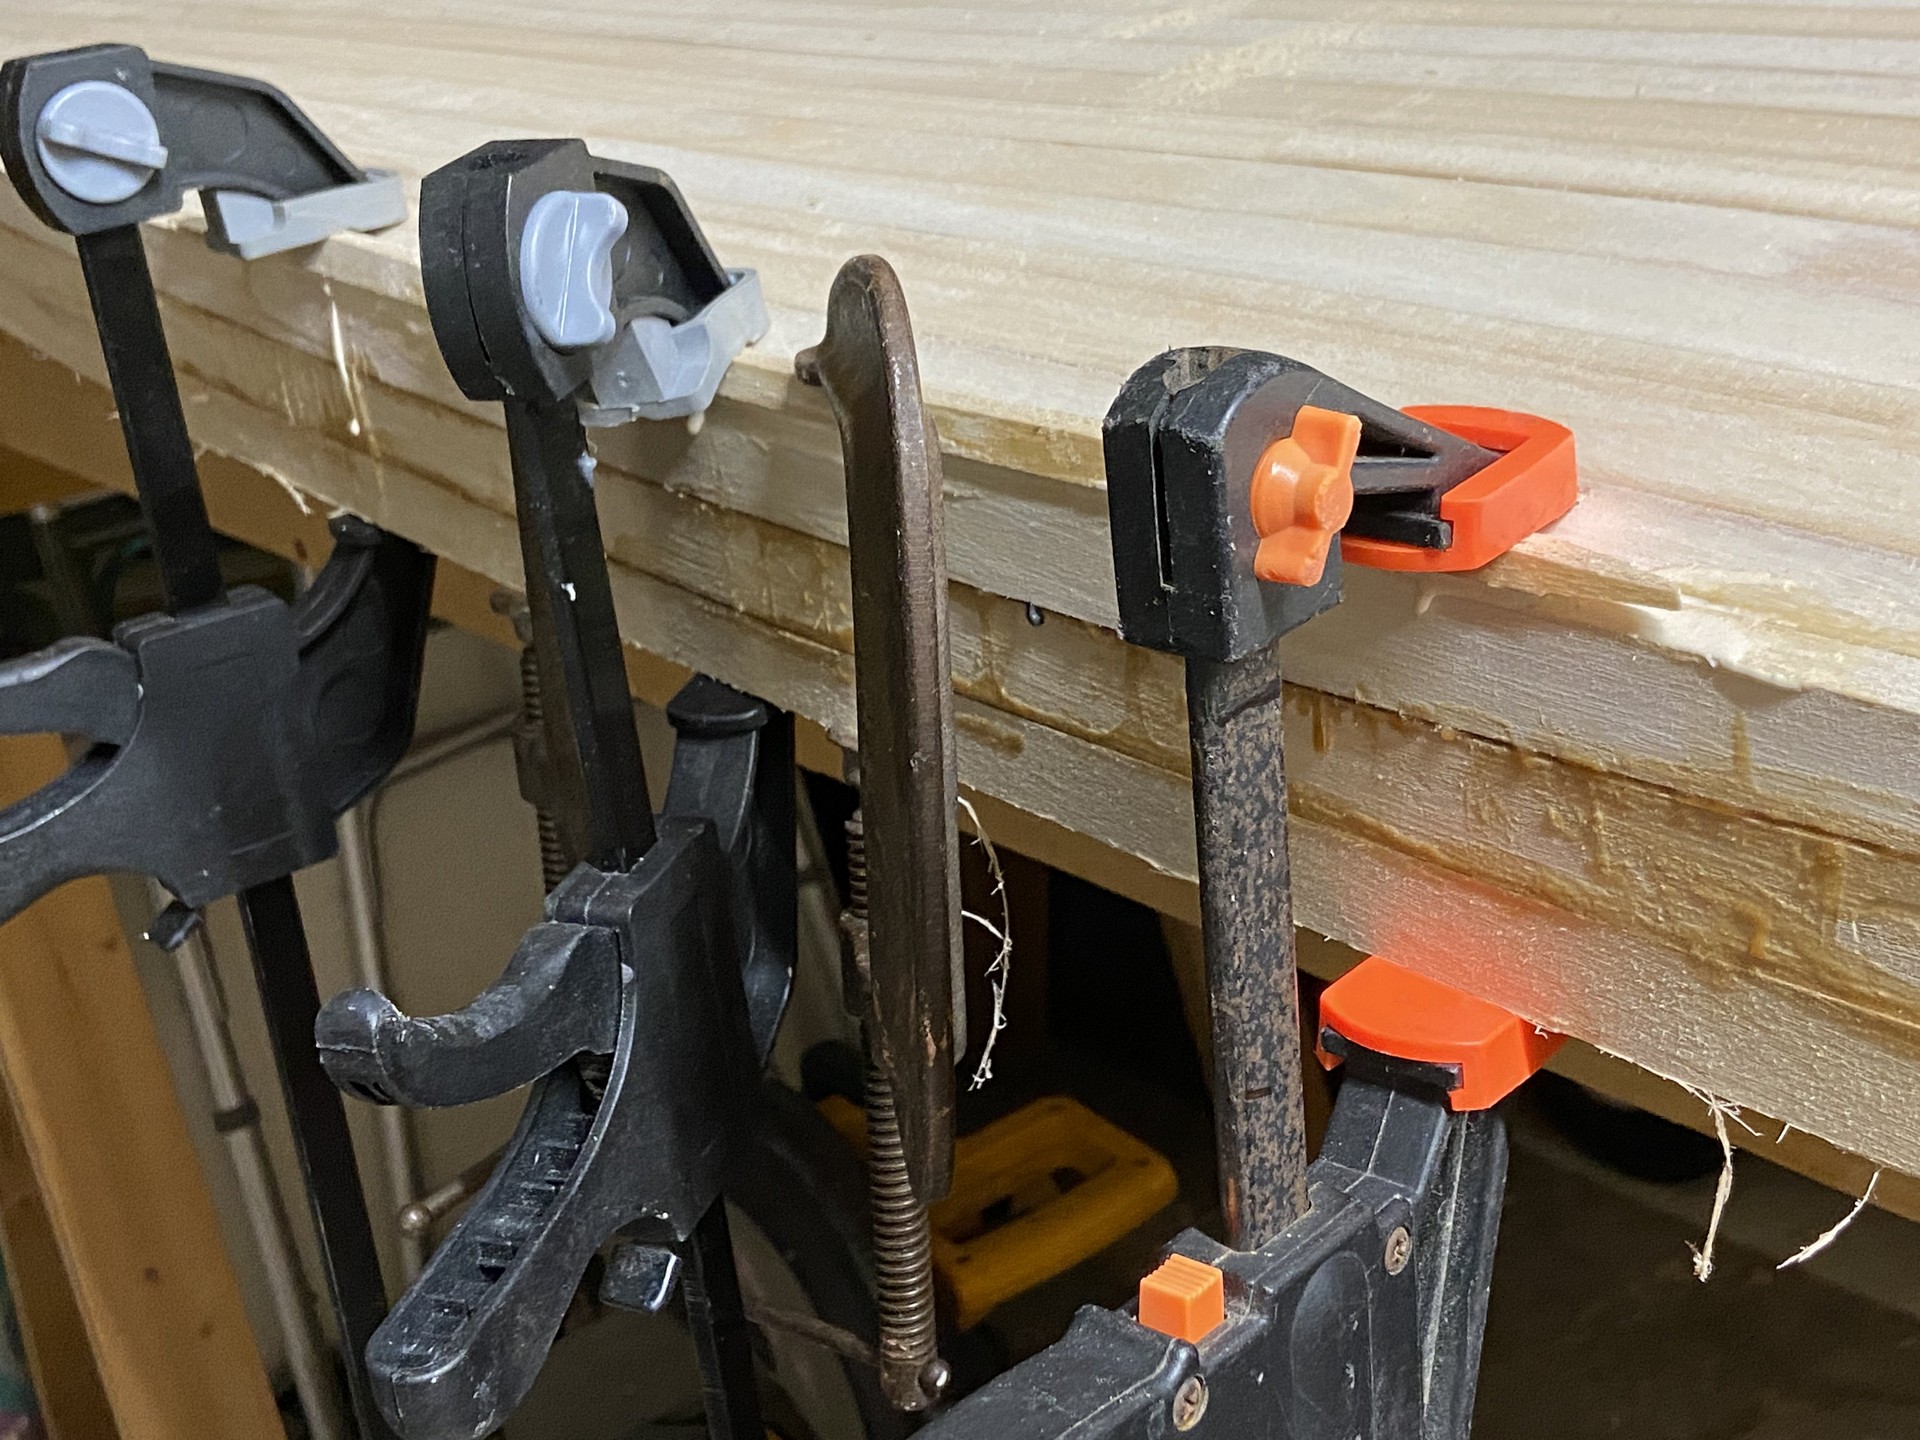
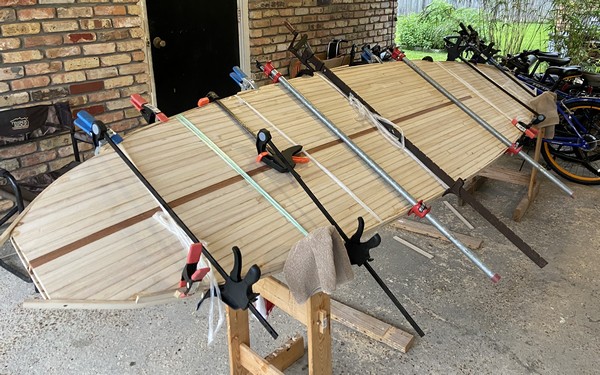
On Mother’s Day Sunday (following the appropriate festivities) I glued two more strips to the rails as shown in the photo below. That leaves one more strip each on Monday and Tuesday, then Wednesday to trim off excess overhangs and maybe Thursday to begin working on the tail and nose blocks. Work this coming weekend will be abbreviated due to a family trip out of town.
GOAL: Substantial completion by first week of June for maiden voyage at a family reunion!
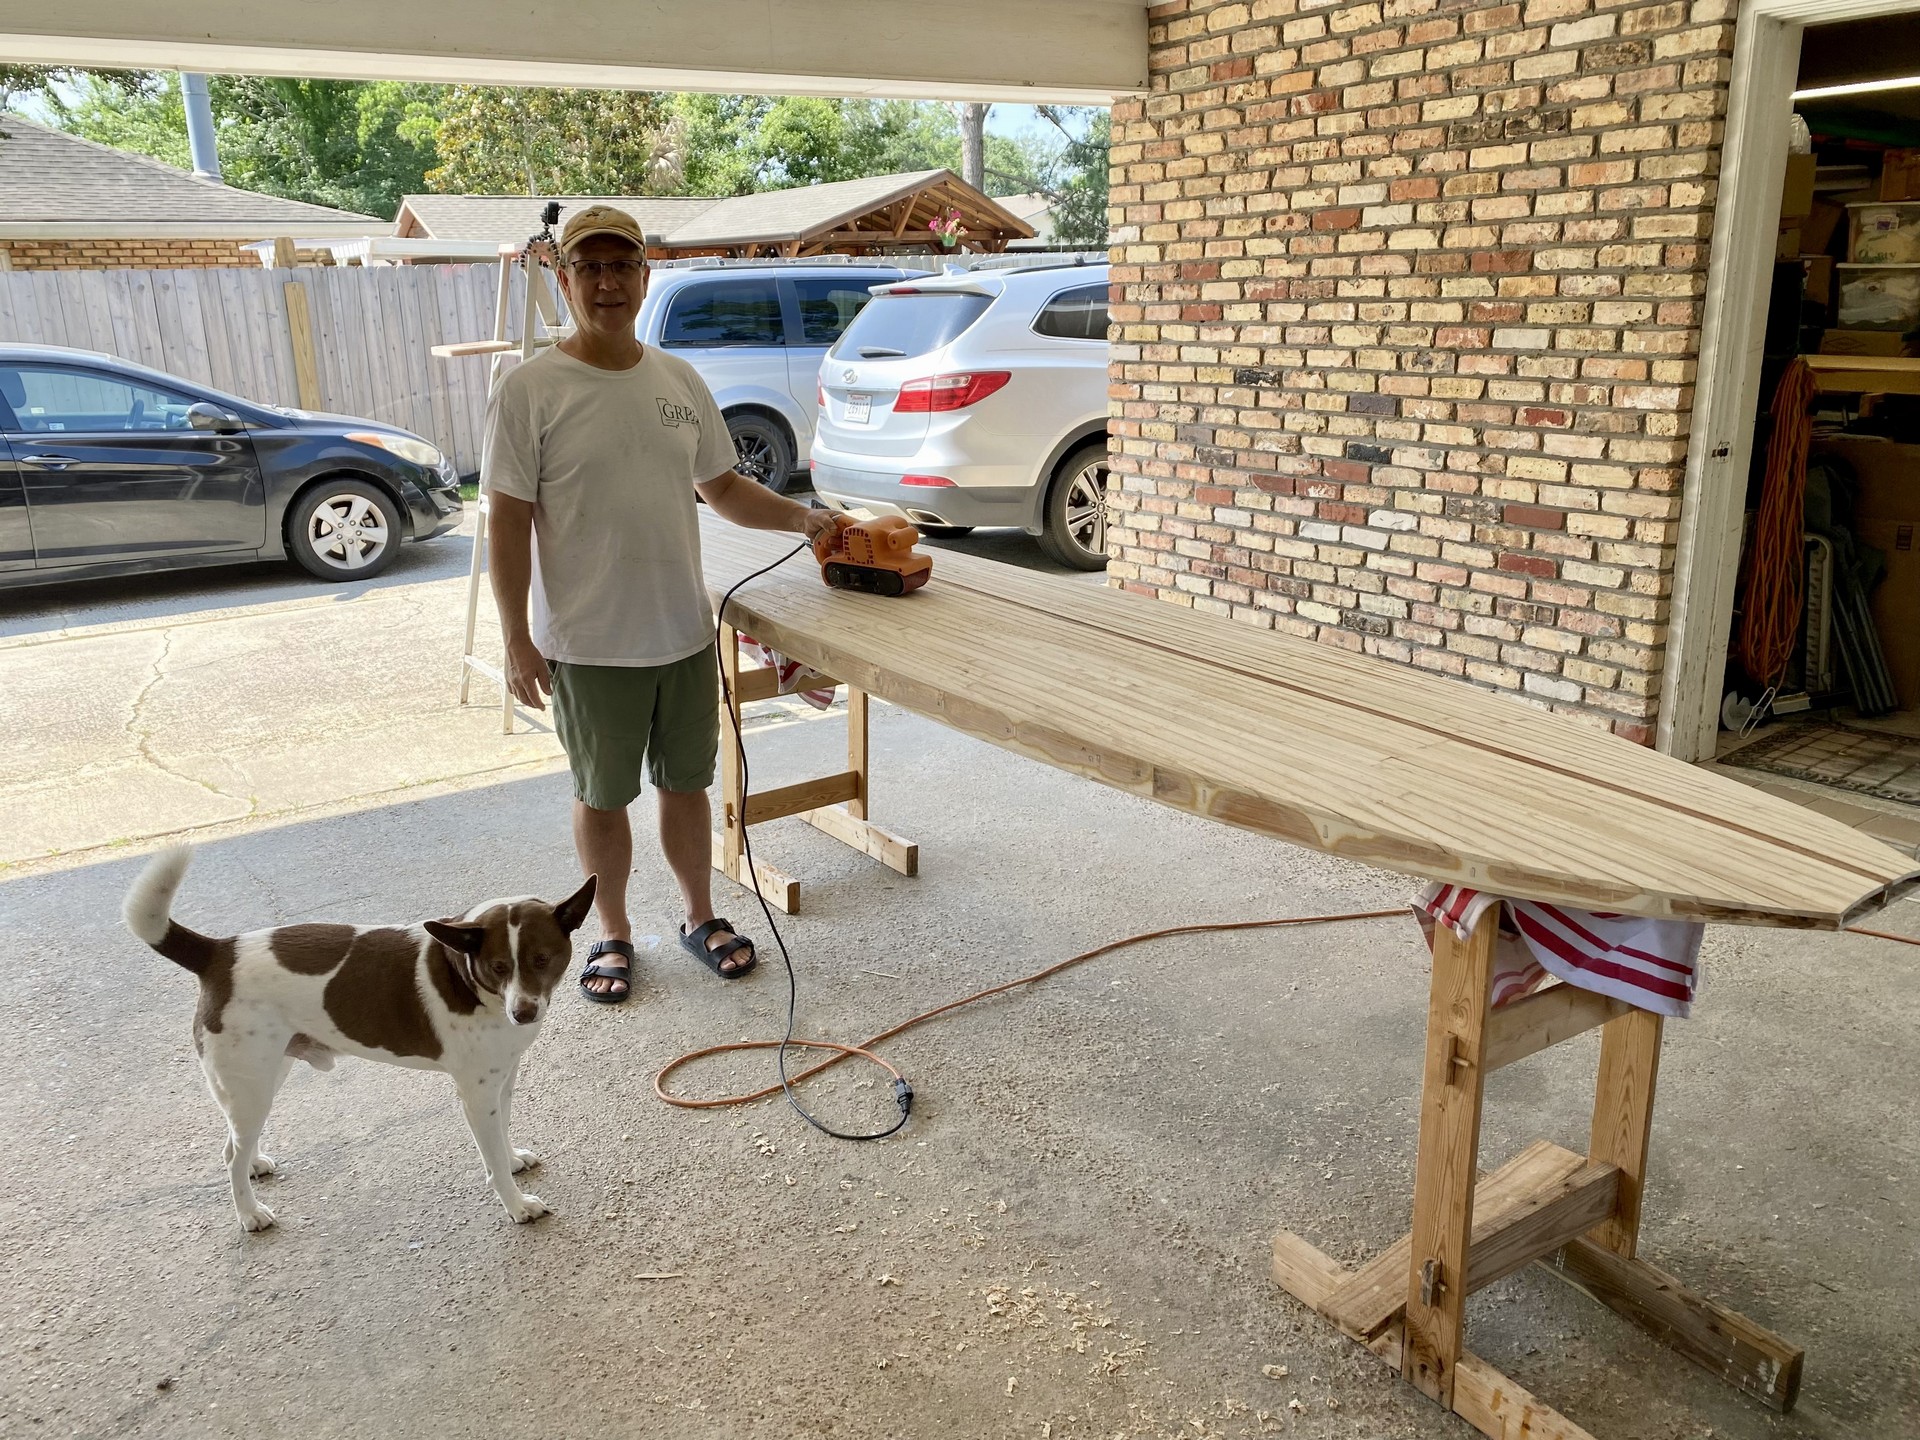
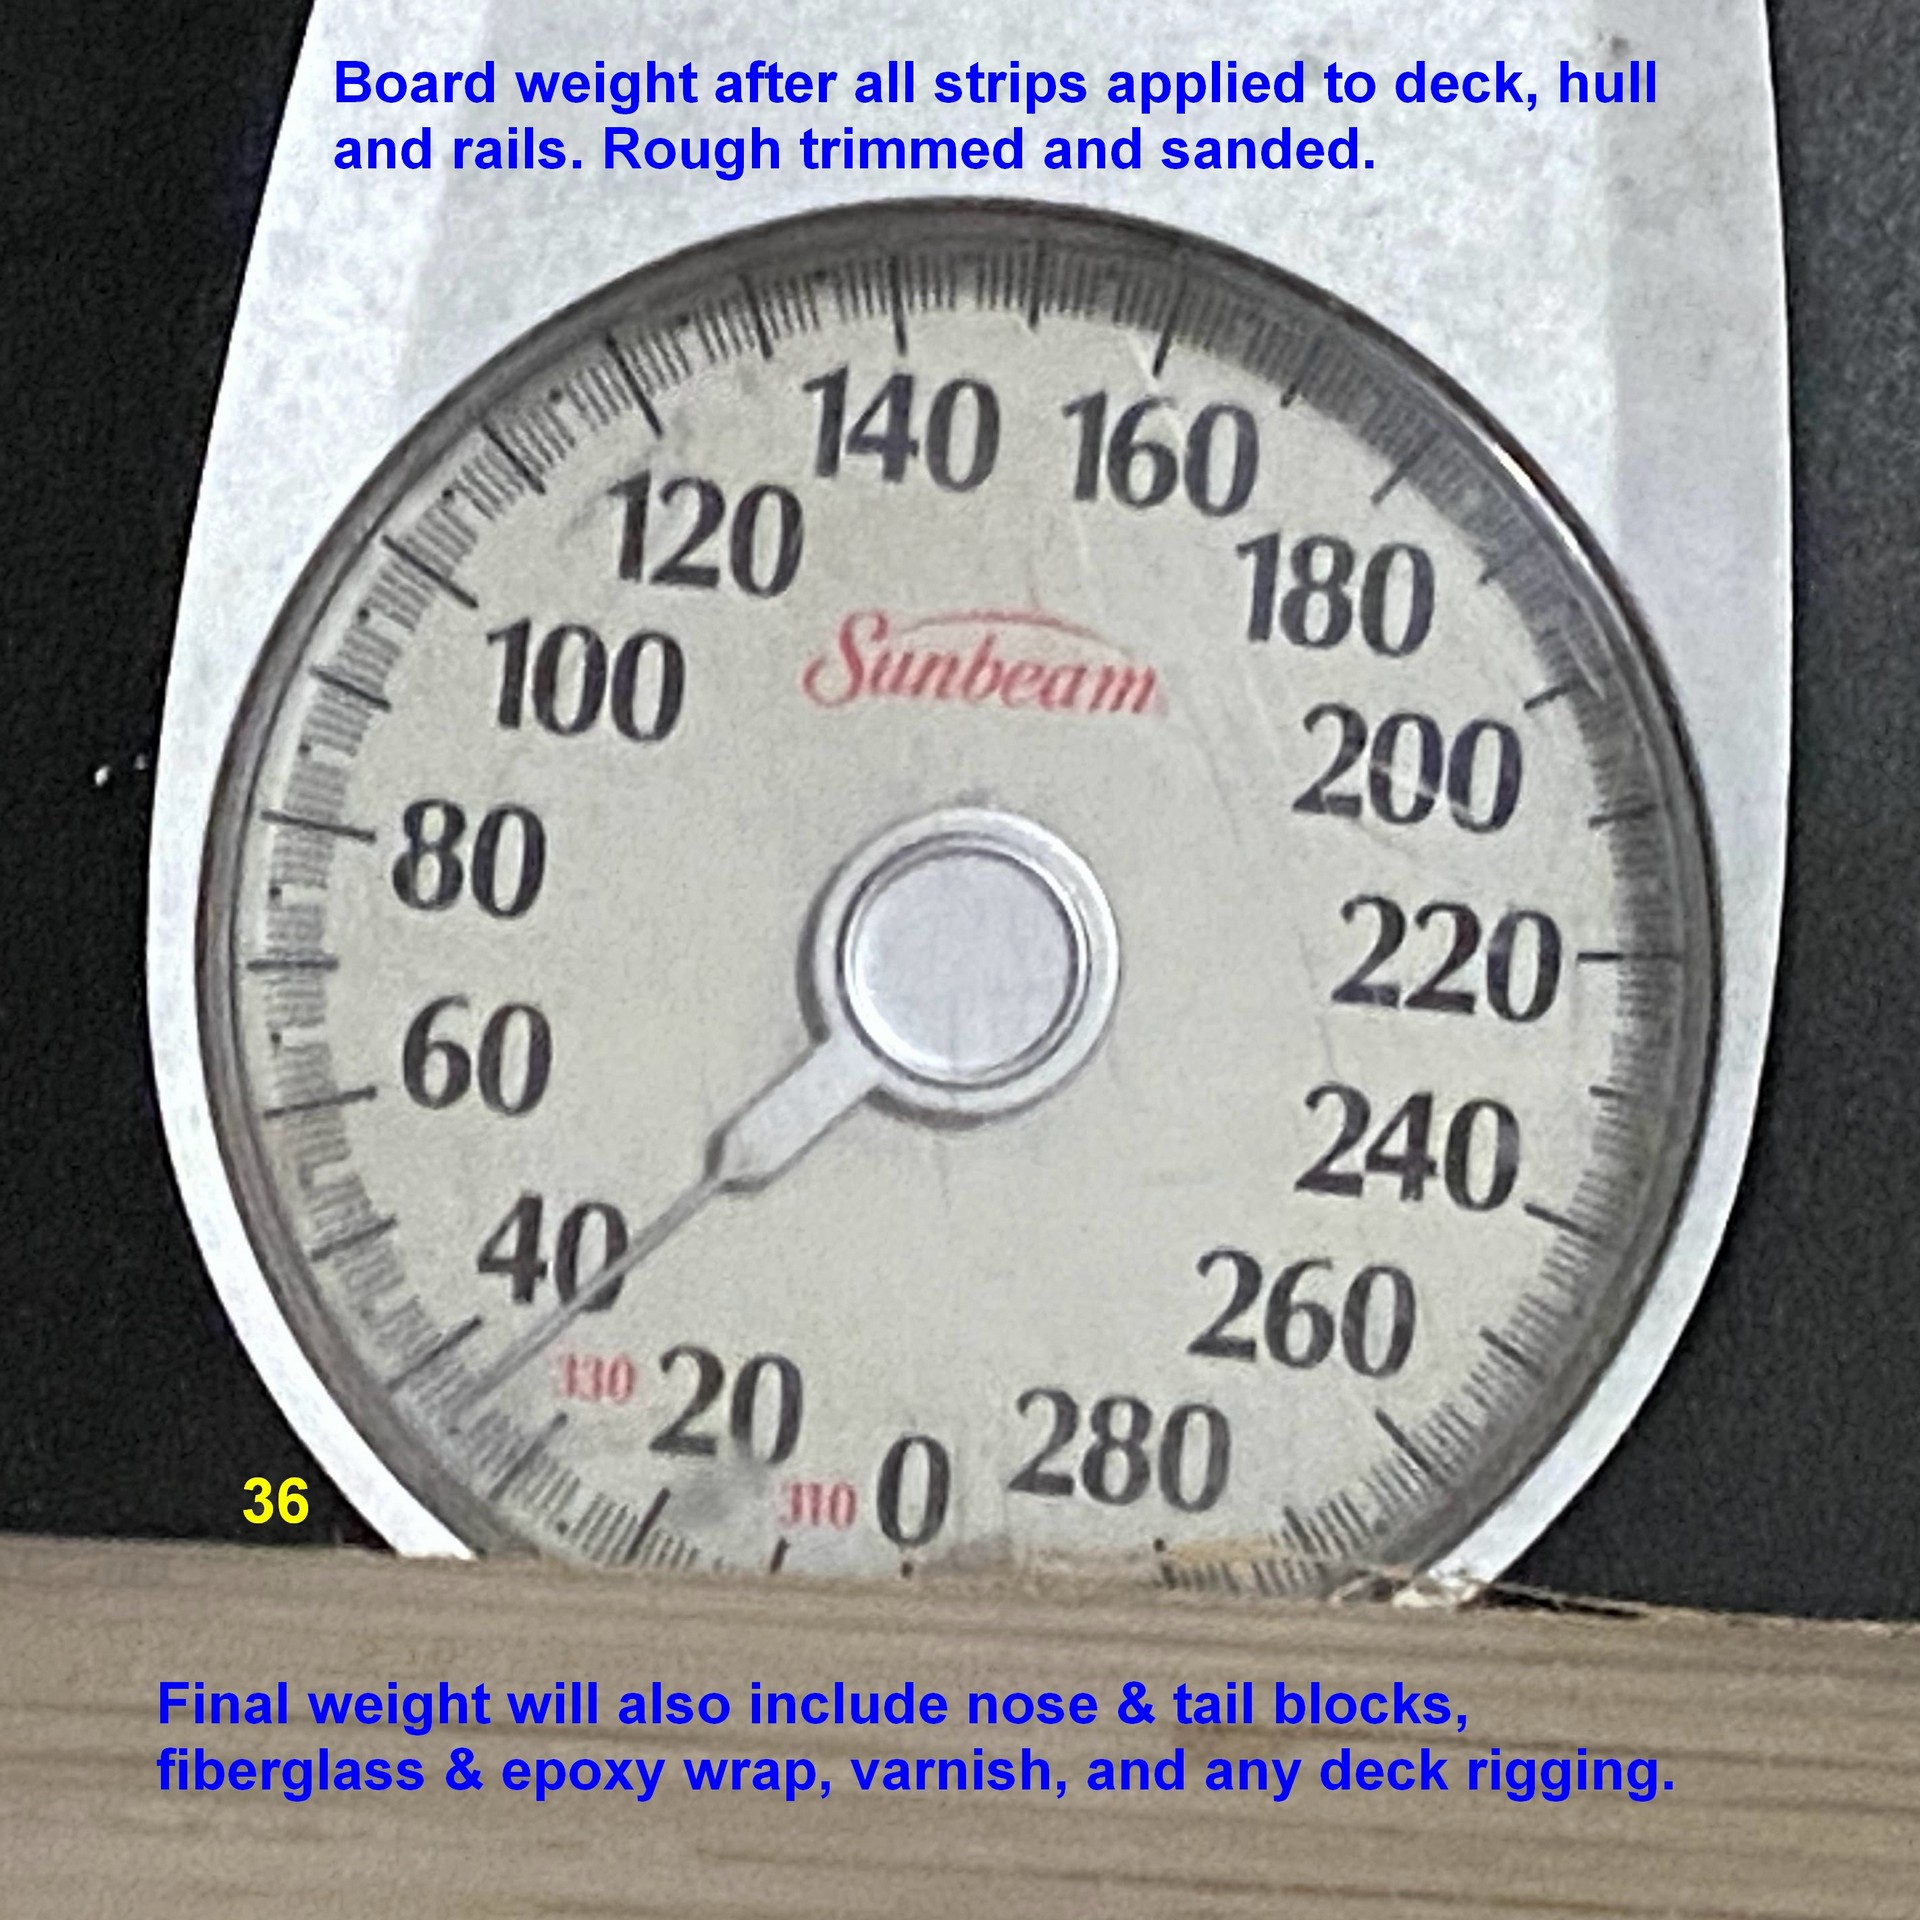
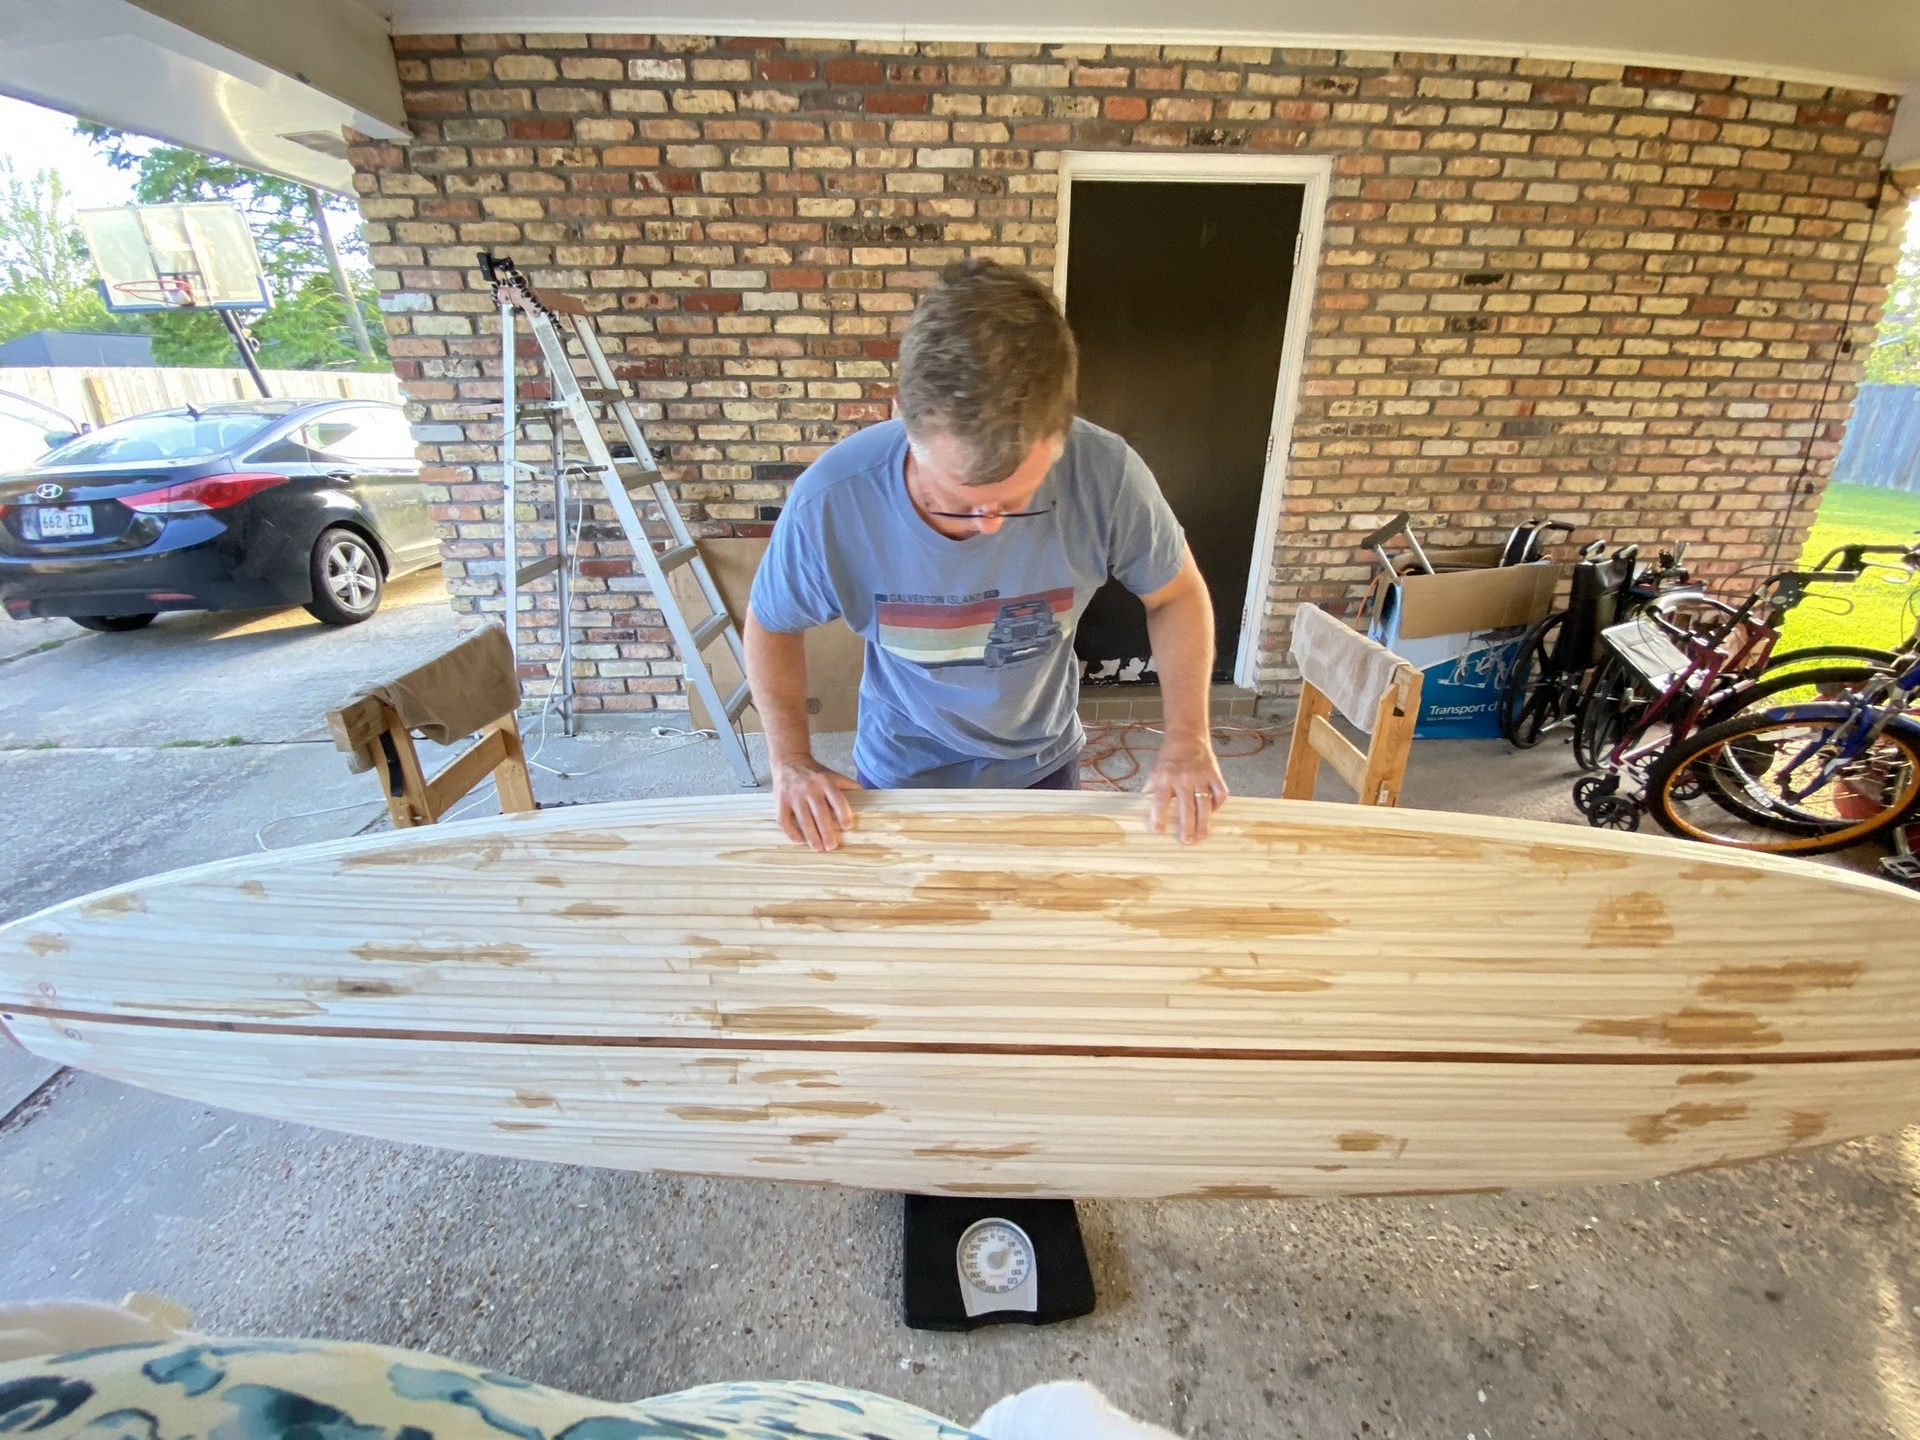
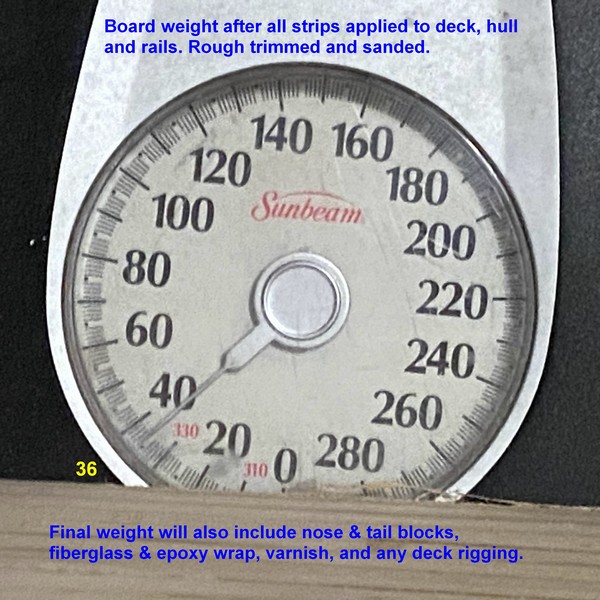
First Weigh-In!
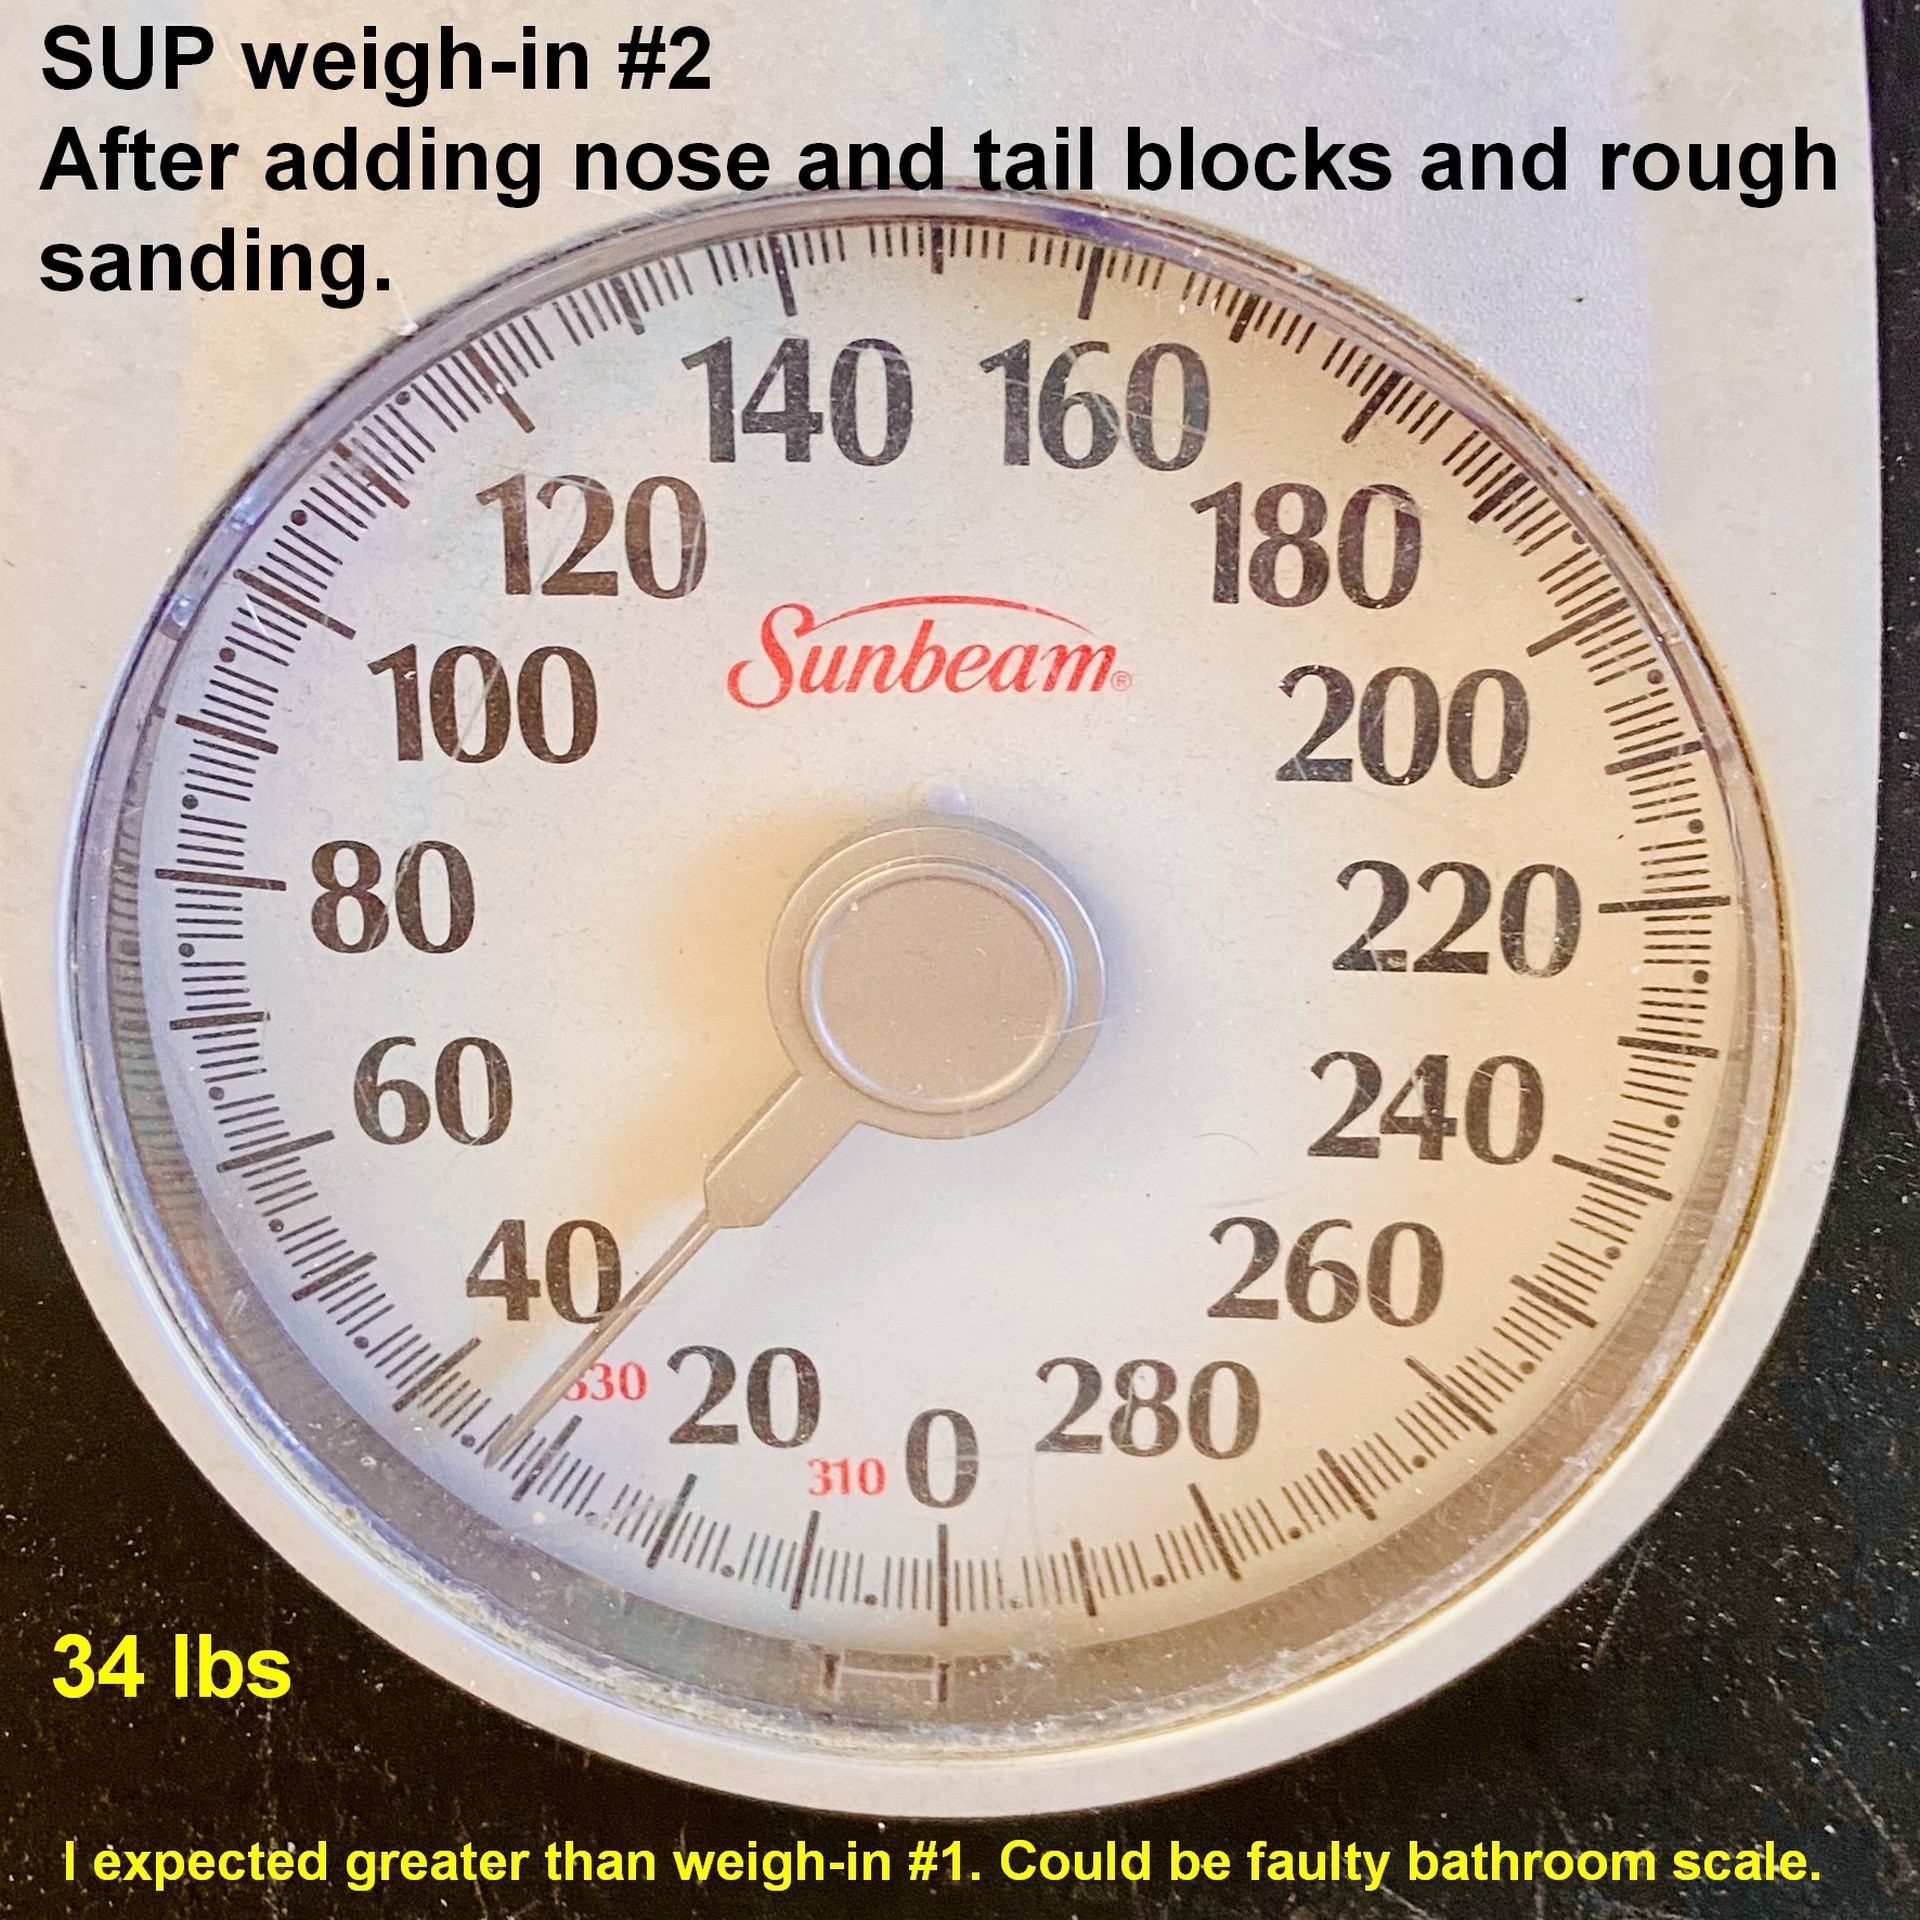
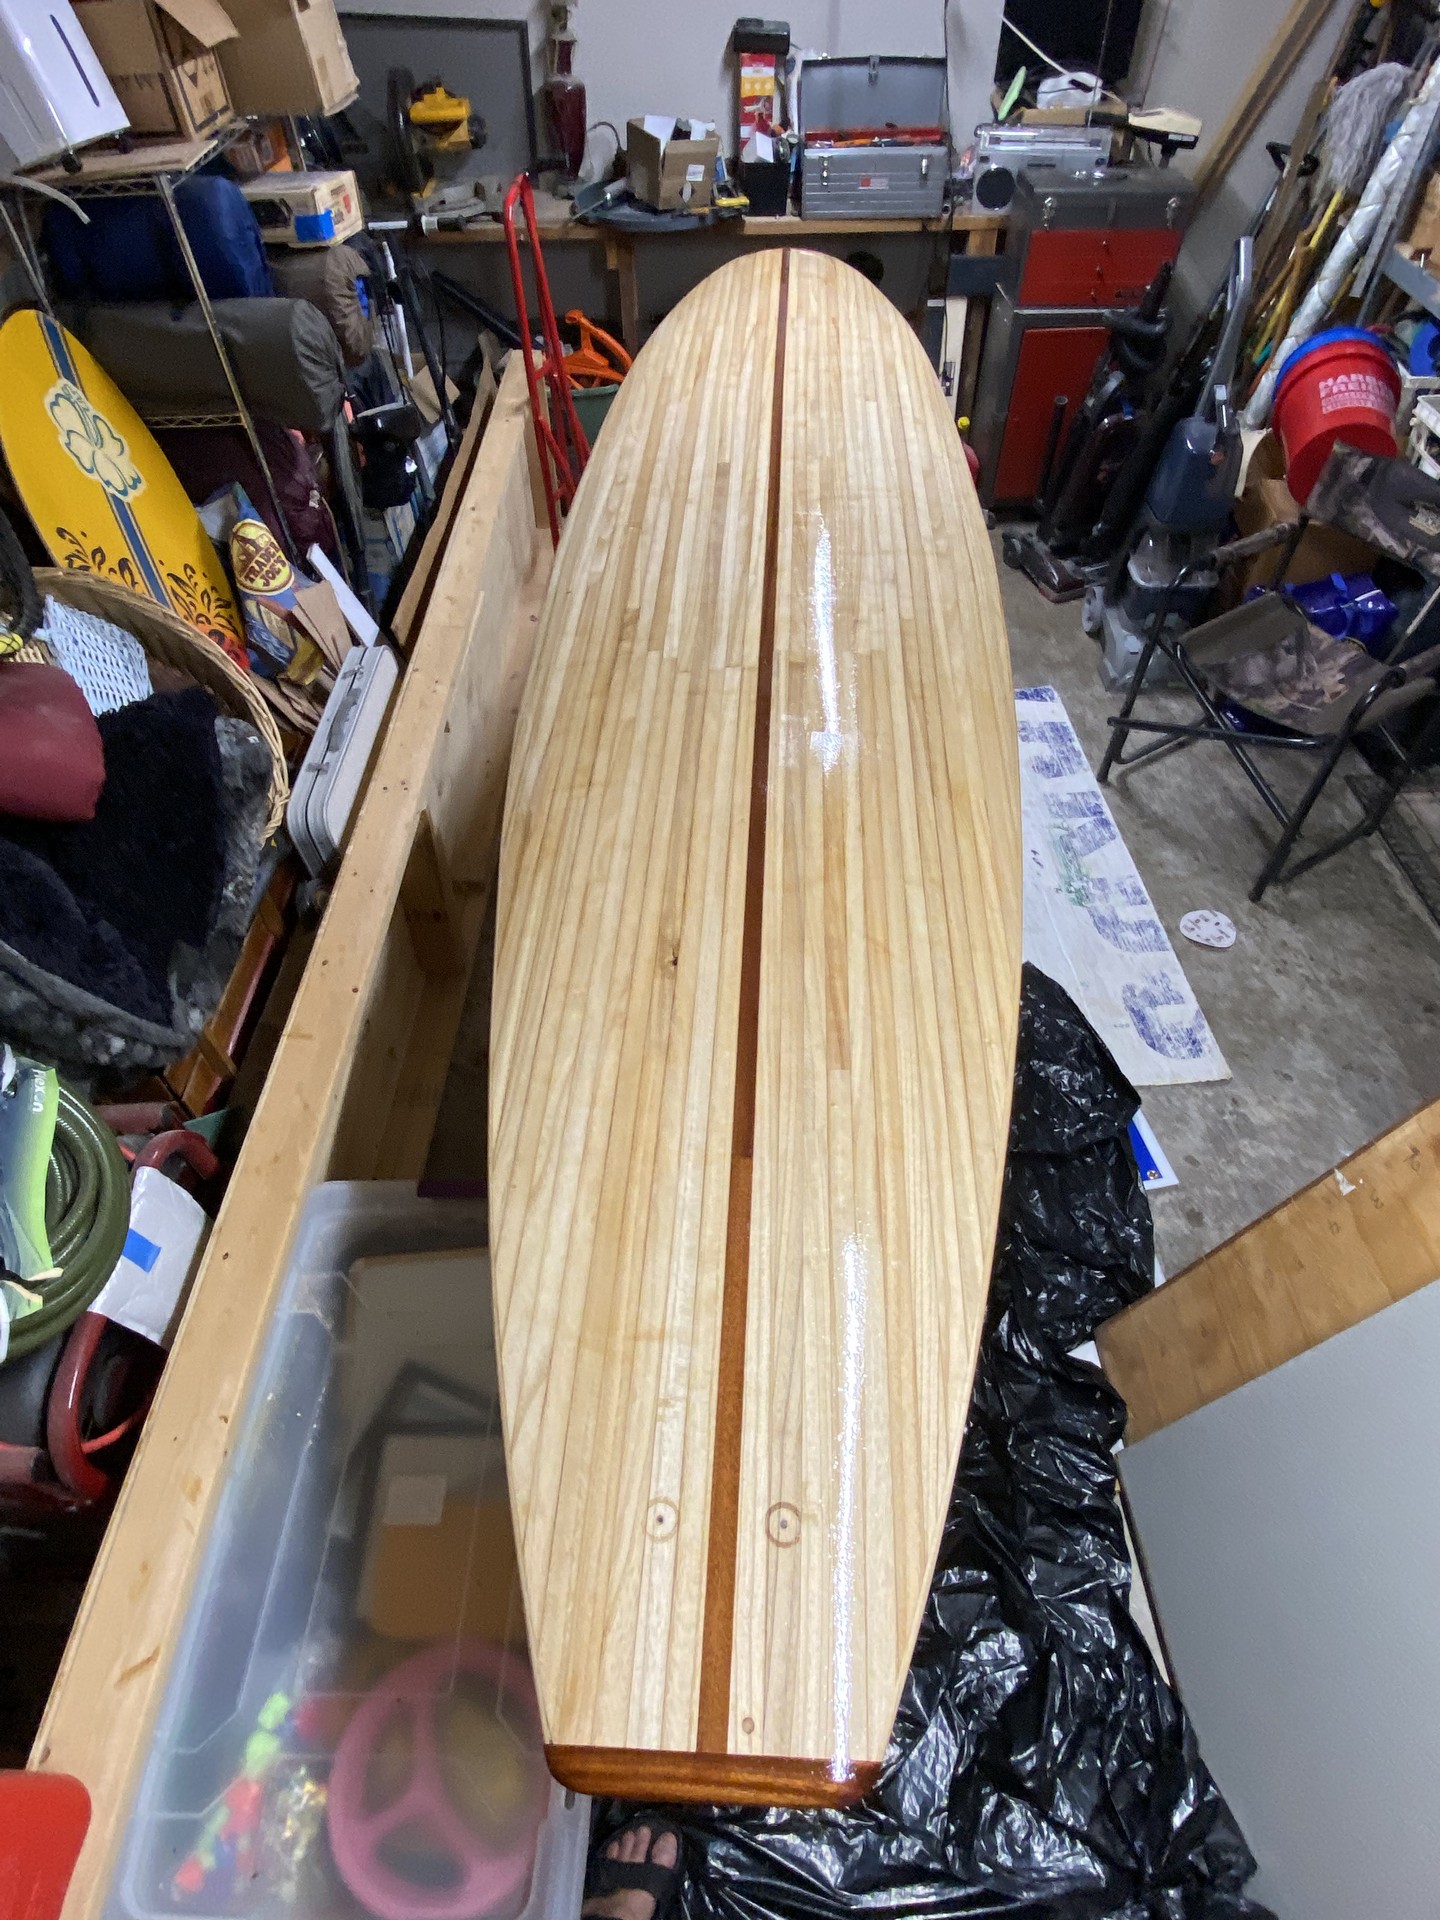
The weight of the paddleboard at this stage of construction is approximately 36 lbs. This was somewhat of a relief as moving this bulky thing in and out of my workshop isn’t exactly easy. The final target weight is approximately 42 lbs. which I believe is achievable. Nose and tail blocks will add a little as they are heavier teak wood, so I’ll strive to make them no larger than necessary. The fiberglass / epoxy wrap will likely add the most weight as multiple coats of epoxy will be necessary to fill the weave of the cloth. Plastic deck and fin box components should almost be a wash as wood will be removed when they are installed.
Weekend #16
May 19, 2024
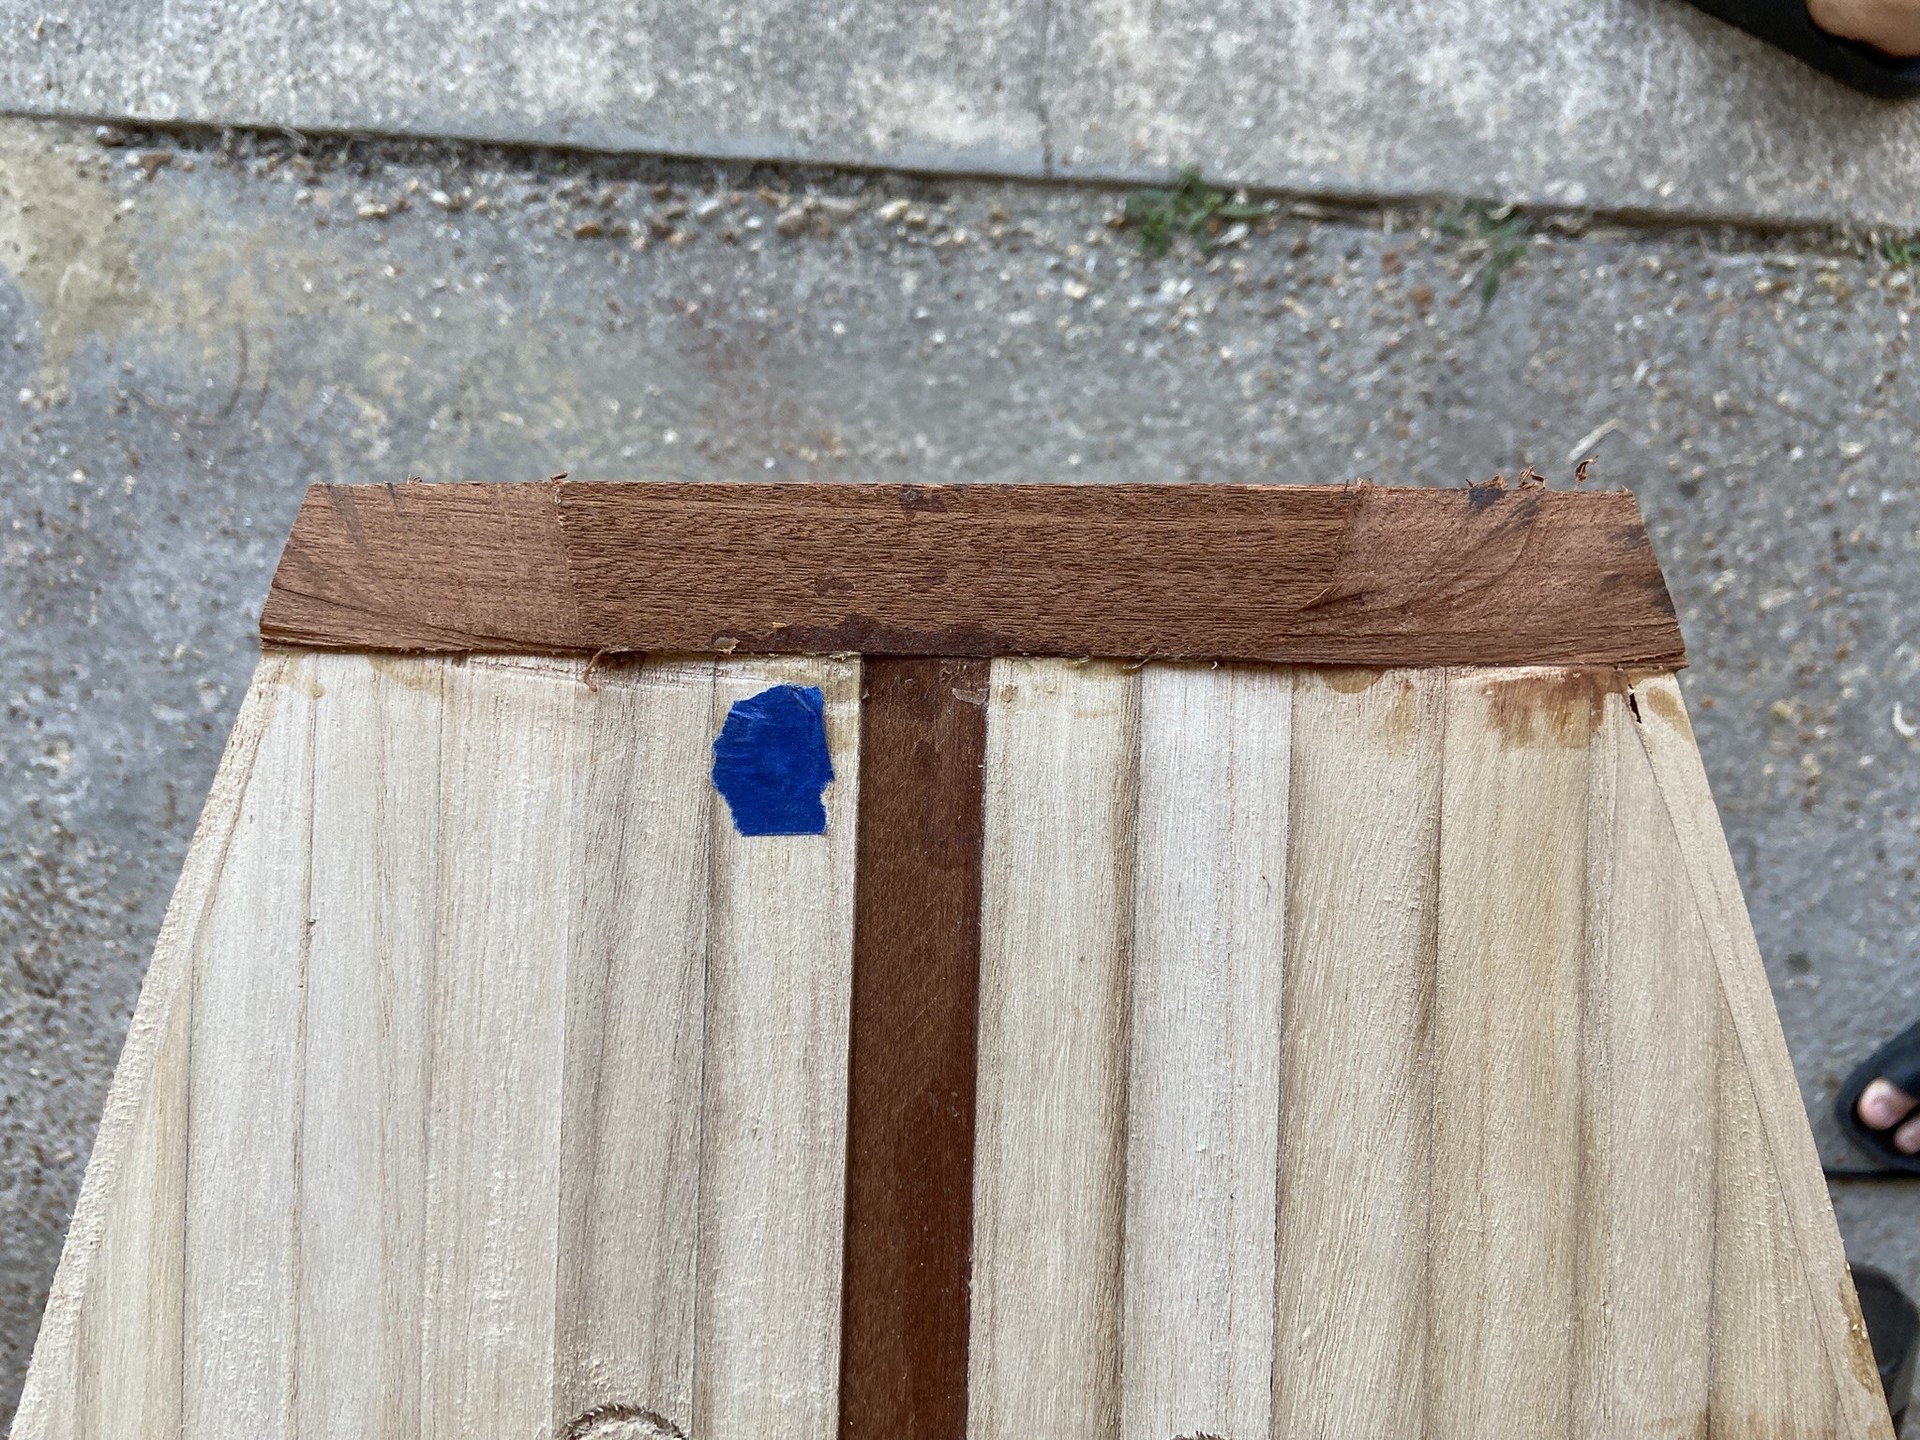
Having only one day to work on the paddleboard this weekend due to family commitments out of town, I installed “rivet nuts” fore and aft to serve as GoPro camera mounts. I also cut and squared the nose and tail of the board to receive mahogany end blocks, and then cut and glued the nose and tail blocks to the board.
Install Camera Mounts
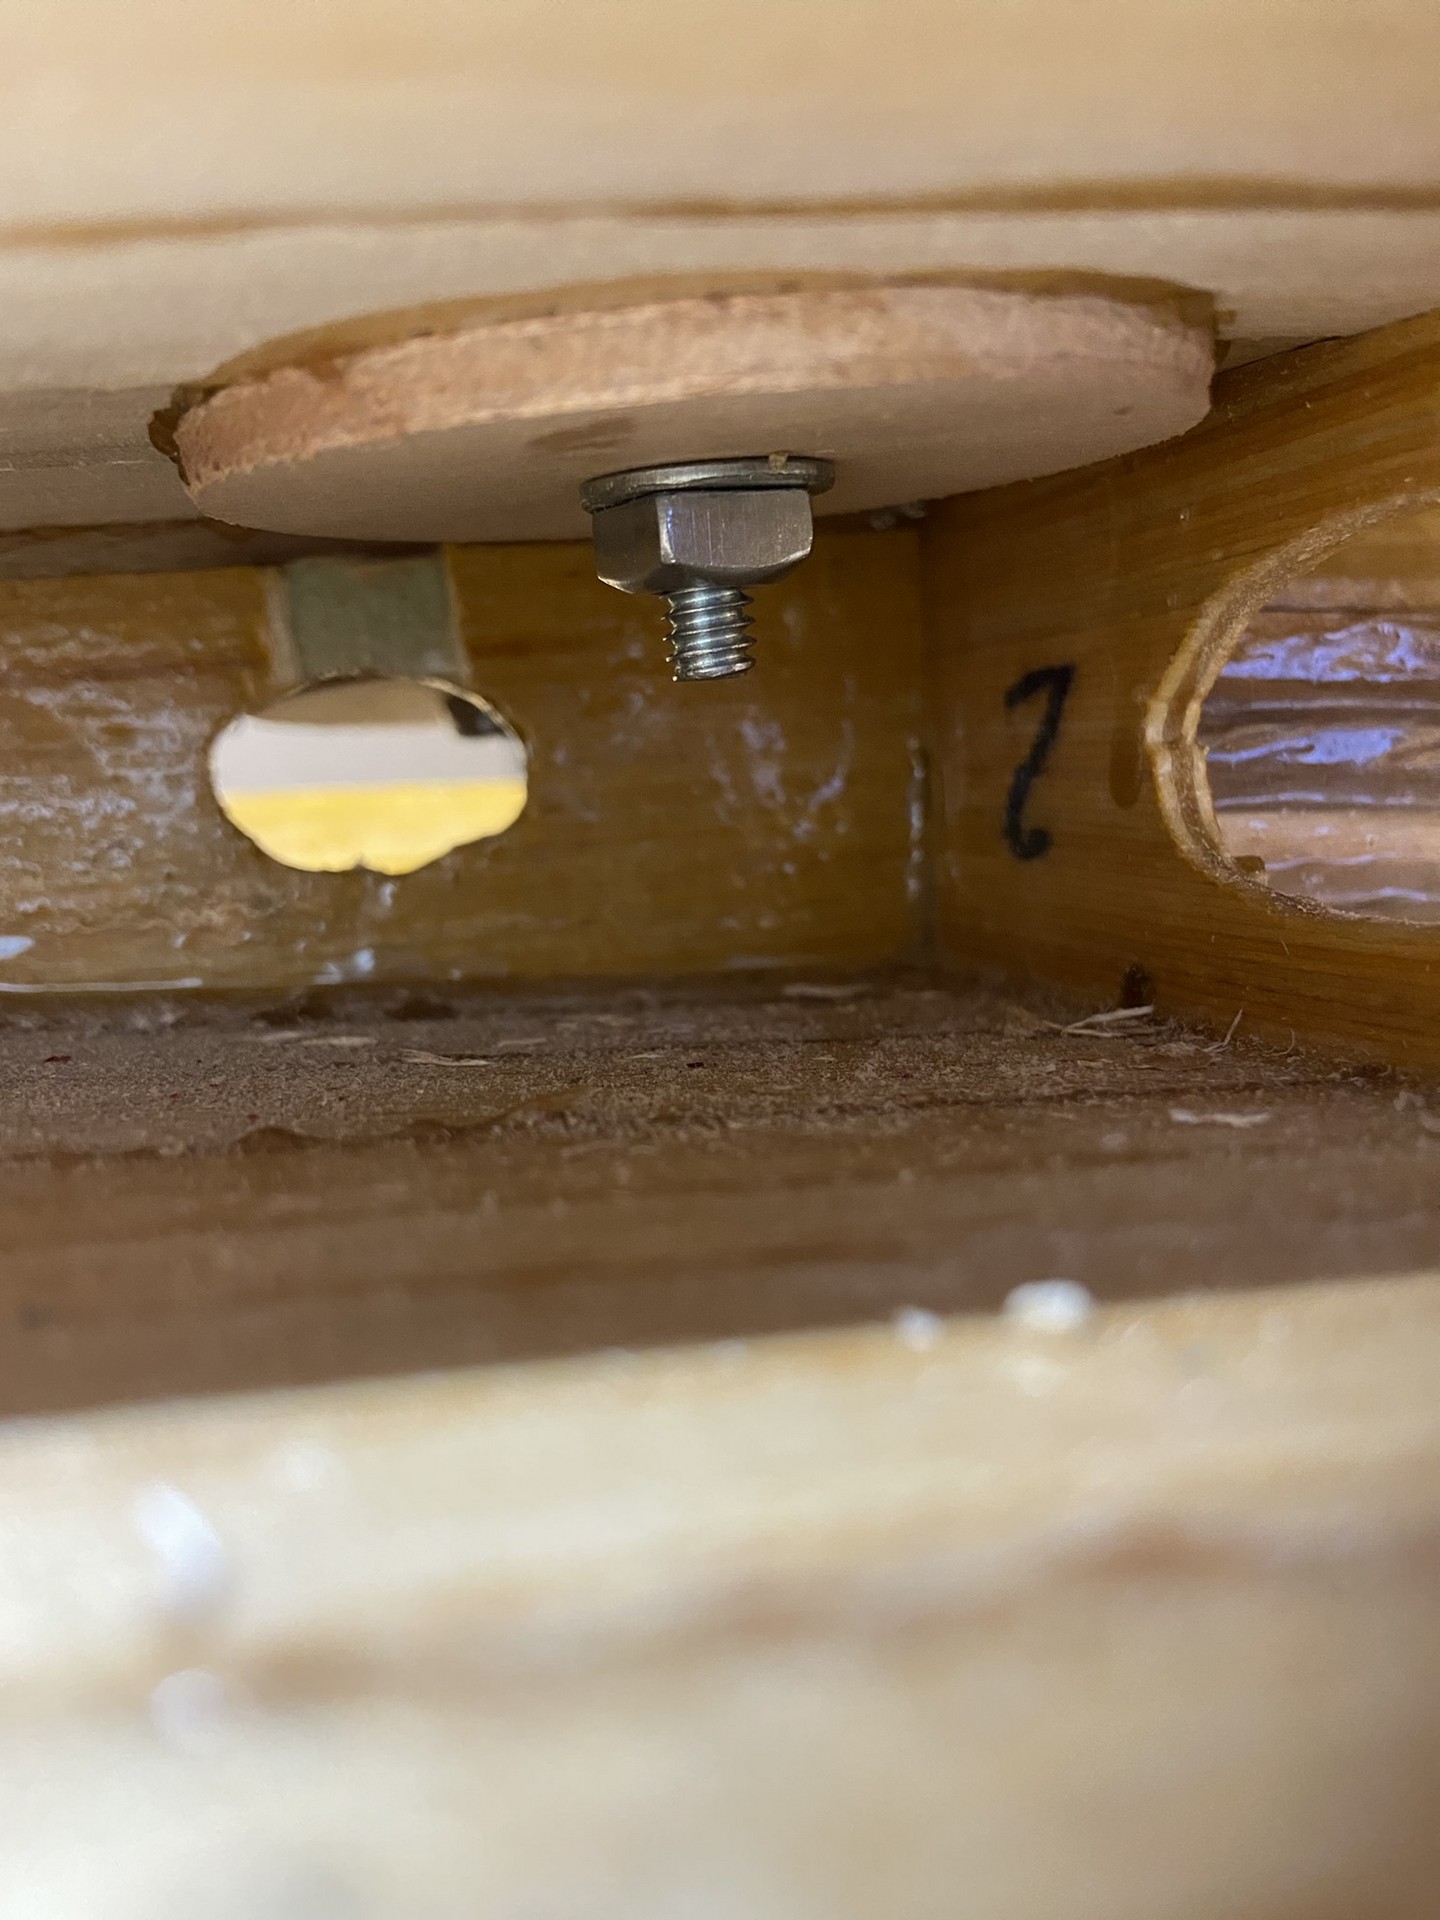
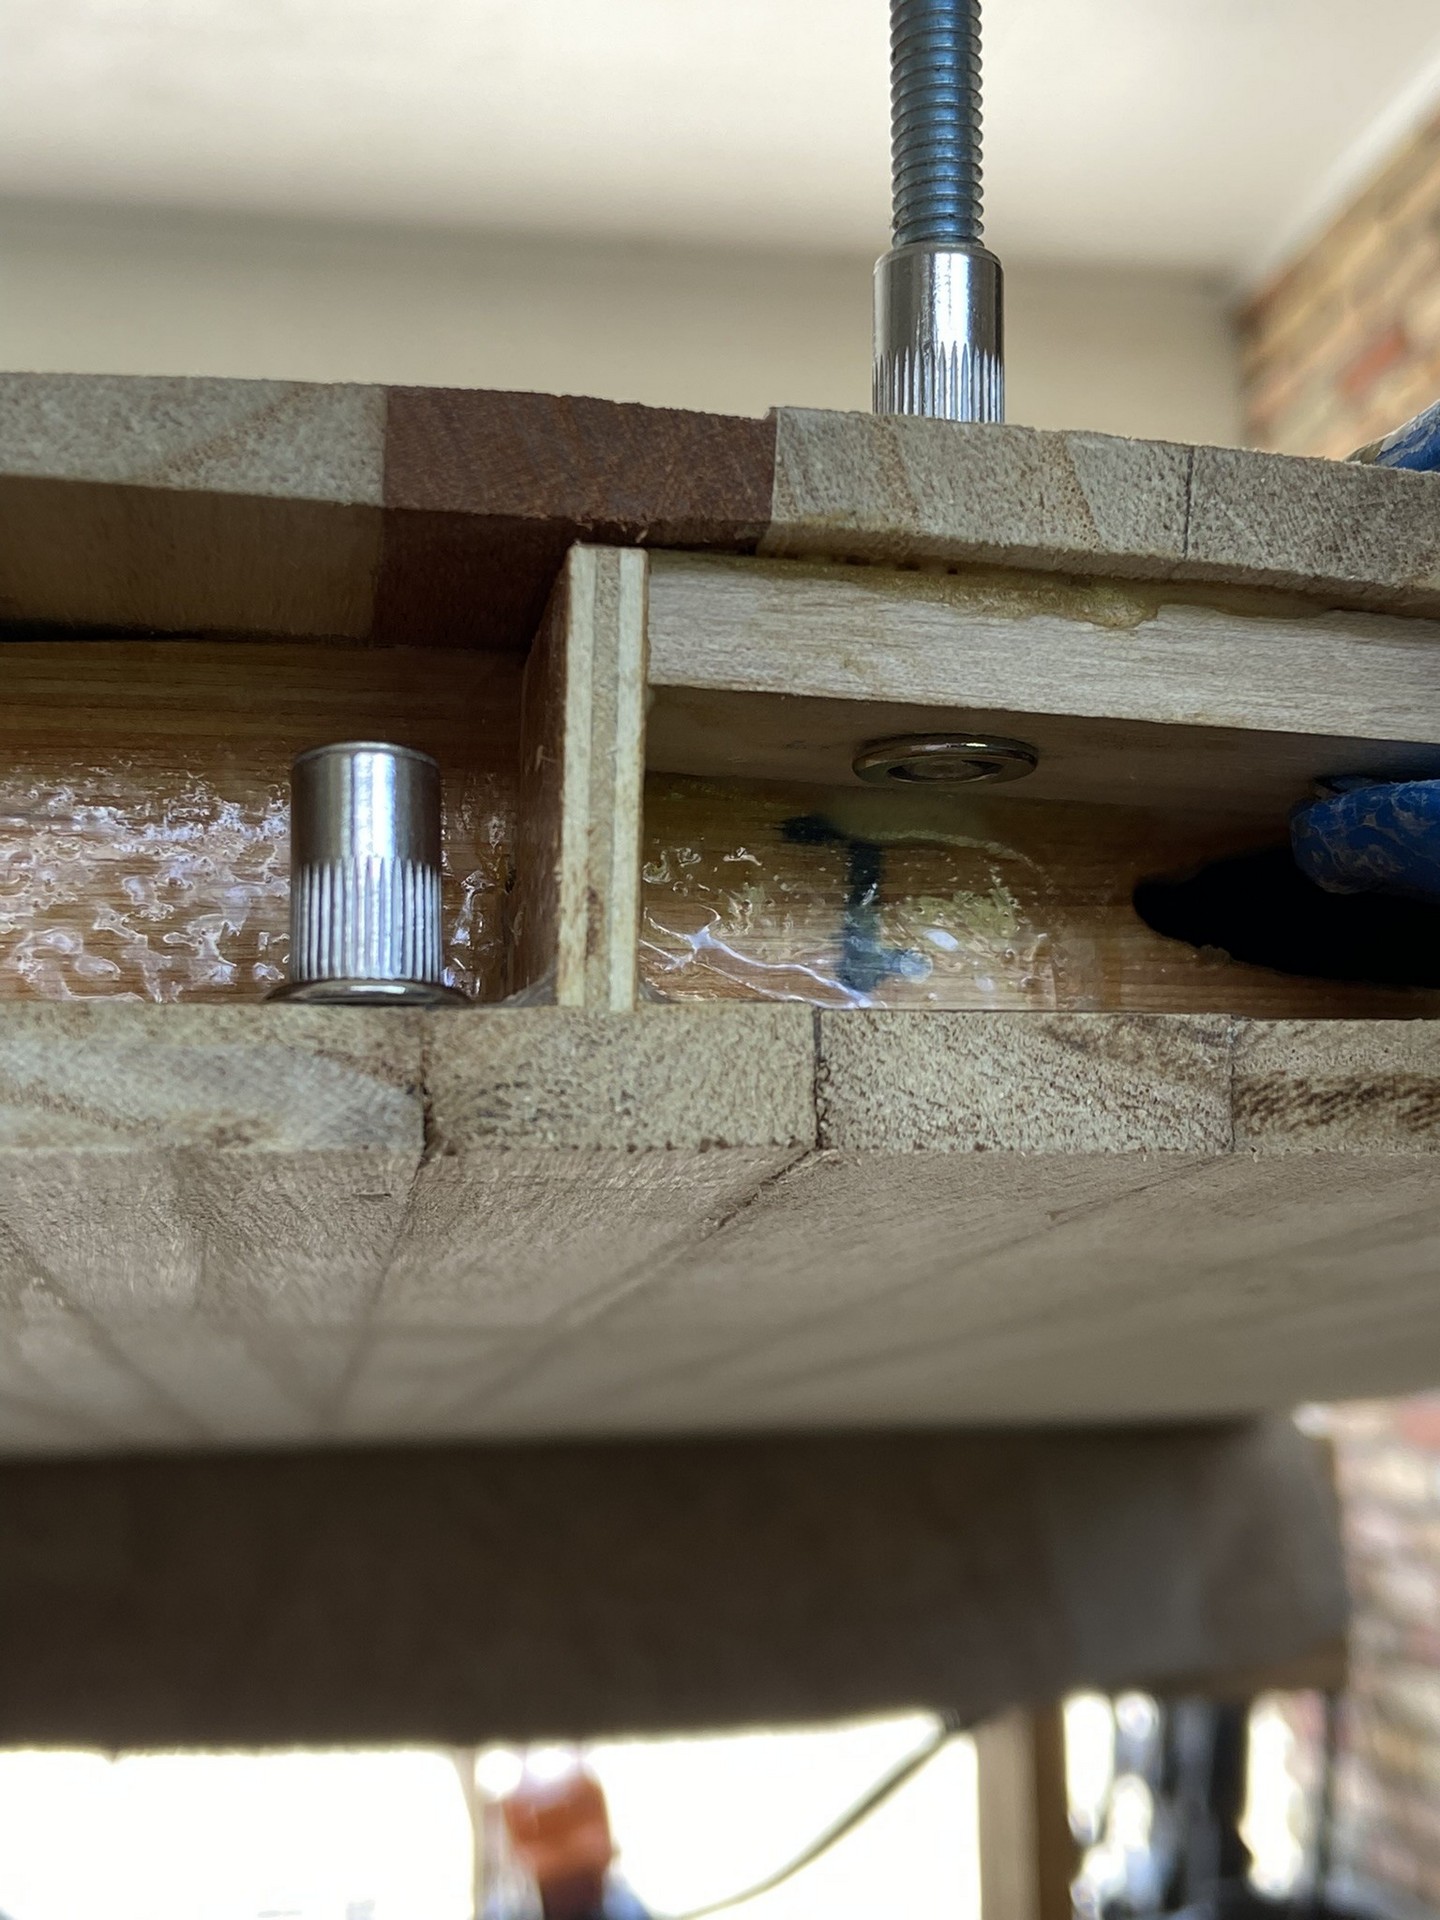
Rivet nuts are stainless steel 1/4" - 20 thread nuts with a flange at one end inserted up through the deck at the nose and tail from within the board. Their purpose is to serve as points of attachment for photography / videography mounts which standardize with the same nut and bold size and thread count. The nuts are almost twice as tall as the thickness of the Paulownia strips, so I needed a scrap of Paulownia as backing beneath the deck at each attachment point to provided needed reinforcement for the nuts. The workspace was pretty tight inside the nose and tail of the board so steps I took to get the rivet nuts installed are listed below.
- Cut nose and tail of board to final length (prior to attaching blocks.)
- Scrape / sand point of attachment on underside of deck - ensure no globs of glue, etc. are in the way.
- Spring clamp a short scrap of strip to underside of deck.
- Drill pilot hole for 1/4" nut down through deck and through blocking scrap. Enlarge with 3/8" bit and round file to allow tight fit of stainless nut.
- Apply glue to top surface of blocking scrap, insert flange nut up from bottom, and then insert both up against / through deck.
- Apply glue to inside of hole in deck.
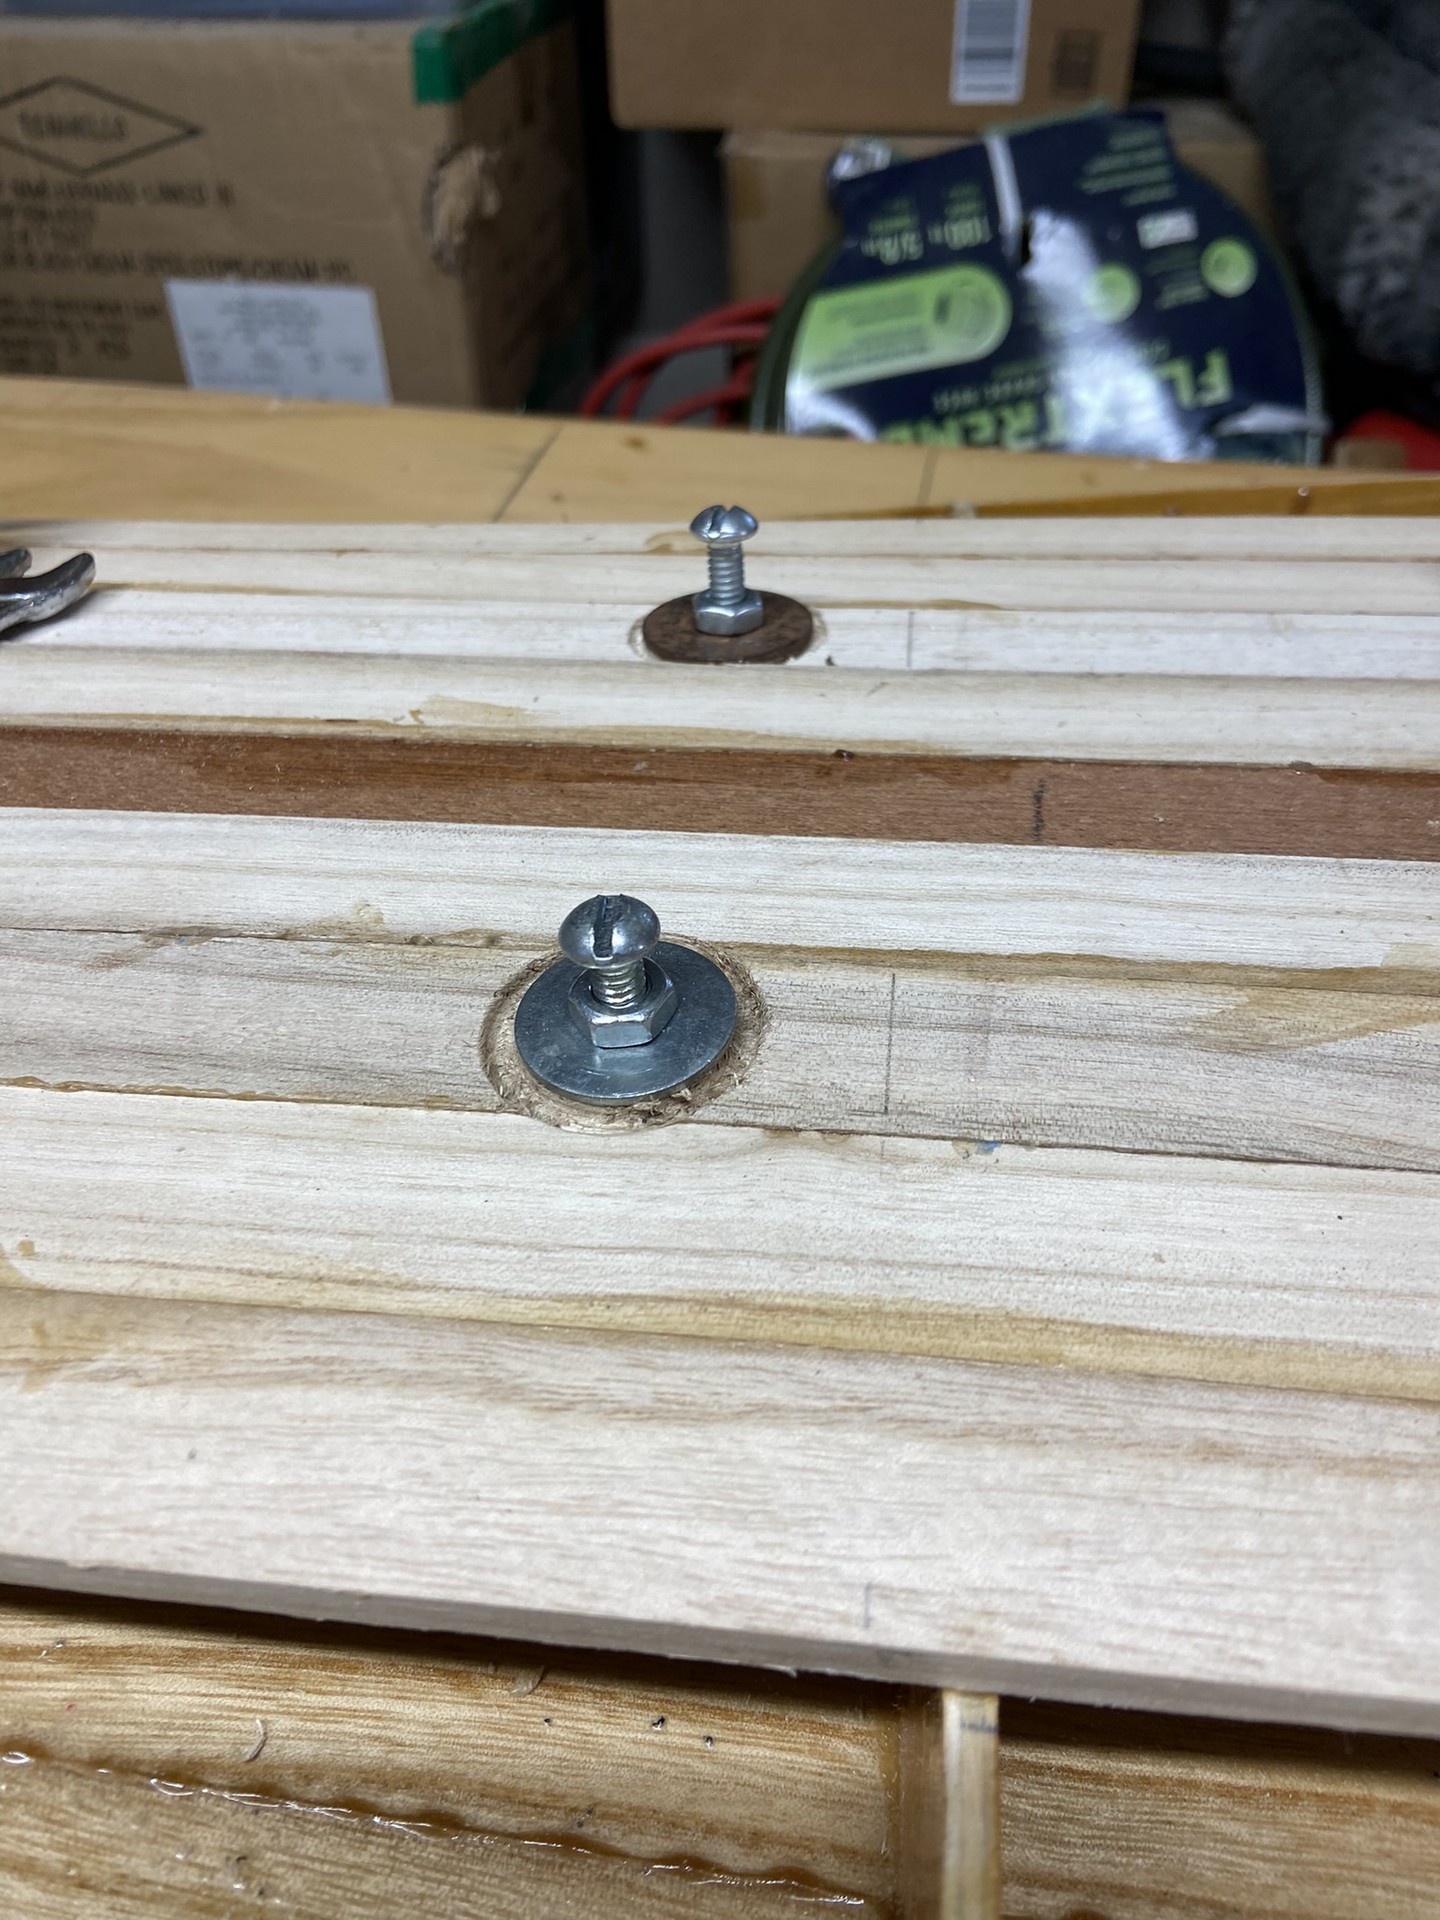
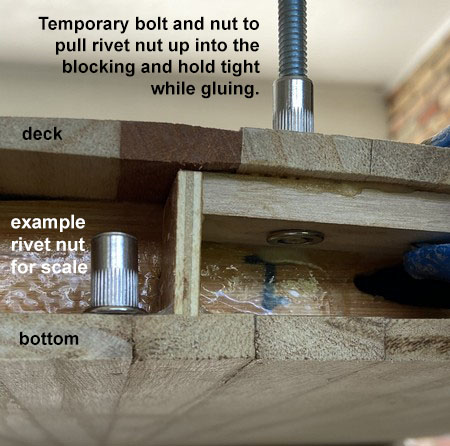
- A spare 2" x 1/4" bolt with spare nut and washer was then screwed down into the rivet nut and the nut/washer tightened to pull the rivet nut firmly up into the hole through the deck, it’s flange seated up against the bottom of the blocking material.
- Allow to dry for an hour.
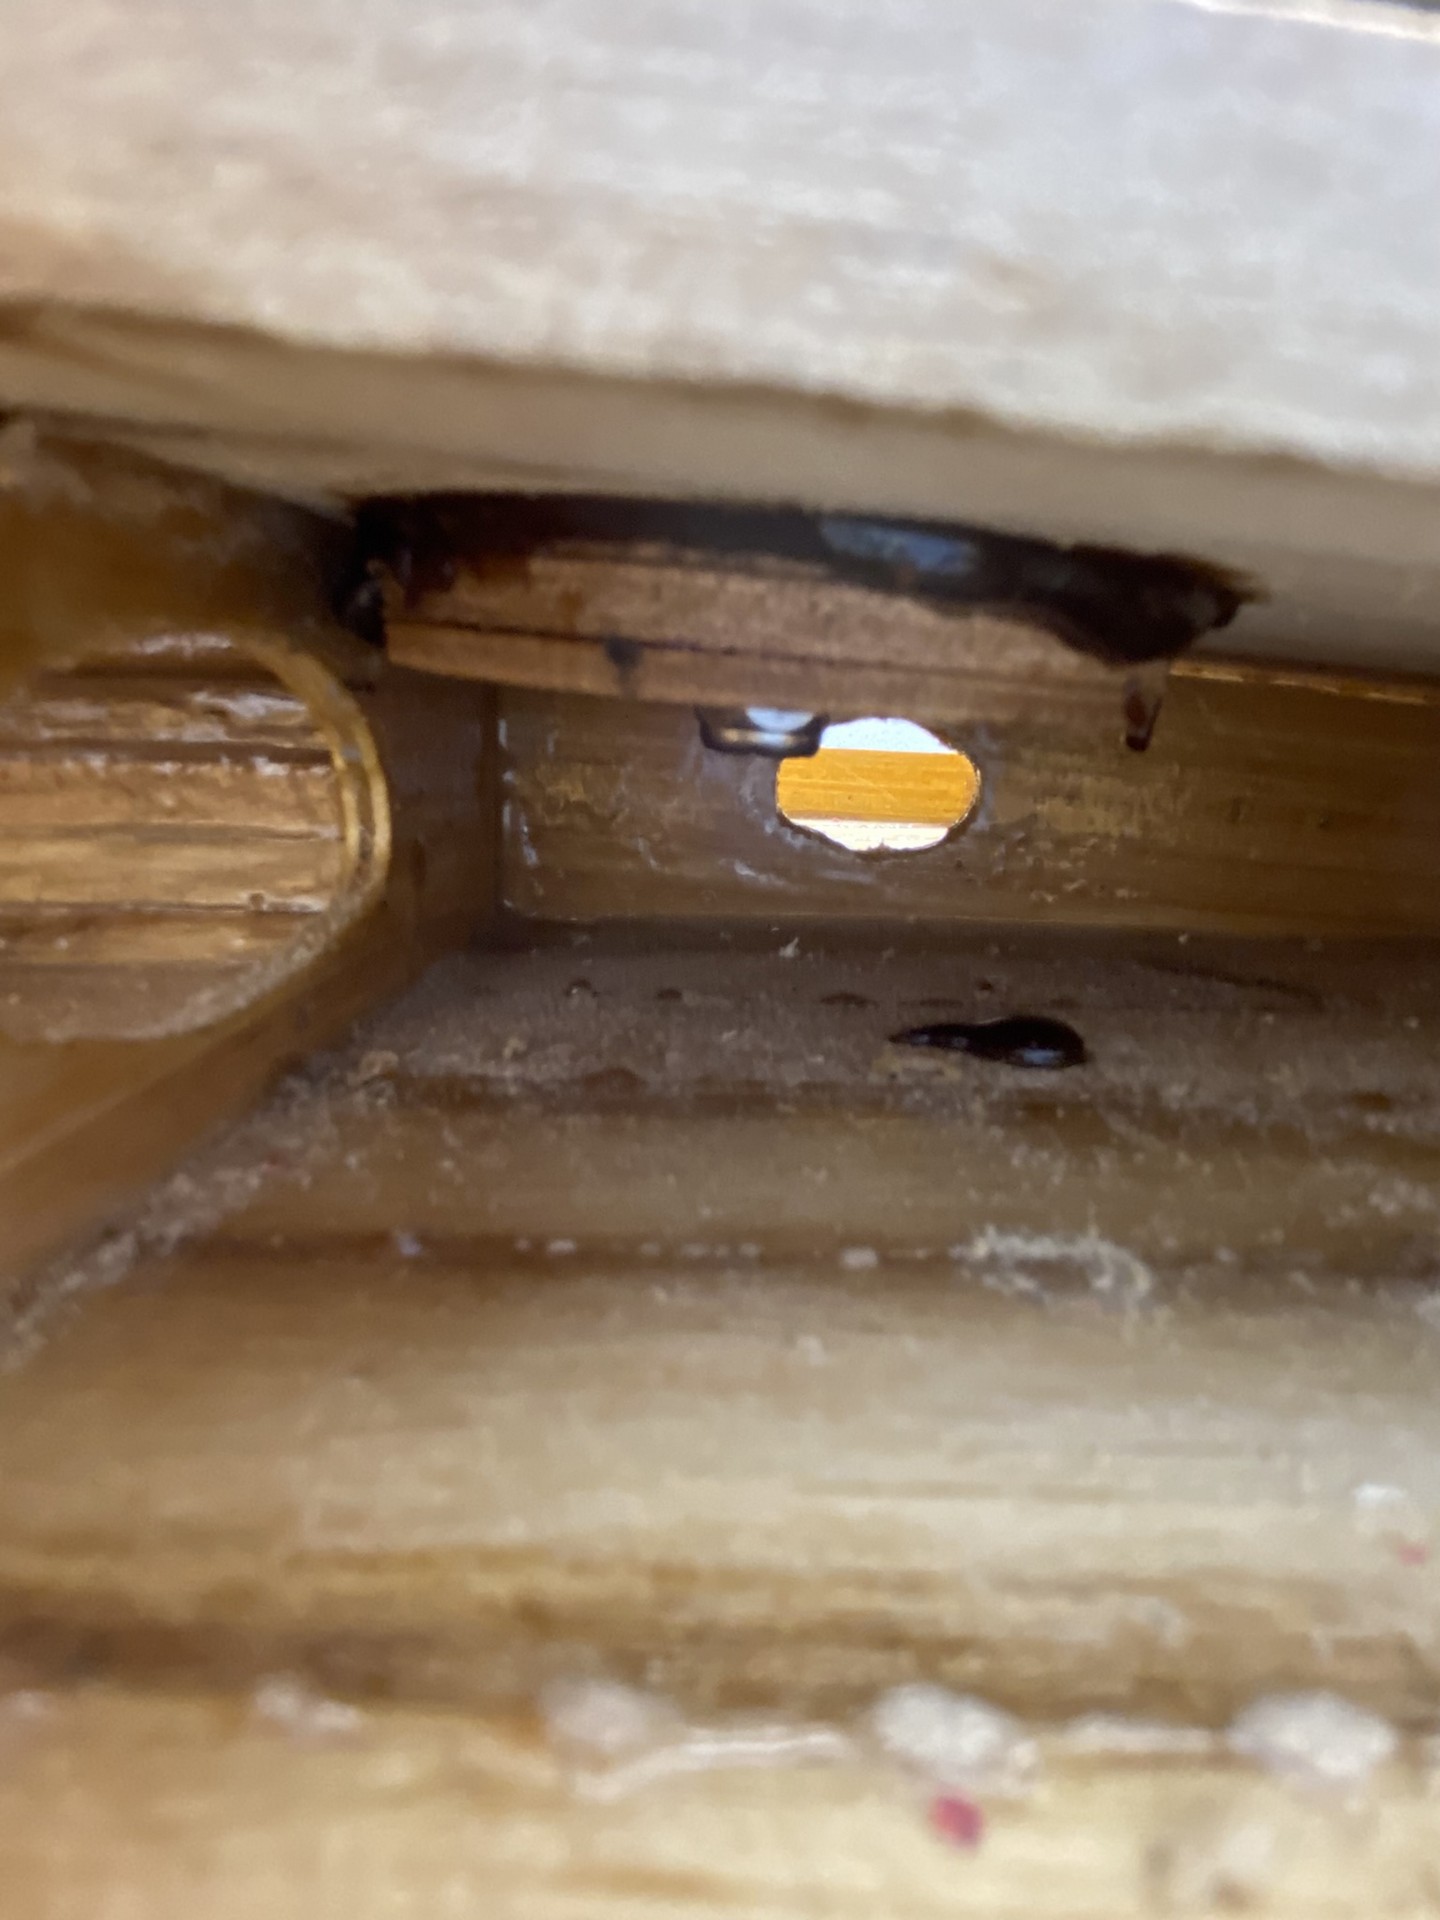
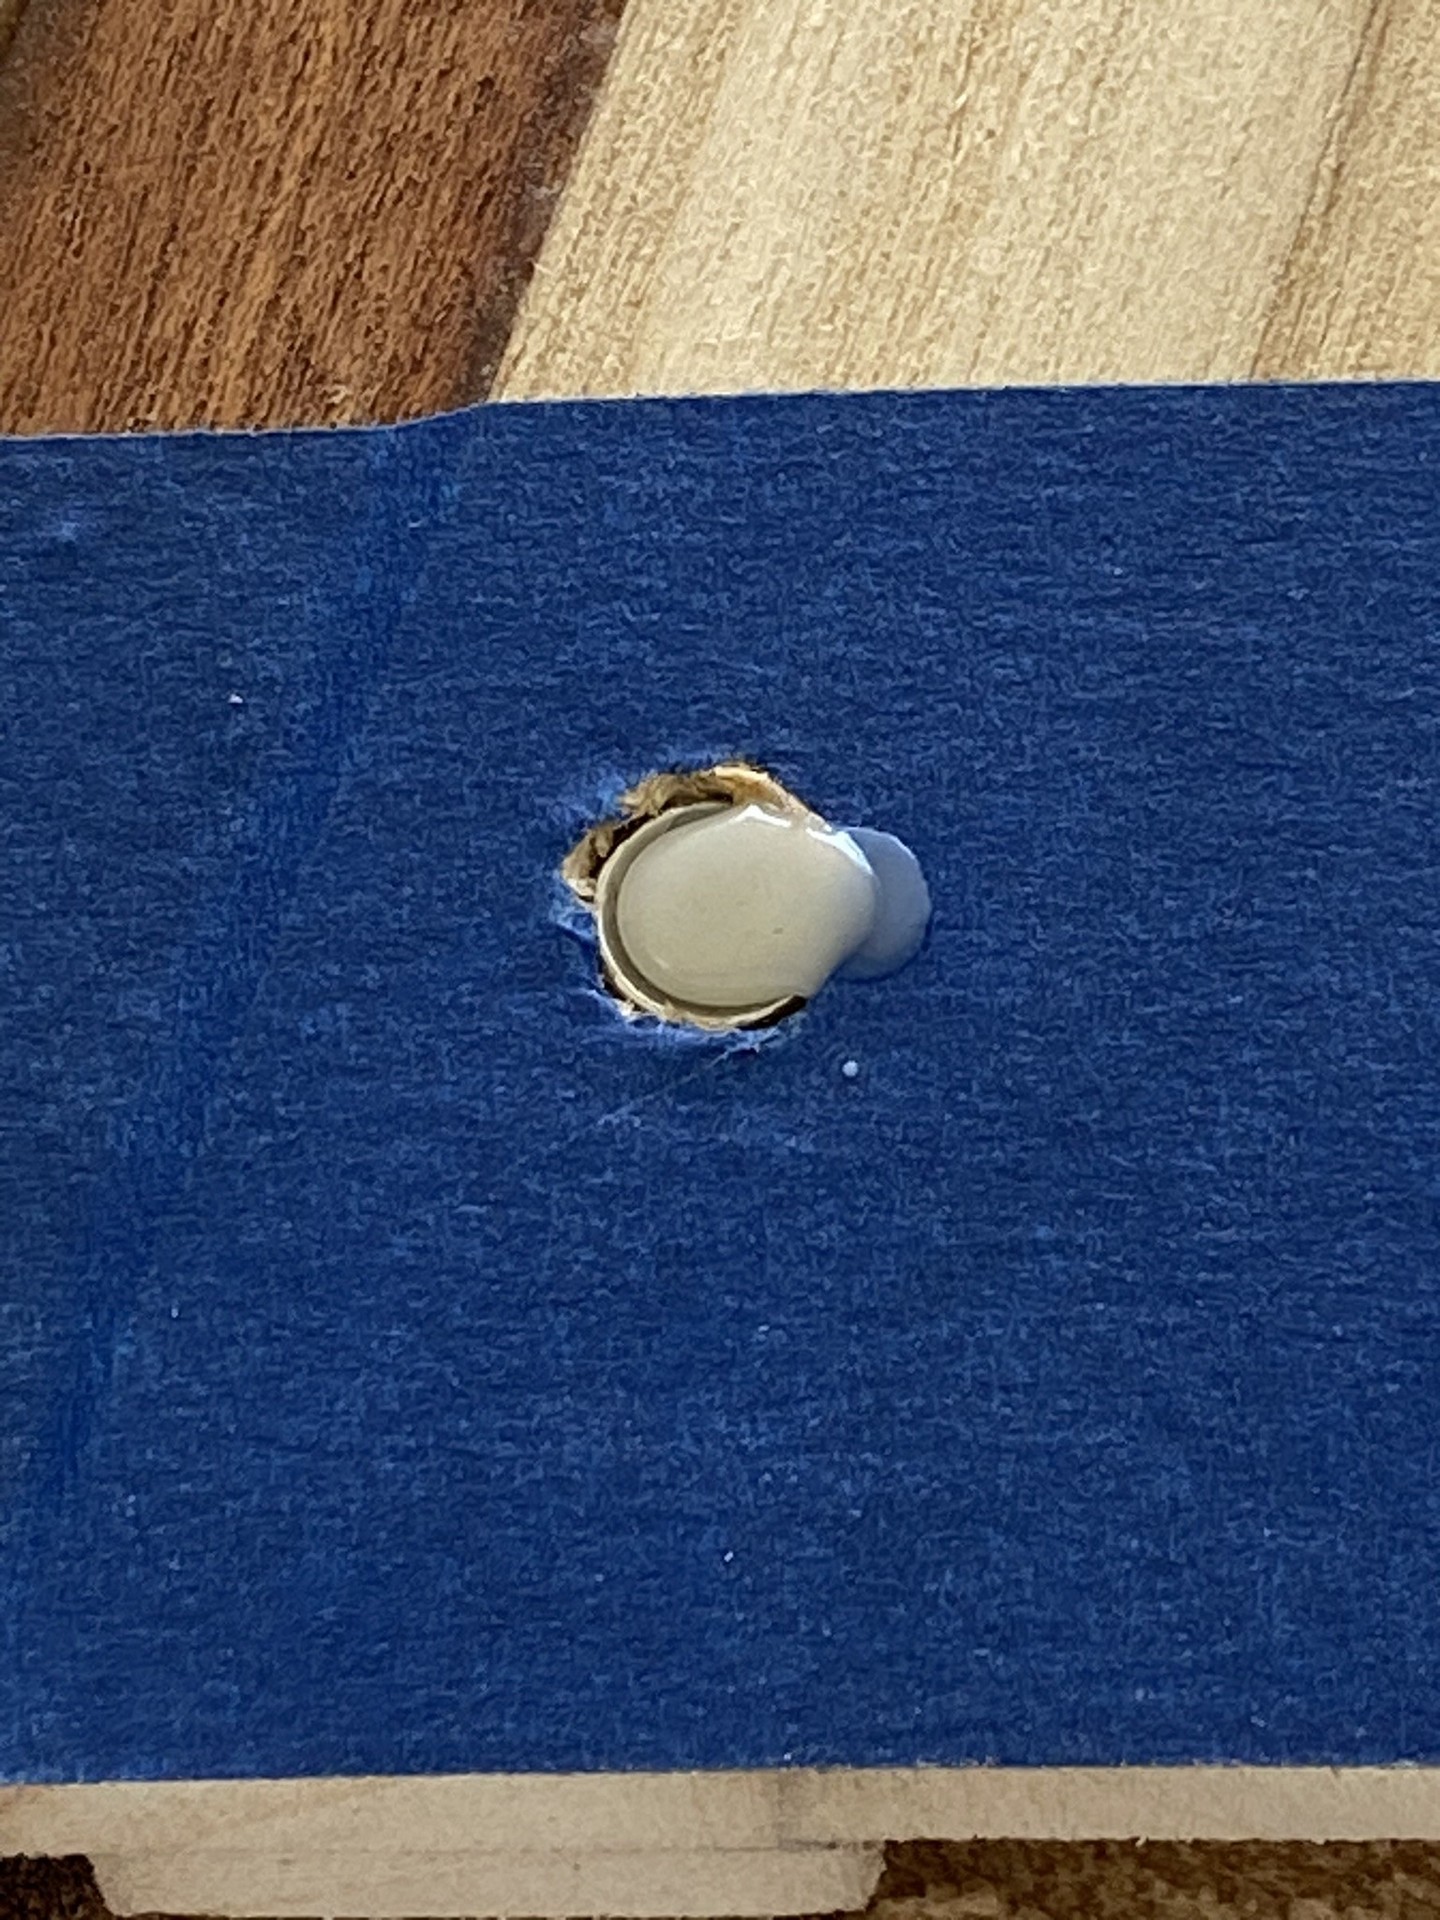
- Remove temporary bolt used to compress rivet nut up into wood. This leaves a hole in the board through each rivet nut - a point of potential water entry to be addressed.
- Apply a piece of masking tape on interior of board to seal off the nut’s bottom opening.
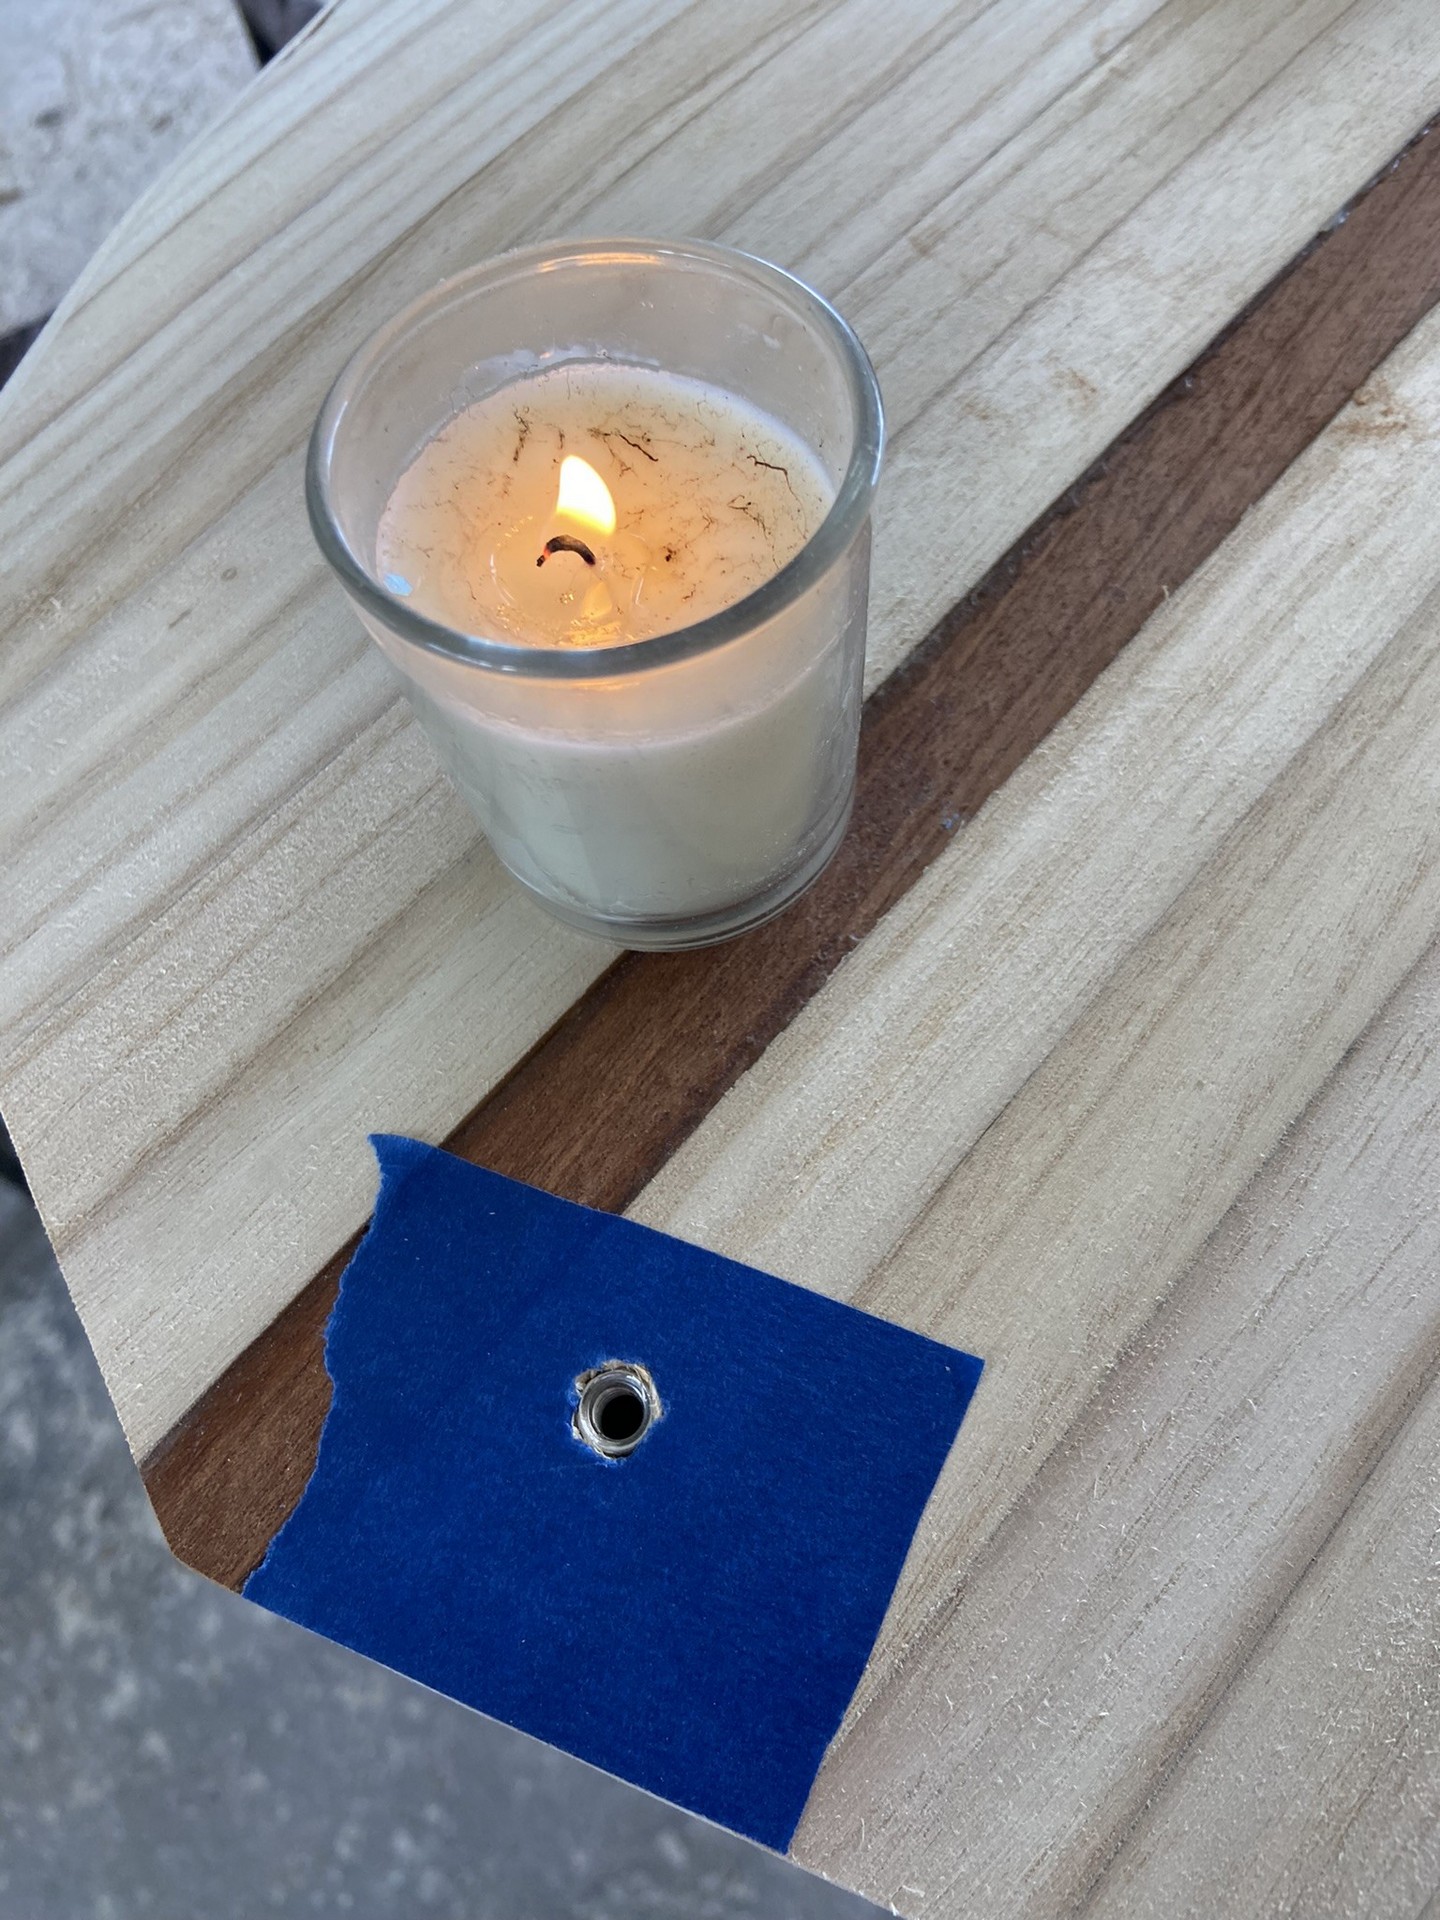
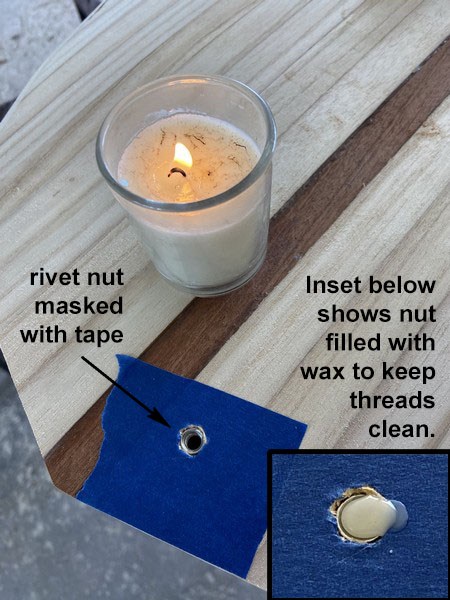
- Drip melted wax from a candle into each rivet nut from the top, filling its threads. This protects the threads from glue, epoxy, varnish or other materials from fouling the threads. Leave the wax in until I’ve completed varnishing the deck. Then, remove wax by melting it with a soldering iron and sucking it out with a syringe or wipe with a Q-tip.
When no camera mount is attached to one of these rivet nuts they will be sealed with a D-ring stainless bolt and rubber washer. The D-ring provides further functionality fore and aft as a place to tie a line.
Installing Nose and Tail Blocks
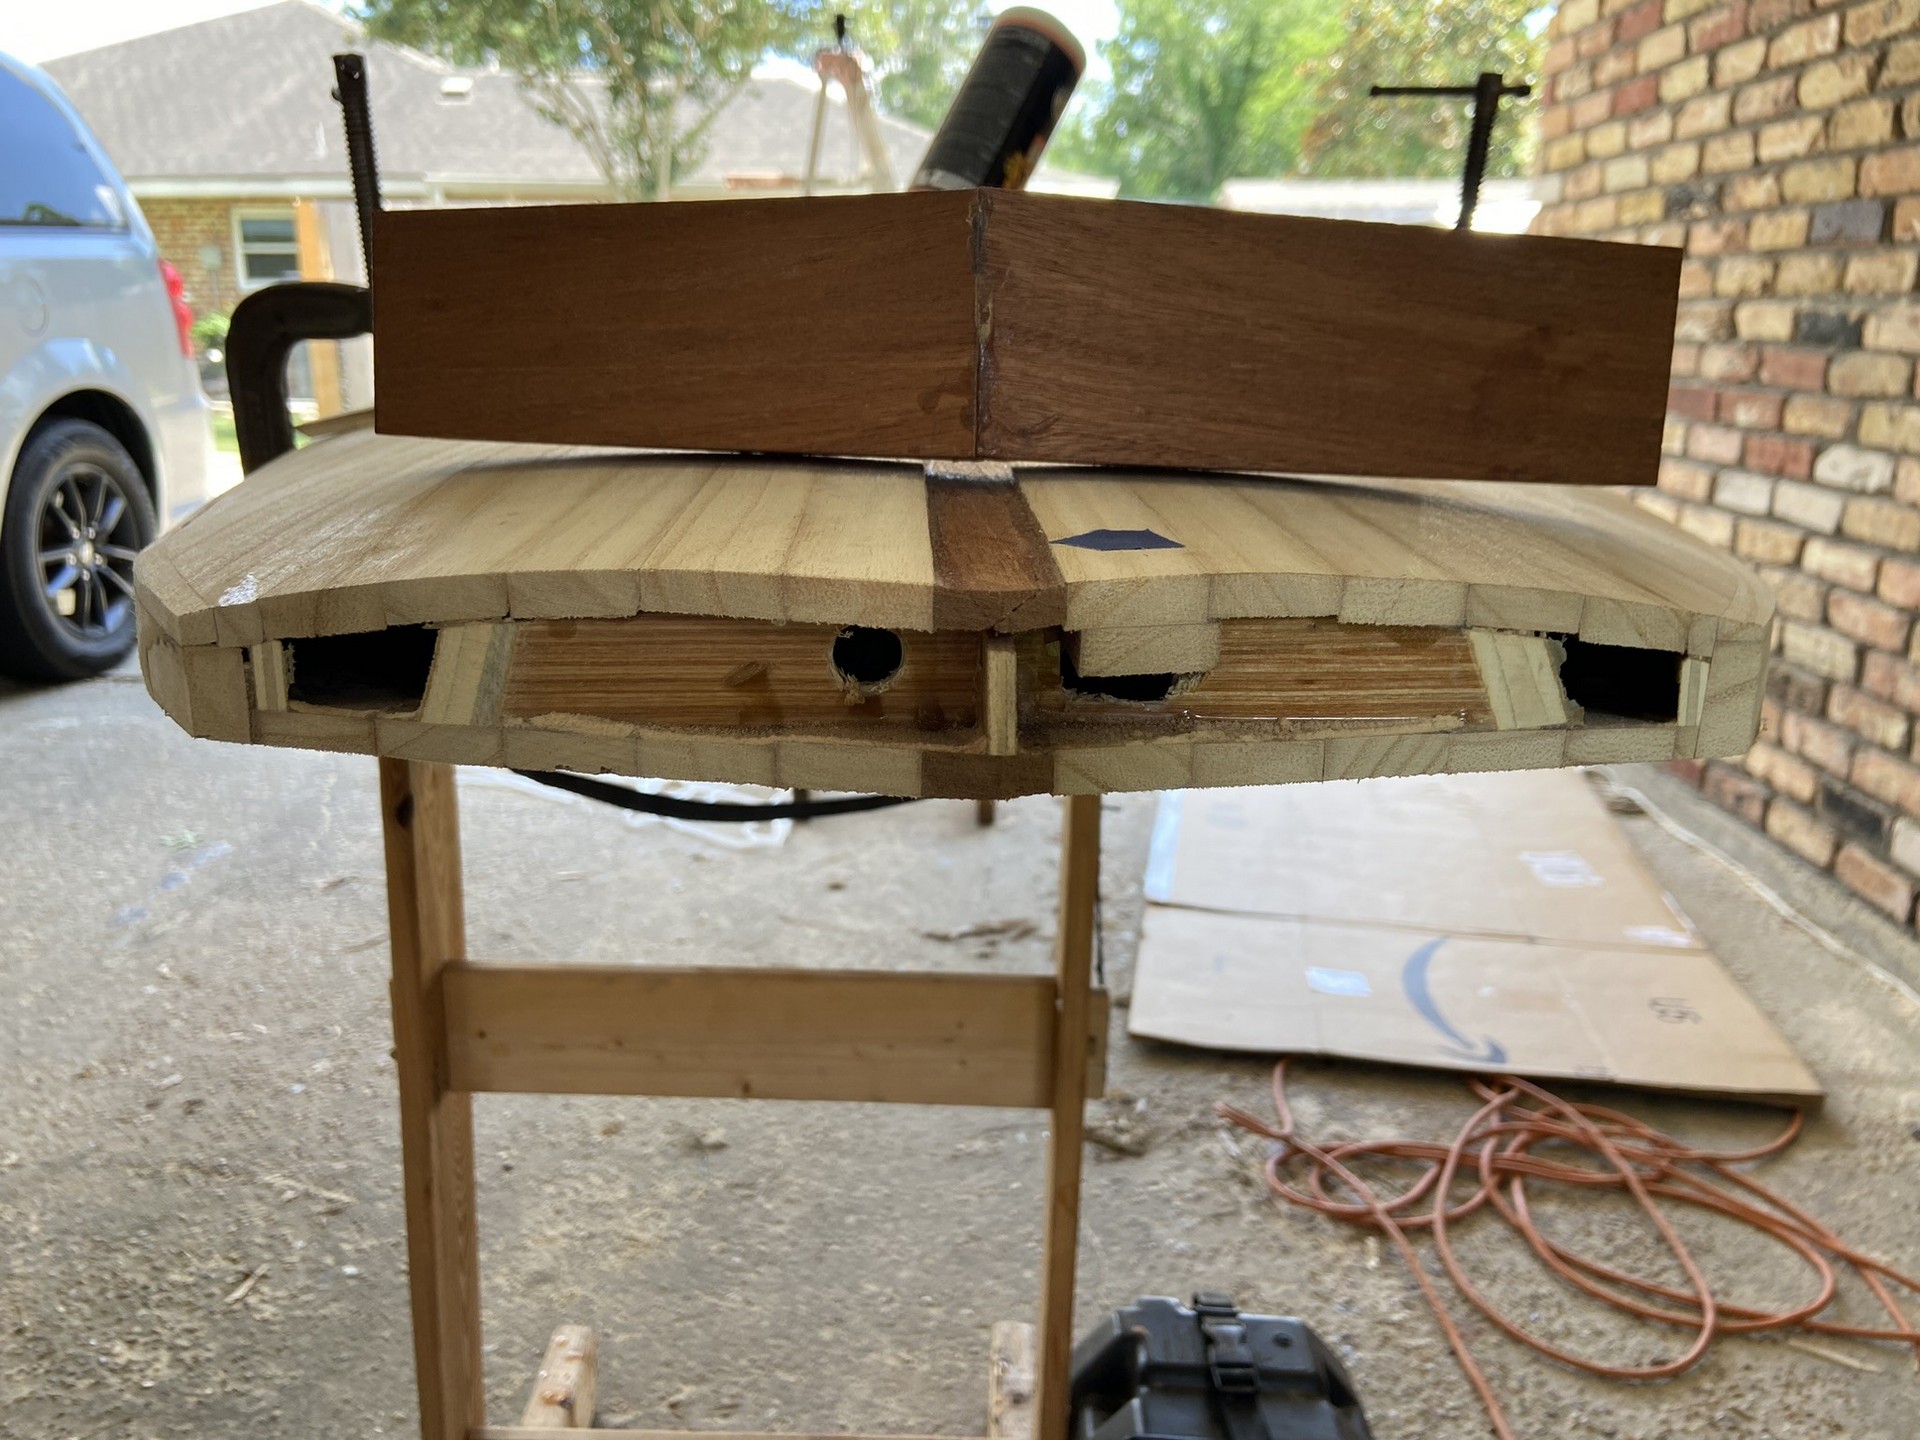
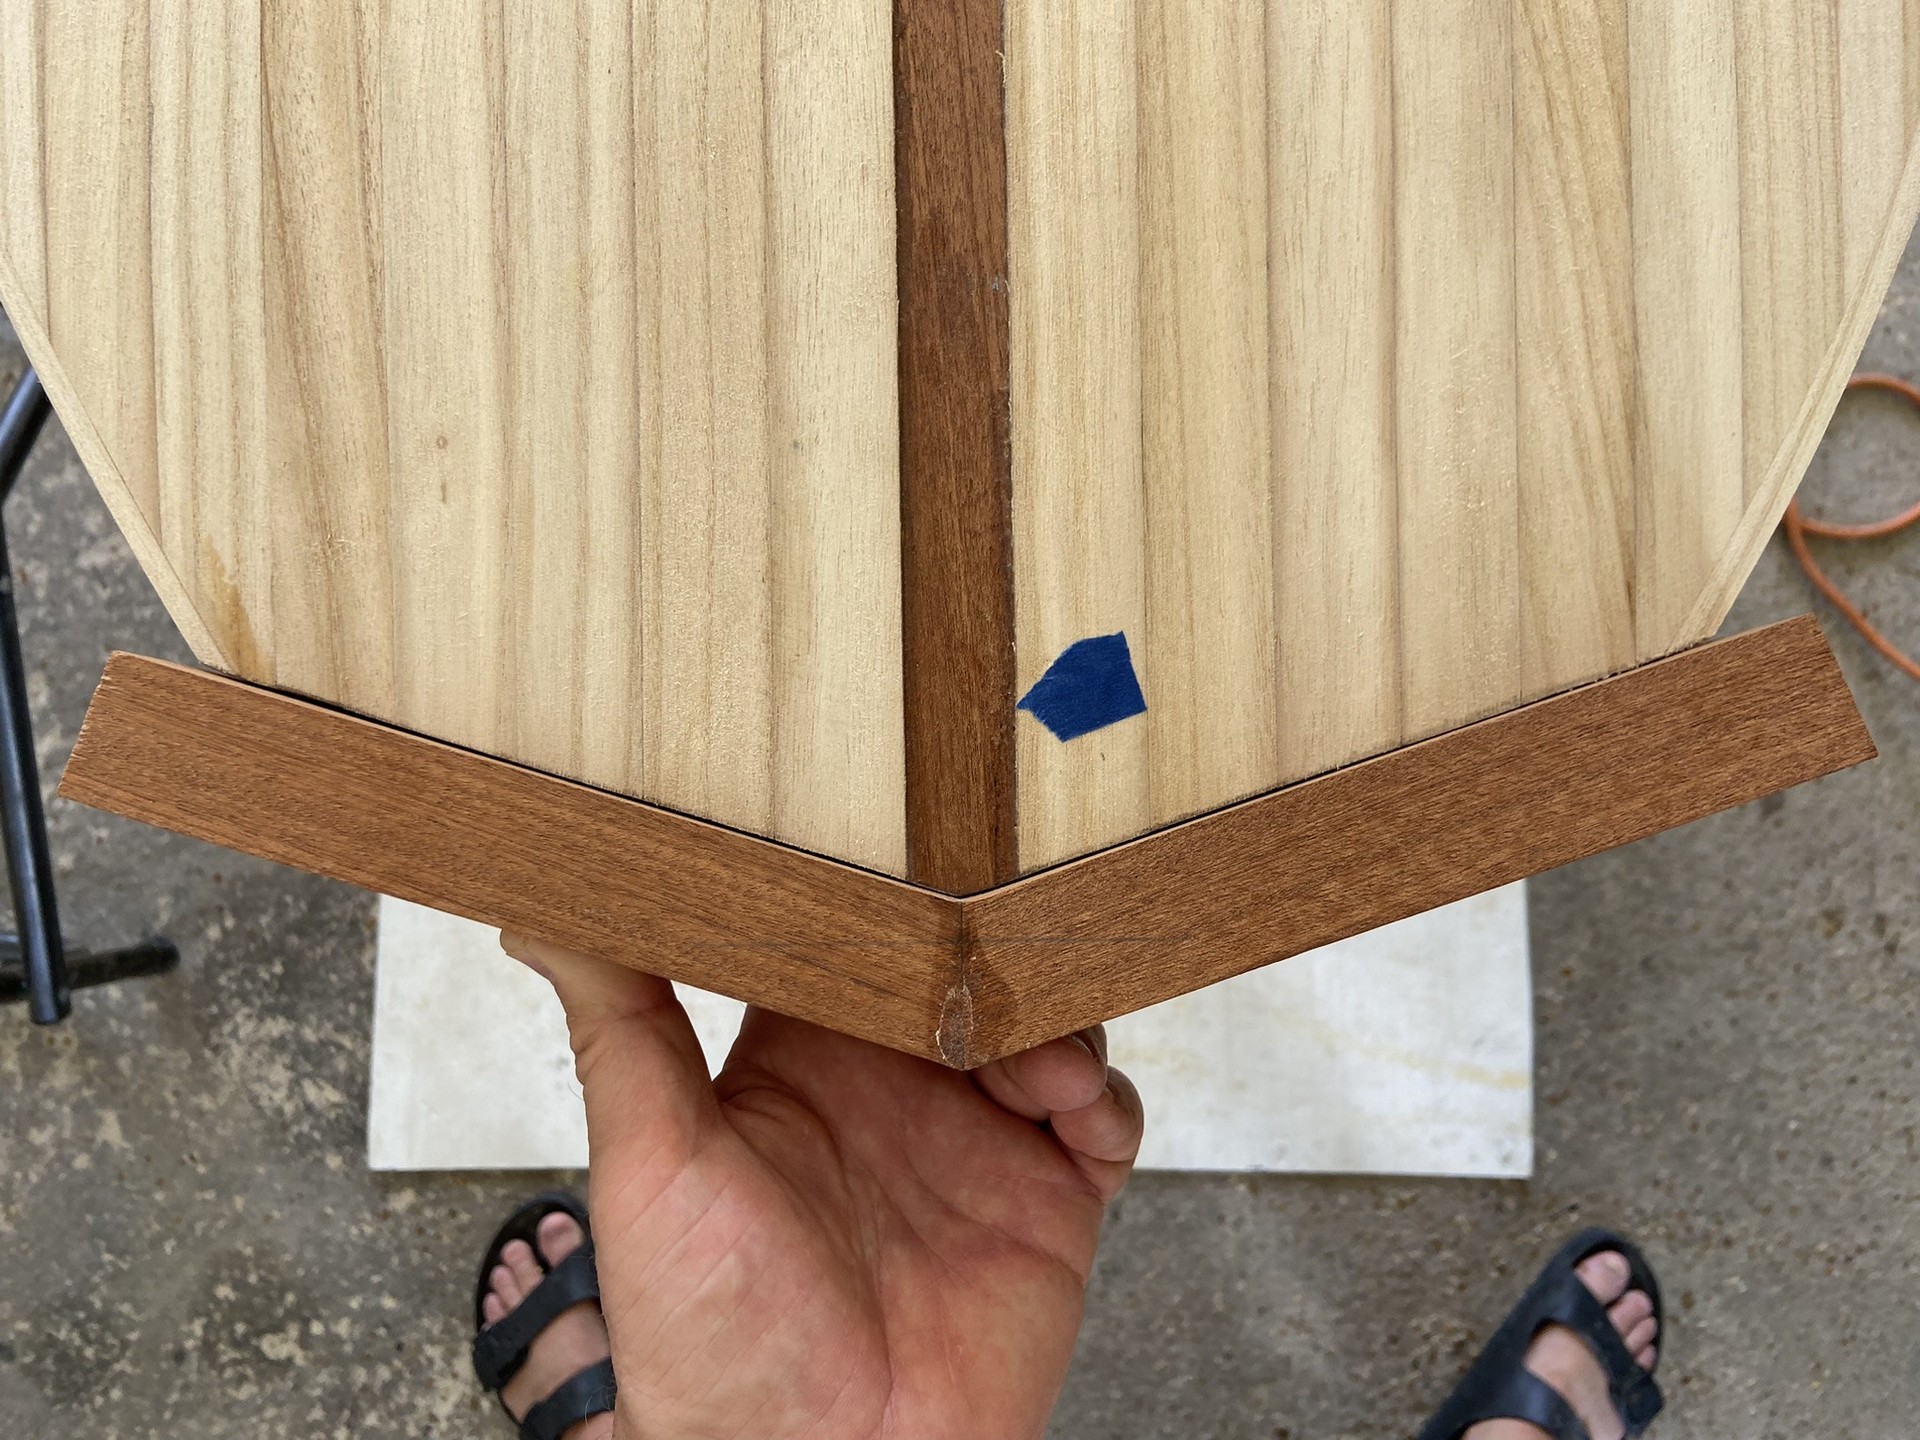
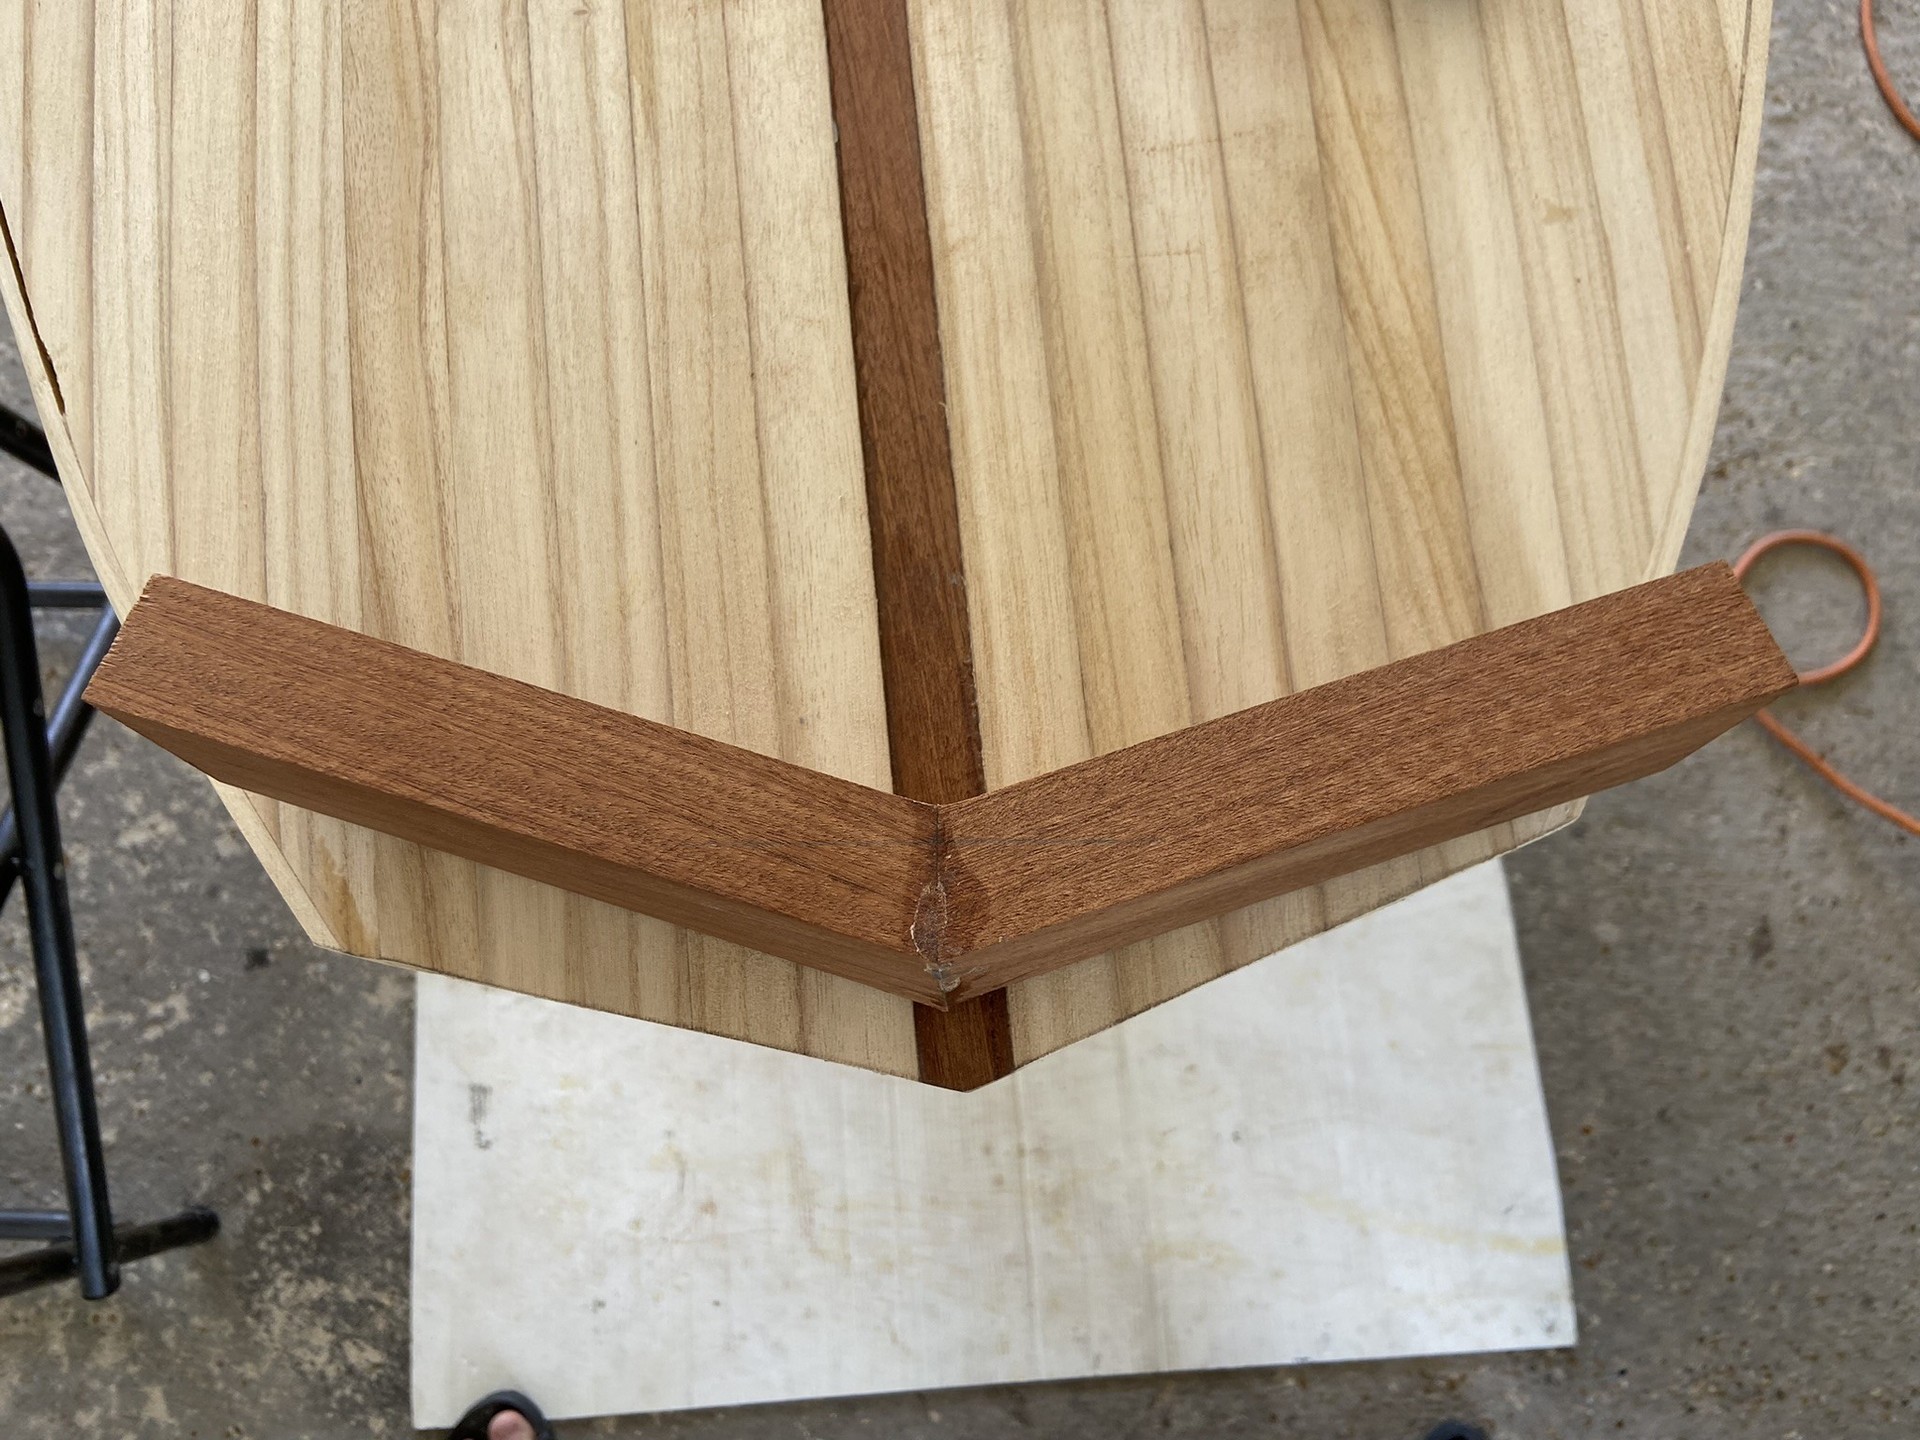
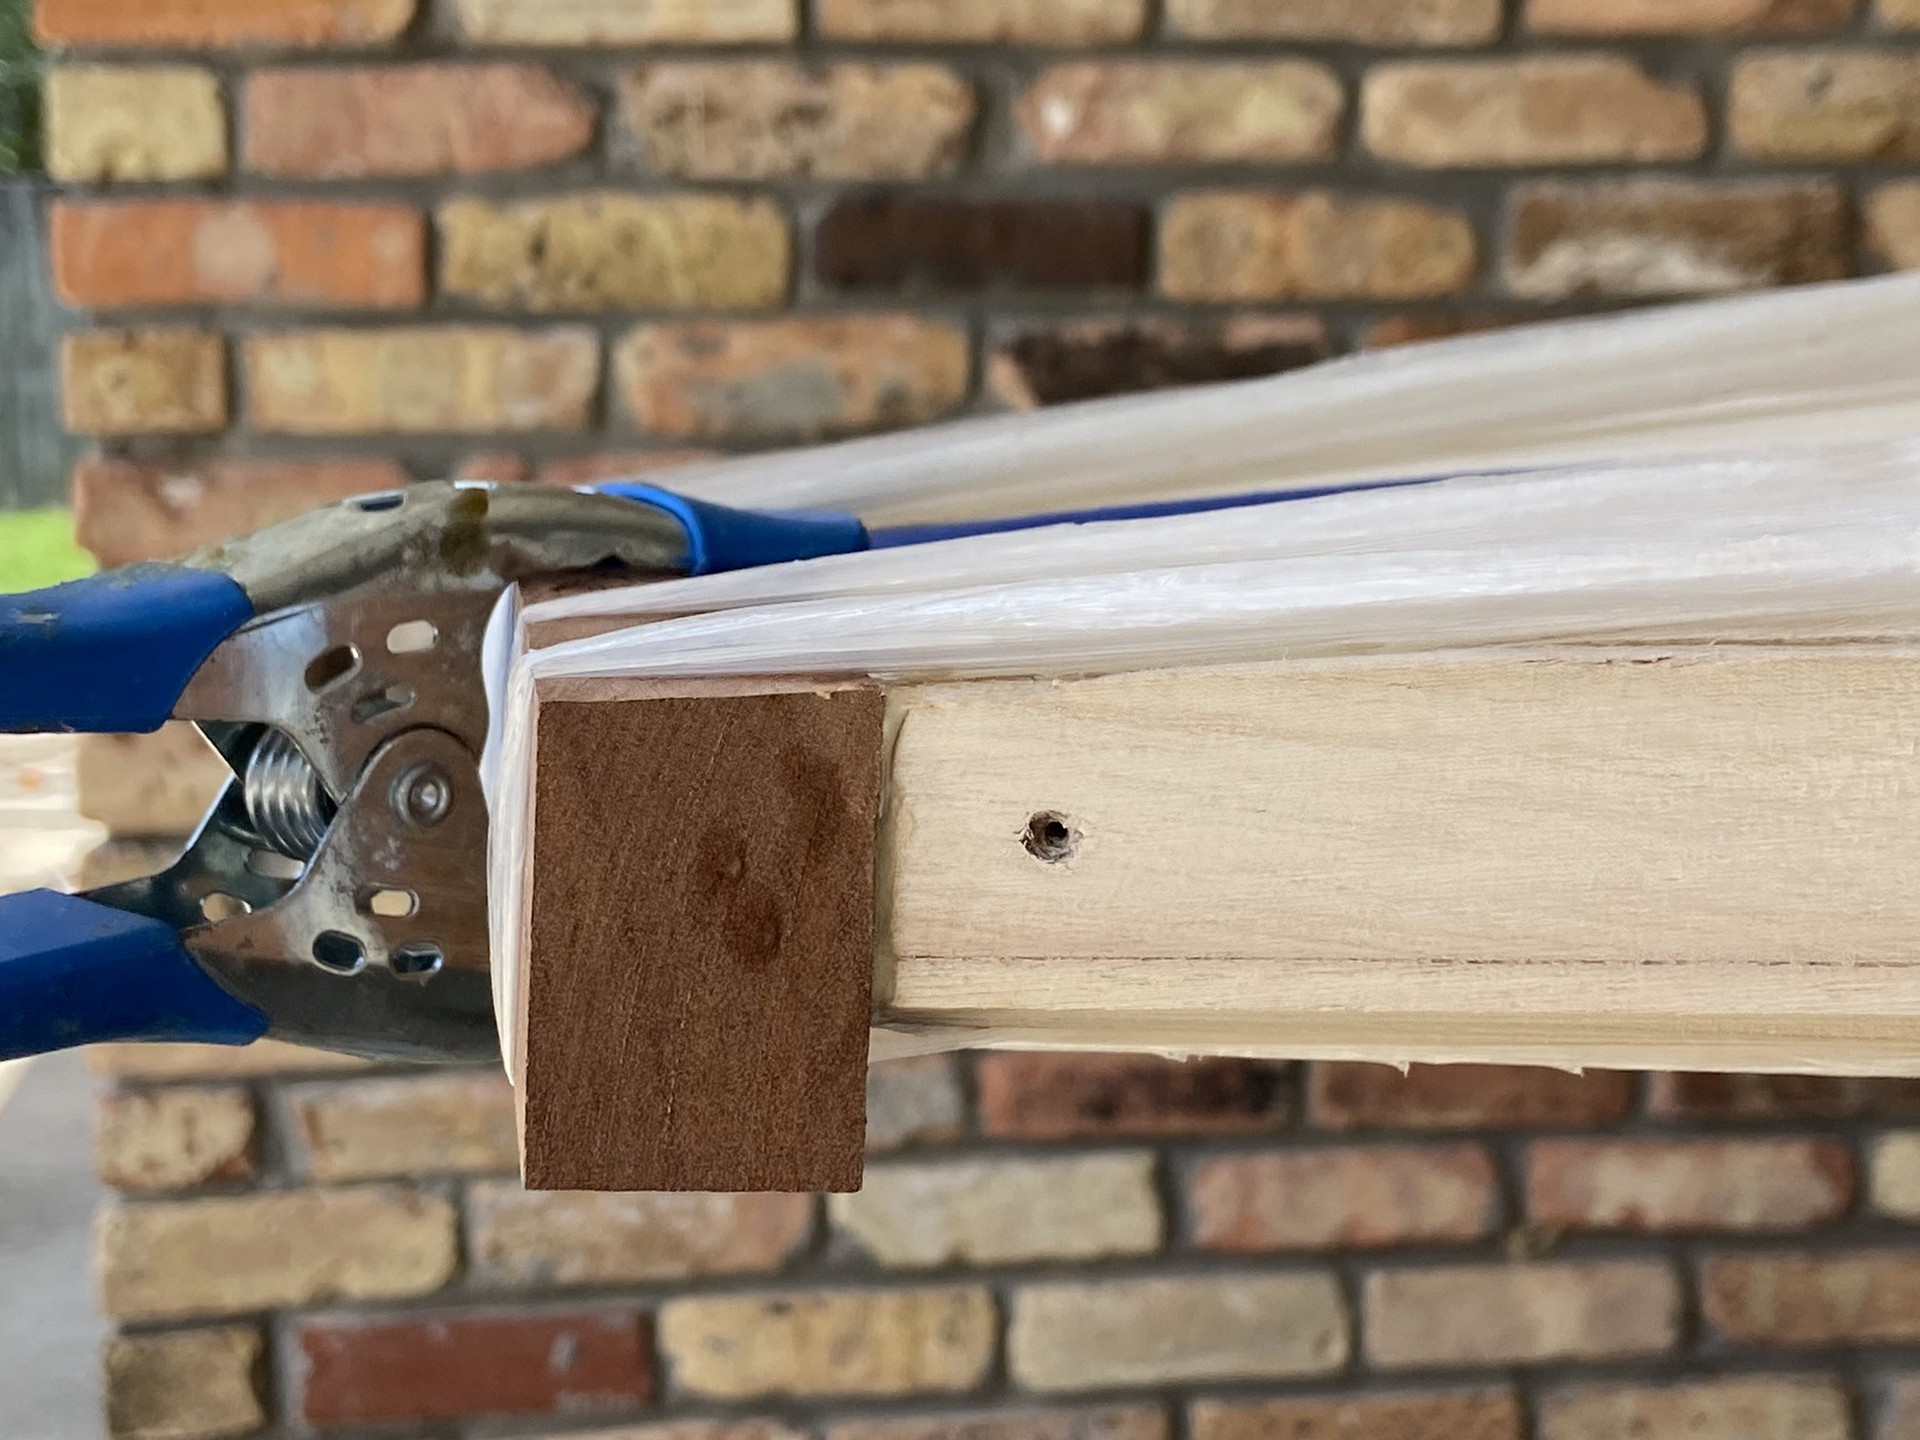
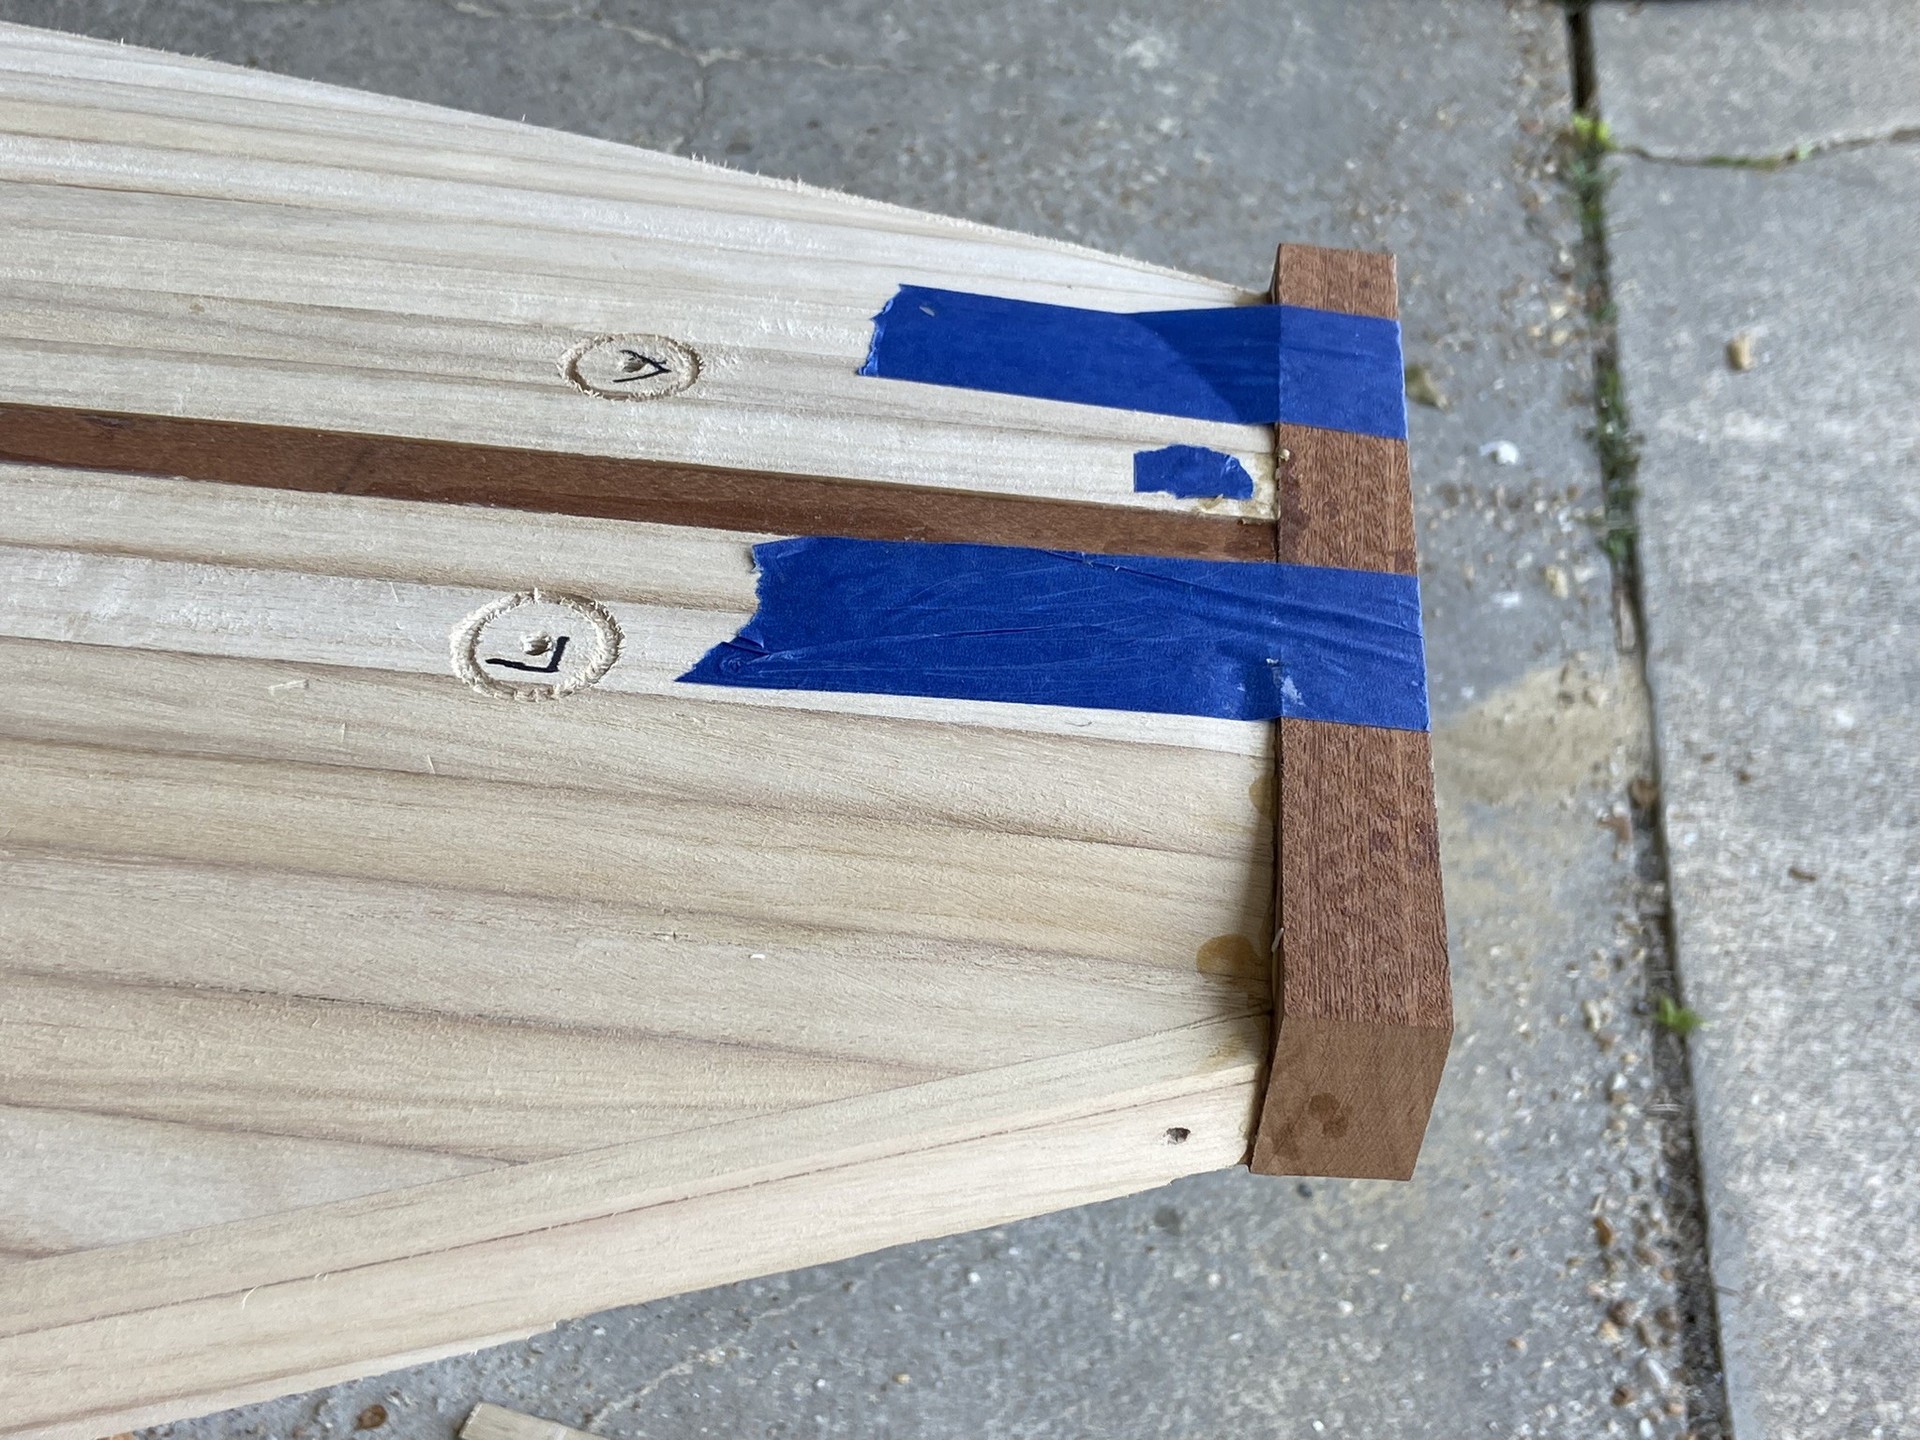
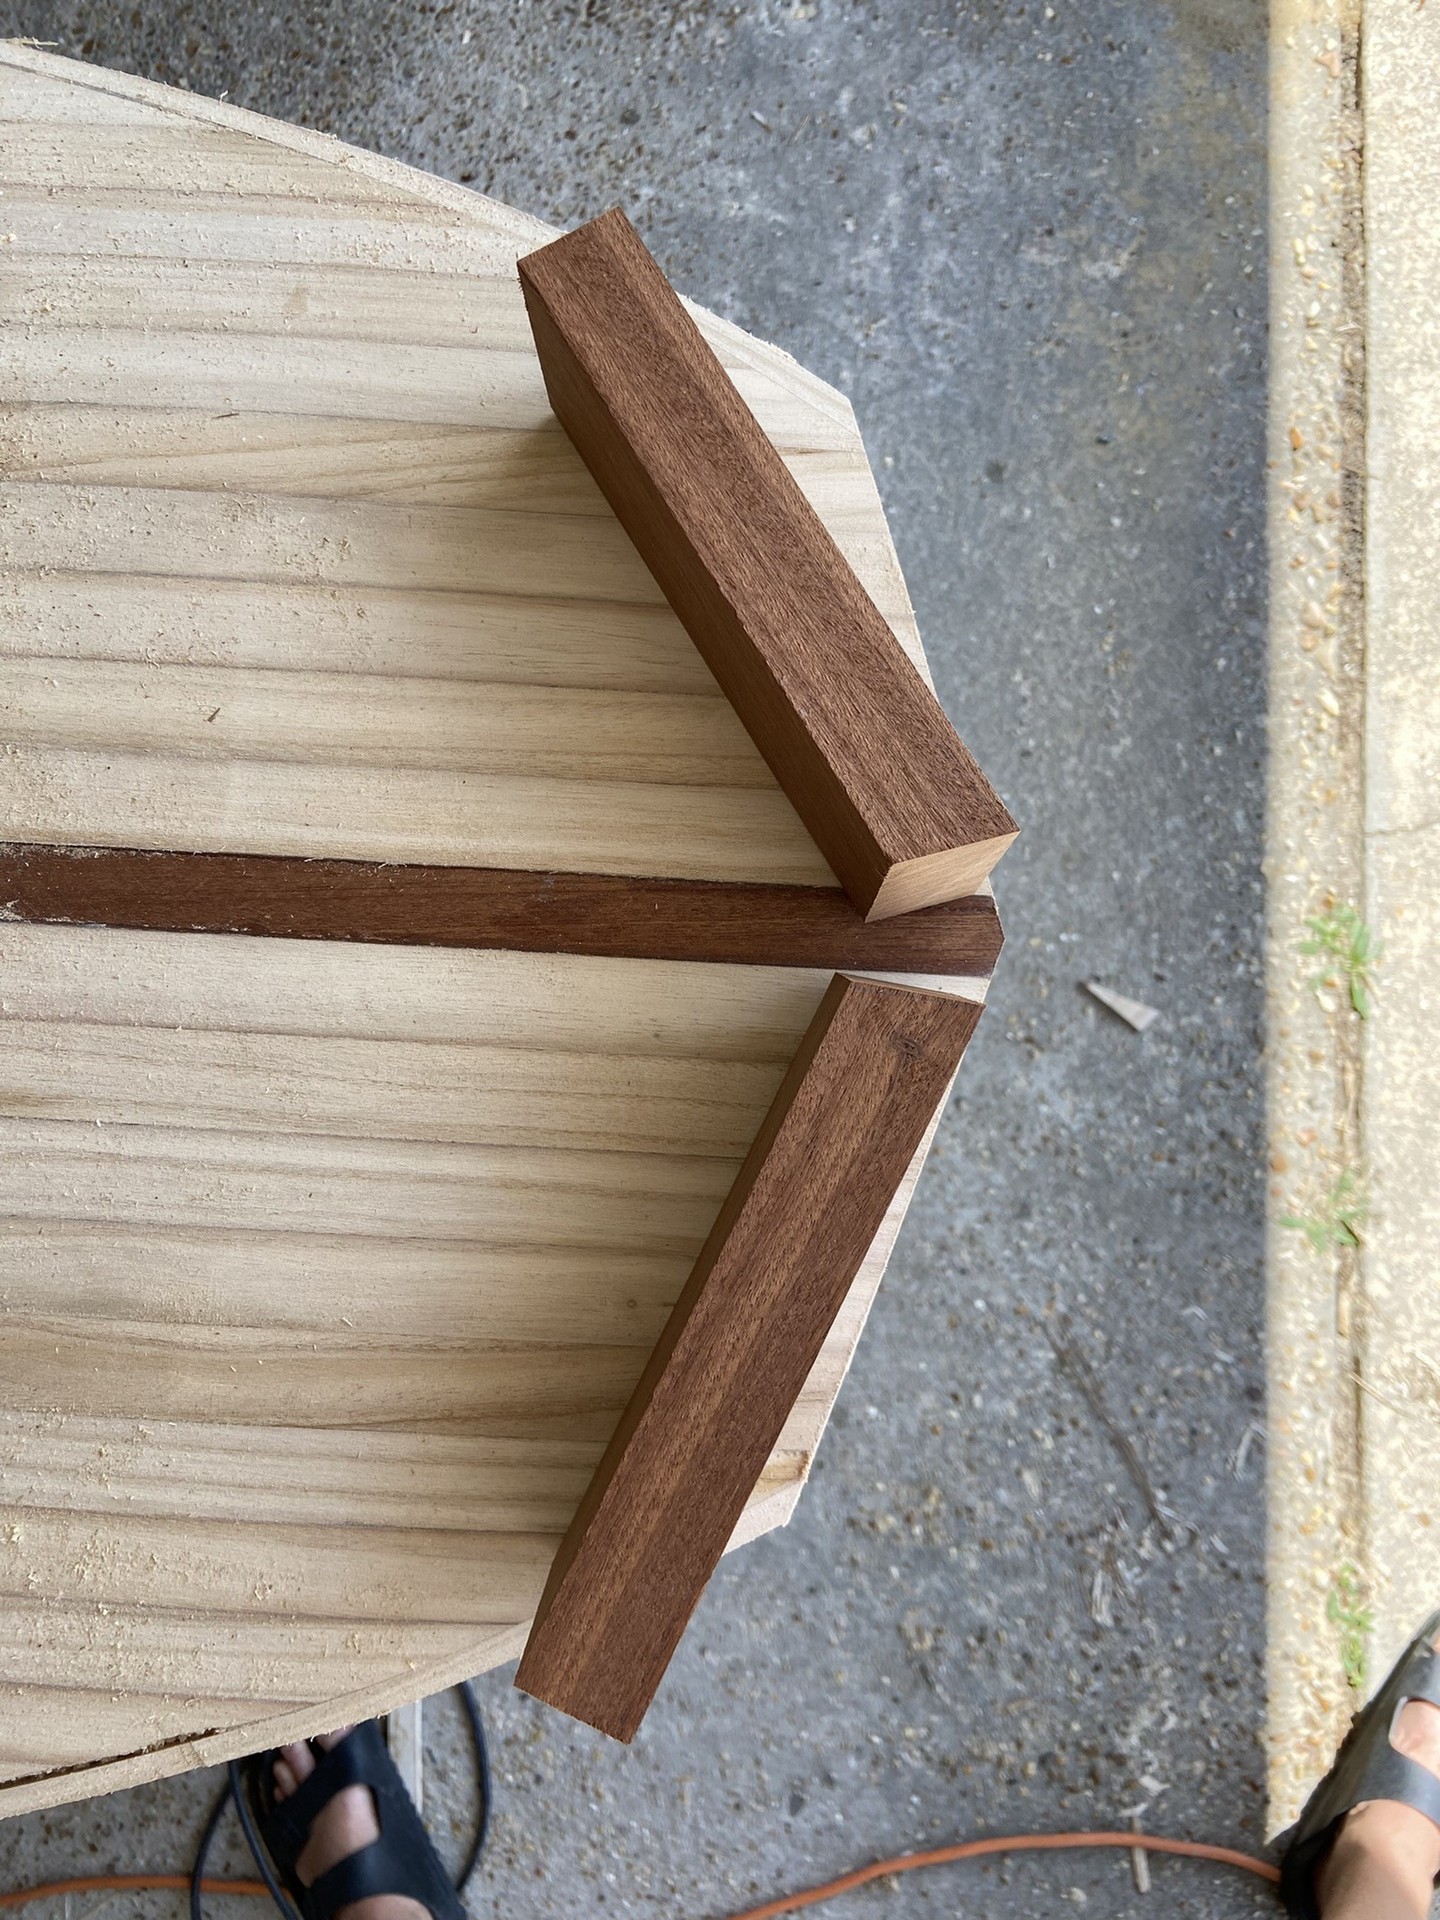
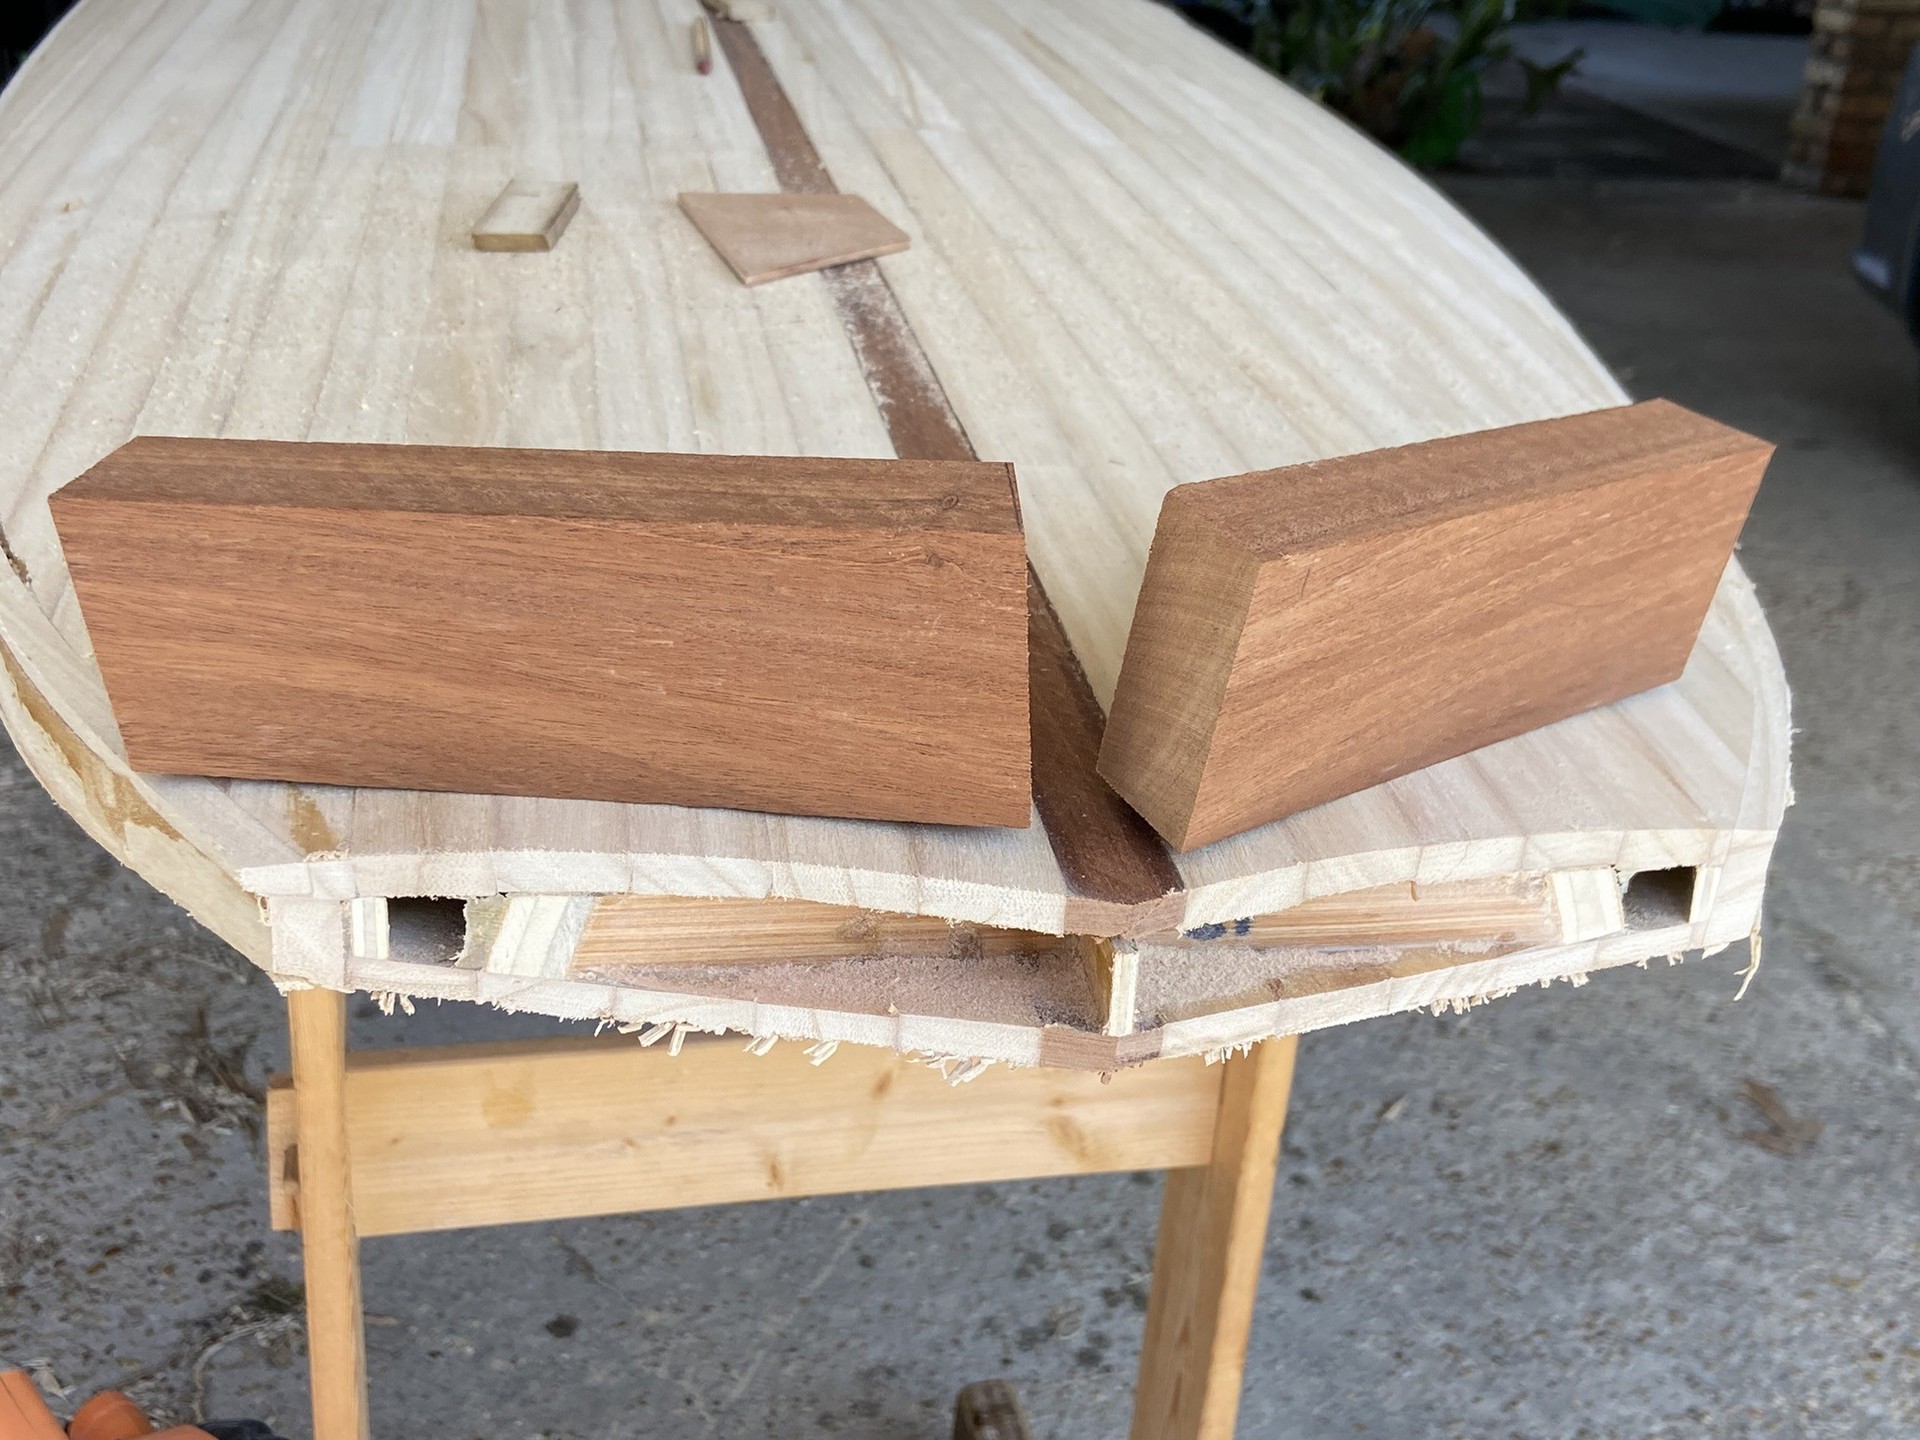
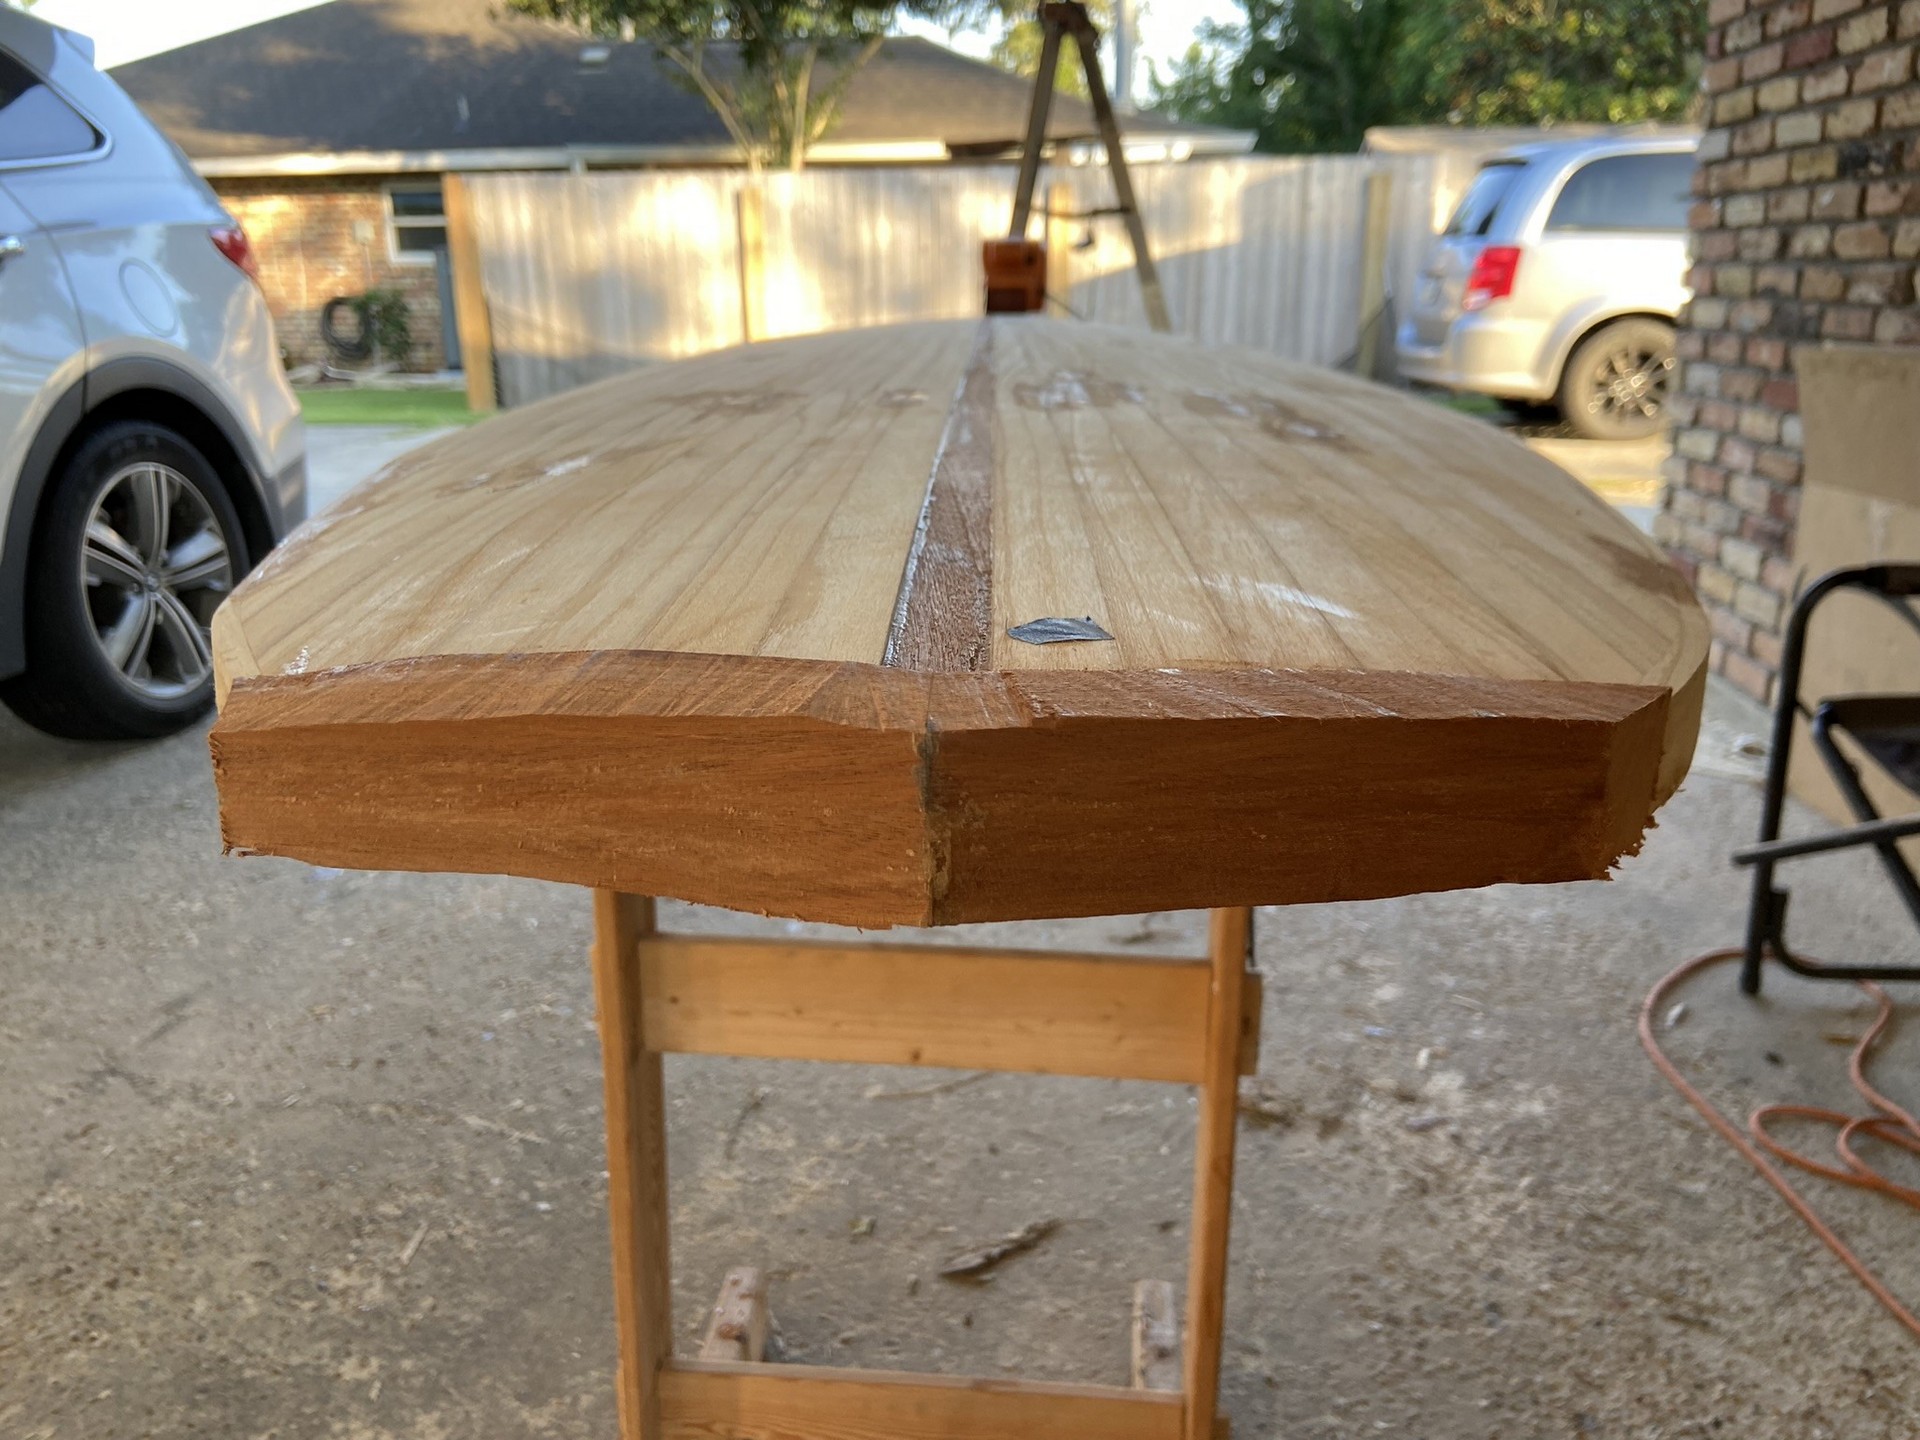
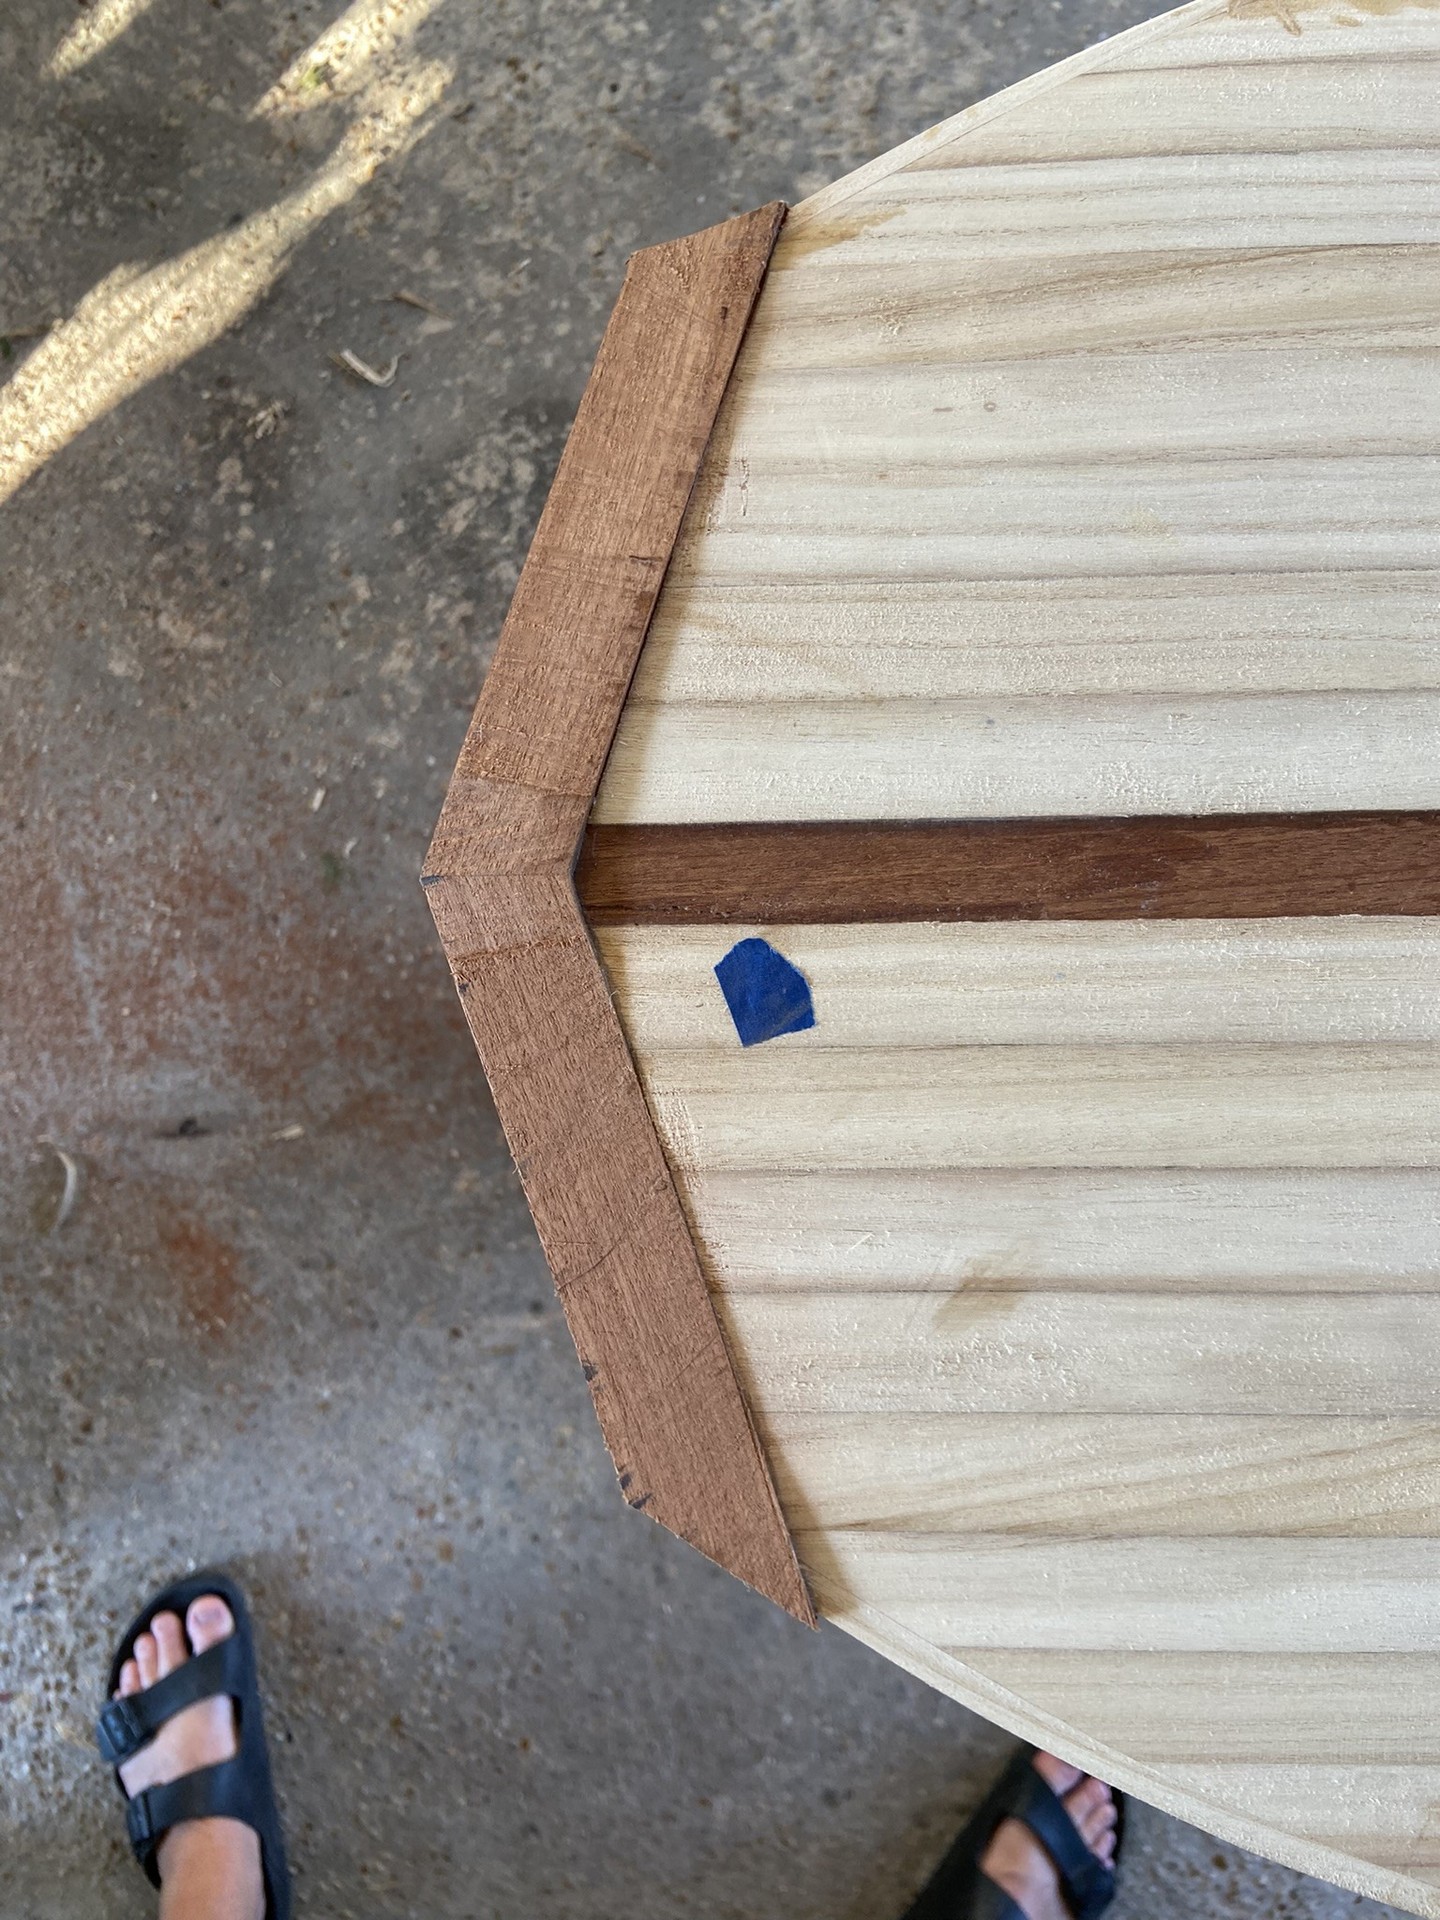
I purchased a ~3’ length of approximately 2 x 3" mahogany lumber during my trip to the specialty lumber yard in New Orleans several months ago. This dense wood is being used at the nose and tail of the paddleboard for resilience to dings and the beautiful contrasting color. The tail will be a simple straight piece of block squarely attached to the back of the board. The nose will be two short lengths of mahogany attached at an angle to allow for a more rounded nose and to form a dark “arrow” where they meet the mahogany center stip. I clamped a scrap of wood to the deck of the board as a guide each time I used the circular saw to make the final cuts off the board. The saw rode up on top of this guide, ensuring the blade was cutting truly vertically across the board. During earlier cuts I realized simply running the circular saw across the rounded deck of the paddleboard did not result in a uniform vertical / square cut across the board which is necessary for attaching blocks. The miter box saw was of course used to cut the mahogany blocks and the appropriate angle for them to join was approximately 15 degrees.

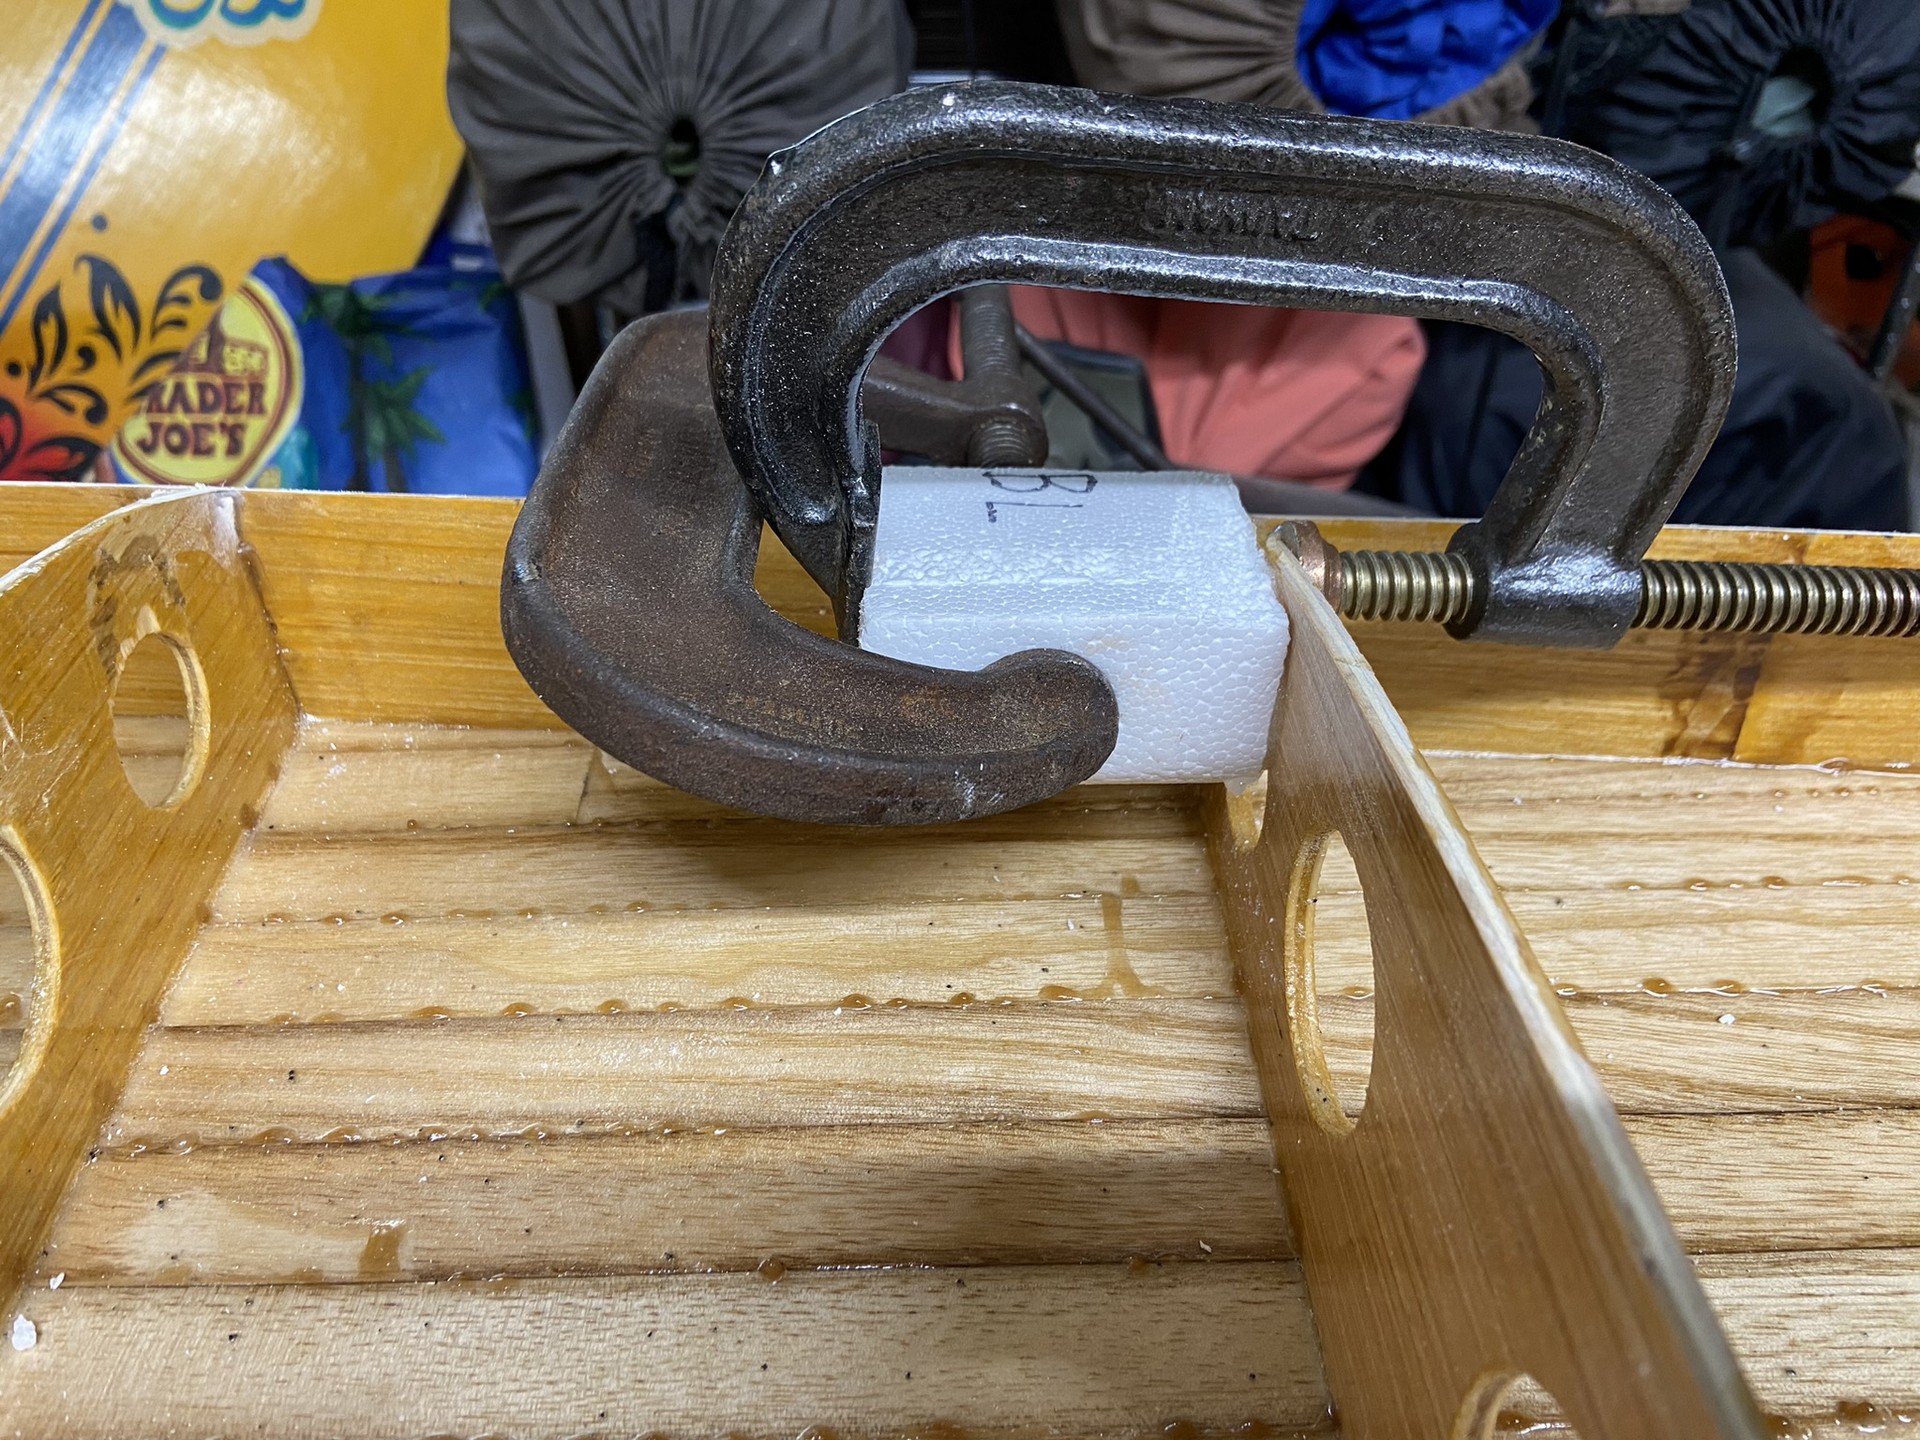
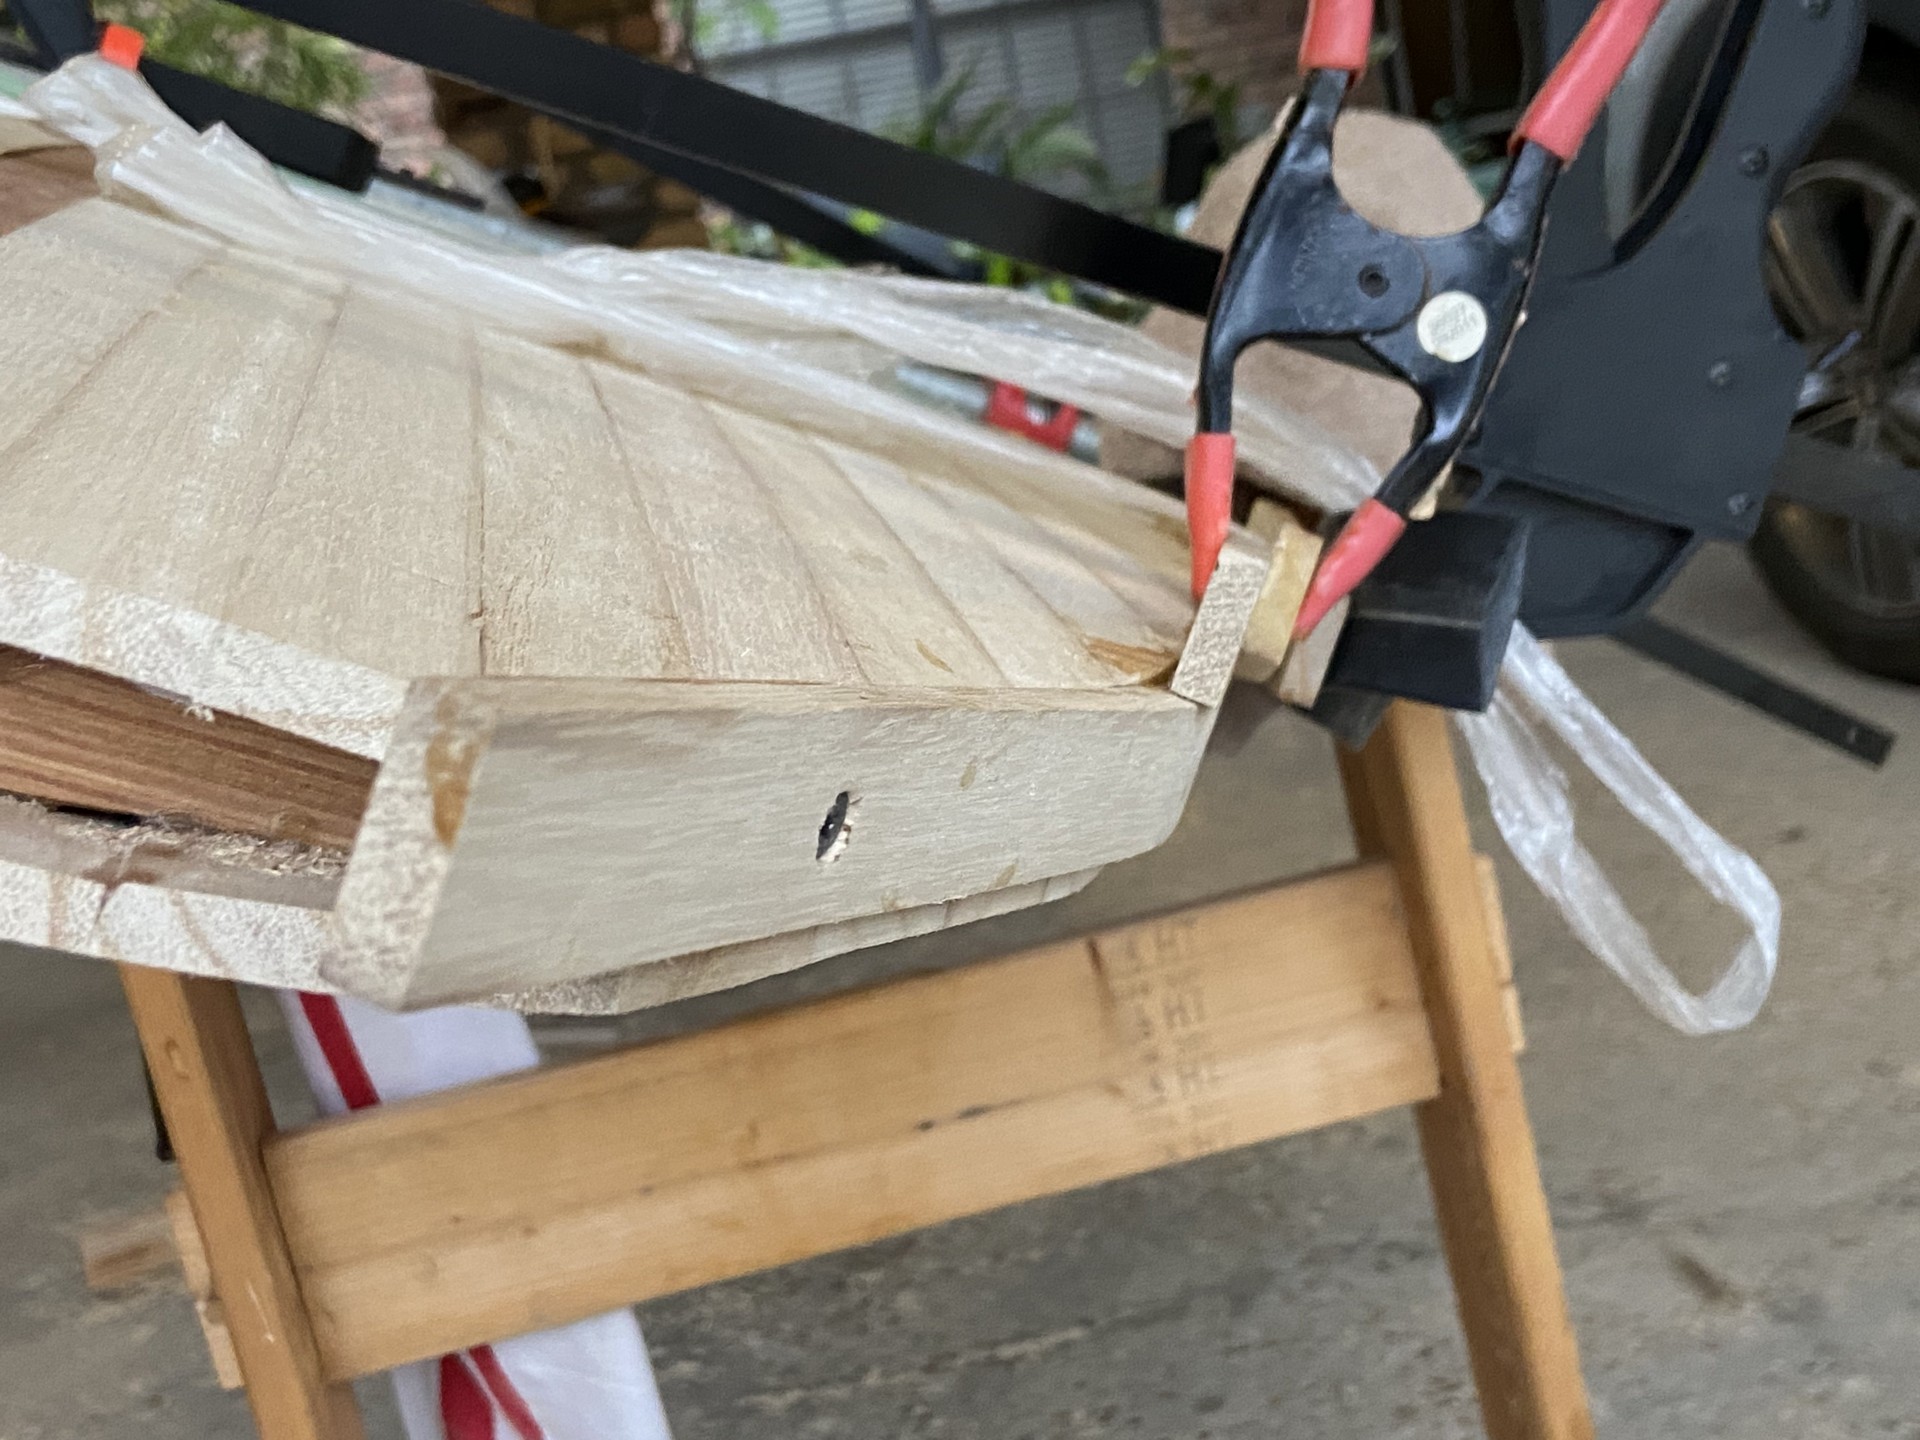
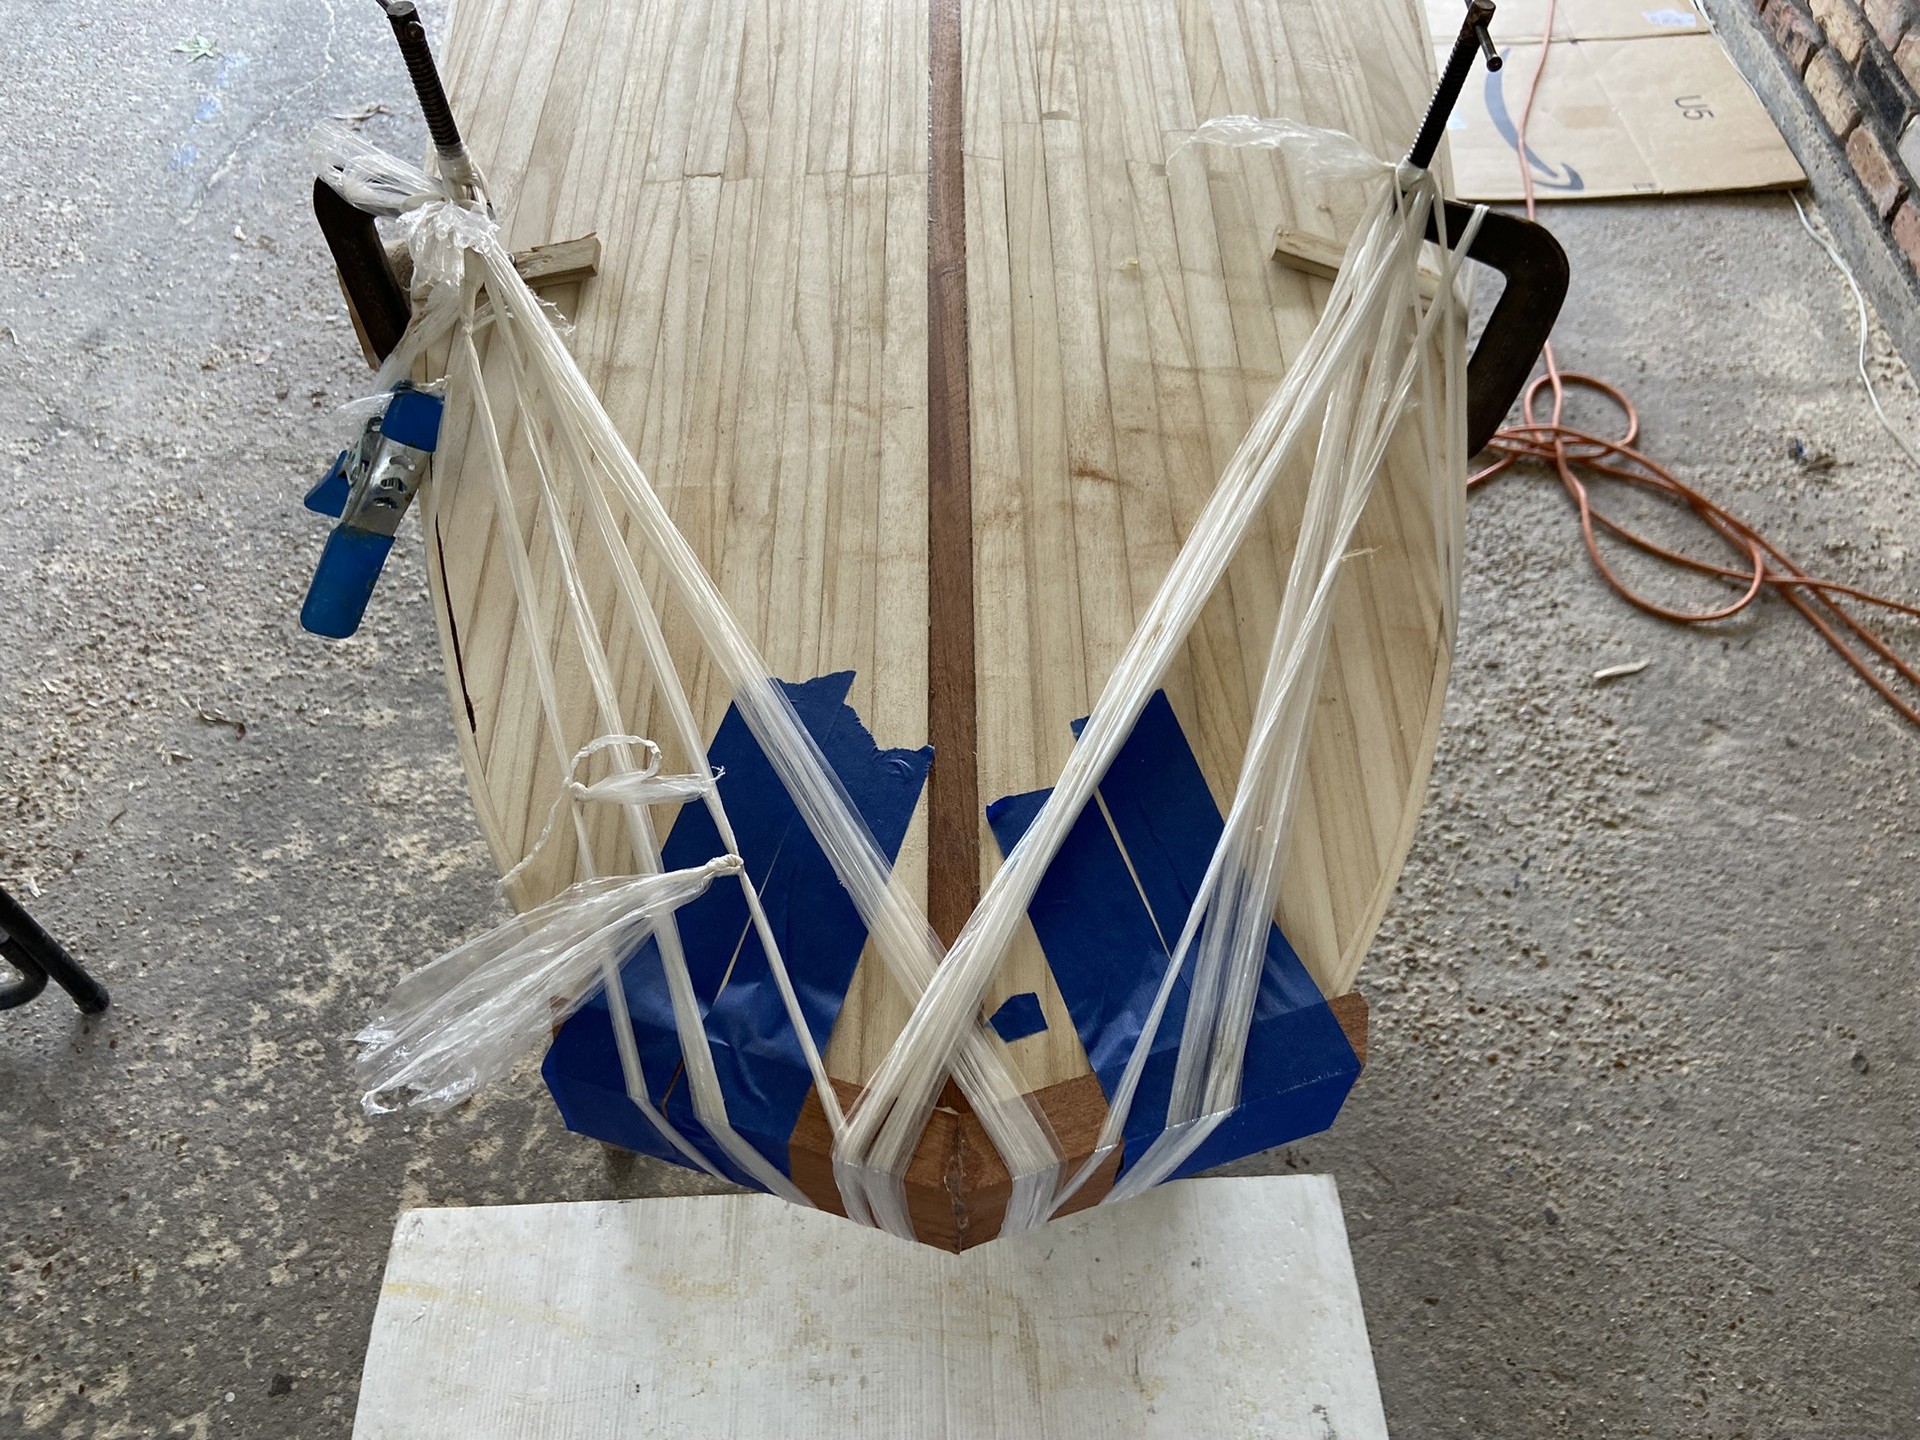
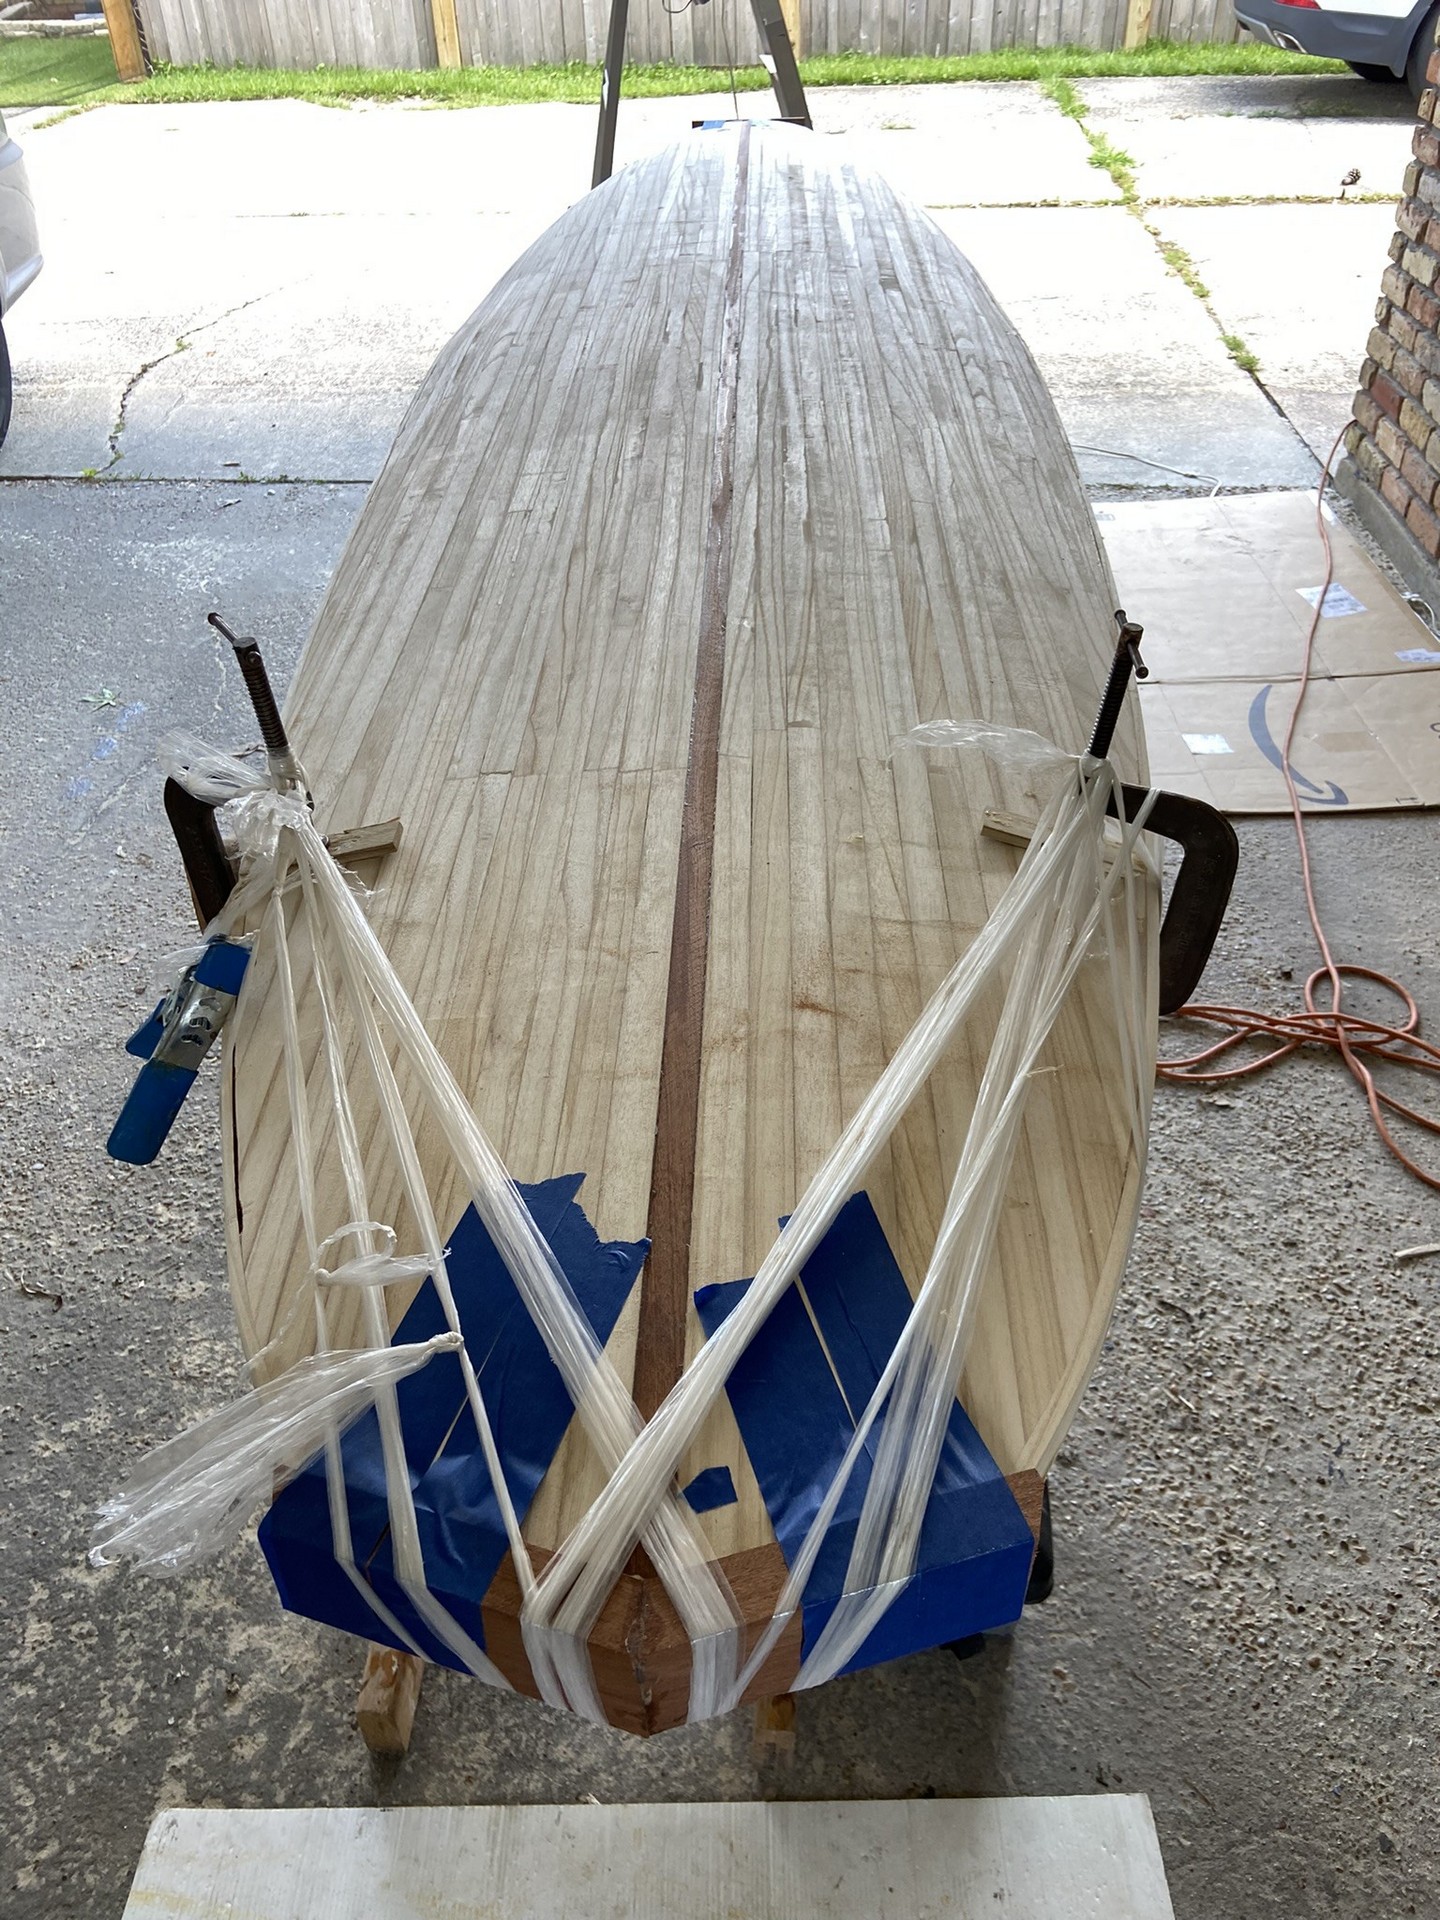
How will I provide compression to hold the blocks up against the board as it is gluing?
Various solutions were provided in YouTube videos by Jarvis Boards and also a newer playlist, by Jenkins Boatworks, and others. I tried using only painter’s tape to hold the tail block in place but felt compression was inadequate. An anchor point midway up the board was needed so I could wrap the cords of plastic wrap around the end block. I ended up using two 6" C-clamps and some wood scraps to protect the board. I affixed a clamp to either side of the board at the rails which provided a sturdy anchor for the elastic plastic-wrap “ropes” to secure the tail block against the board while the glue set. The same technique was used for attaching the nose blocks.
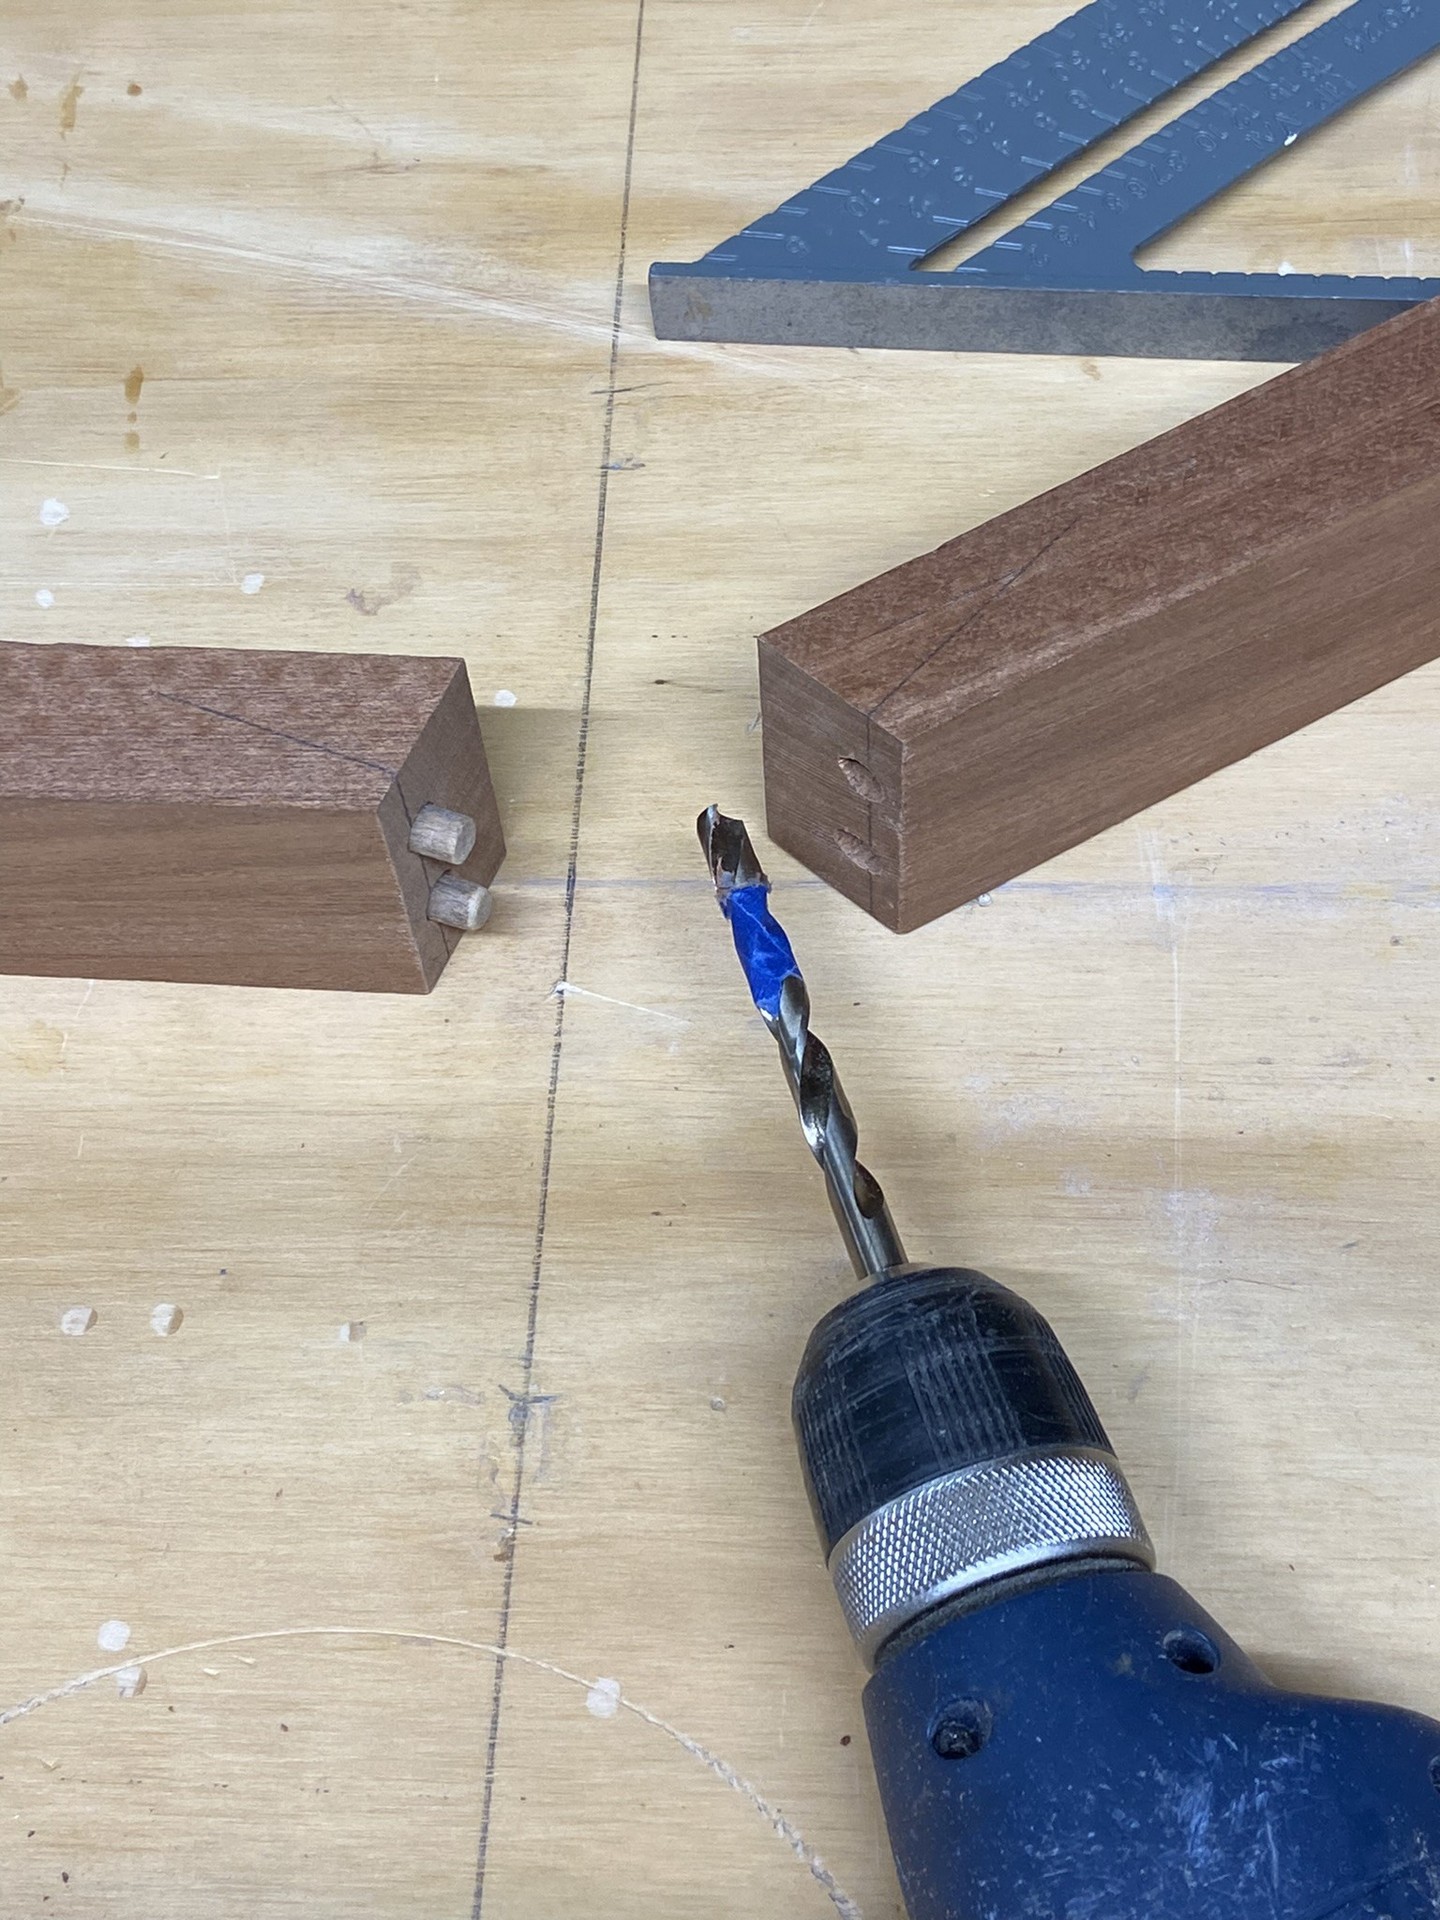
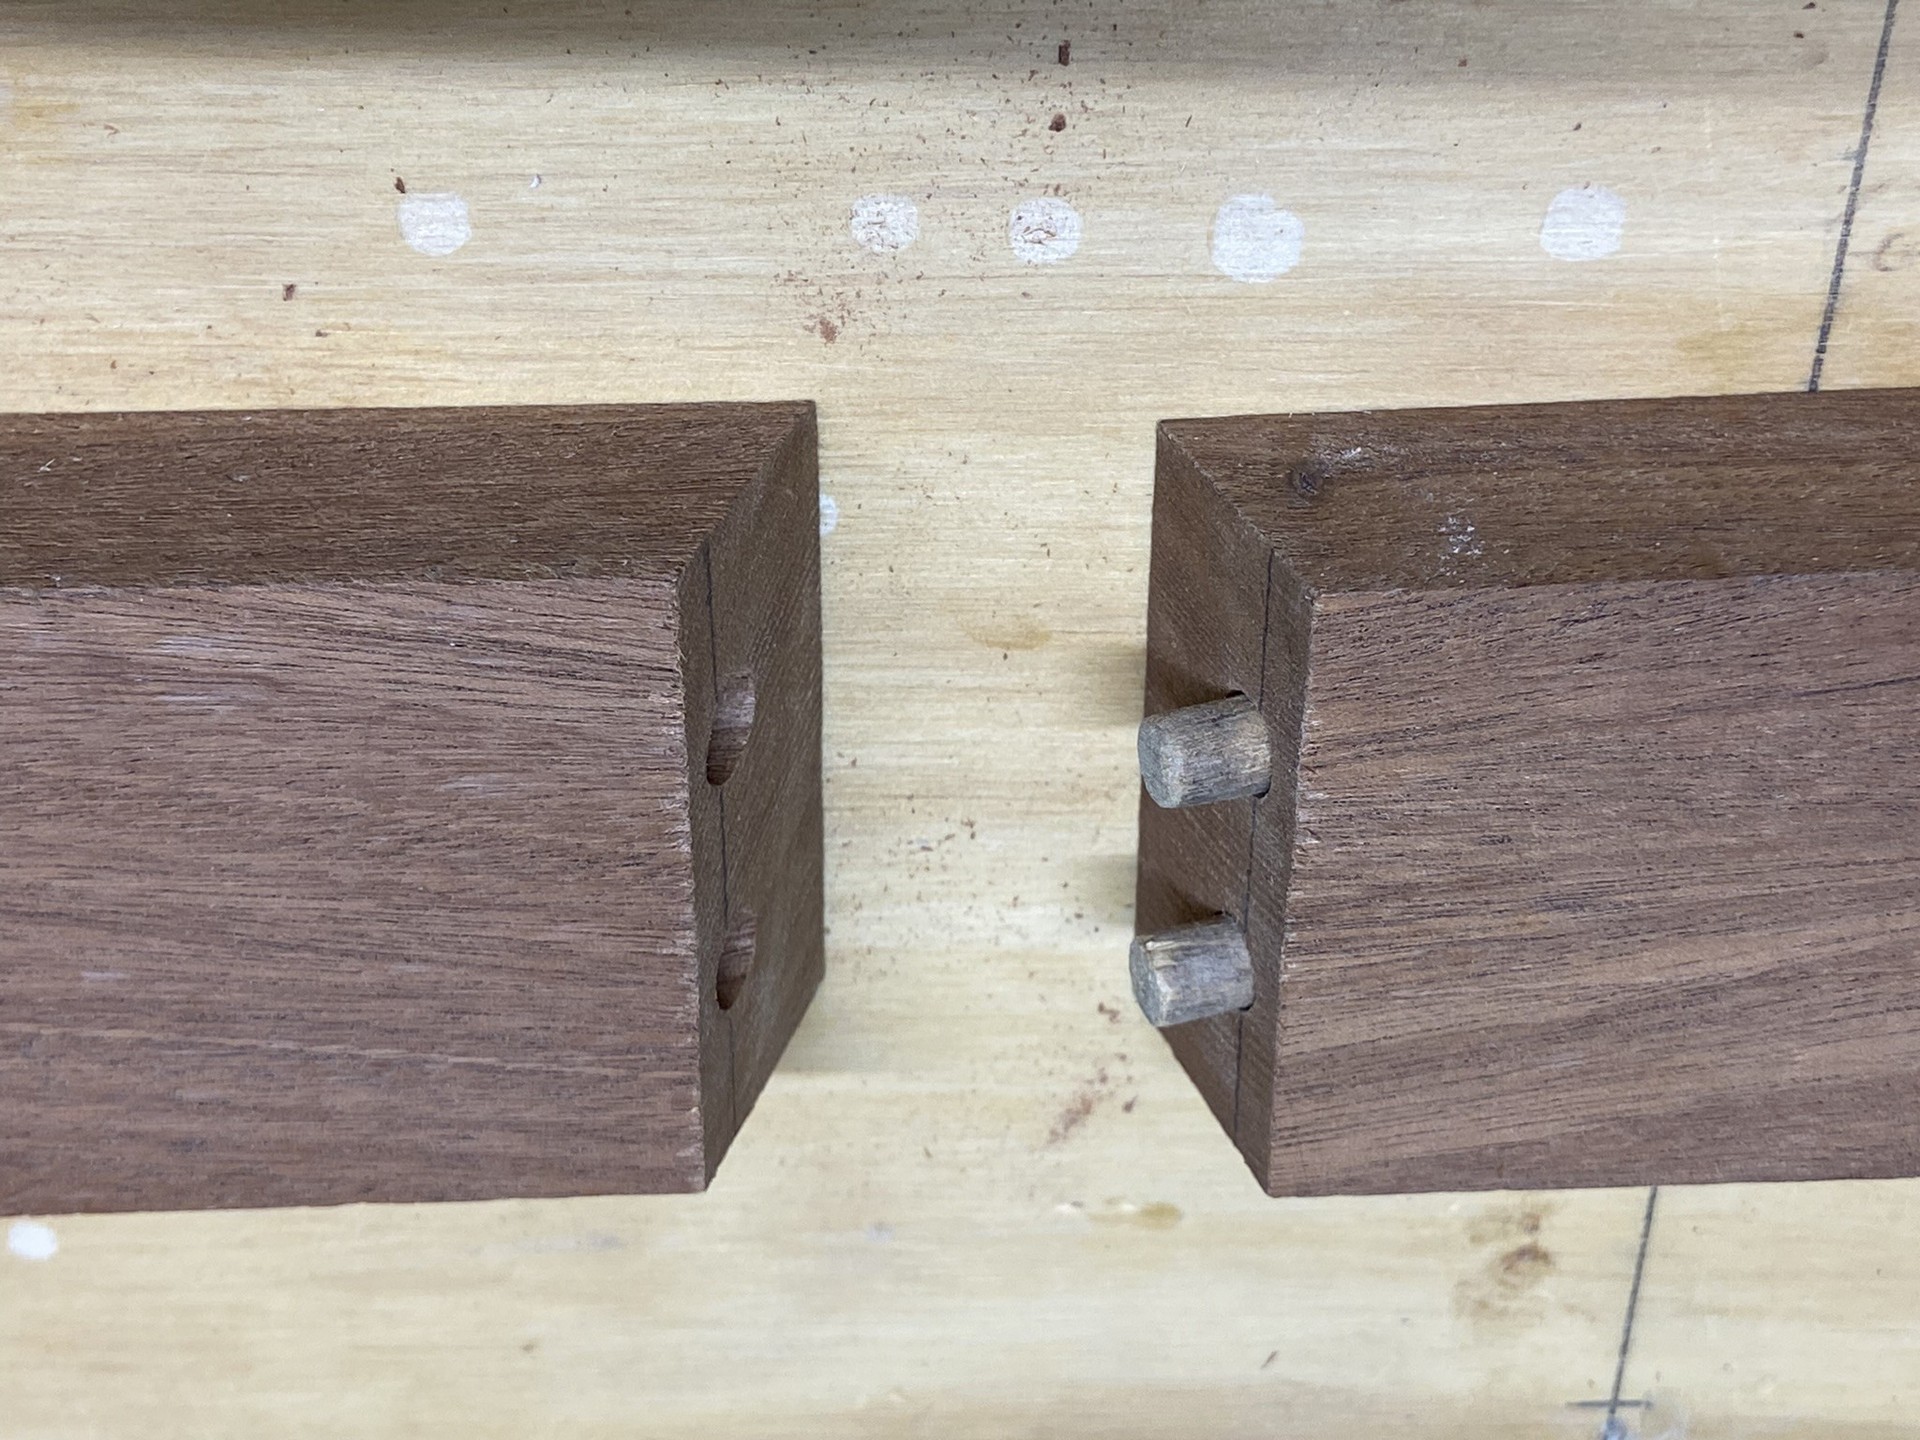
But first, I decided to pre-glue the nose blocks together at the angle (to ensure a tight fit) and I drilled and inserted two dowels within the angled surface to help hold them together and strengthen the bond. This was then glued to the board and allowed to set up securely for a day.

Progress continued early this week with rough cutting of the surplus material around the nose and tail blocks. After first creating a notch at each cut point with a hand saw, a reciprocating saw was used to speed up the process of removing surplus wood.
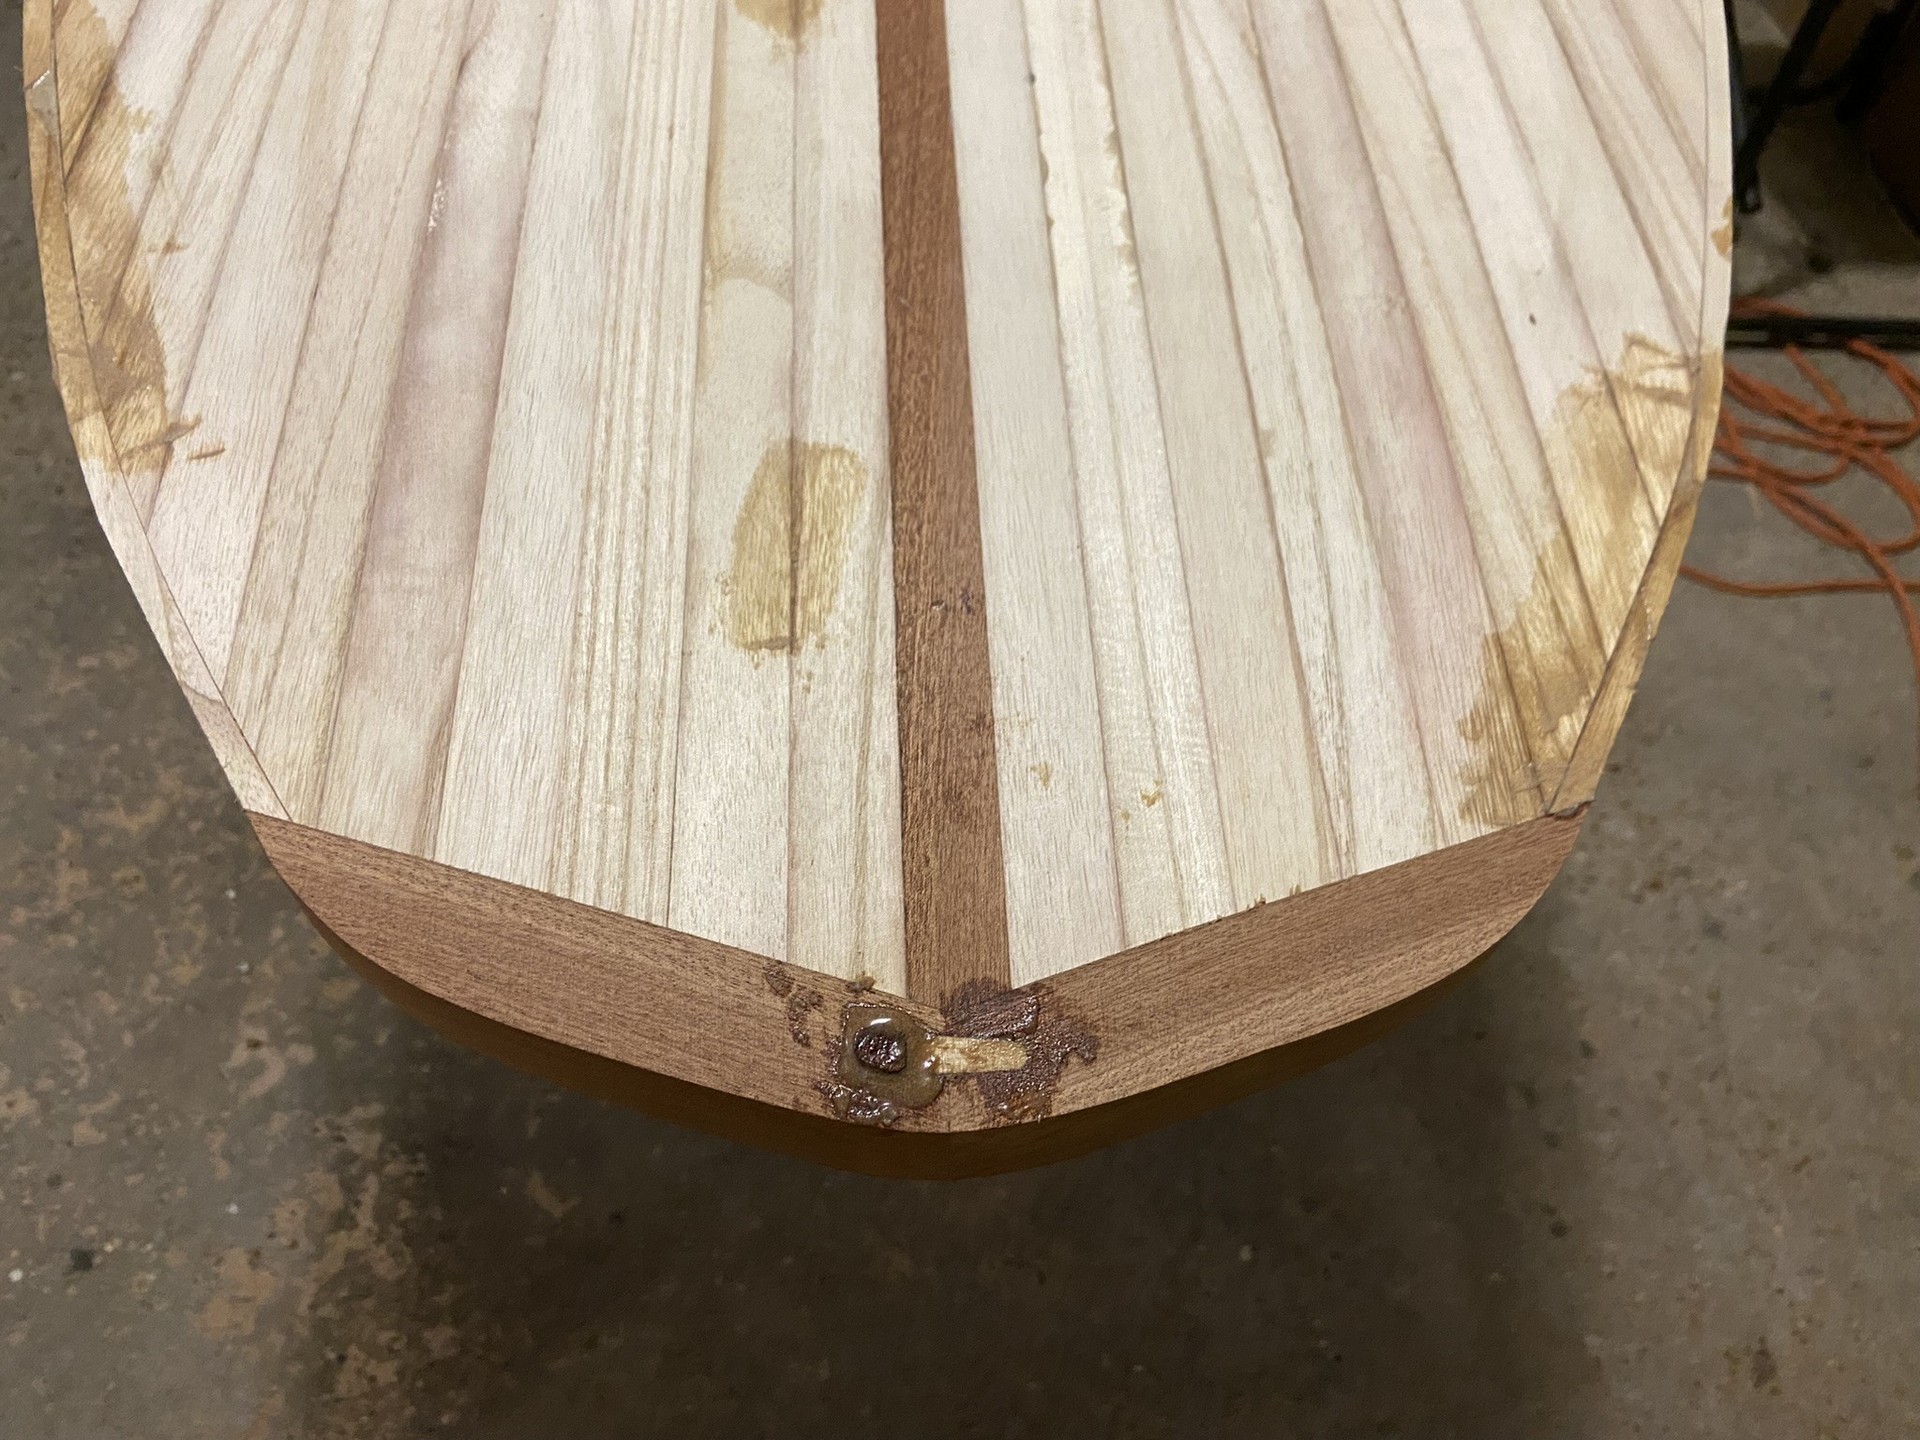
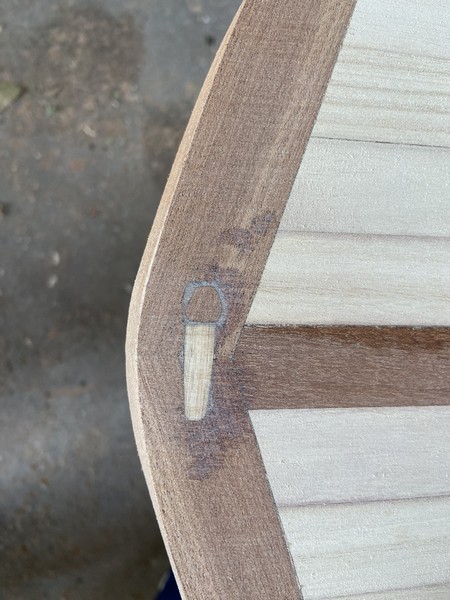
The nose blocks joined by glued dowels worked out reasonably well, except I misjudged the final thickness of the nose piece and after cutting and sanding off surplus, one of the softwood dowels was exposed on the underside of the board. Oh well, I’ll think of it as a beauty mark on Cindy Crawford’s face… I also over-drilled the hole for this dowel on one side, and rough sanding of the nose to shape revealed a pocket of glue. This was not a beauty mark. To remedy, I cut out the glue with a knife and then fashioned a tiny plug of mahogany to fill in the void, ensuring the grain direction of the plug matched the surrounding stock. This was glued in place with epoxy thickened with wood flour to make it dark and hopefully hide the blemish. Once sanded smooth I’ll know if this was successful.
Prior to final sanding this was also my opportunity to vacuum the board and closely inspect all surfaces for cracks and pits. Epoxy thickened with silica powder and a touch of wood flour - to yield a light colored putty matching the Paulownia - was used to fill all cracks and imperfections in the surface.
Second Weigh-In
A check of the board weight after all woodwork is complete but prior to fiberglassing.

Weekend #17
May 27, 2024 - Memorial Day
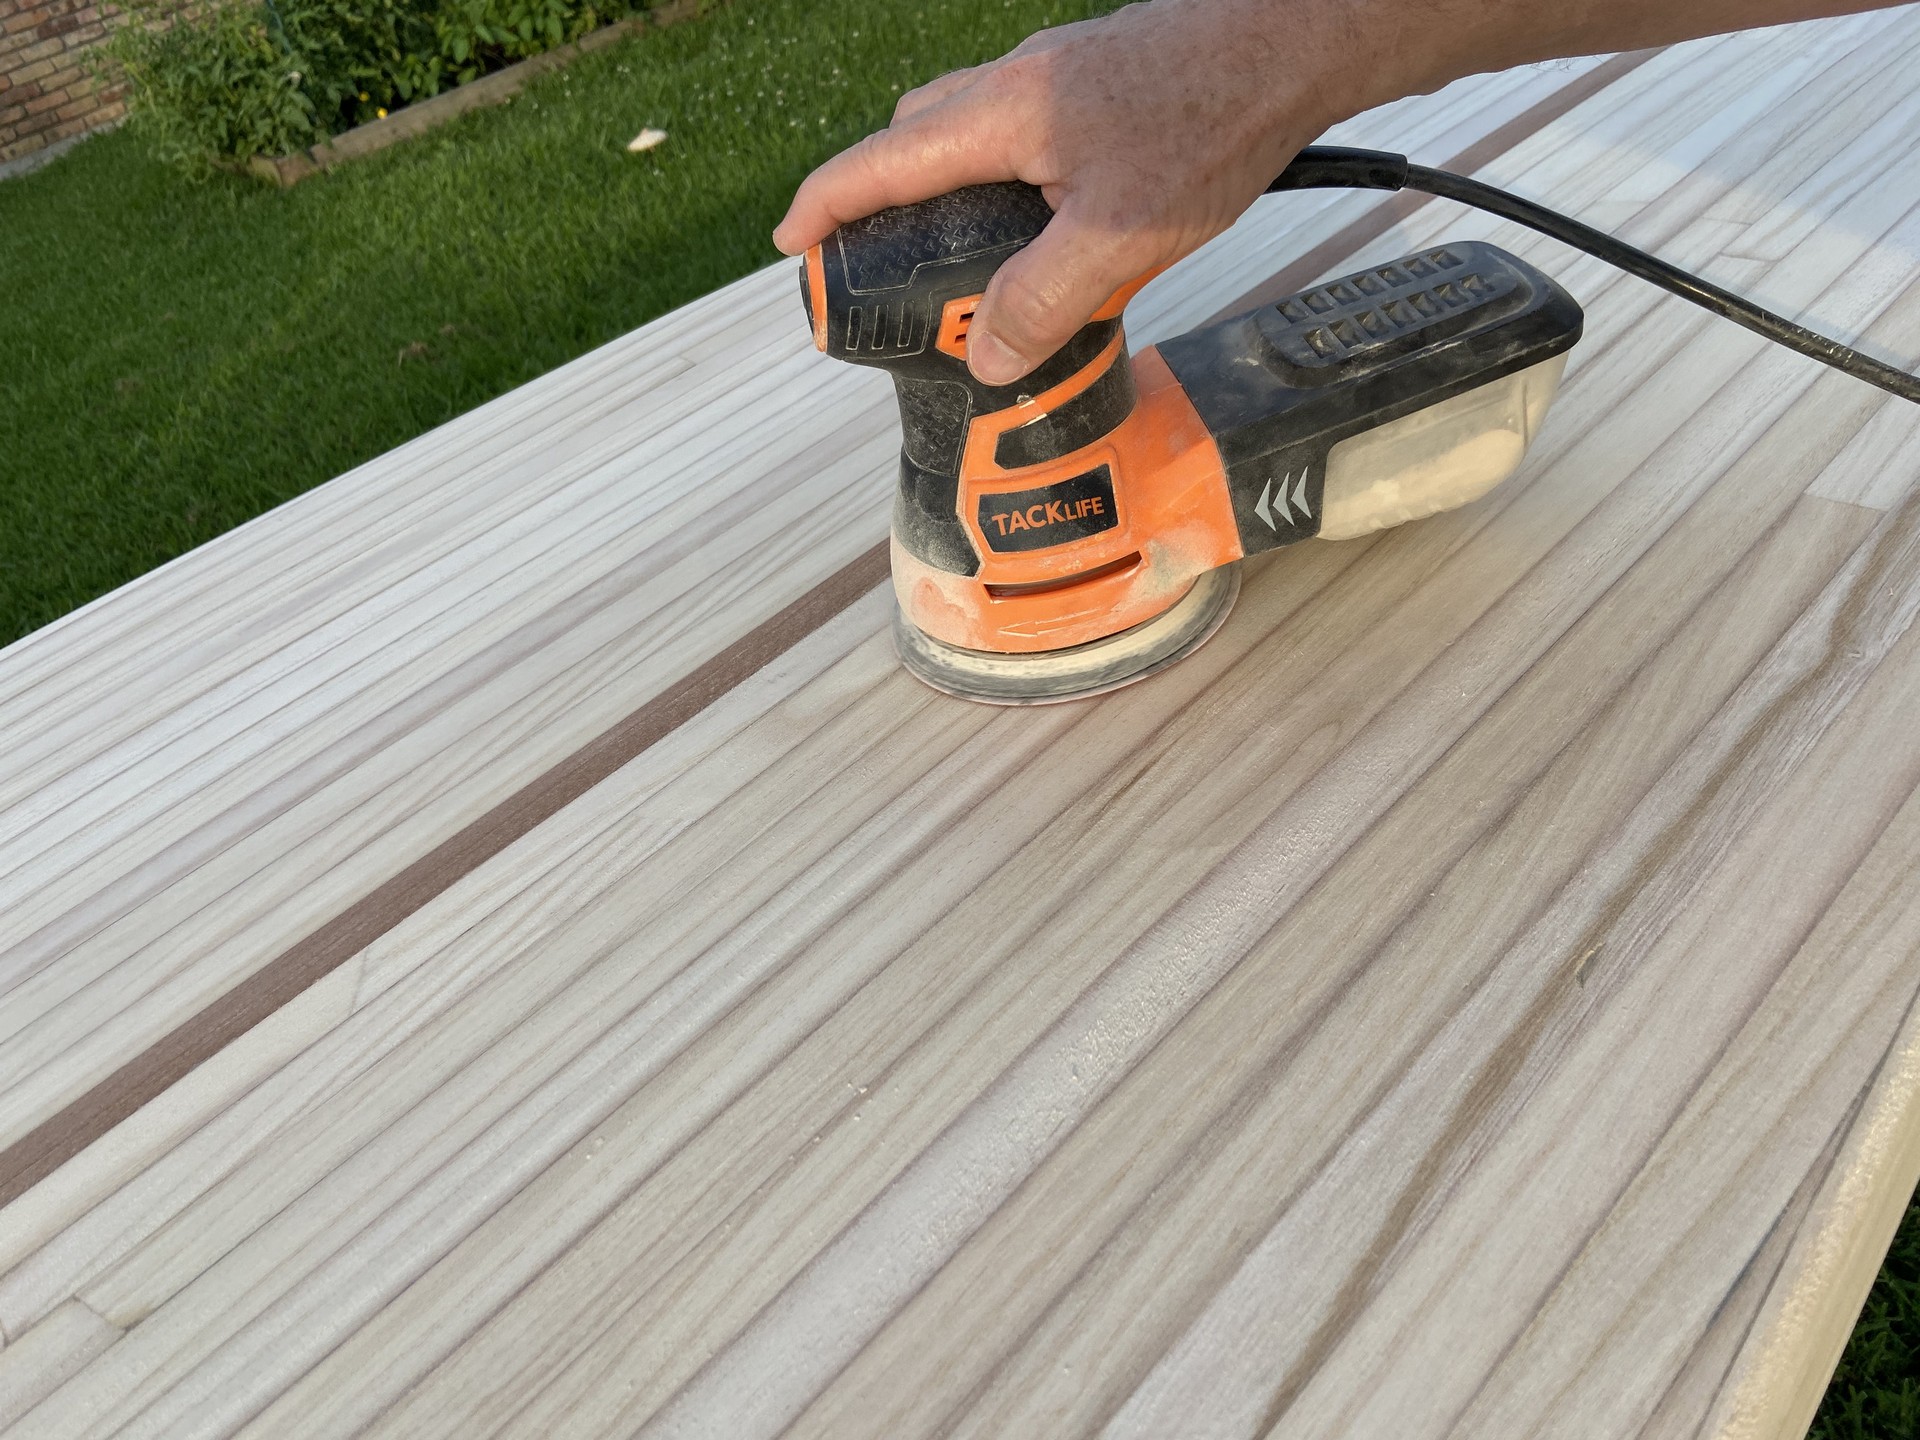
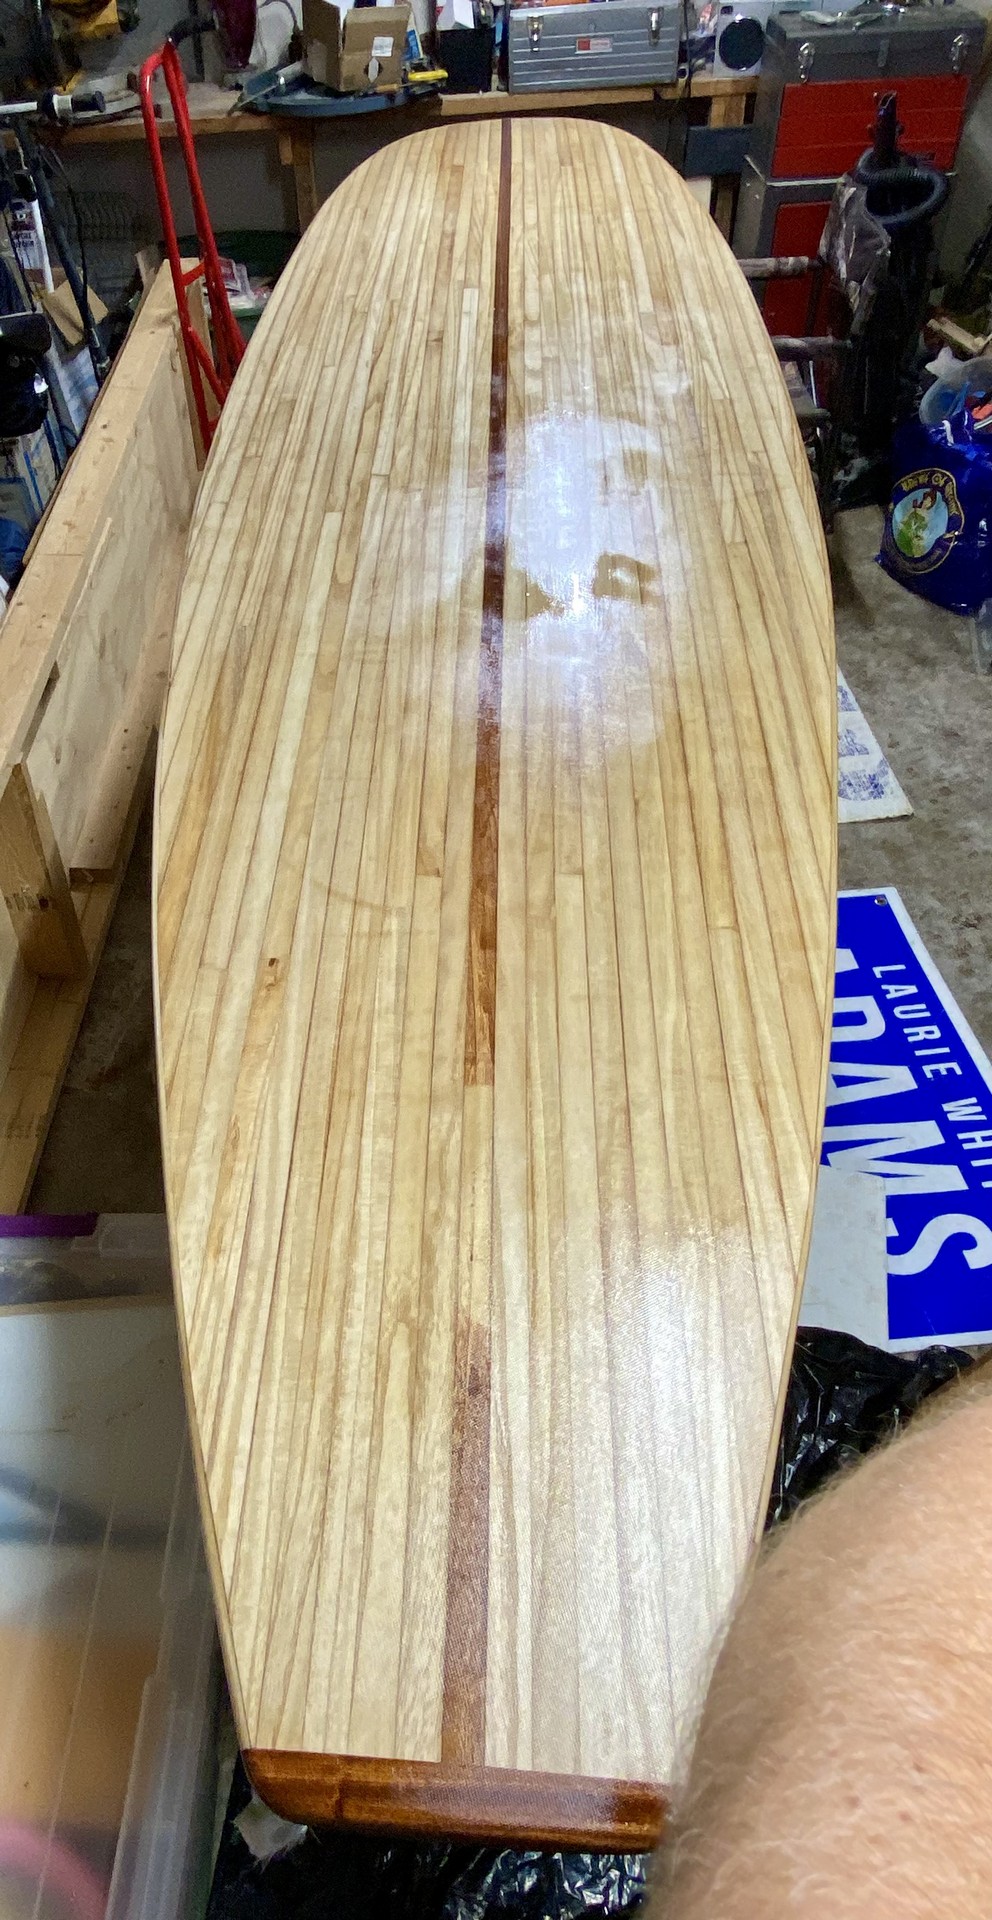
A second round of filling cracks with thickened epoxy was necessary on Friday, which dried overnight allowing me to complete the final sanding Saturday morning. Prior to the very last fine sanding I used a mister to lightly spray the board with water. The wood fibers absorbed it quickly and swelled. After drying a few minutes, I used 220 grit to sand the newly raised bumps leaving the board very smooth.

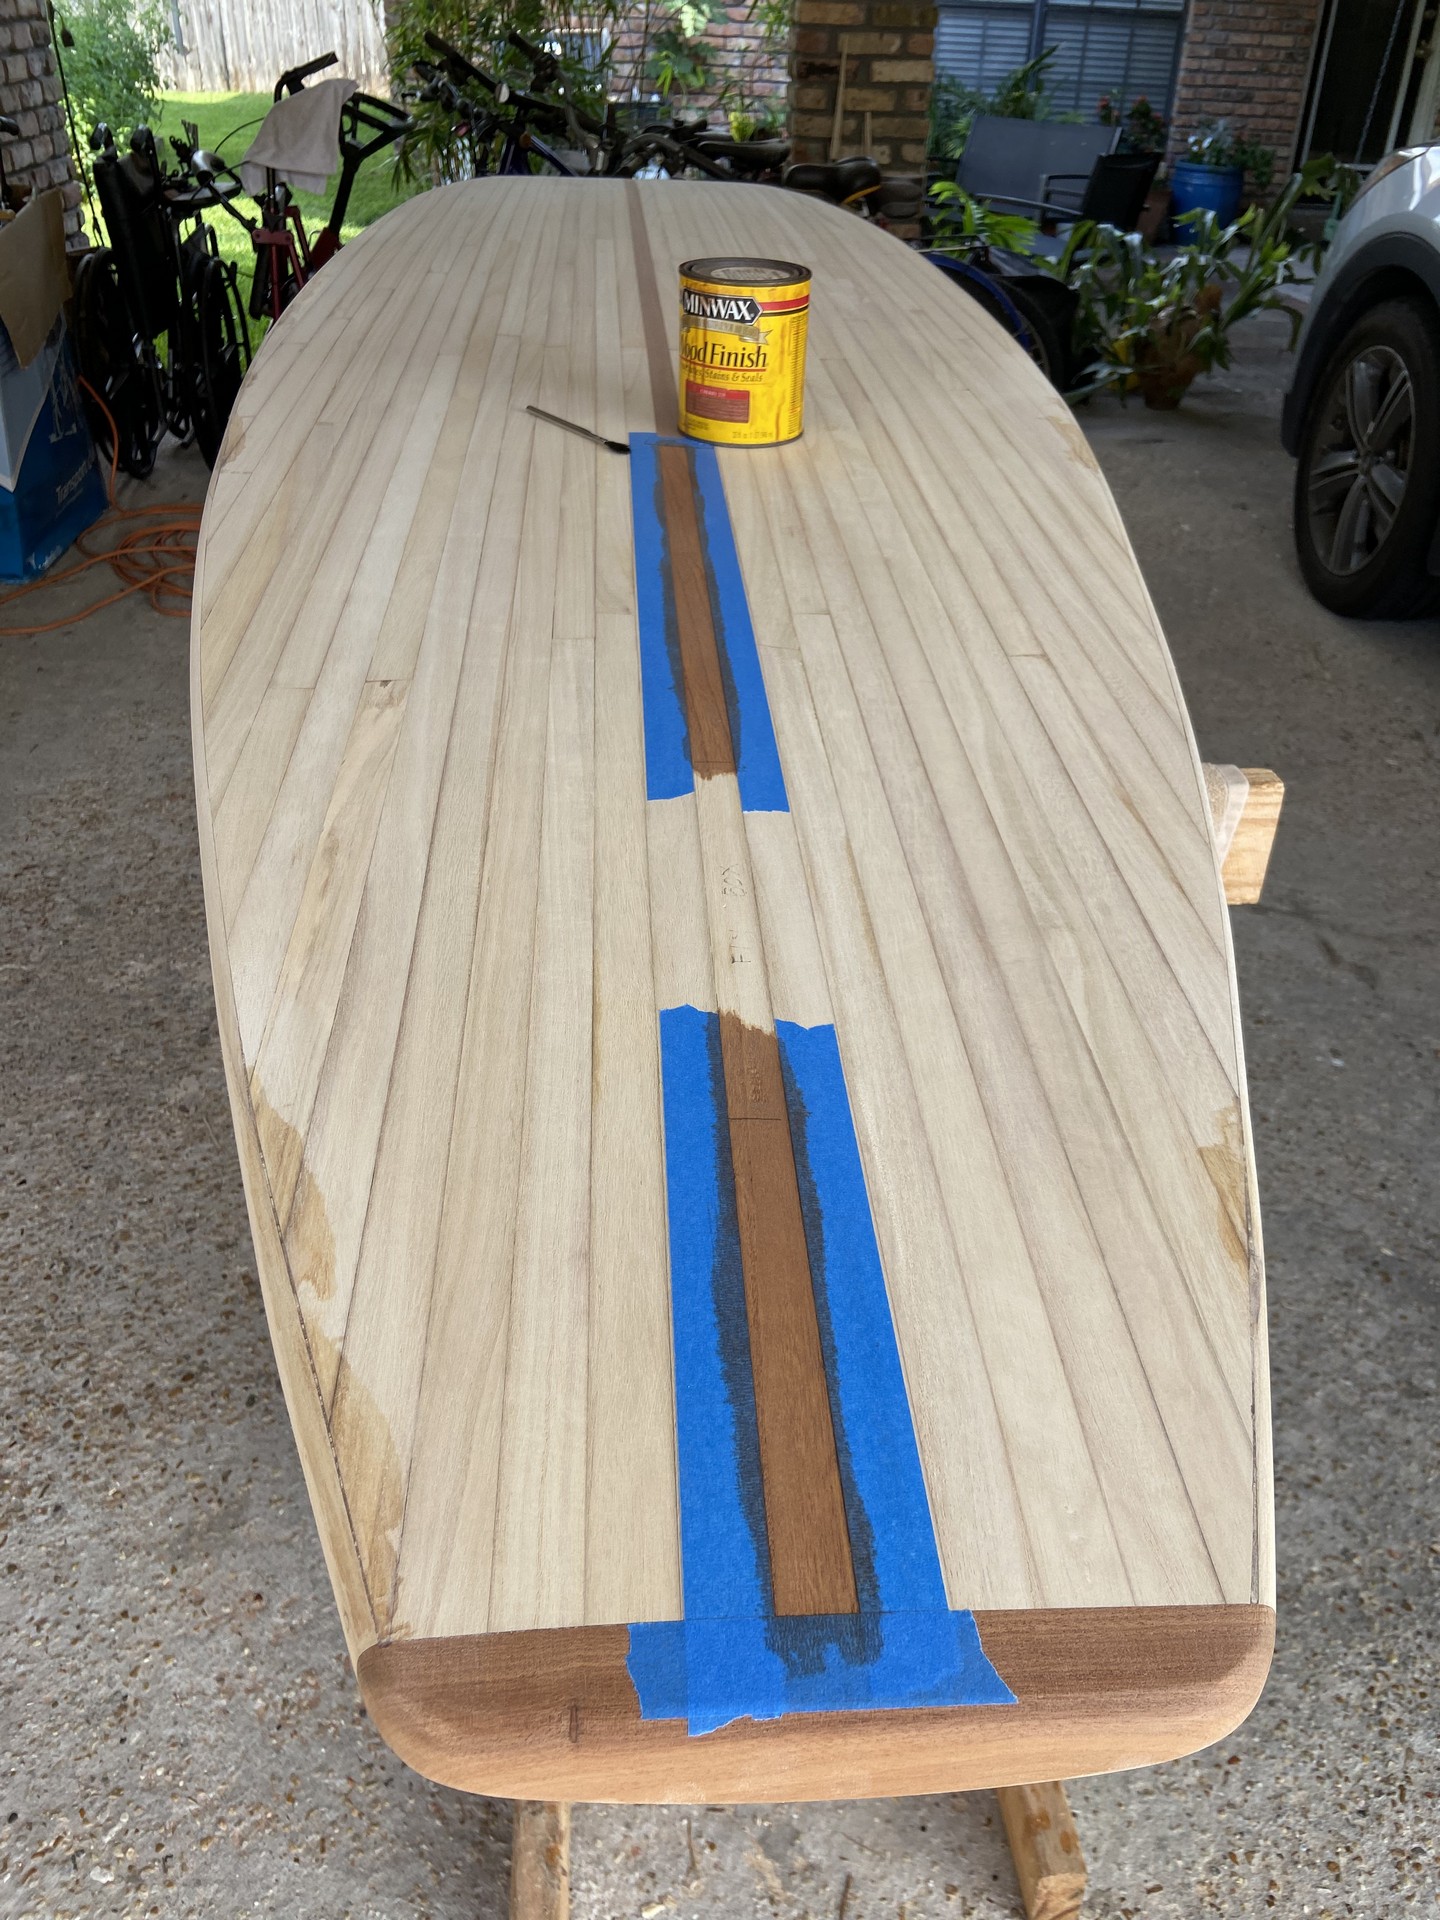
Since I didn’t buy quite enough mahogany strips I used some cherry stain to “fake” the mahogany center strip on the bottom of the board around the fin box. I applied two coats of stain with a light sanding in between.
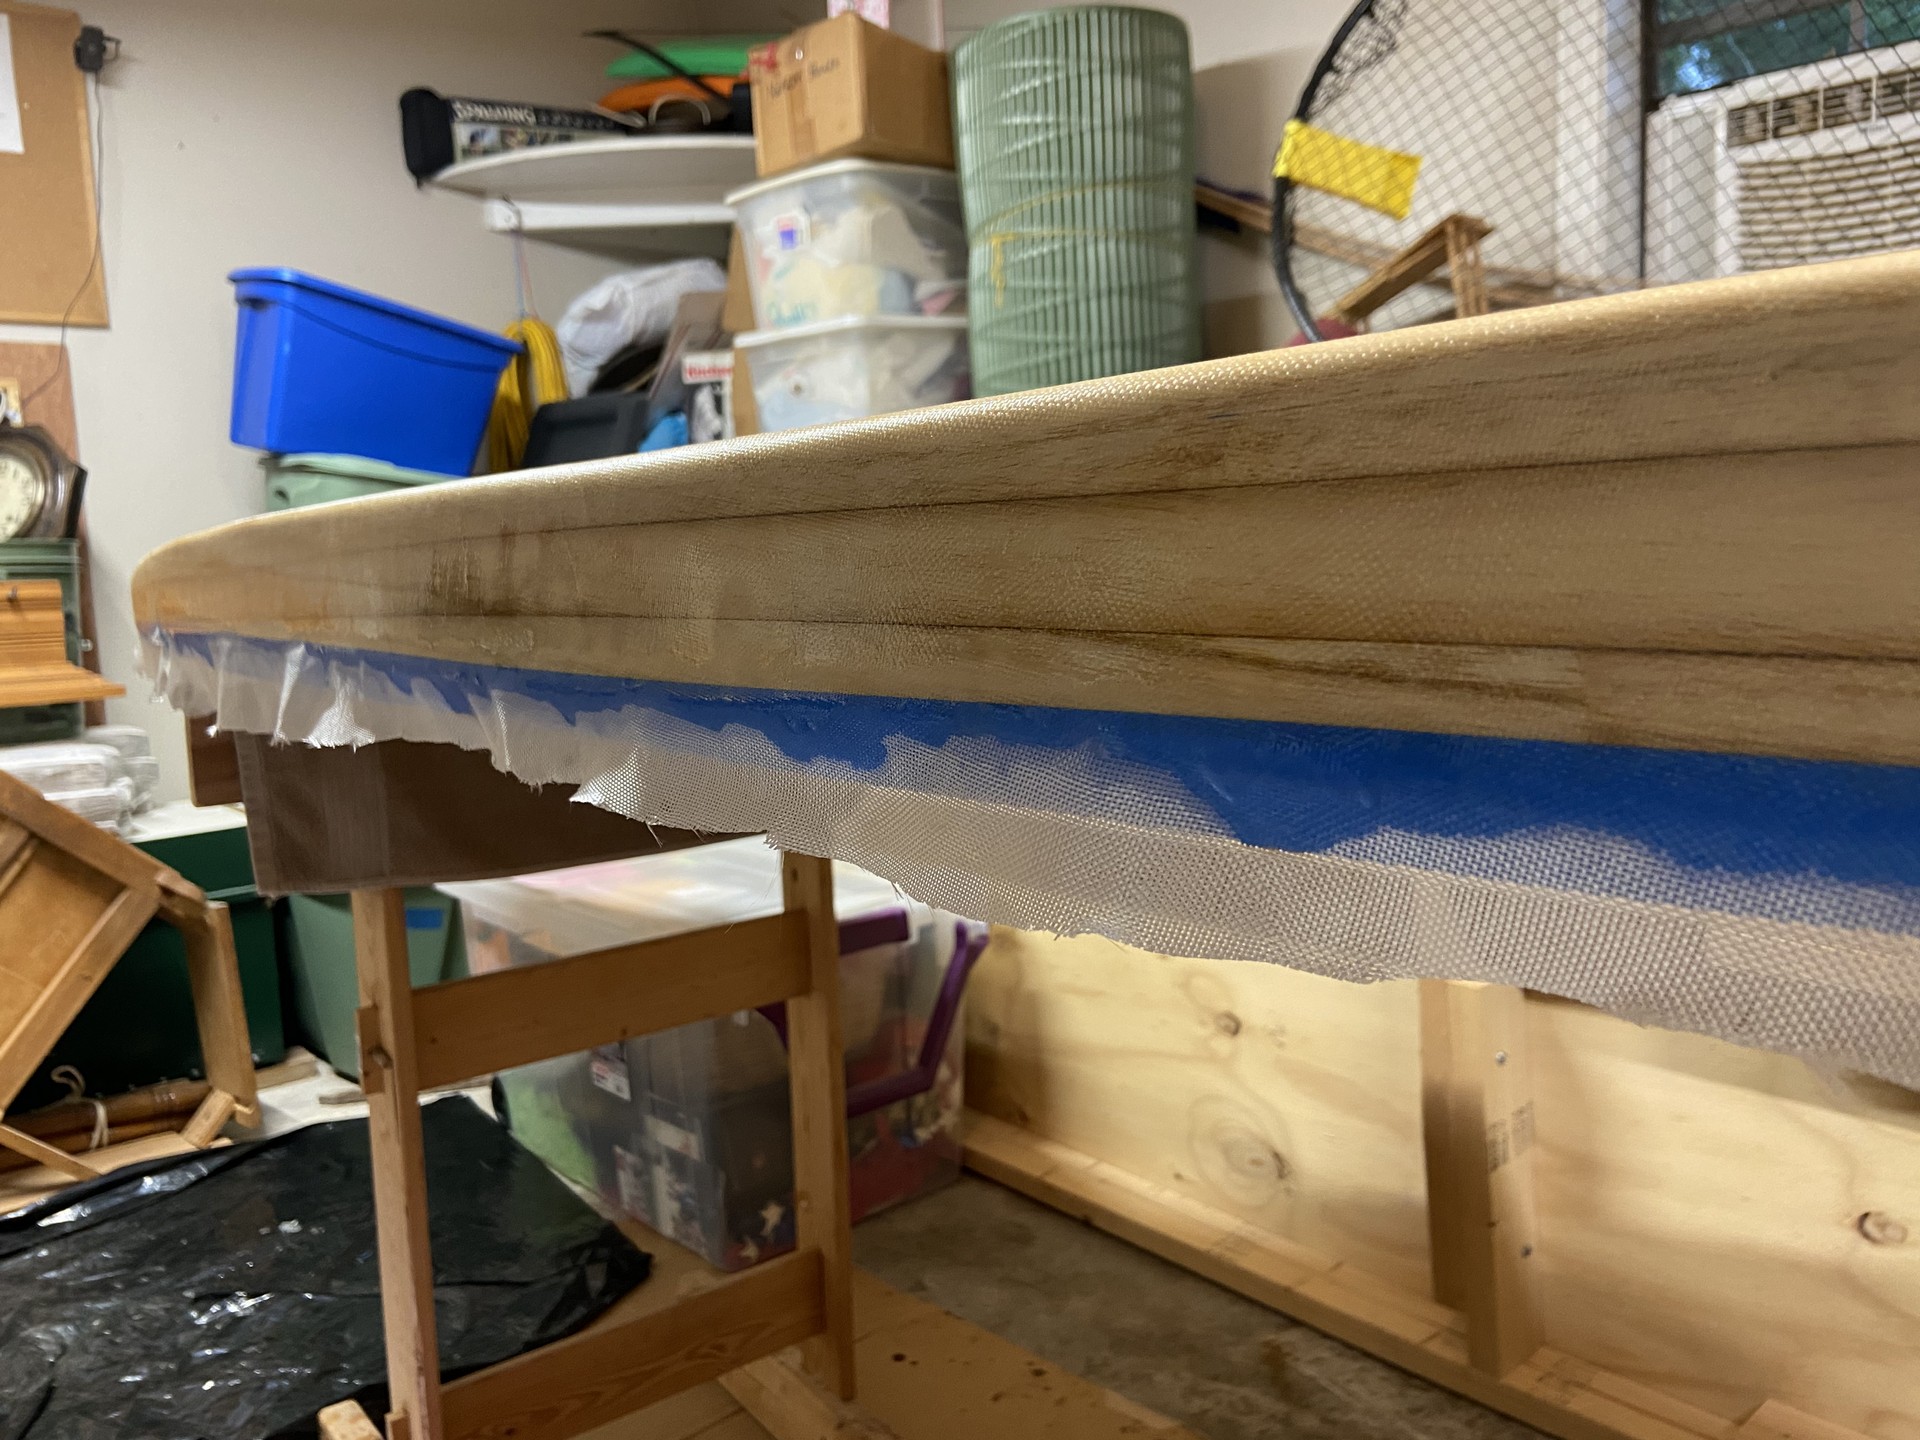
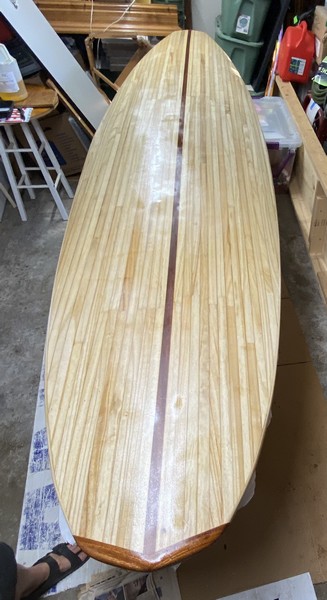
Sunday afternoon I applied the fiberglass cloth with epoxy resin to the deck of the board. Blue painters tape was used to mask around the bottom of the rails to force the epoxy to drip off the piece onto the floor rather than pooling along the bottom edge of the board.
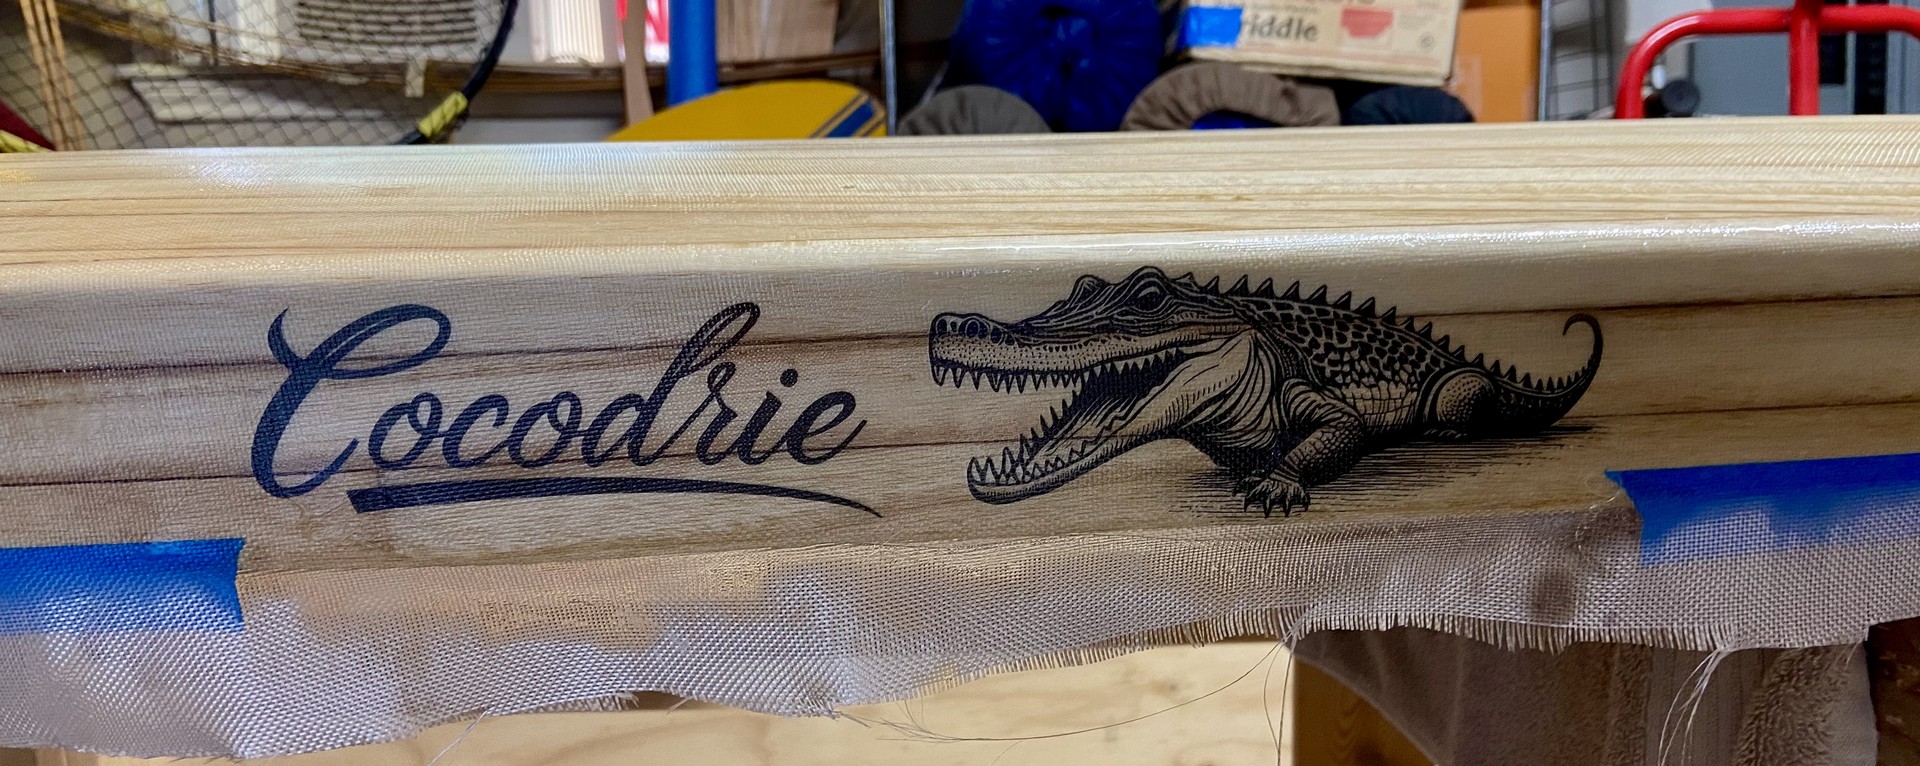
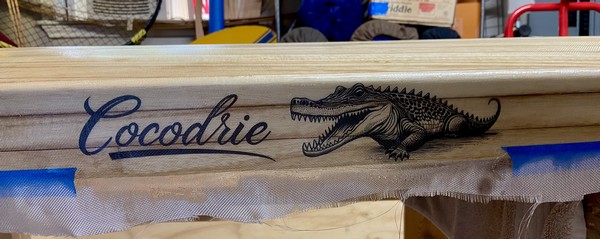
I named the board Cocodrie, which is a south Louisiana placename and is a Cajun word for alligator - (think crocodile.) The graphics were printed using a monochrome laserprinter onto rice paper. When saturated with epoxy resin, the rice paper disappears, leaving just the graphic. Similarly, the fiberglass cloth, laid over the rice paper, disappears when saturated, allowing the graphic to show through yet be protected.
Weekend #18
June 2, 2024
The completion deadline is rapidly approaching as I intend to put this paddleboard on the water next Friday afternoon during a trip to visit family on Alabama’s Lake Martin. I’ve worked as aggressively as possible over the past week applying a coat of epoxy resin to the top, bottom and sometimes both each day. Beginning the weekend I had fully completed the 3rd coat of resin and the fiberglass fabric is effectively filled. Next is installation of the fin box and deck hardware - each of which requires epoxy to glue it into place.
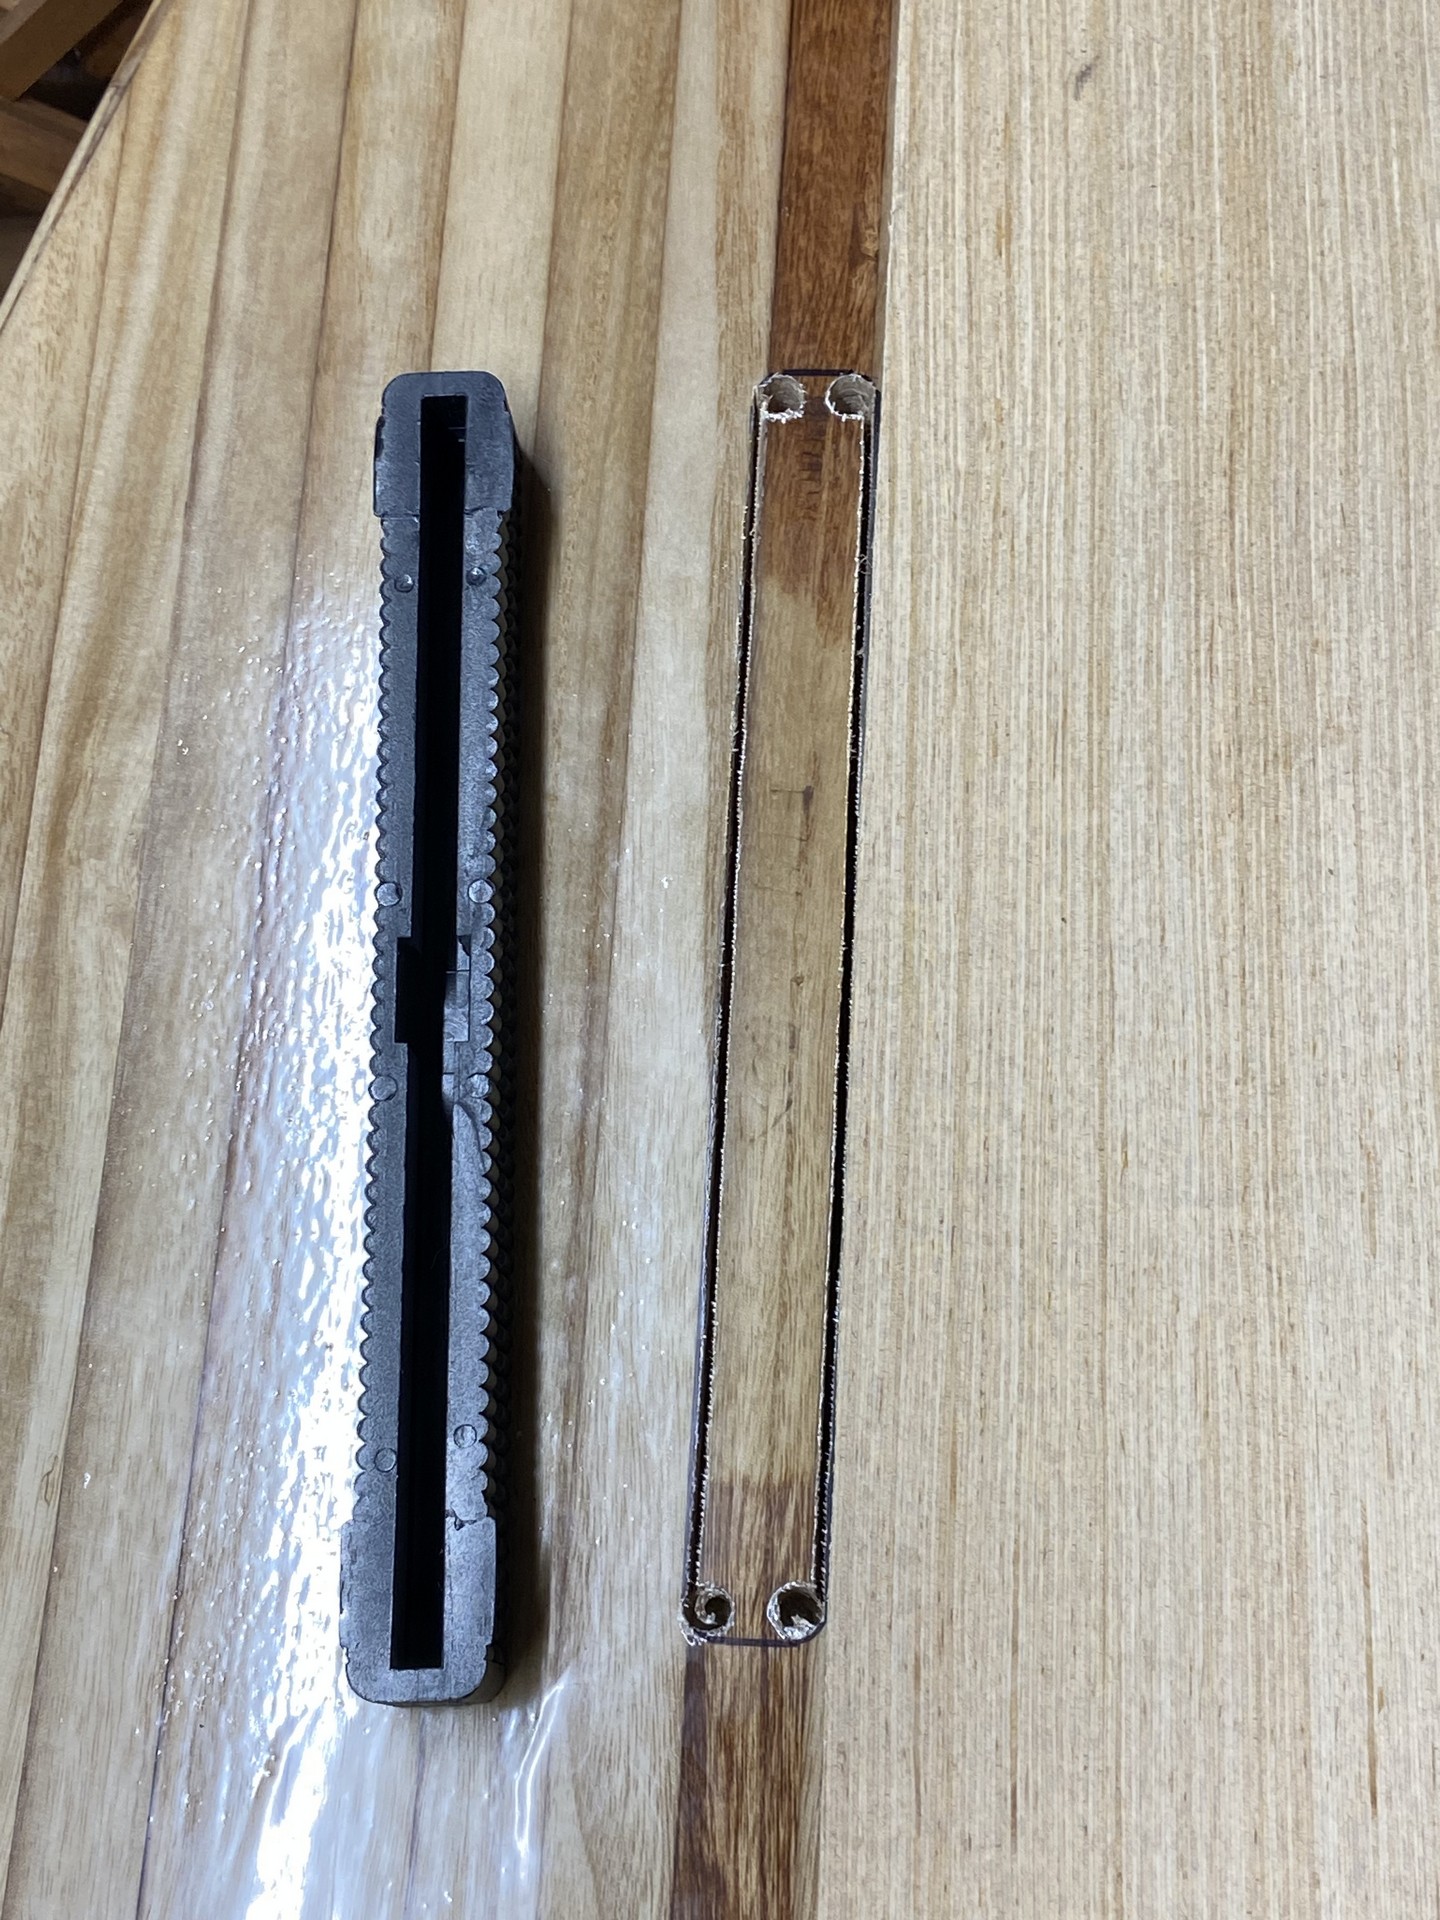
Fin Box Installation
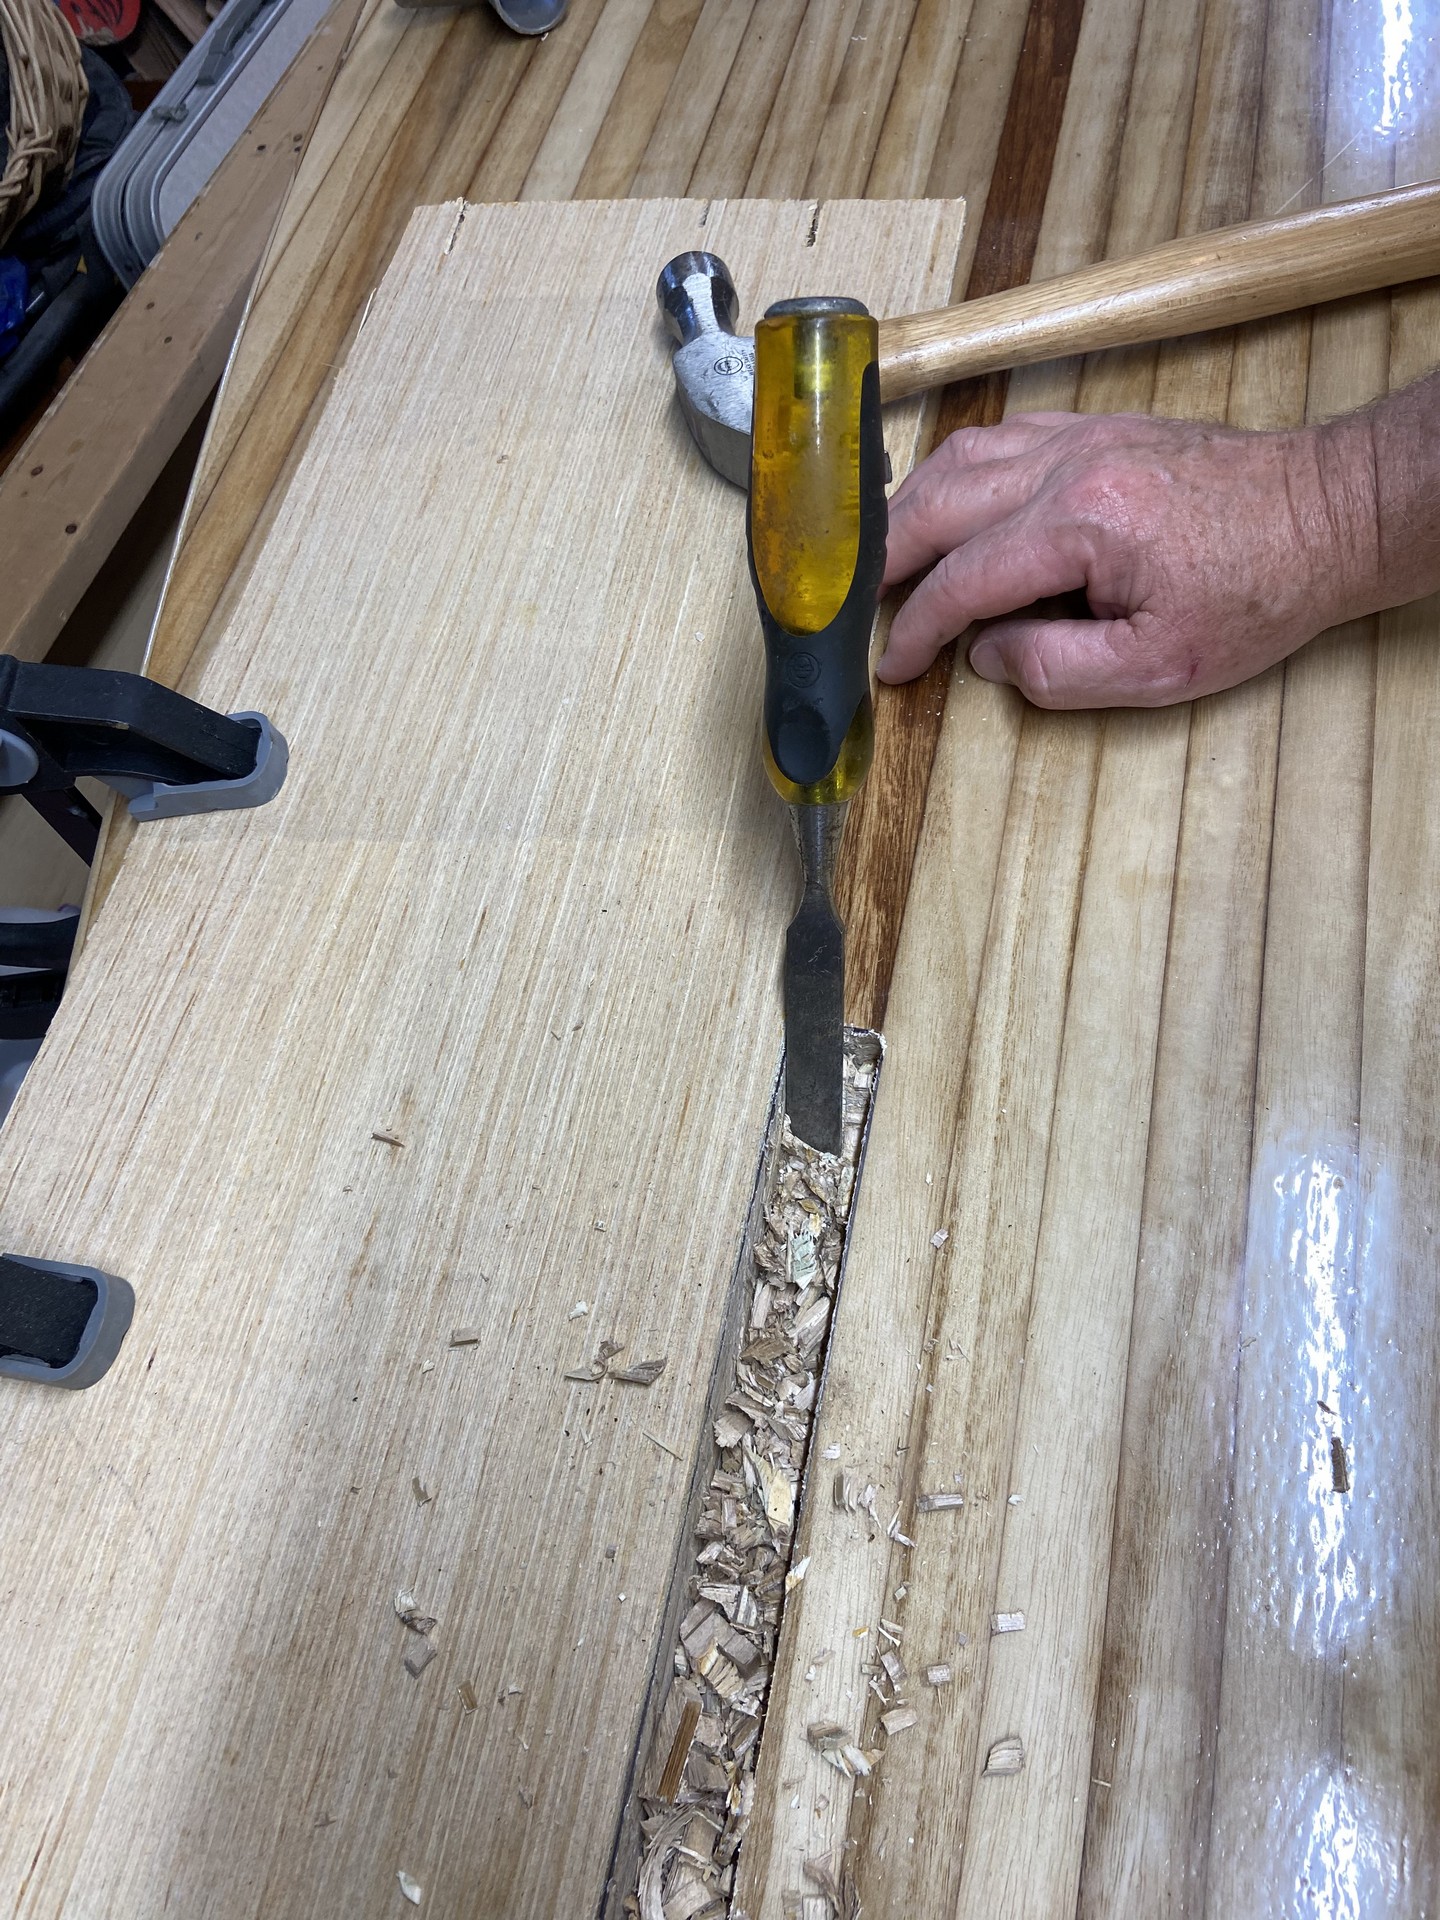
Most of the instructional videos from Jarvis and other designers recommend cutting out the void for the fin box using a router. Jenkins Boatworks’ used a “multi tool” to cut the rectangular shaped chunk of wood and blocking material out of the bottom of the paddleboard to insert the plastic fin box. I had neither tool, so I used a drill, a circular saw and chisels. My situation differed from many builders in that I used solid wood blocking rather than foam for the fin box.
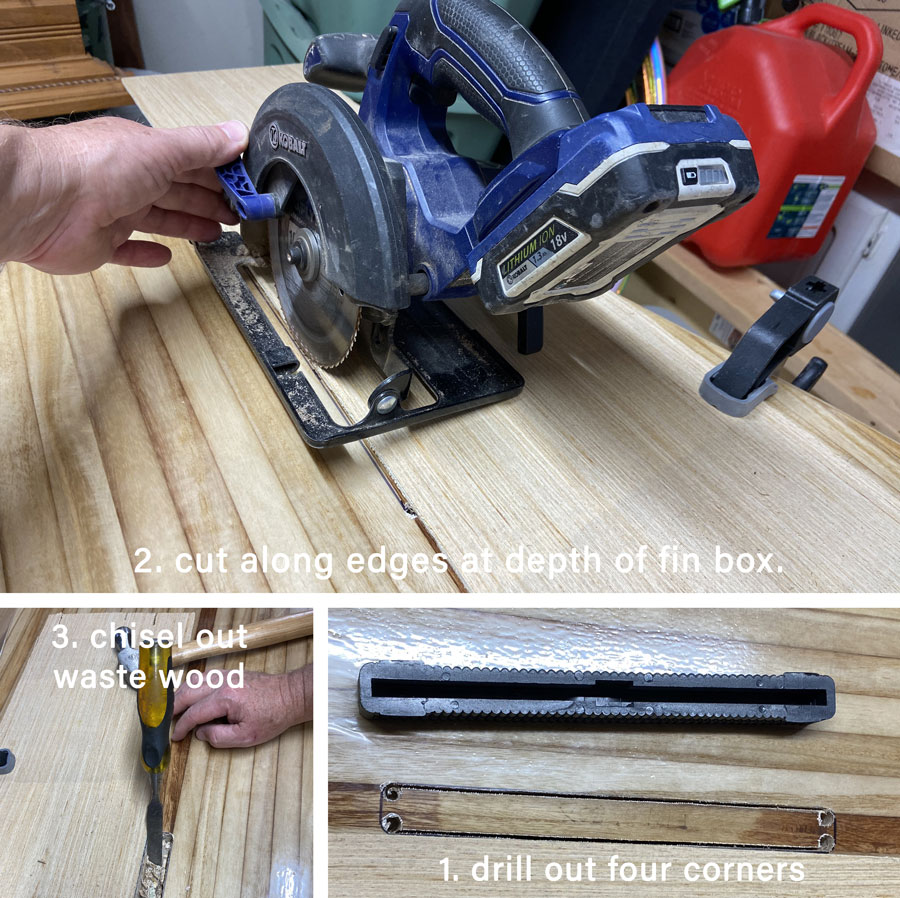
- First I drilled holes in each of the four corners of the location for the fin box. I used a 3/8" bit, and wrapped painter’s tape around the bit to show the desired depth to drill.
- Using the circular saw, I slowly dropped it down and cut along both long sides of the rectangle. Then I made several cuts up and down the middle to remove extra stock and establish the desired depth.
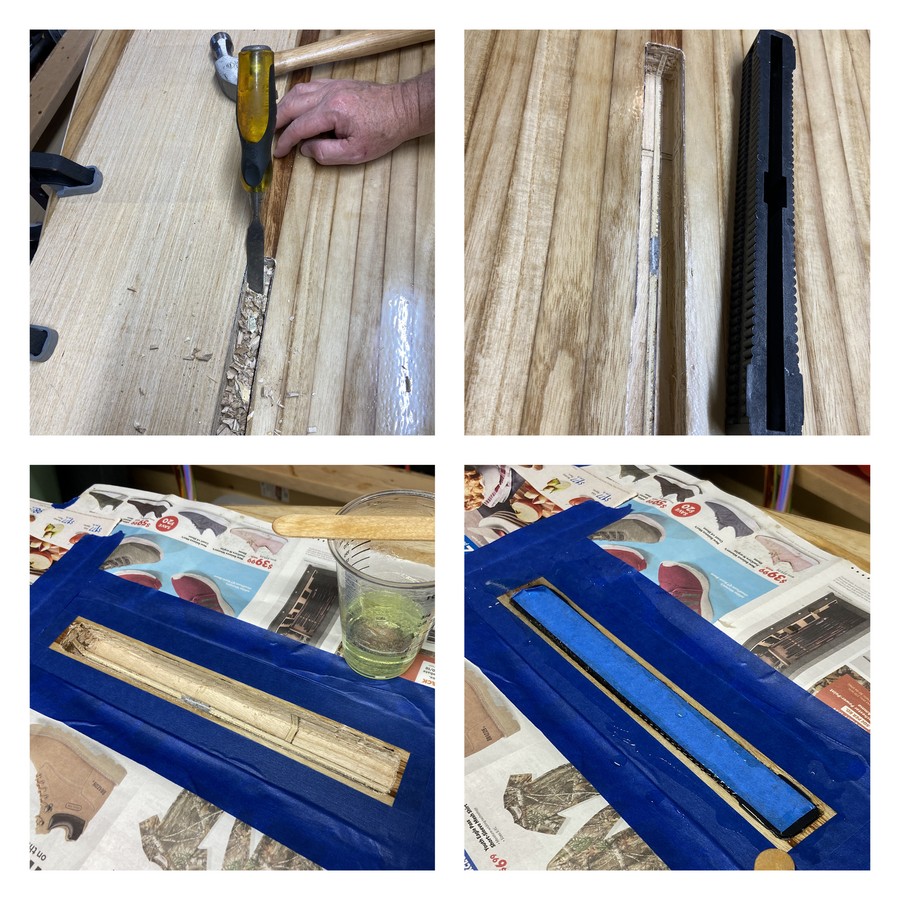
- I used wood chisels and a hammer to remove the remainder of the stock, eventually leaving a rectangular void to accept the fin box.
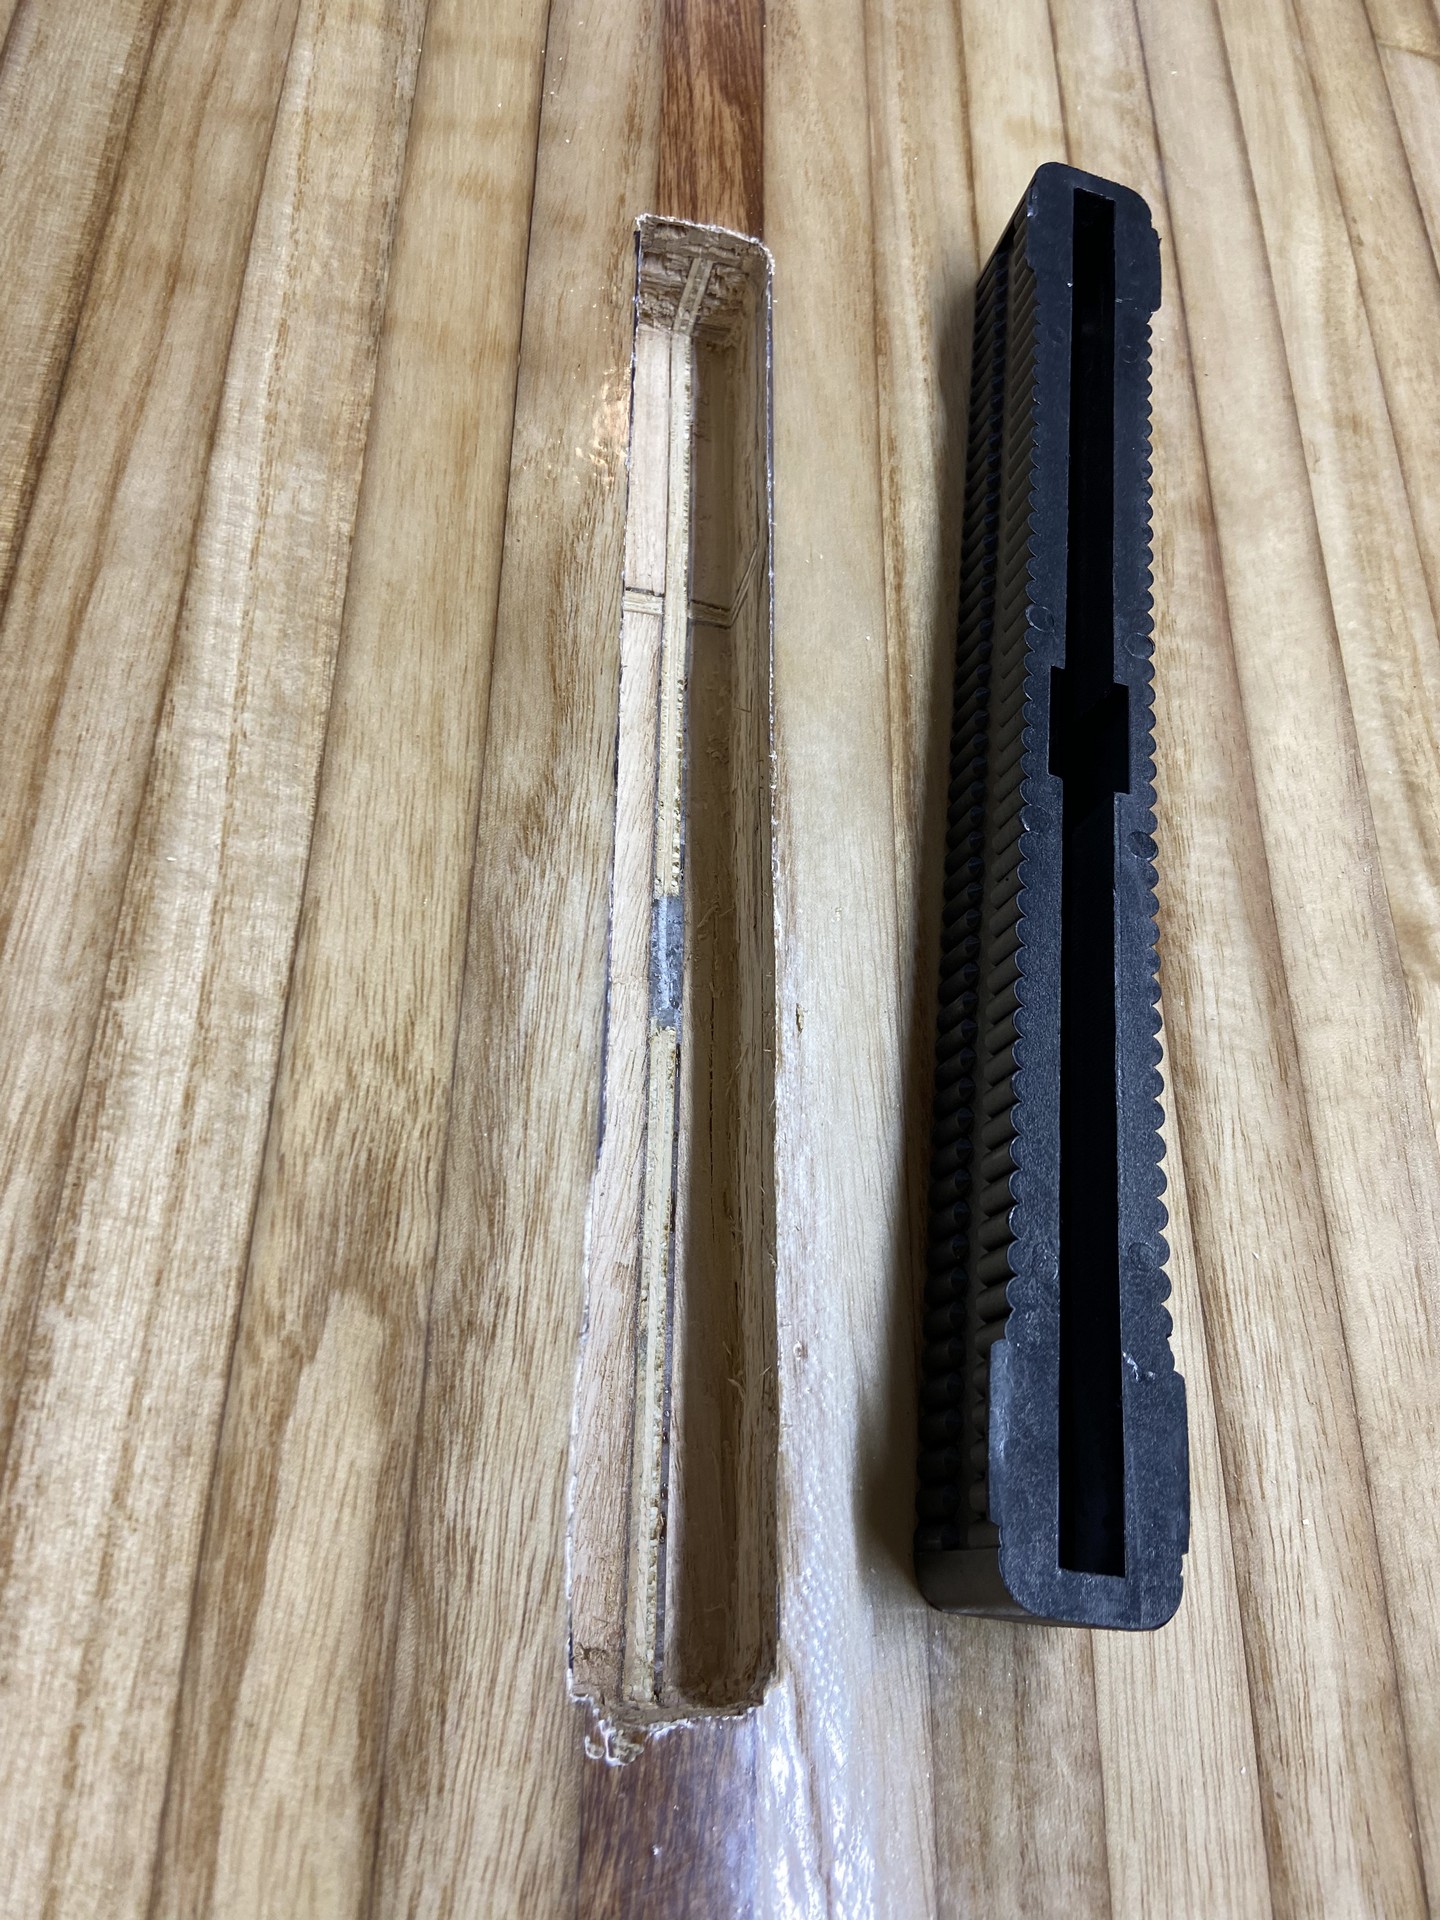
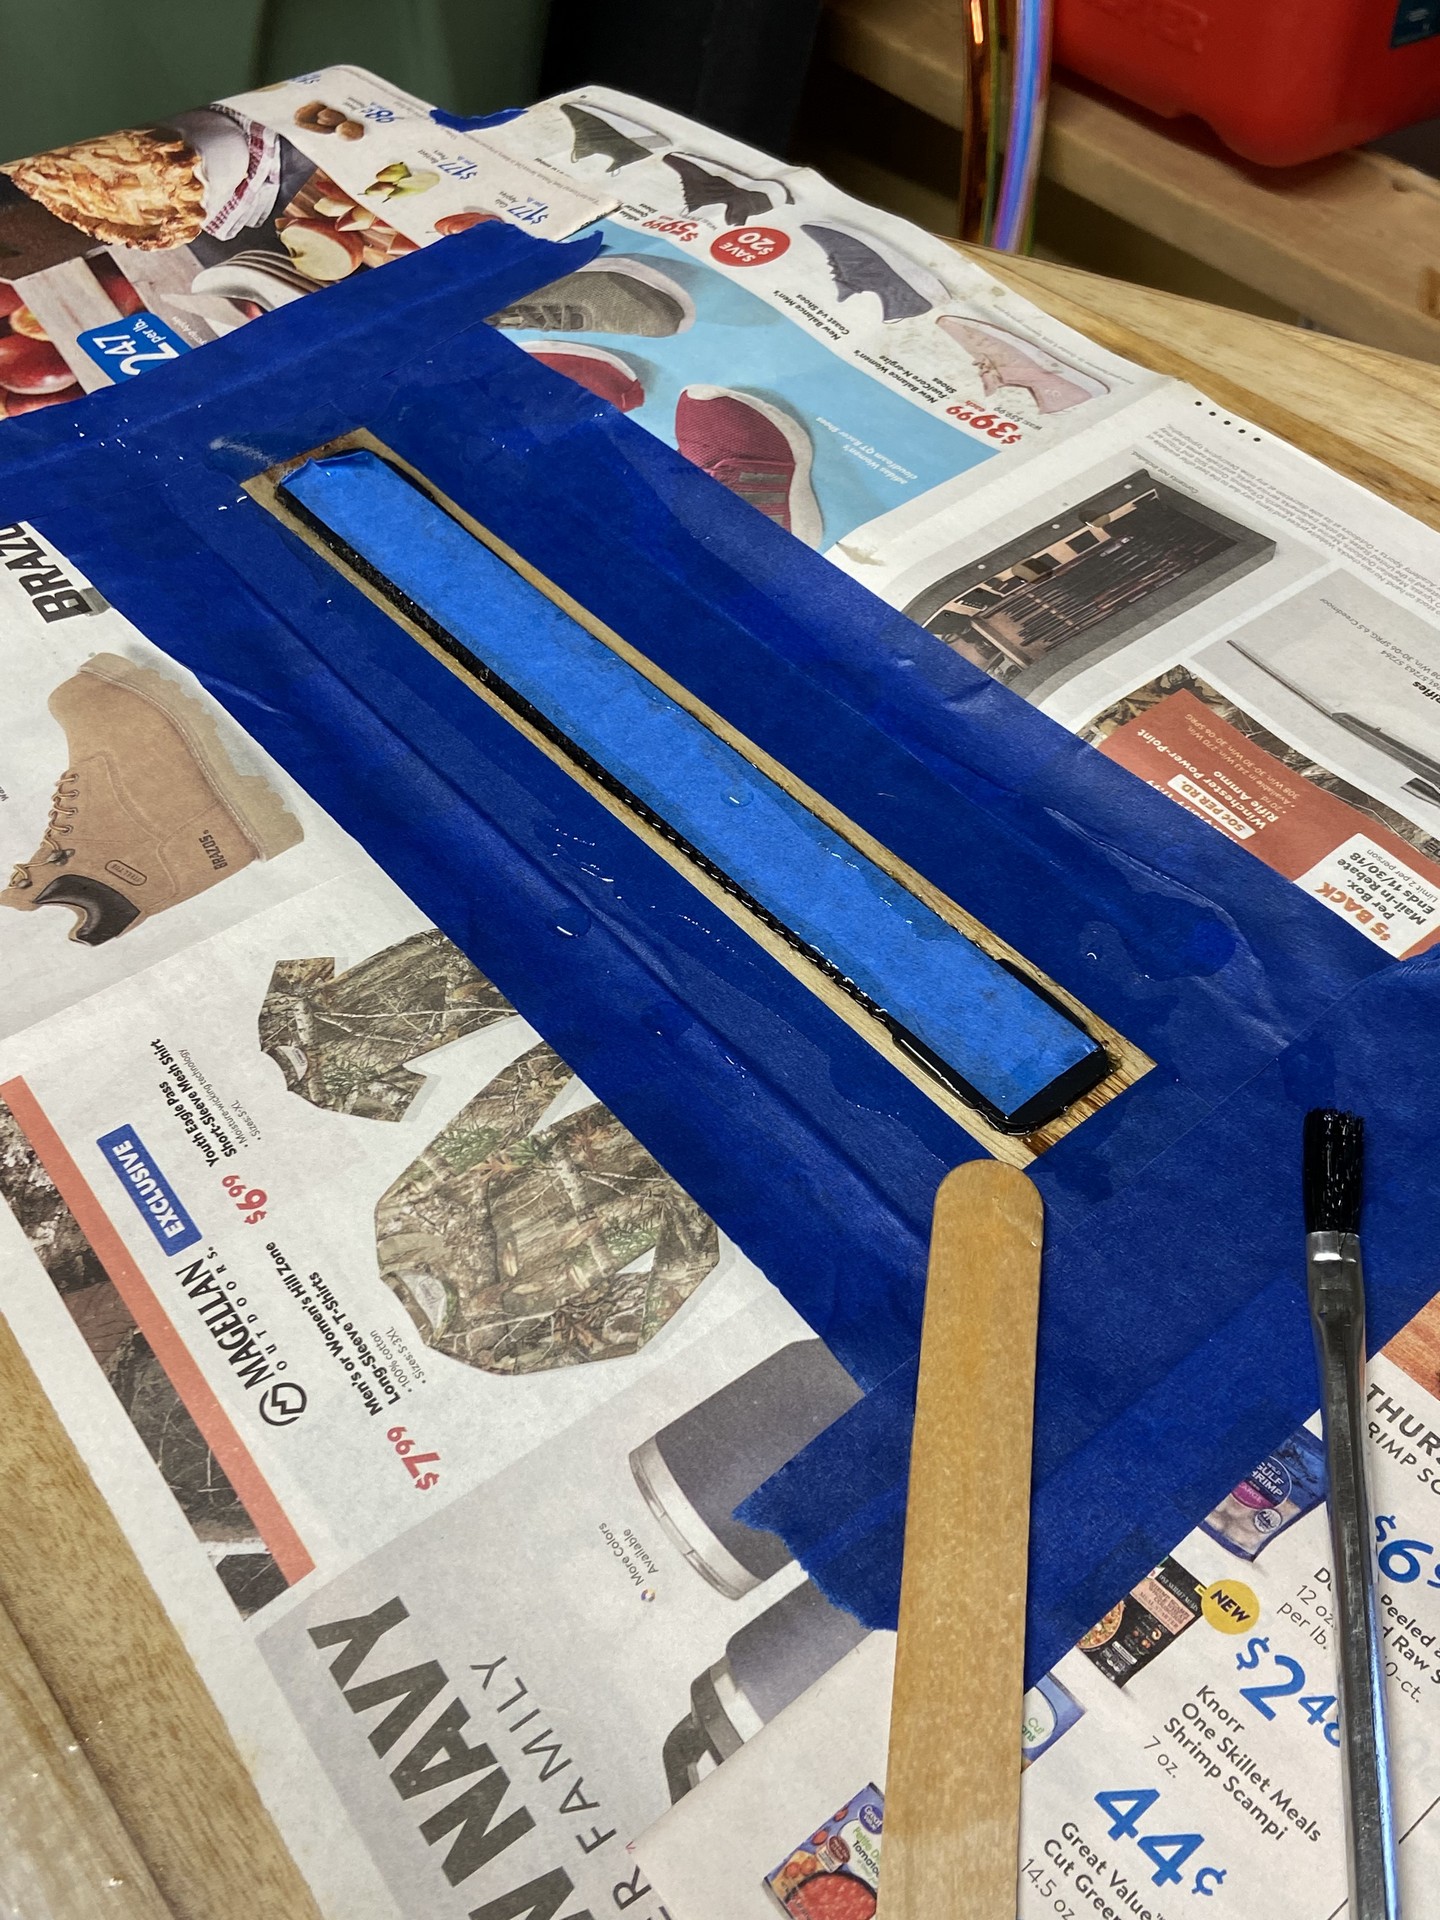
- After ensuring a good fit - that I had removed enough - I masked off the area with painter’s tape and newspaper, and glued the fin box in with clear epoxy. Some recommend thickened epoxy, but I didn’t want a colored epoxy to be visible.
- I masked the slot in the fin box with painter’s tape and stacked some heavy objects onto the fin box to ensure it was forced down into the slot as the epoxy cured.
- After initial epoxy set up I removed the masking tape and paper, and cleared everything away from the area. Some cracks remained alongside the plastic fin box, so I mixed a little more epoxy and filled them with a syringe.
Deck Hardware Installation
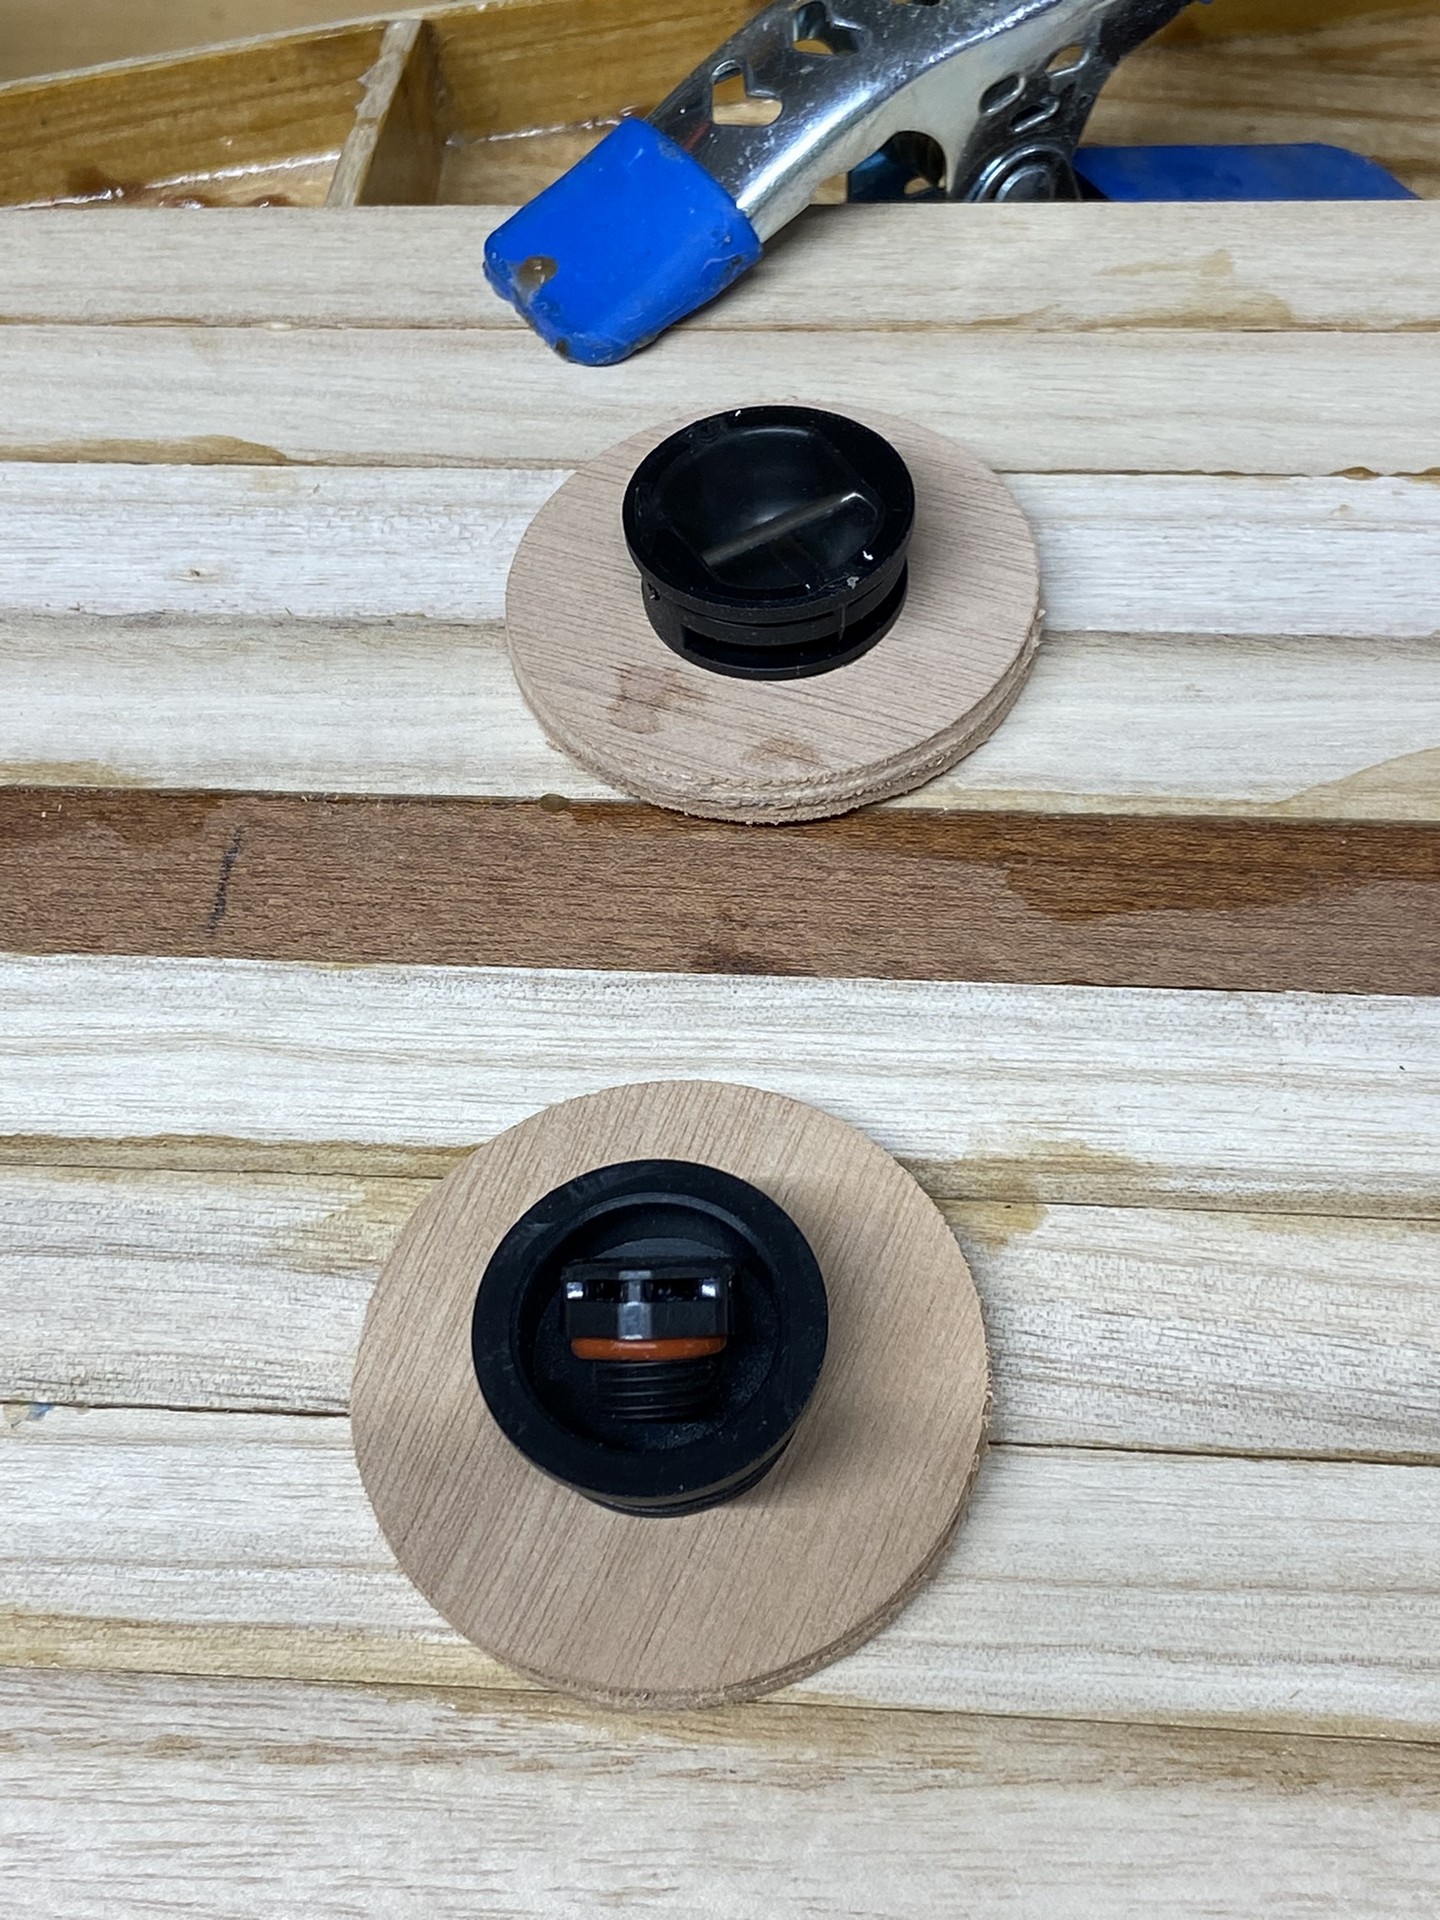
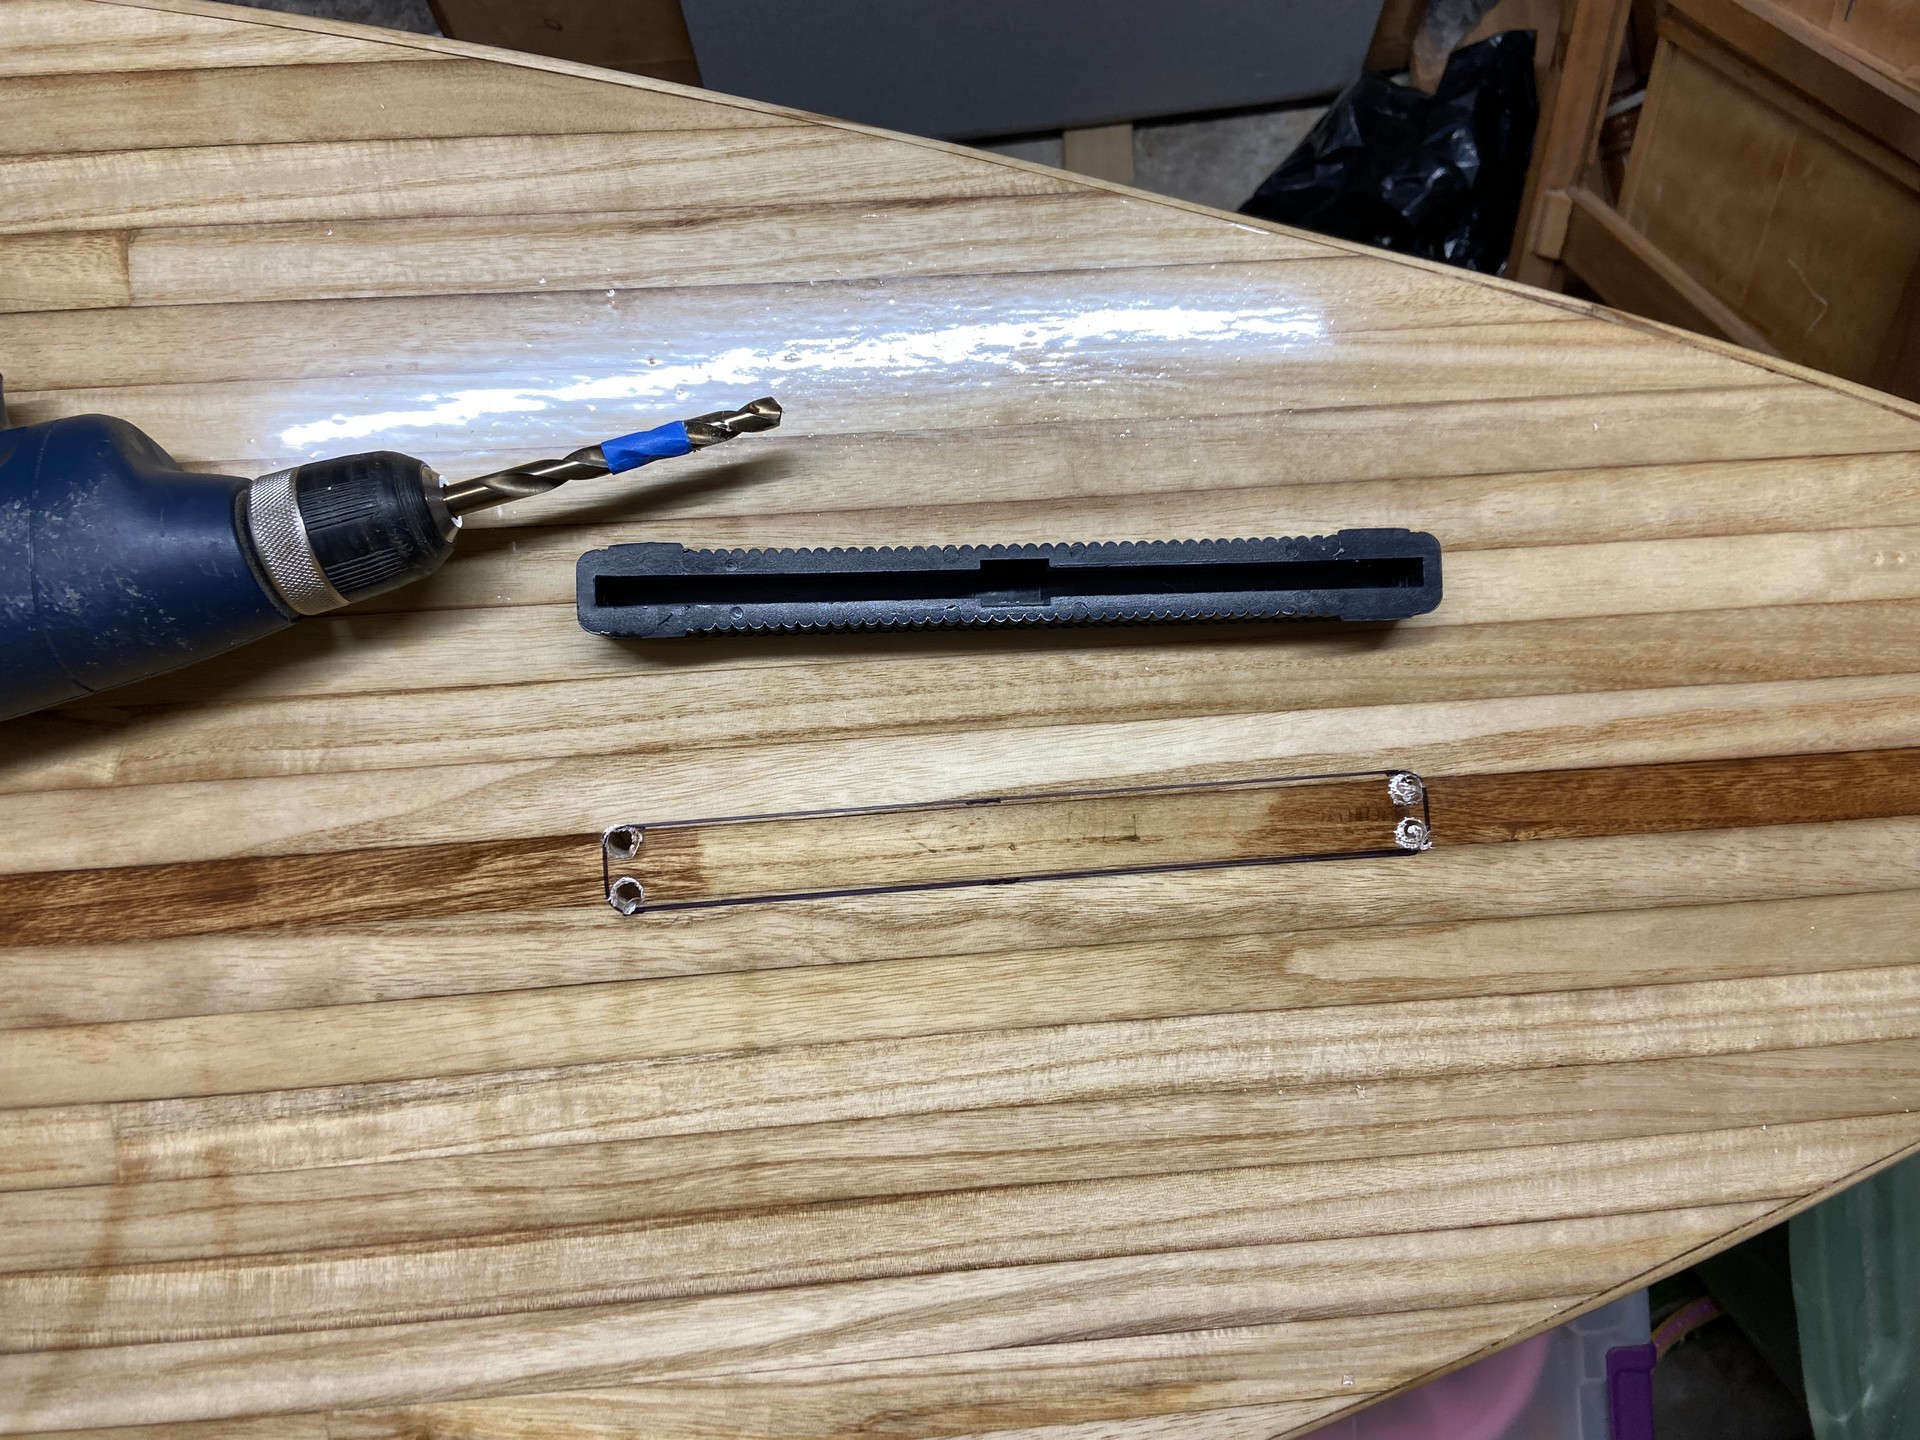
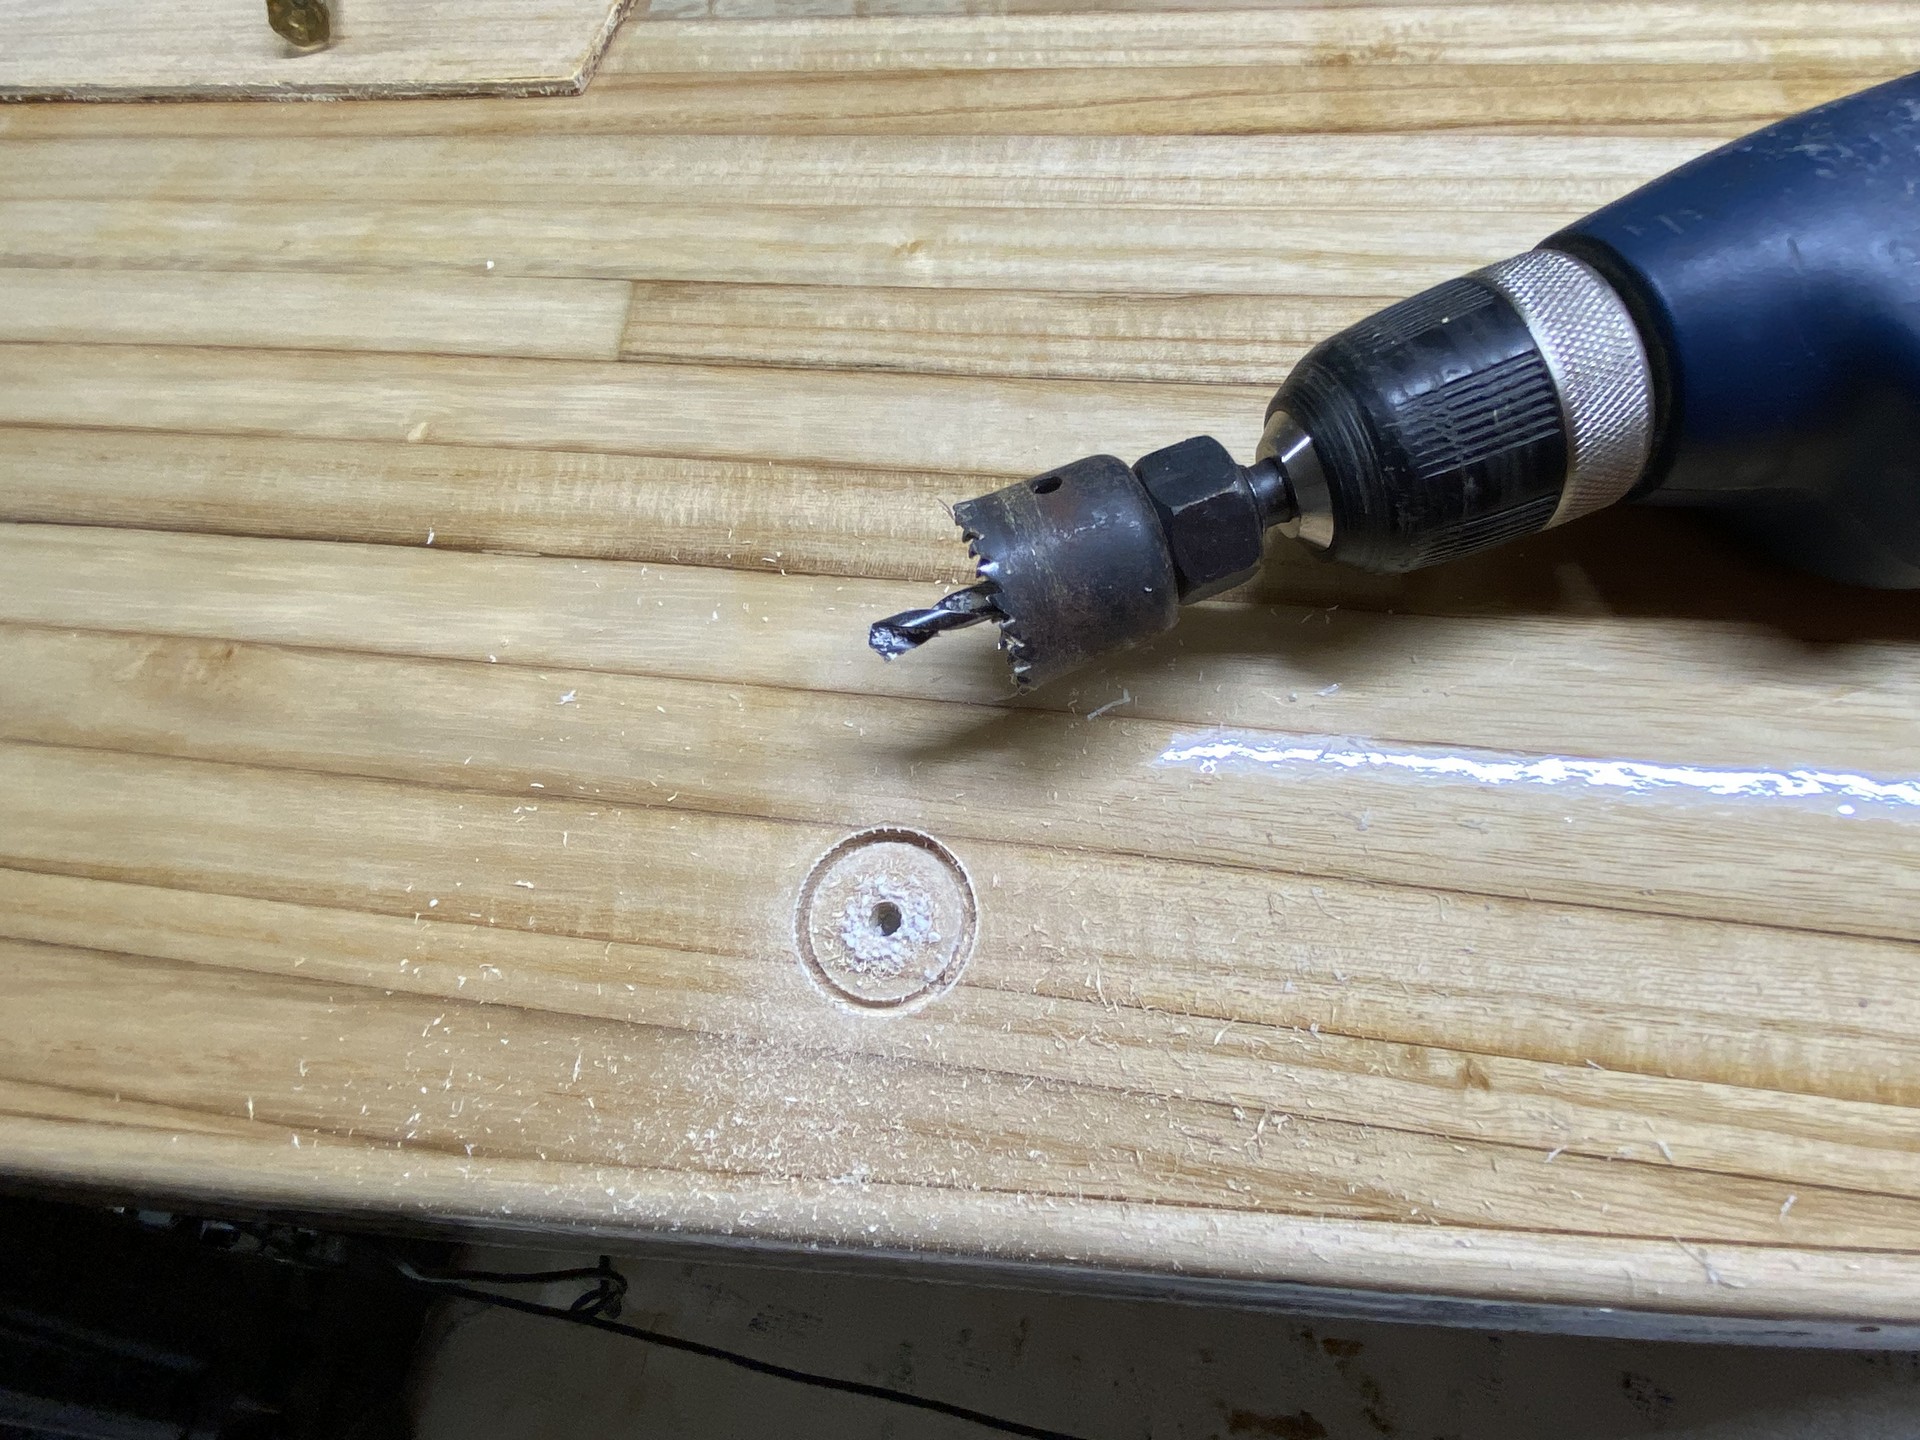
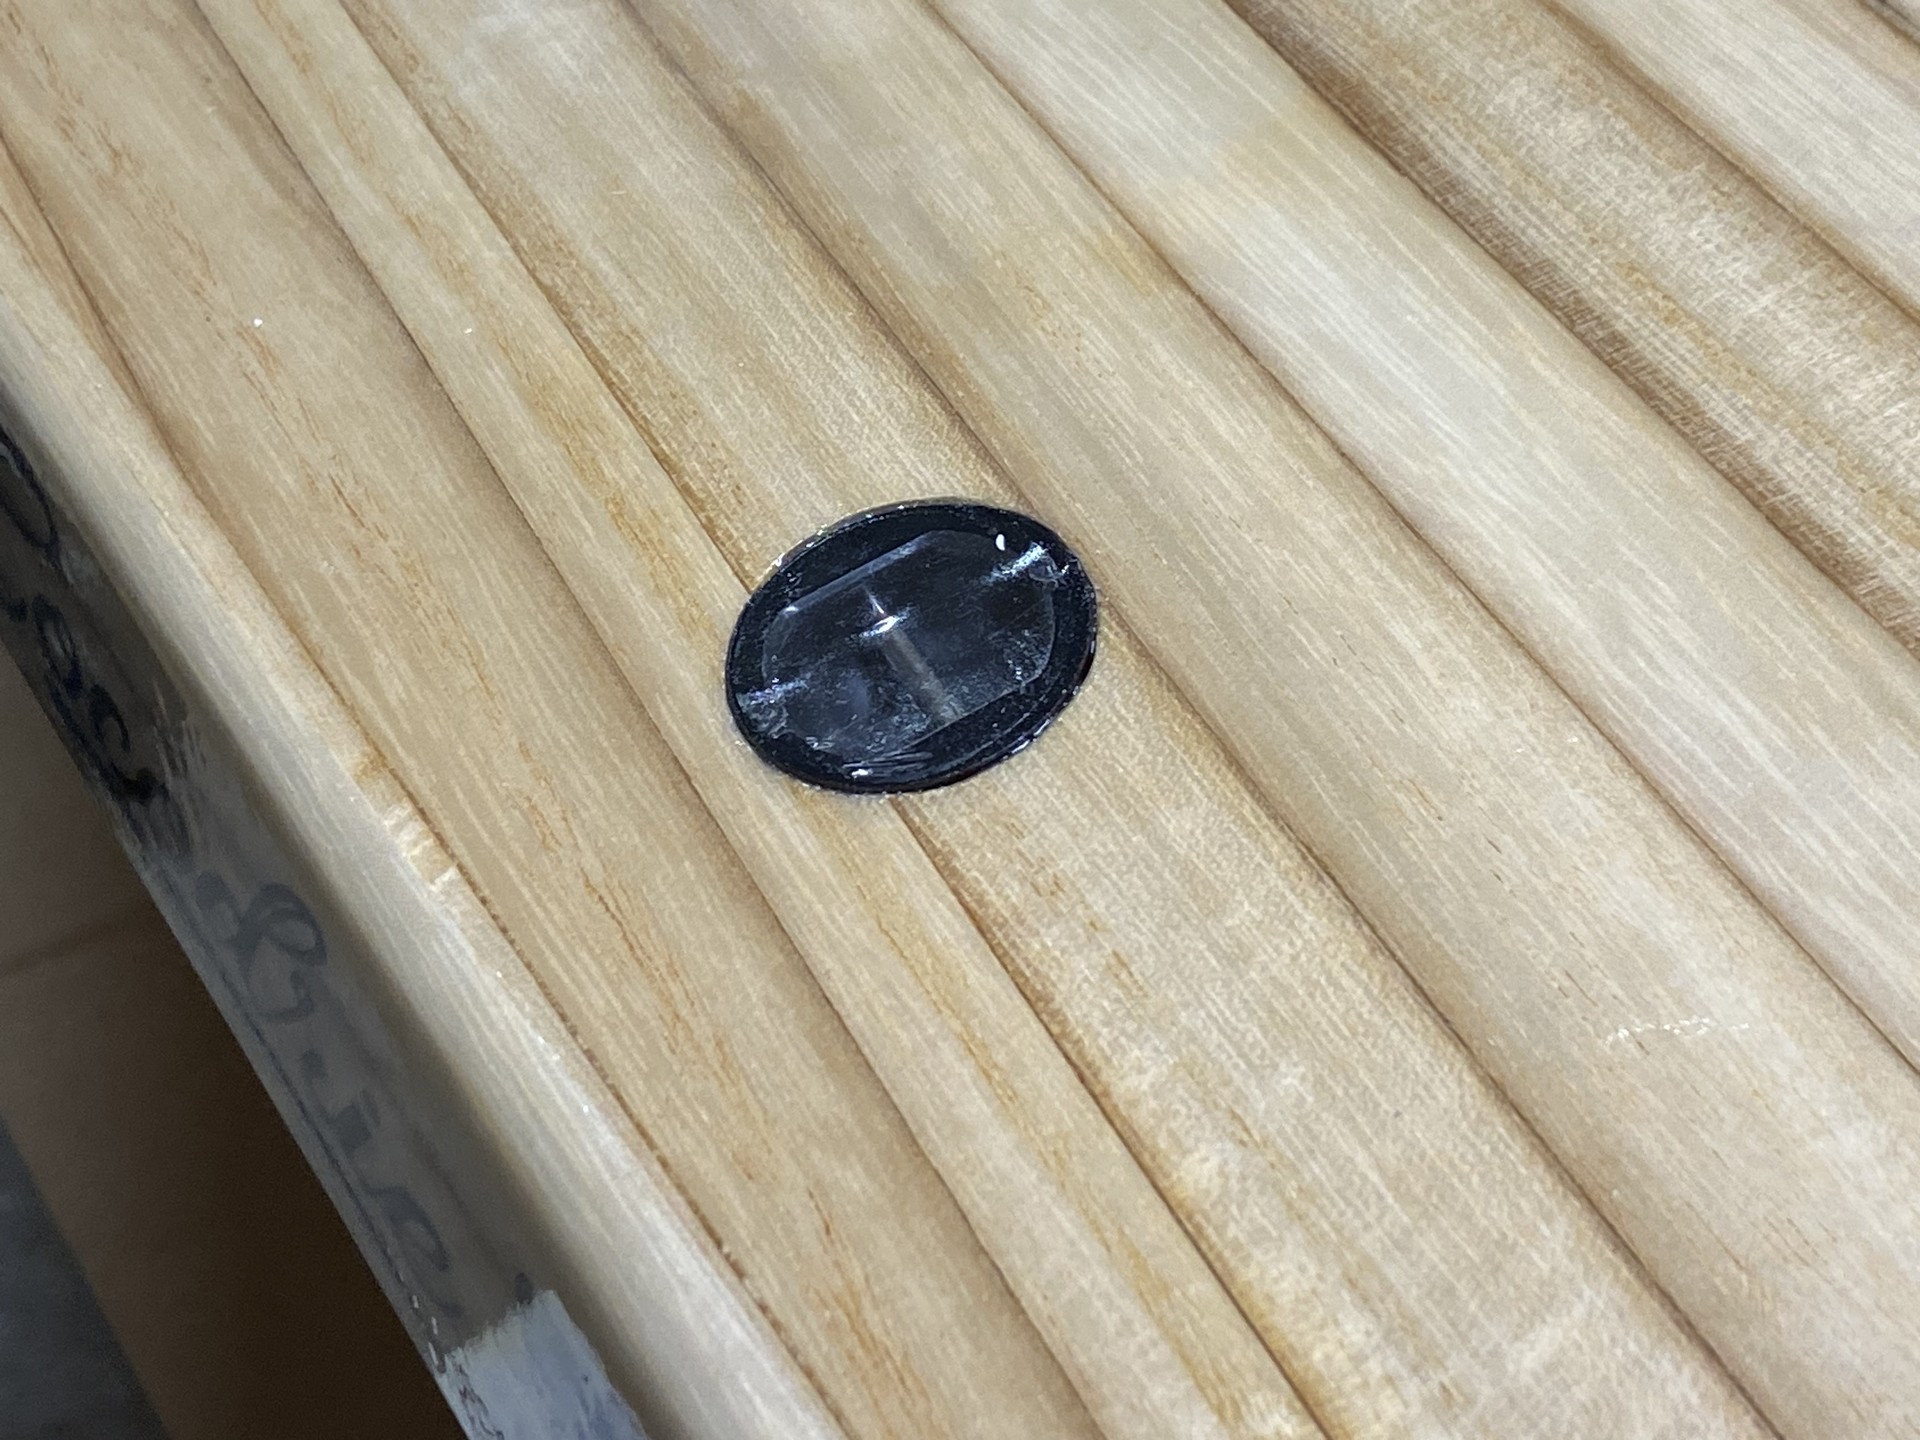
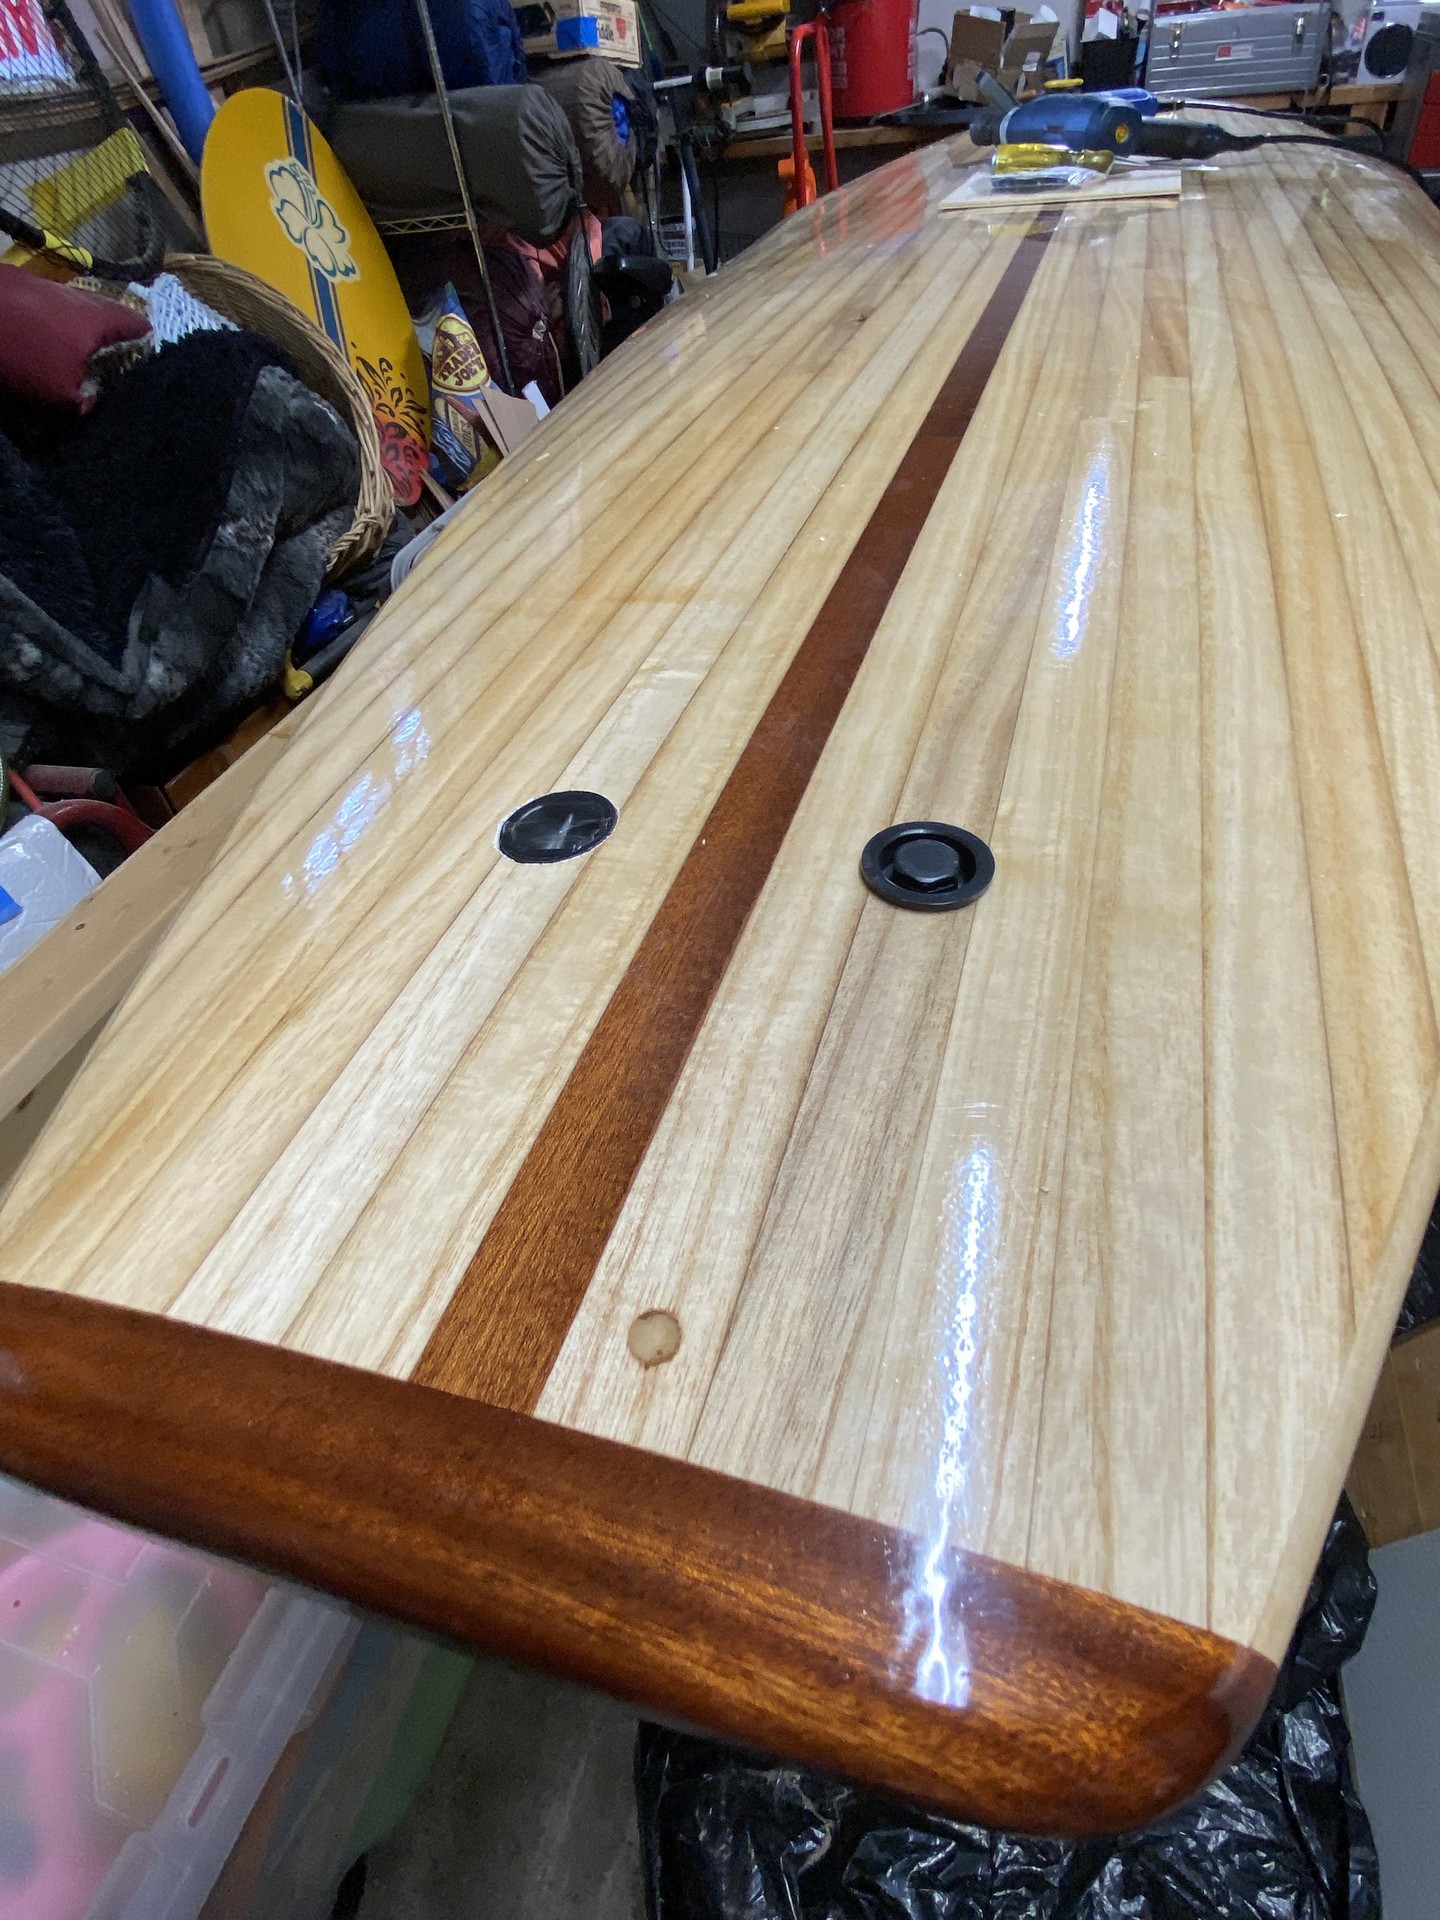
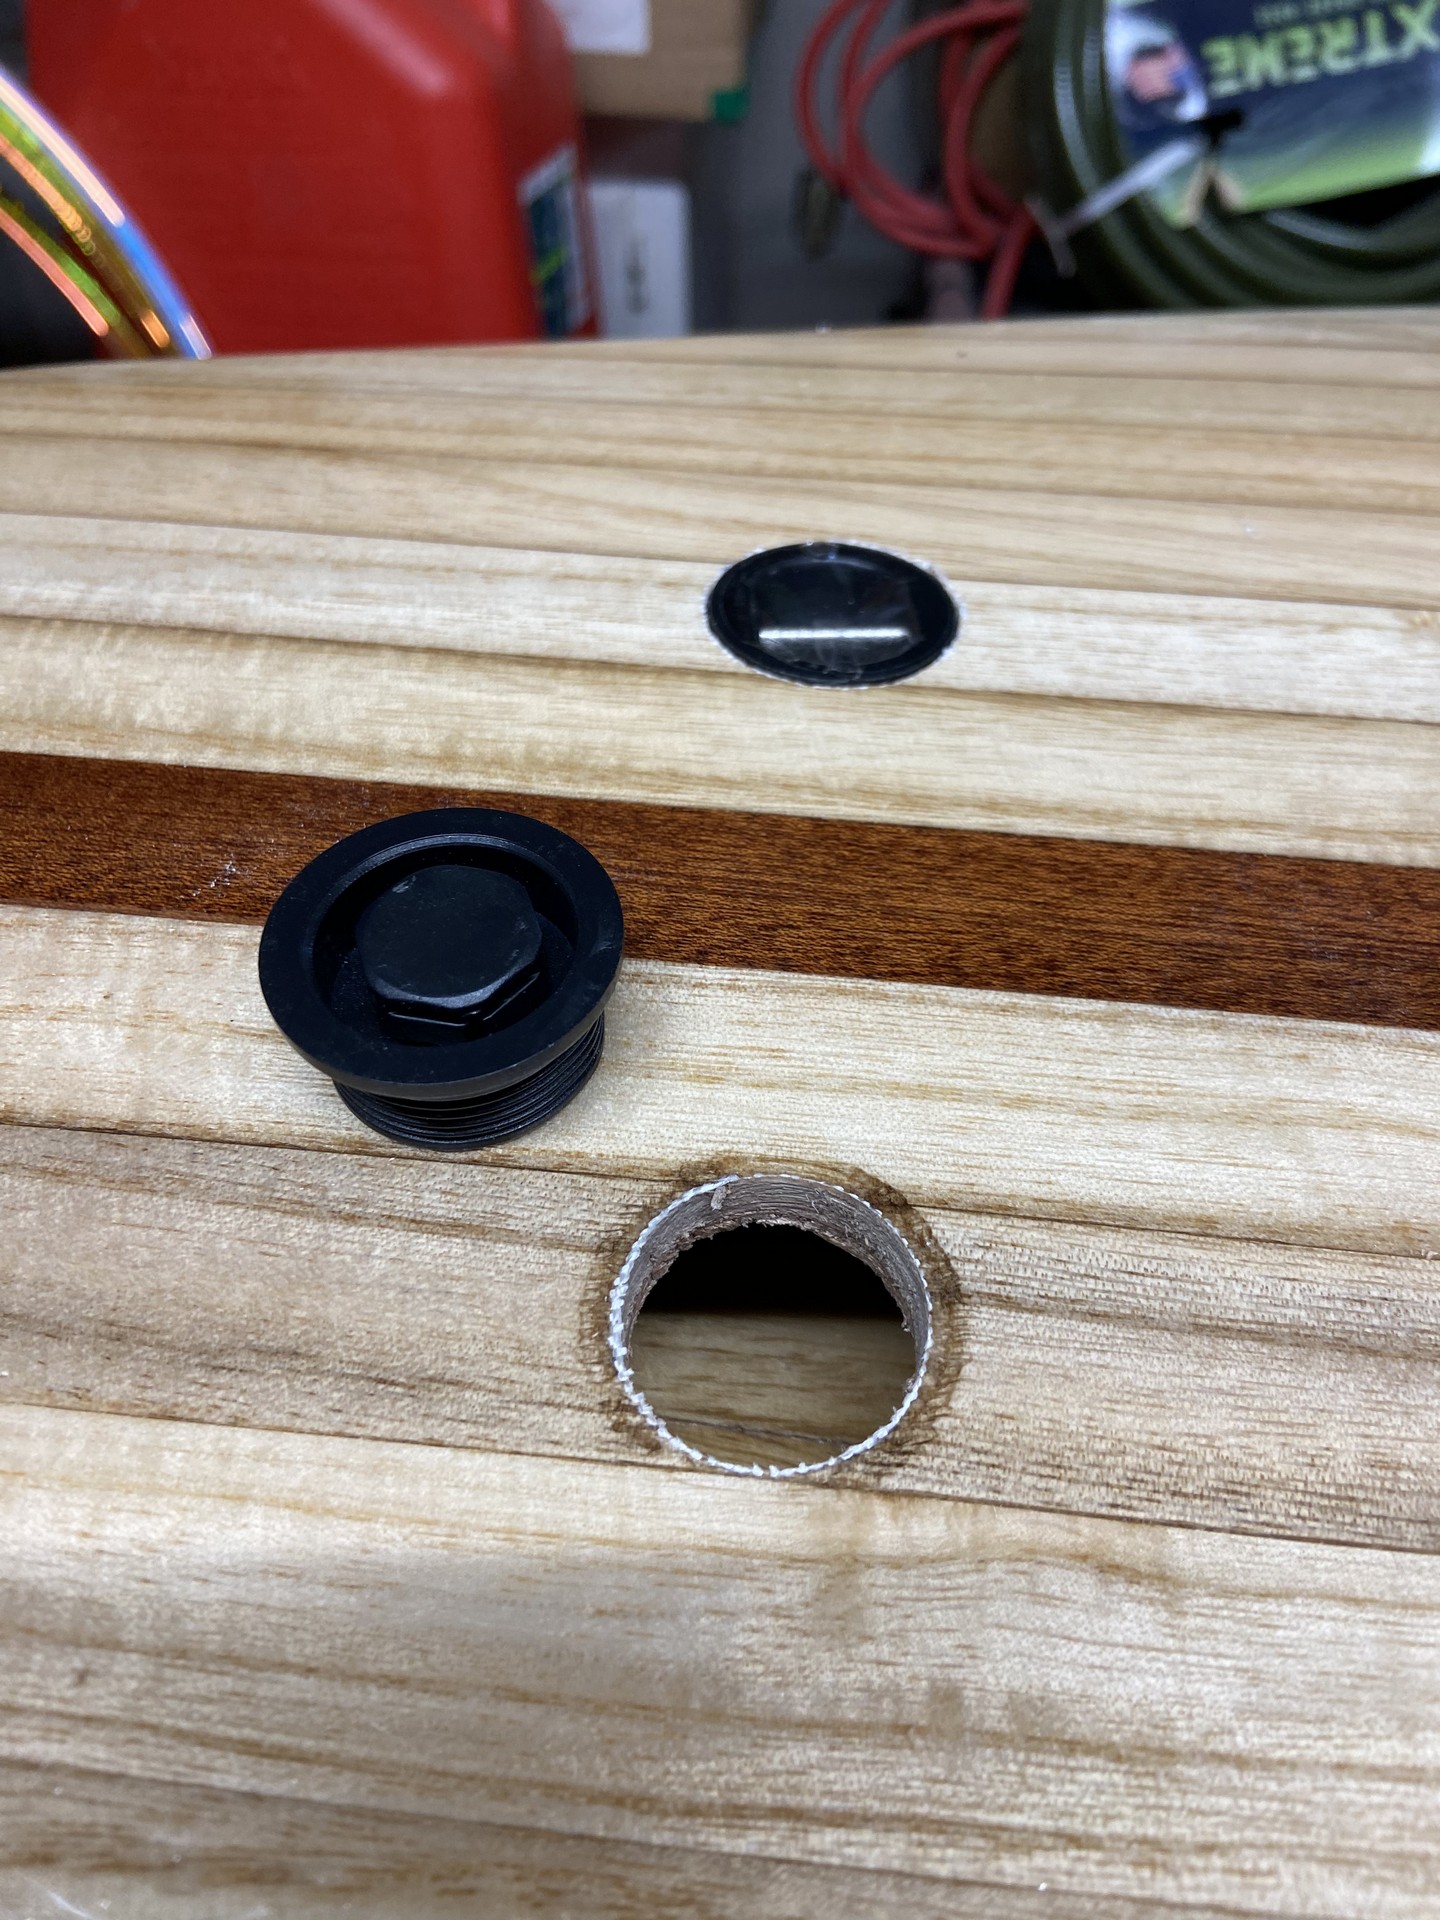
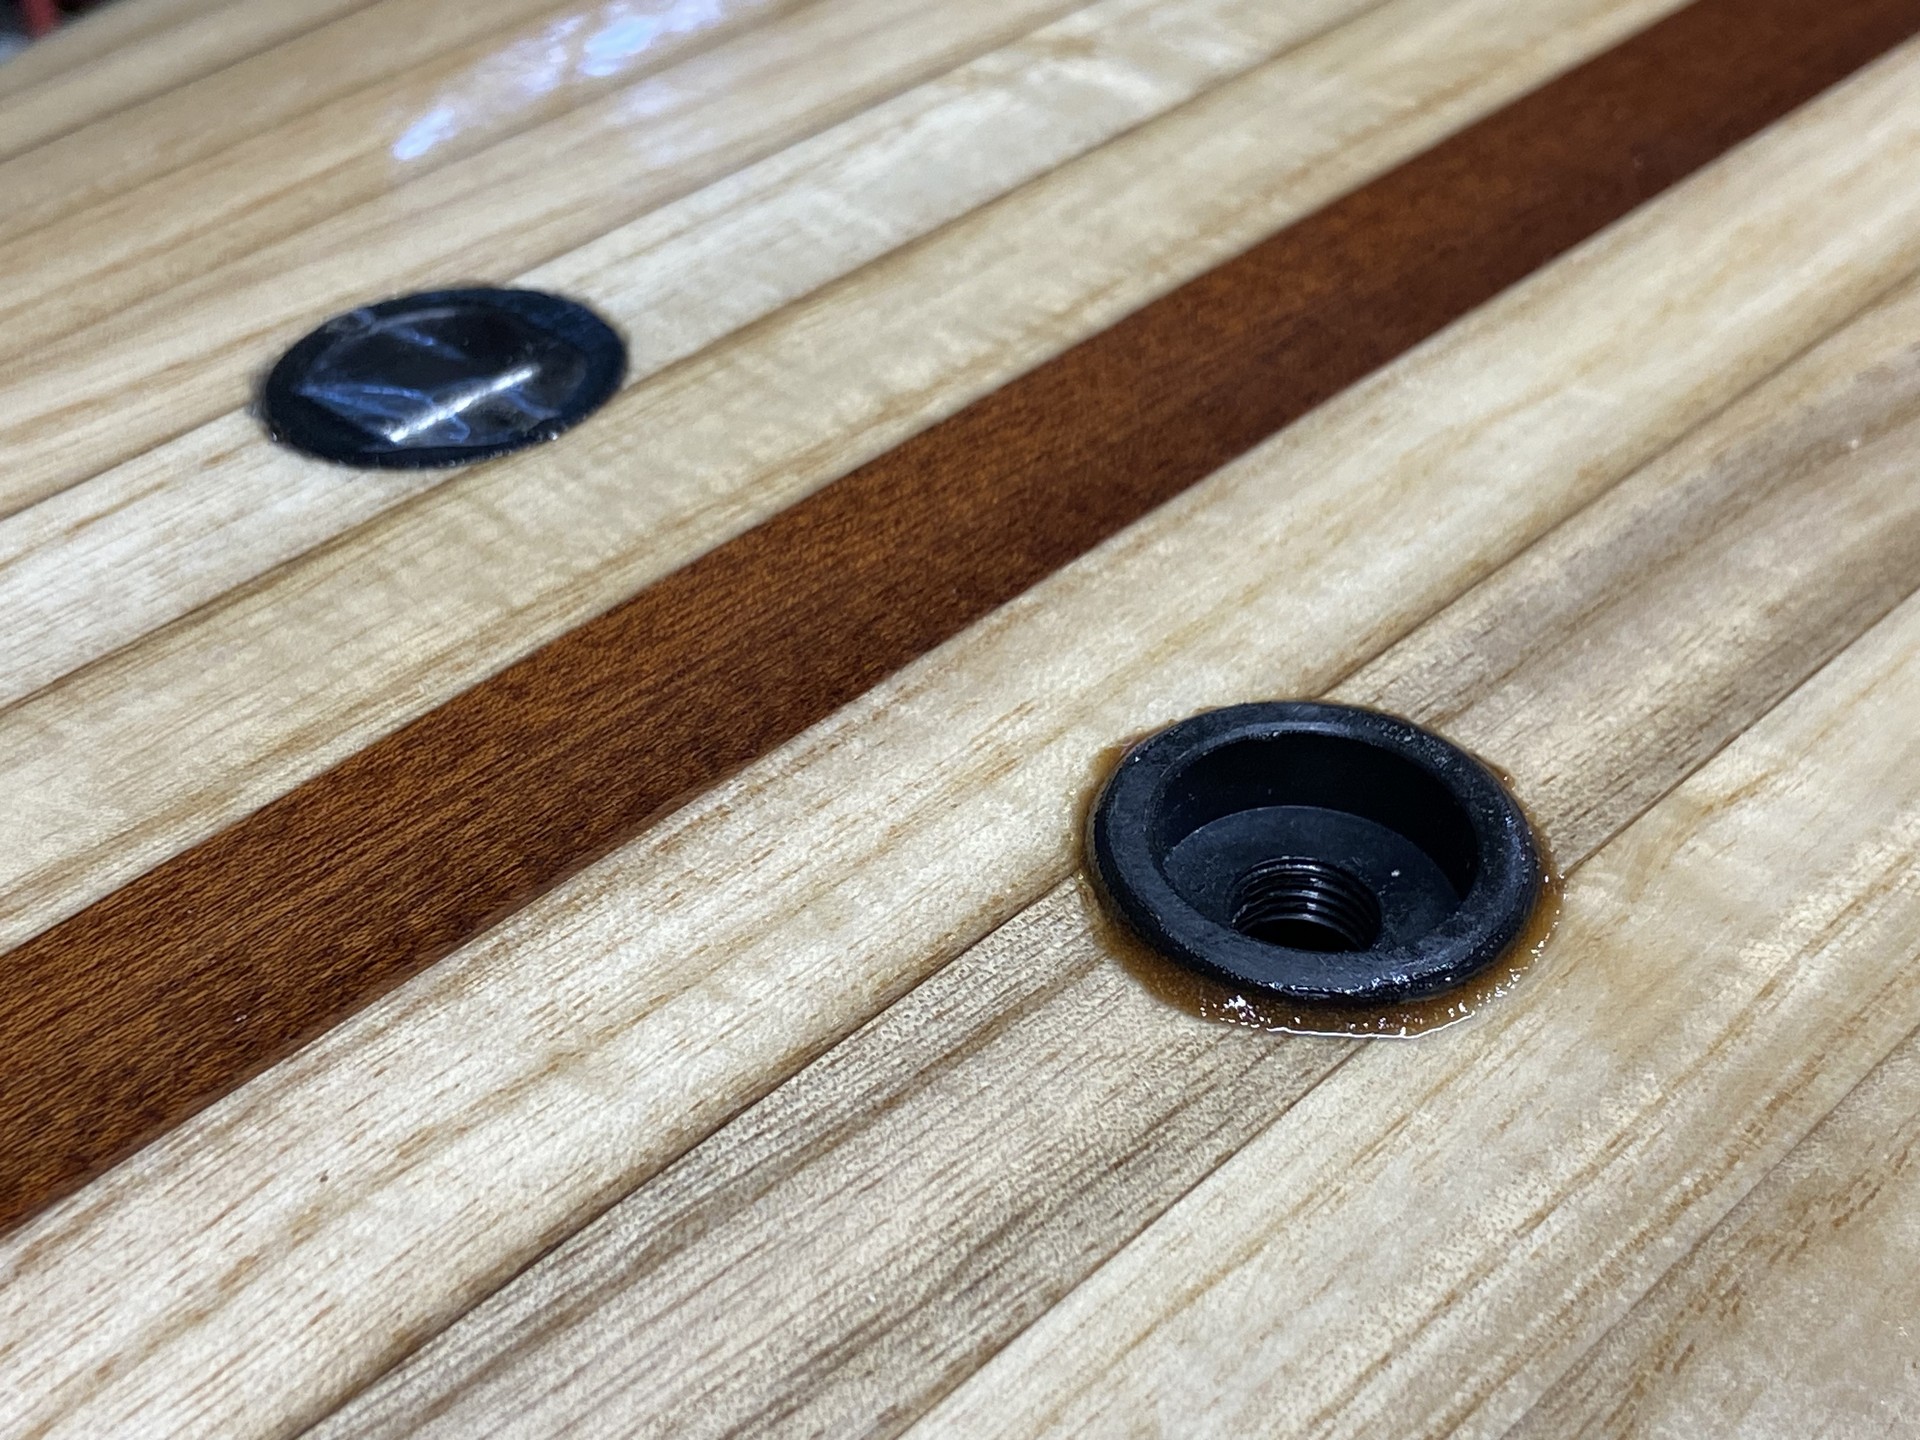
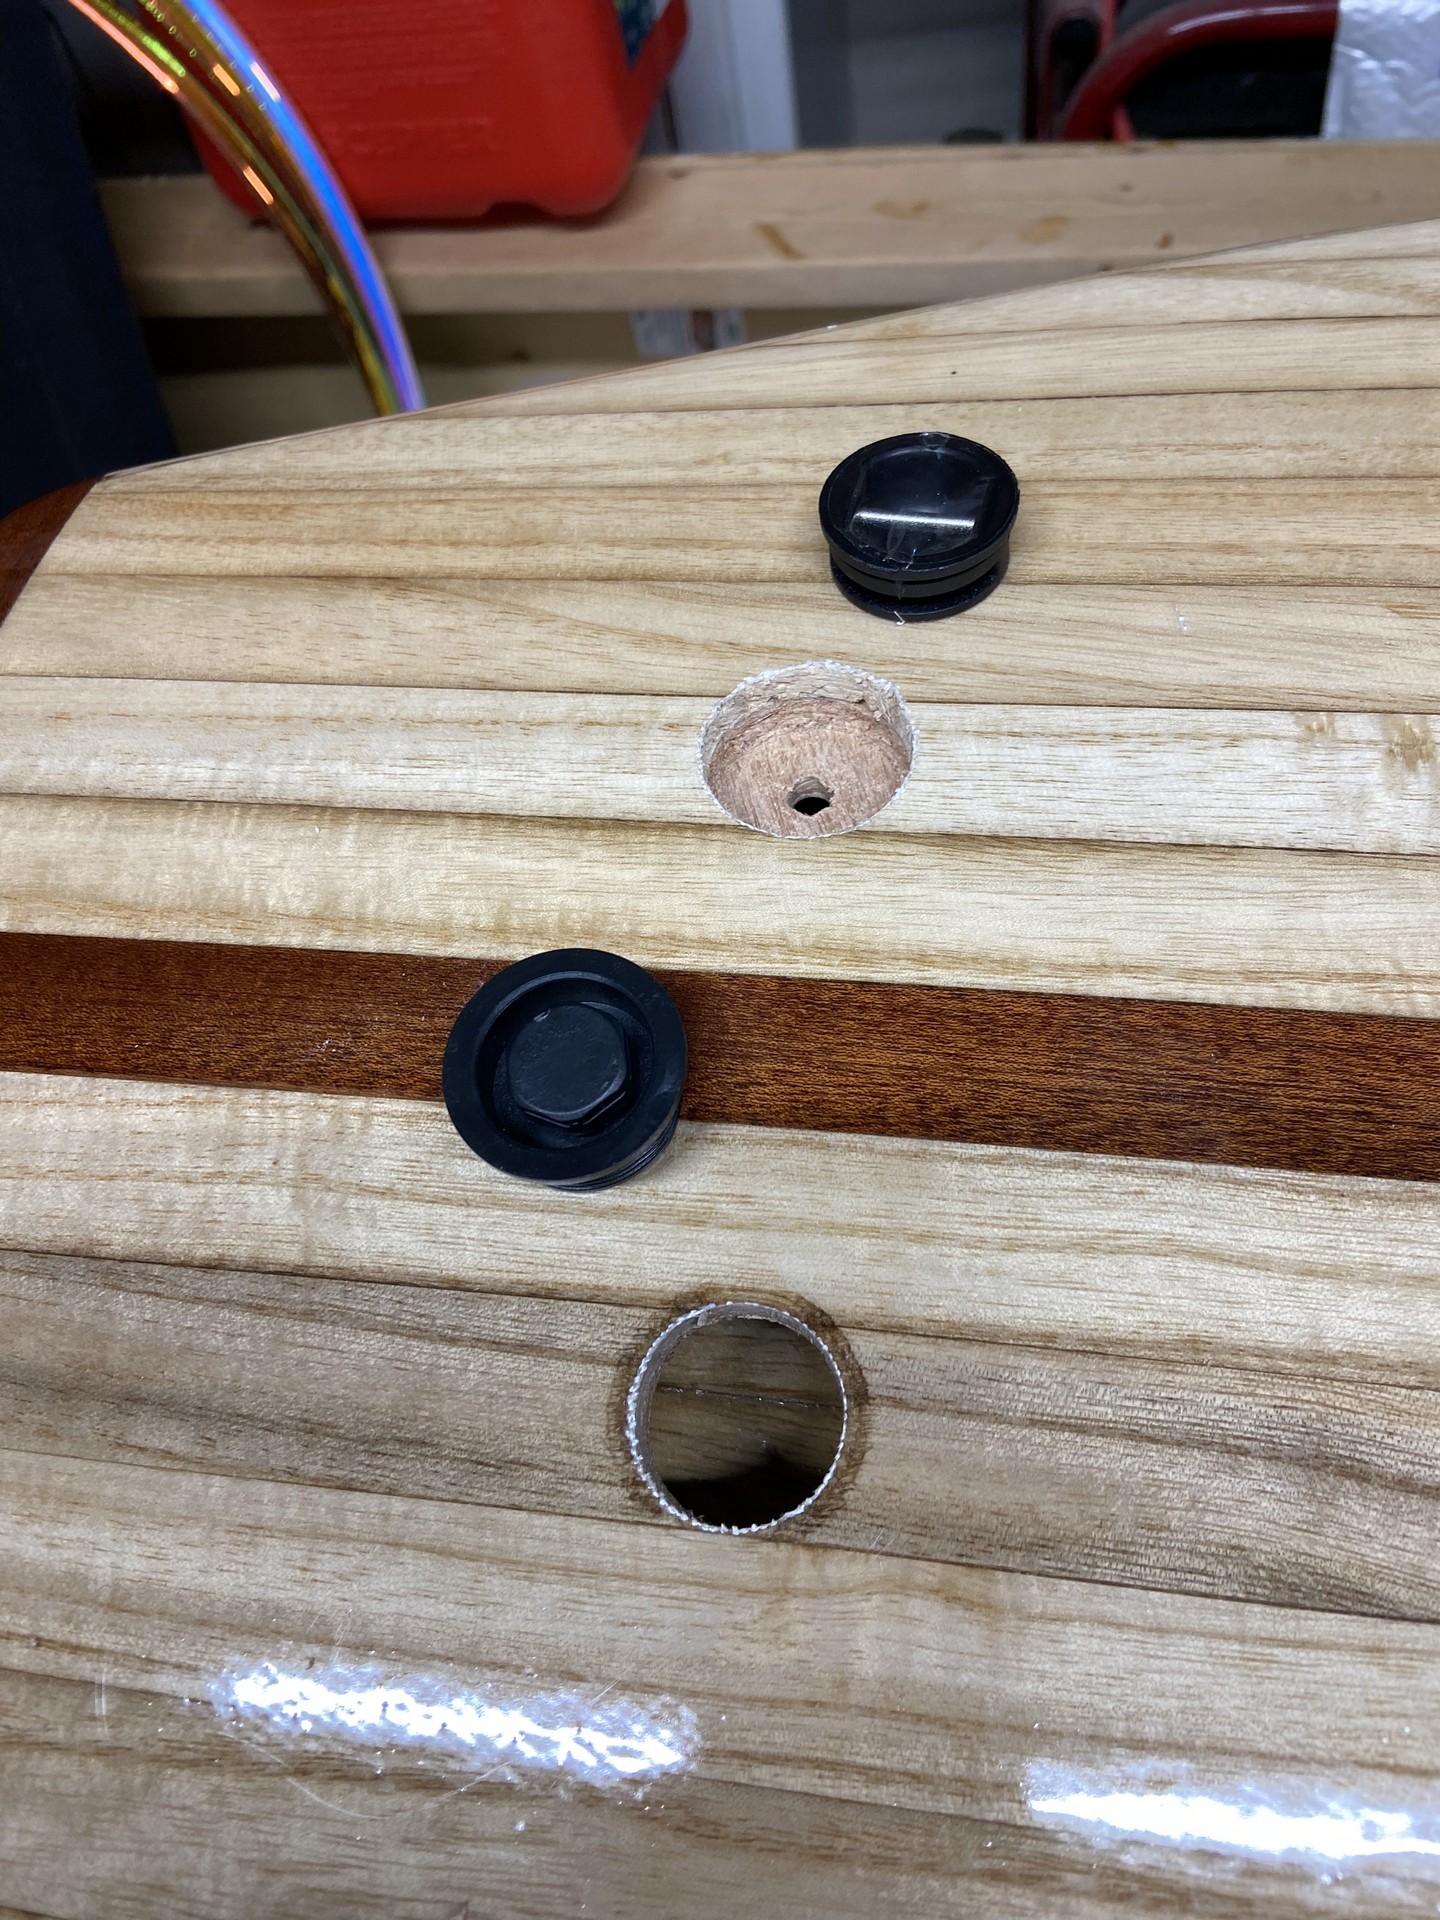
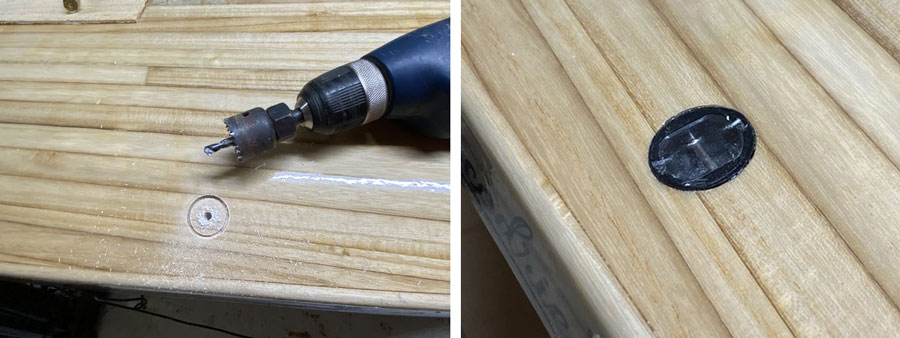
Six plastic disks - bungee cord anchors, leash anchor and an air vent, must be glued into the deck of the paddleboard in areas where blocking had been installed inside the board. Jarvis and other designer’s instructional videos again recommended using a router to cut these holes in the deck. Chuck at Jenkins’ Boatworks used large spade bits. I’m going to use my hole saw kit. Jenkins had trouble with the spade bit wobbling when he got down into the foam blocking because it didn’t hold the point centered. I did use foam blocking beneath the four bungee anchors, so I think the hole saw will be less likely to wobble and result in more uniformly round holes. The blocking at the tail of the board for air vent and leash anchor have wood blocking.
The vent plug required a clean hole completely through the board’s deck and, thanks to Chuck Jenkins’ video, I learned that the diameter of the air vent plug is smaller than that of all of the bungee anchor plugs. (Thanks Chuck!) I ended up using a 1" spade bit for this hole and it worked okay cutting a clean hole.
Tip: Go slow and frequently lift out the spade bit, cleaning away sawdust and allowing things to cool a little. The epoxied fiberglass immediately surrounding the hole began getting discolored due to the heat, so you need to not let the bit get too hot as you cut the hole. Fortunately the overhanging lip of the vent plug will cover the thin border of discoloration. The plug was glued in with epoxy thickened with wood flour. Nearly all of the resulting dark brown epoxy will be hidden by the overlapping lip of the plastic air vent plug.
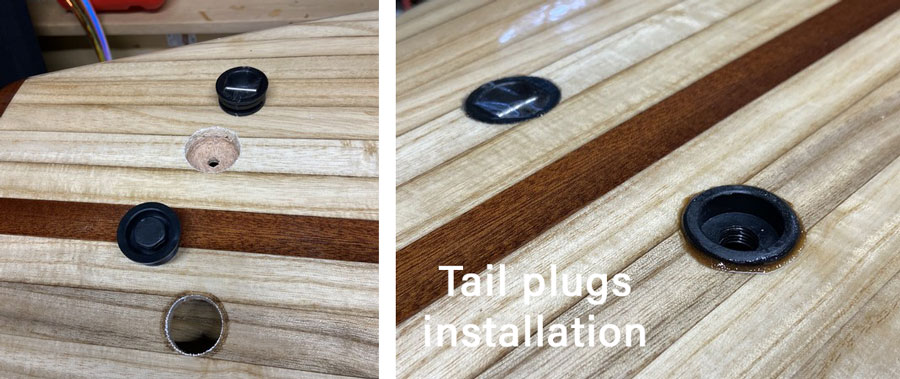
A hole saw on my drill was used to cut the remaining holes for the five bungee and leash anchors. I used epoxy thickened with phenolic microballoons to make a thick but light weight paste which fills holes and crevices well and dries whitish rather than dark brown as would the wood flour thickener. The light colored epoxy in my opinion looks better against the light colored Paulownia wood than dark brown epoxy.
Deck Pad Options
I’m considering how to handle the deck padding. And, I need to consider where my dog will ride (up front?) because he will need some traction pads. The available deck pad options are:
- Leave it bare - it will probably be slippery and no padding will induce foot fatigue. My heels could damage the board with no padding at all.
- Clear no-slip adhesive patches - these preserve the beauty of the wood and prevents slipping, but have zero padding for comfort.
- Marine foam decking sheet - thin waterproof adhesive-back foam sheets are the standard solution. They can be cut to fit, providing traction and thin padding, and they probably would look the best.
- Or, I might use 3/4" minicell foam - I already have a sheet of this stuff left over from my kayak builds. I’d cut it to fit and bevel the edges. Being thicker, it would be the most comfortable and doesn’t absorb water, but the thicker foam would add weight.
- Temporary bath tub mats - I decided to temporarily use a couple of non-slip shower mats. They are removable, repositionable, and will let me use the board a while to determine where the finished deck pads should be placed and how large they should be.
Weekend #19
June 16, 2024 - Father’s Day!
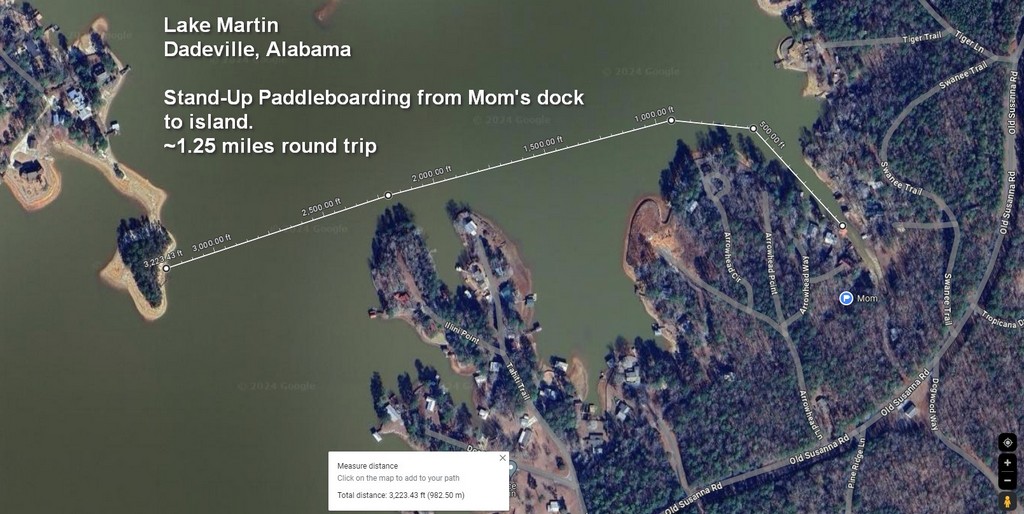
During the intervening weekend I took the board to my family reunion in Alabama where I took it on several runs in Lake Martin. My first time on a SUP went really well. Over three days I went out four times paddling several miles and didn’t fall even once! The wakes from the boats and jetskis on Saturday afternoon did make it challenging though.
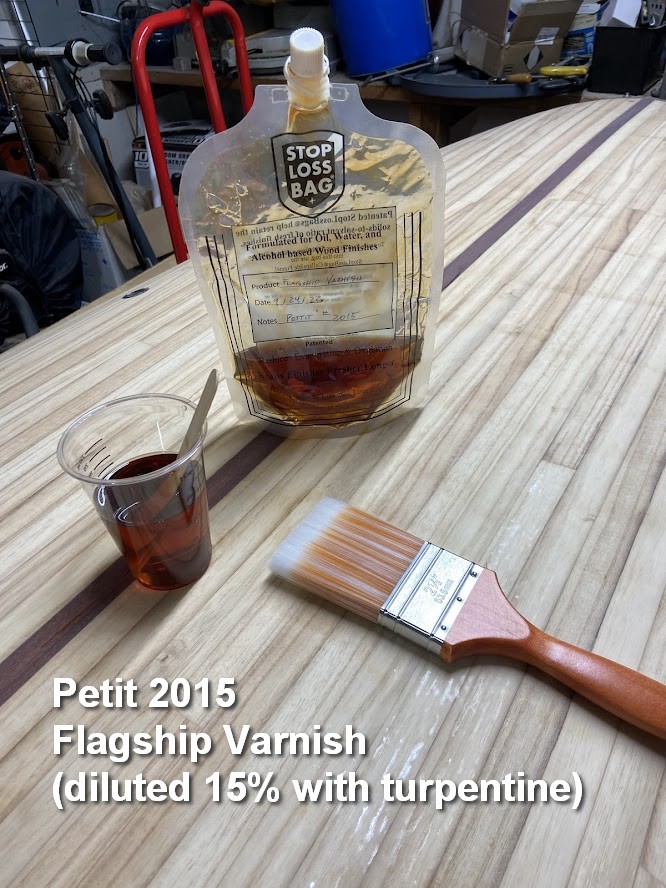
Varnishing
Over the past week I’ve been sanding and applying coats of varnish. I used Pettit Z Spar Flagship 2015 Varnish diluted with turpentine. I had a quart of this varnish left over from the gallon purchased for my stitch-n-glue kayak building projects completed in 2022. It is great stuff and I applied 4 coats, preparing the surface with steel wool between each coat and wiping down with a microfiber cloth soaked in rubbing alcohol to remove dust.
Installing Deck Hardware
- Remove the masking tape from the deck inserts and clean.
- Remove the layer of epoxy and fiberglass from the two rivet nuts at nose and tail, remove wax filler.
- Install bungee cord on deck and screw 1/4" D-ring stainless bolts into rivet nuts to seal out water.
- Install deck padding, or keep using non-slip shower mat.
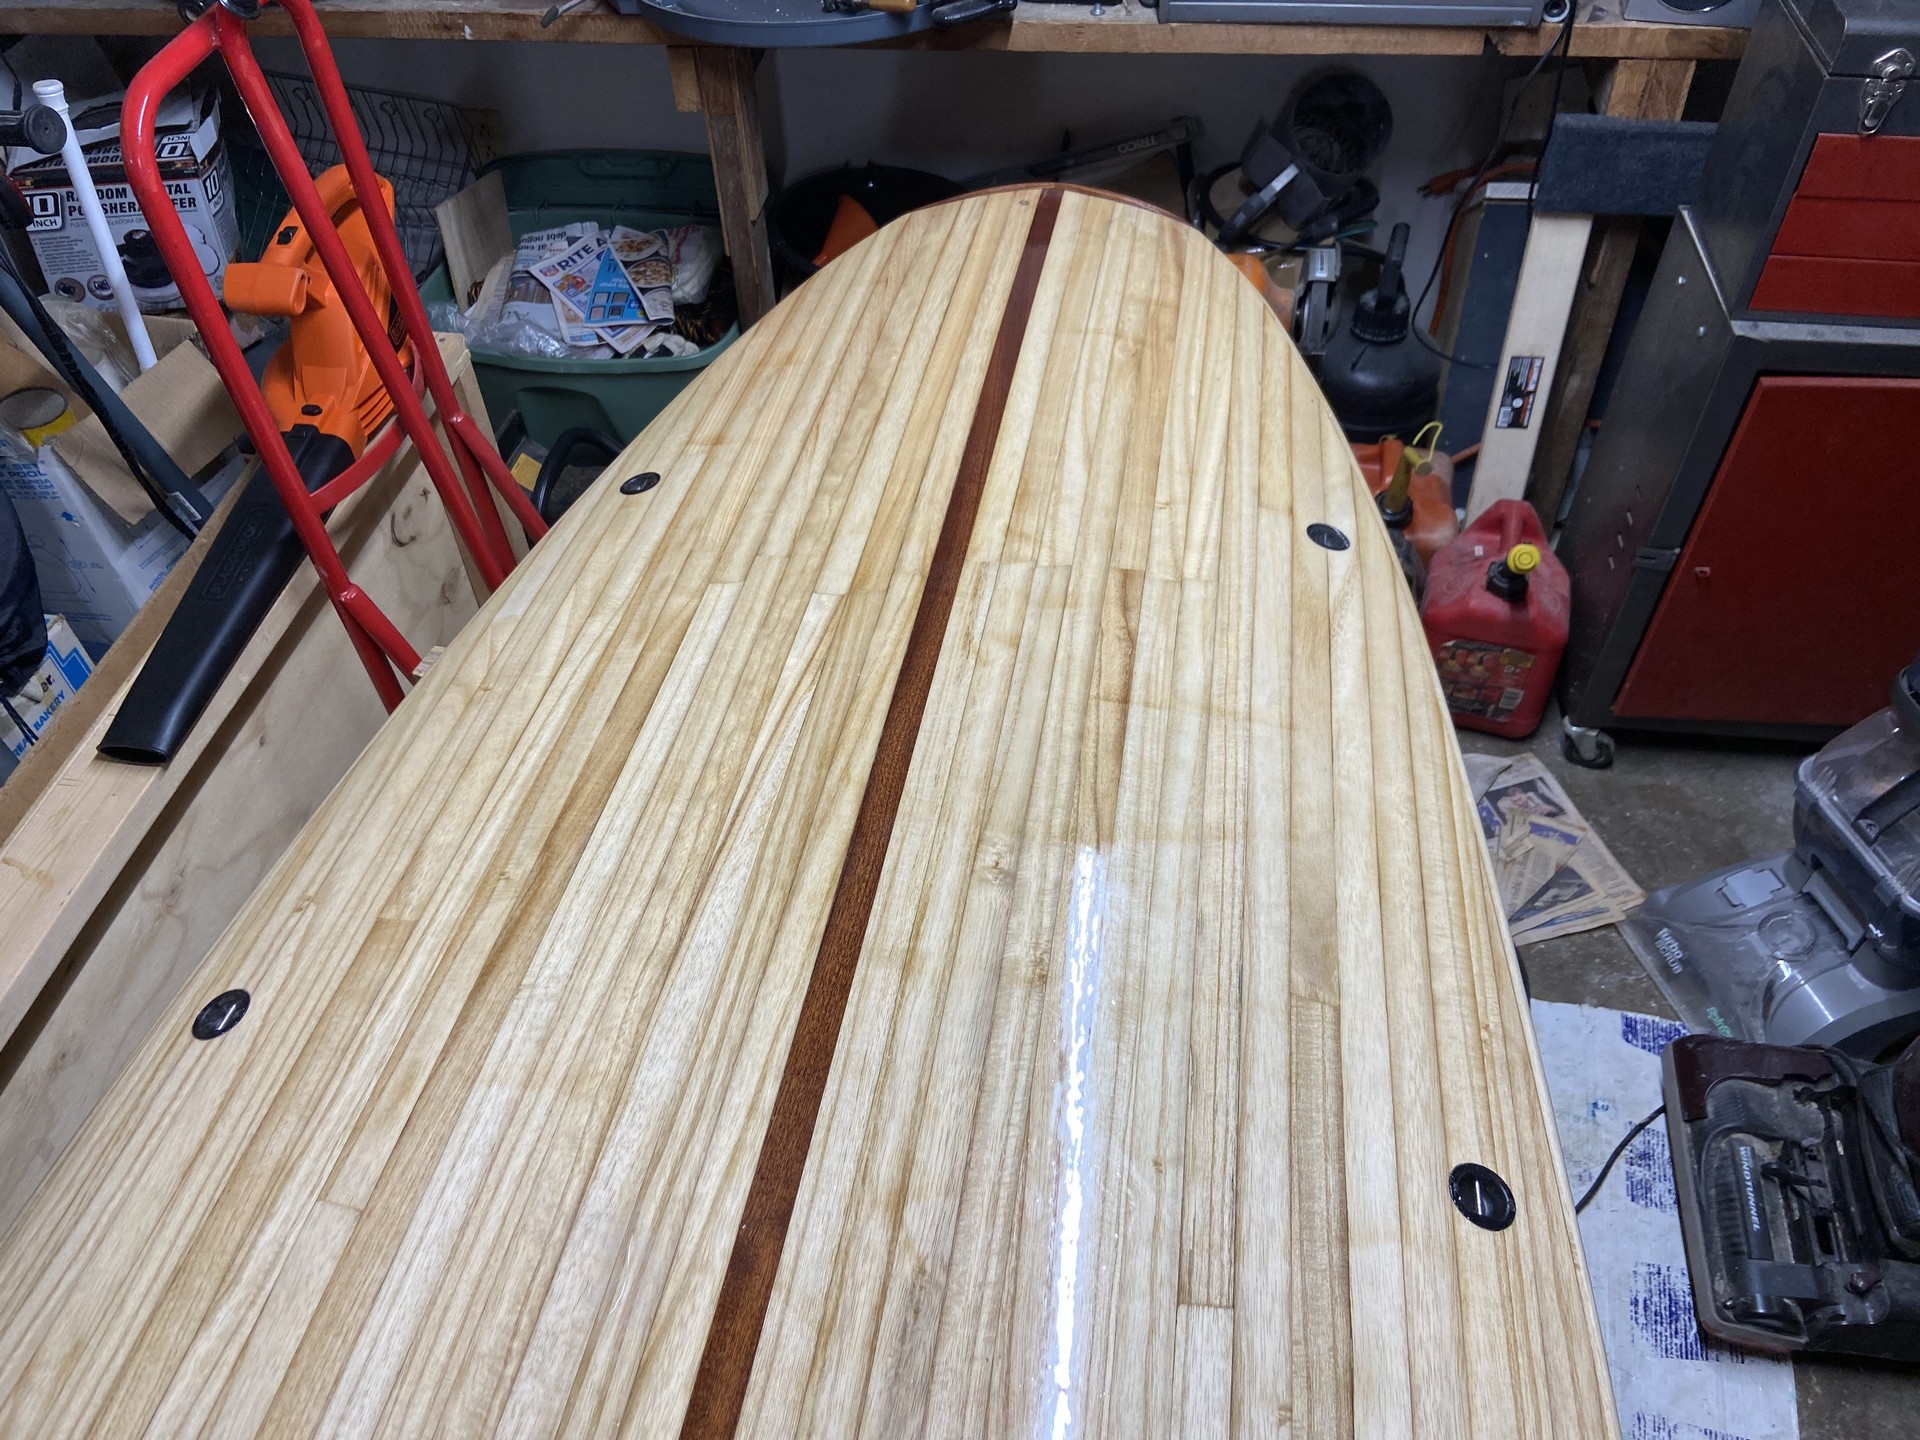
Finished Paddleboard
I am thrilled with the results of this project. I’ve enjoyed it and am considering building a second board with the surplus materials - two boxes of strips, half gallon epoxy, fabric, and more - but…but first I’m going to get some use out of this one.

Lessons Learned
For anyone considering this project I want to be candid about the process and result.
- Build a wood strip board if you really like the look and/or enjoy woodworking. But understand…
- Inflatable boards are lighter, more durable, less expensive, and more easily transported.
- Composite boards are also lighter and are likely to be faster, but will probably be more expensive (unless you’re valuing your time.)
- It’s the roto-molded plastic boards that are tanks. They’re nearly indestructible, but heavy.
- Transporting that wood strip board on my minivan the first time was a big problem.
- It was resting on foam kayak pads on the rack cross bars and tied down with two ropes, but it worked itself loose. I almost lost it on the interstate at high speed. Fortunately, another motorist blew their horn.
- I completed the trip by putting down all passenger-side seats and placed the paddleboard inside the van. This obviously is inconvenient for passengers in the van and limited seating and storage.
- To solve I’ll need to tie the nose and tail to the front and rear of the van, in addition to straps across it. Or, carry the board on my kayak trailer.
- The carry handle isn’t ideal. If your finger tips are against the board they will get pinched. After a few steps it starts to hurt.
- I now try to insert my hand with the back of my palm against the board to avoid discomfort.
- On a future build I may consider using a slot-style carry handle embedded within the board. This has the benefit of not protruding if one were to lie down on the board.
- Like my plywood kayaks, the wood strip paddleboard is easily scratched, dinged, etc. Sure, I can repair dings, but one must always treat the board carefully. No rocky rivers in our future.
- However, I enjoyed the wood working part of this project, and the beautiful result. My extended family was very impressed.
Paddling Lake Martin
Lake Martin at Dadeville, Alabama offers an ideal location to learn to paddleboard. I launched from my mom’s dock in a protected slough and paddled out to “big water” and then returned. On subsequent trips I went much further but didn’t bring the video camera. Pleasure boats and jet skis produce some waves - especially on summer weekends and holidays - but it wasn’t too bad during my visit.
Above is a short video of me paddling around in Lake Martin, Alabama
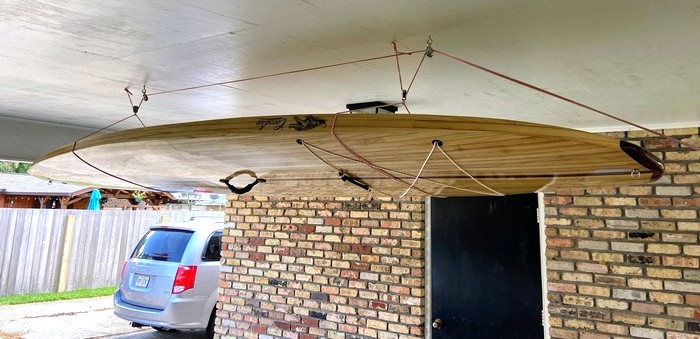
Storage
Where am I going to store this thing?
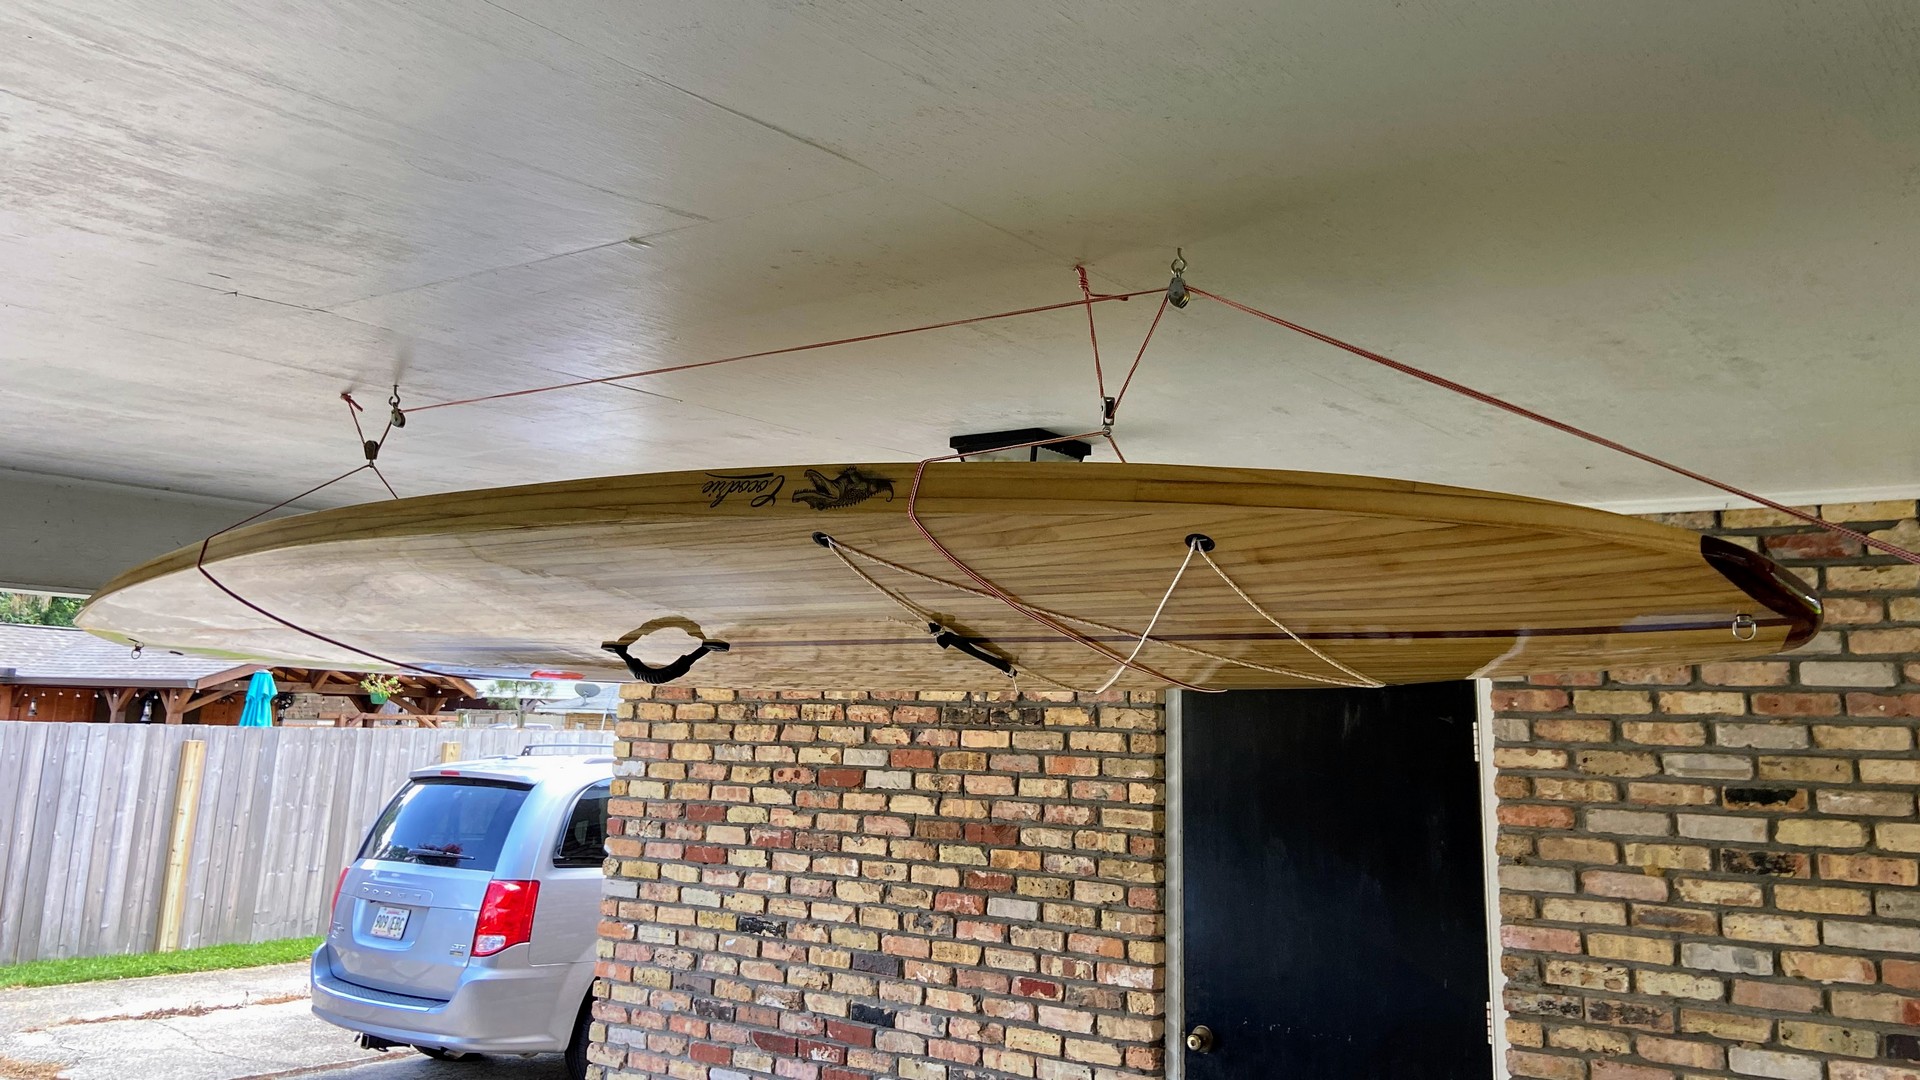
During the build process I assumed I was going to store it on the boat trailer with my three other kayaks. But, I never actually measured anything. Duh. It didn’t fit. And, the board was consuming too much space resting on saw horses in my storage room, so the next best option was to rig a hoist to store it up against the ceiling of my carport. This seems to work out well, though I wasn’t able to pull it up tightly against the ceiling as hoped and had to install it in the center of the carport between the two vehicles rather than against the storage room side because the door hit the board when opened. (The storage room was too small to install the hoist in the room, as getting the board in and out would have been challenging every time. Also, there isn’t sufficient wall space.)
Project Image Gallery
Photos from my SUP project are presented in a gallery format below. Click any thumbnail for an enlarged version and / or for slideshow.